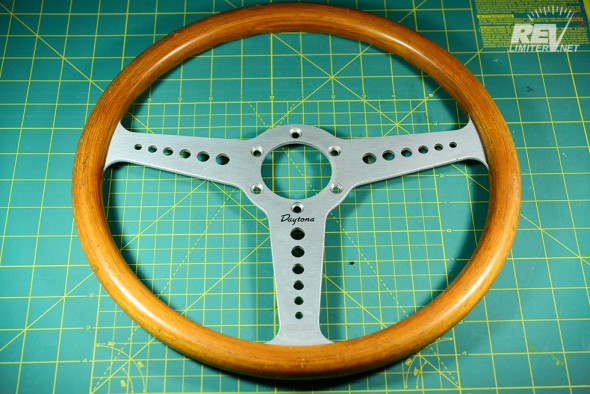
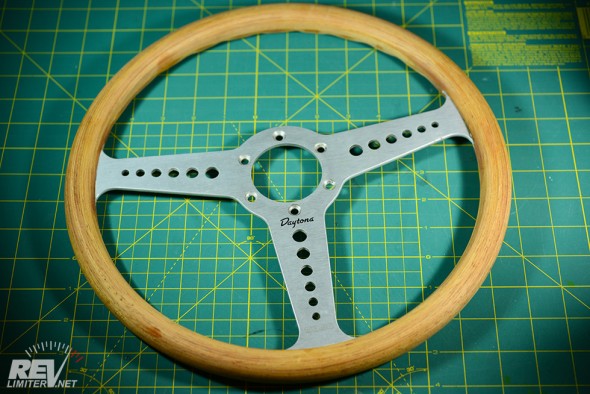
I’ve wanted a wood wheel for a while. I think I spent more than a year scouring ebay and YJ looking for the perfect wood wheel. I wanted something that wasn’t too common. I wanted something not too expensive. I was looking mostly for Nardi wood until I came across this old Momo Daytona.
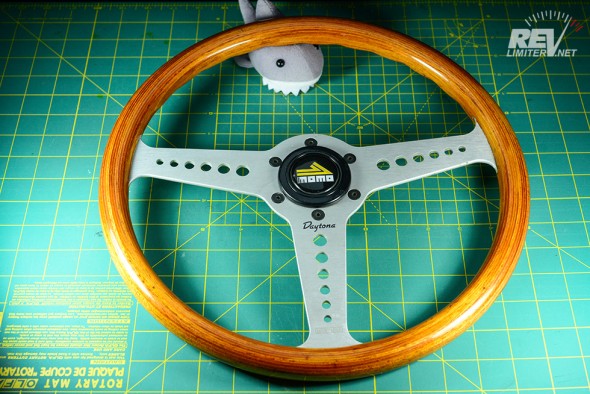
350mm. Made in 1983. Flat spoke (no dish). Pretty rare. I’ve seen these sell for $800 and up. The one I found was barely 1/8 of that price.
I was smitten. I bought it. It came out of an old Alfa in Singapore. A few weeks passed and DHL rang my doorbell.
The next month of my life would be spent working on this wheel.
The wheel was a bit more unassuming in person than in the ebay ad. Yeah… unassuming is a good word.
Okay, it was a plain looking, sad sack of a wheel.
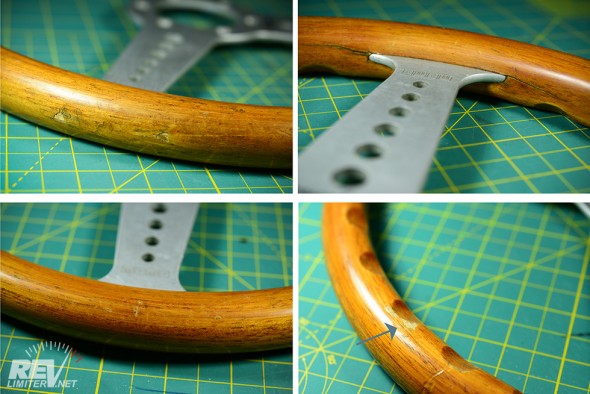
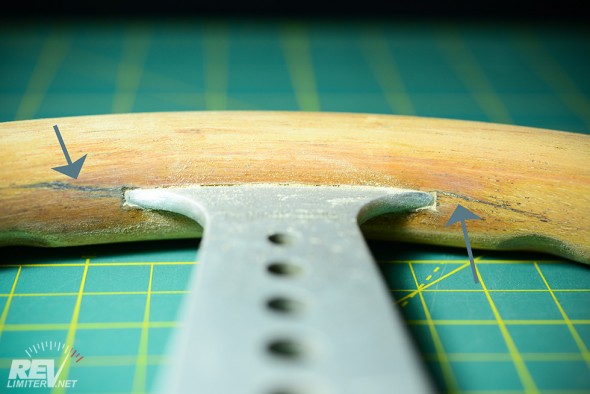
No contrast. Cloudy finish. Lots of cracks on the left. Apparently the Alfa owner was married and wore a big ring. The wheel had a lot of ring damage. There were cracks at each of the spokes as well.
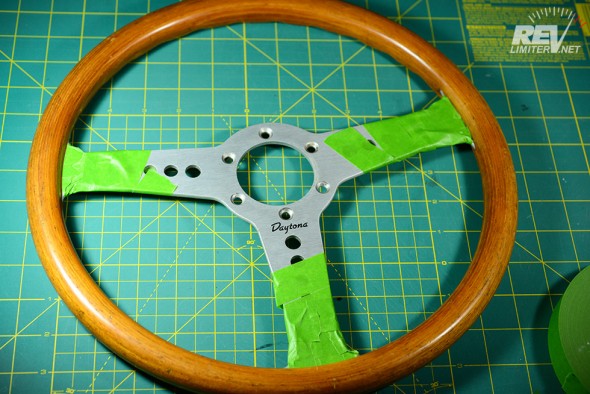
Out came the Frog Tape and sand paper.
Shift Knob Interlude
I don’t really know much about working with wood. It could almost be summed up with one sentence – “I guess I can google it?” So I didn’t really want to learn on the steering wheel.
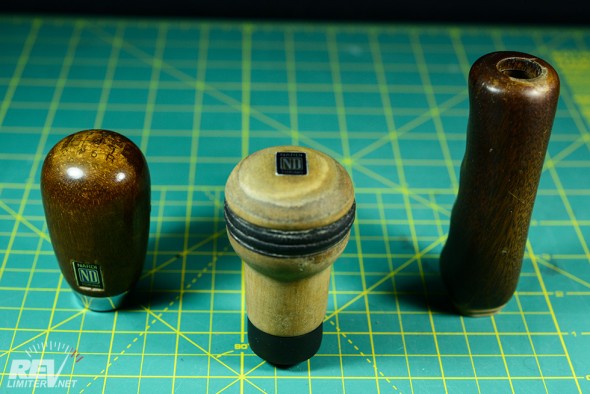
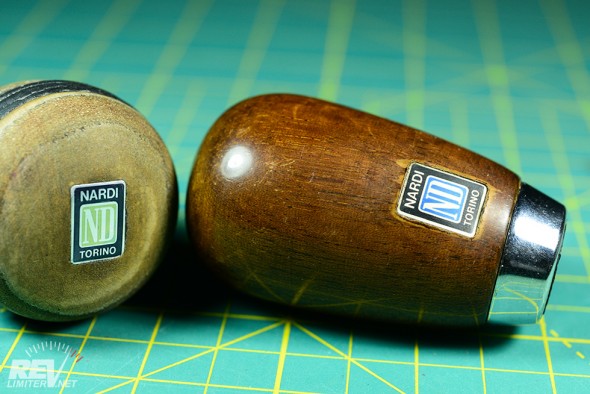
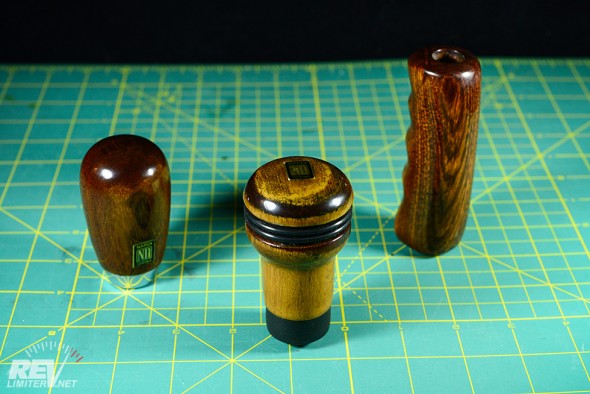
These knobs came from a couple of sources. The Nardi NA came from Star, who owns the Crane/Sunrise gauges. The darker pair came off an NB known as Major Hater on ClubRoadster.
Quite a set, huh? Thanks again Ben and Star!!! You are both awesome.
The knobs were pretty worn. The NA Nardi had been sanded a bit. Star had plans to restore it but sent it to me instead.
Perfect for learning on? I think so.
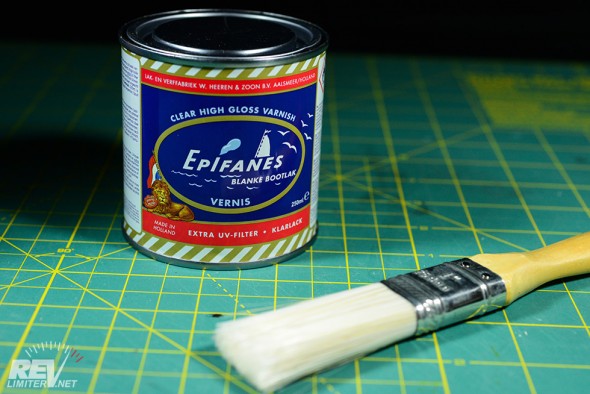
The Googlez suggested this – Epifanes spar varnish. I got this little can from amazon. 2 days later, I was ready to spend far too much time coating wood with it.
“Spar” means it’s meant for a ship. It’s marine grade. This is apparently what you want for something that will be out in the elements a lot or something that will be touched a lot. Regular varnish will not hold up as well. At least, that’s what I read.
The internet suggested it. How could I disagree?
So, I spent a month learning about varnish, the application of it, the sanding of it, and all the rest.
1: Sand.
2: Varnish.
3: Allow to cure the minimum time.
4: See step 1.
After 3 varnish layers, I felt confident enough to start work on the steering wheel.
Back to the wheel…
Sanding is easy. I figured that I probably couldn’t screw up the sanding. And, to my extreme delight, the cracks on the wheel surface disappeared with the sanding. None were more than surface deep. It was just the original varnish that was cracked.
But the cracks in the actual wood around the spokes? Care was needed. Back to the intartoobz for research.
The method that came up the most often was to patch the cracks with sawdust and wood glue. It would apparently match the wood grain better than some other patch material and provide strength for the cracked wood.
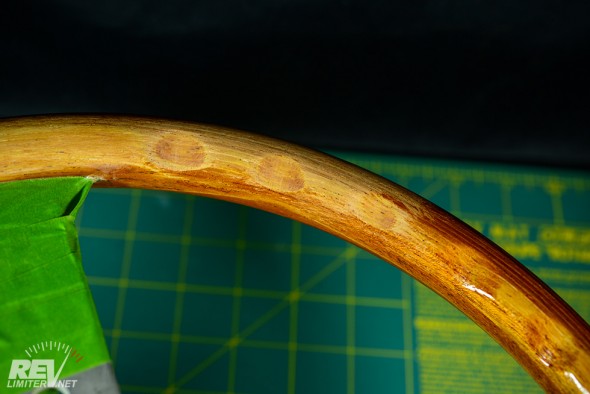
So I saved some sanding dust and made up some paste. I opened up the cracks ever so slightly with an X-acto knife and applied the putty.
It kinda worked. I mean, it sealed the cracks. I’m happy with the result. It doesn’t match the wood, but it worked.
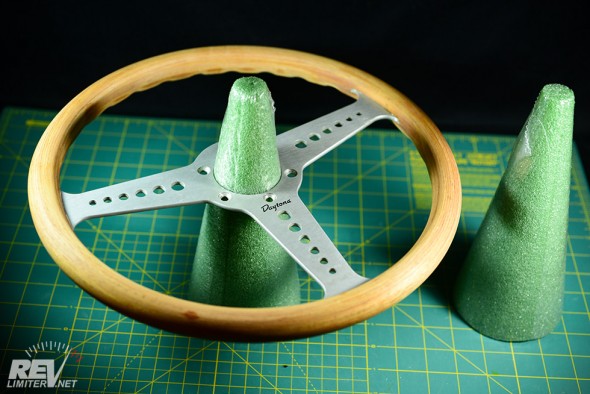
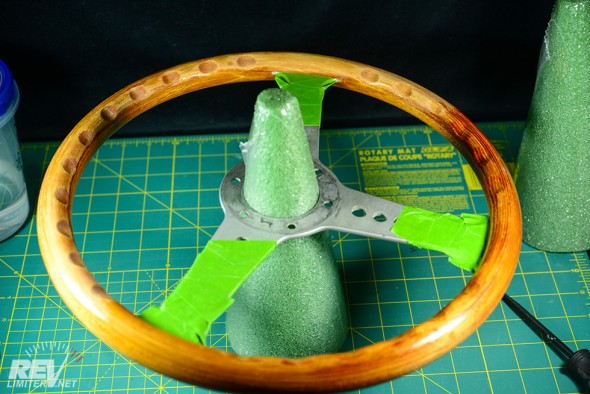
How the heck do I keep the wheel from touching… anything while being varnished? That question hung in my brain for days. My wife suggested hitting a hobby store for some high-density flower foam. I could likely find something to sand into shape to support the wheel center.
Brilliant!!!
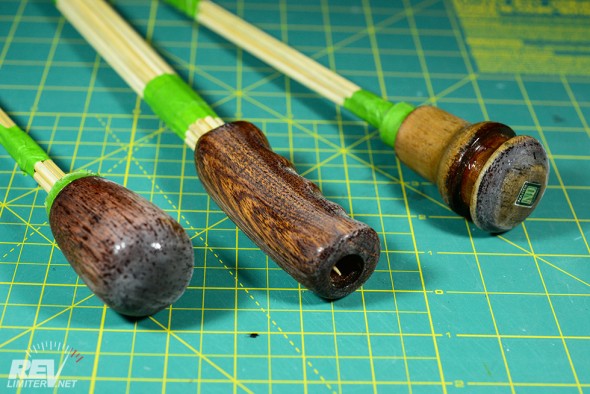
I took the wheel over to the nearest craft store and immediately saw these cones. They fit the wheel center perfectly. I could easily spin the wheel on it and then flip to varnish the other side.
Perfect.
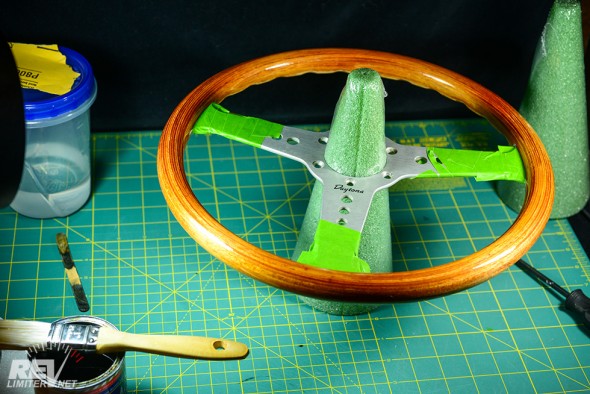
Just look at that varnish. Just look at it.
I mean, it’s wet, so it looks WAY better than it should. But only one coat and already there’s so much gorgeous wood grain visible.
After only one coat, I was pretty confident in the direction I was going. The wheel finish was really coming up nice. All the was needed was patience.
Stuff I learned about varnish
- It needs to dry between sandings. For Epifanes, that’s about 3 days. Non-cured varnish chunks up when you’re sanding it. Cured varnish creates dust.
- A clean brush is really REALLY nice. After a couple of cleanings with the mineral spirits, the brush is just too far gone to apply a smooth coat of varnish. I bought extras. The final finish was worth it.
- Use a brush, not a foam sponge on a stick. Someone on the internet suggested the damn foam sponge thing. I tried it on a shift knob. Fortunately, I was able to sand off all the drips.
- There’s such a thing as too many coats of varnish. The butter zone for Epifanes is 6-10 coats. 12 is too many. One shift knob has 12 coats.
- You can sand pretty aggressively between varnish coats. I started out sanding with 400 grit. To me, that’s a pretty rough sand paper. You don’t sand car paint with 400 unless you really want to take some paint off. But… varnish is not car paint. It’s fine to sand with 180 grit. You just don’t want to remove all of the good clear stuff you recently painted.
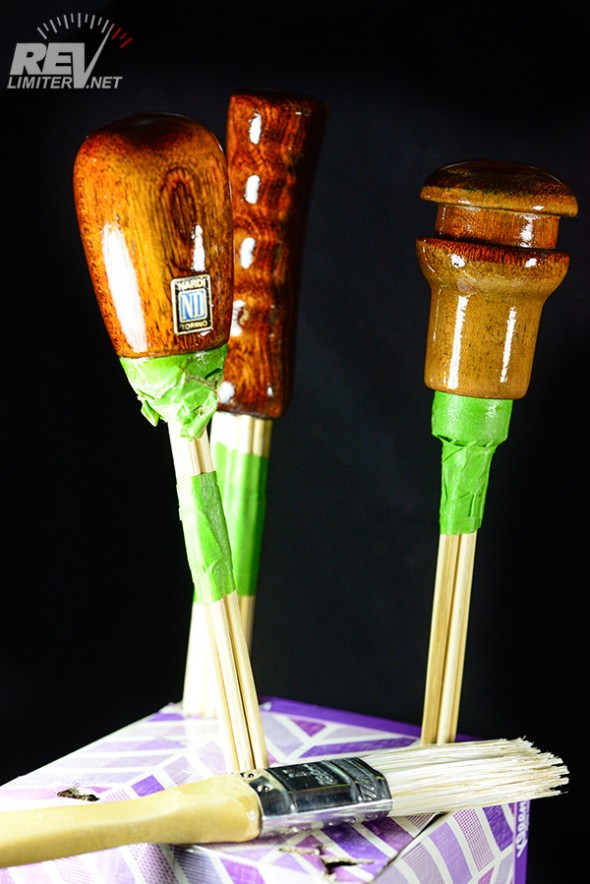
Finished Knobs
NA Nardi: 12 coats. That was too many. It started to get cloudy.
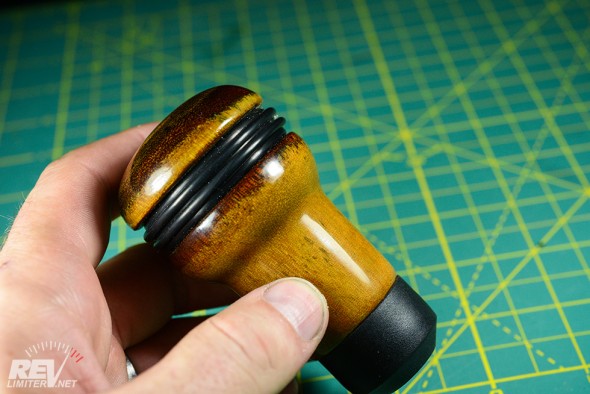
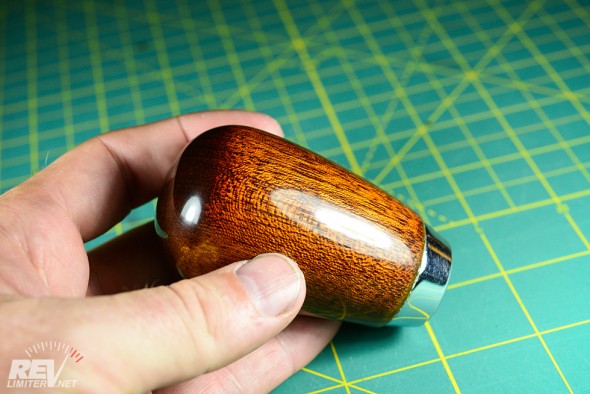
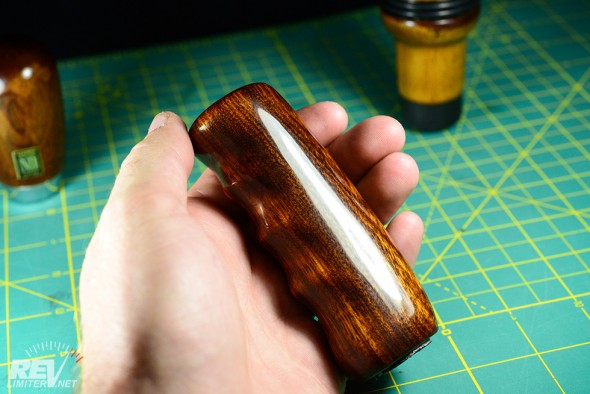
NB Nardi shift and brake: 10 coats. That was pretty much the maximum. There’s a mile worth of gloss and it feels like holding glass.
I really like the NB Nardi stuff. The knob has an excellent weight. Both are lovely and cherry colored. The NA shifter is very light, both in weight and color. Unfortunately, my steering wheel matches the NA shifter better than the NB wood.
Finished Steering Wheel
8 coats. The first 4 were pretty light. The second 4 were a bit heavier. I allowed an extra day or two of drying time between the thicker coats and sanding.
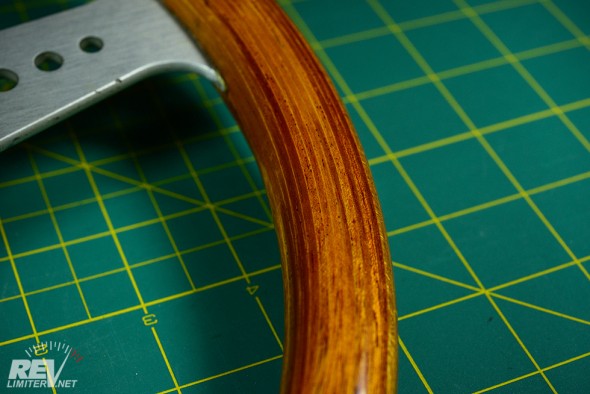
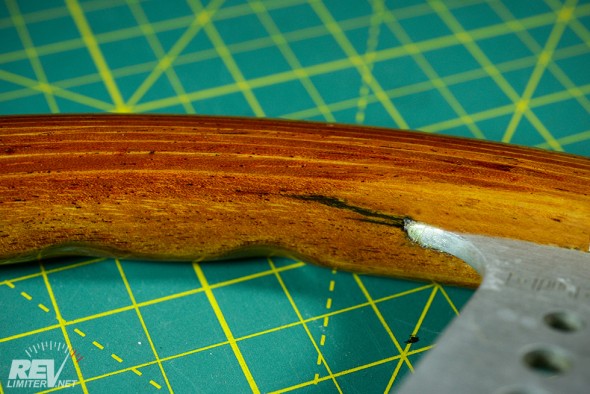
The wheel just glows. It doesn’t even need good light to do it. It has this insane finish even in shadows.
I have something obscene like 80 hours of labor spread out over about 6 weeks on these various wood items. Worth it? Hardly. But the final product is unlike anything I’ve ever seen.
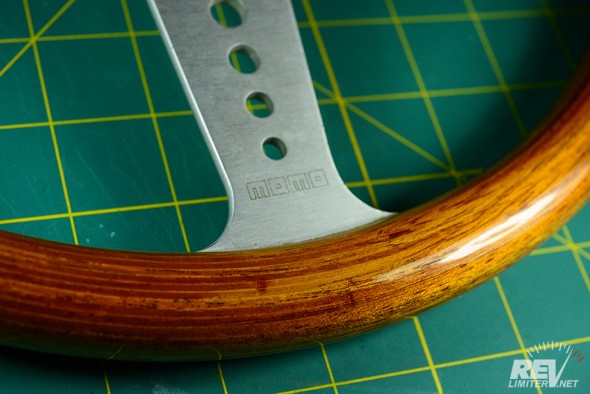
Depth. Grain. Smooth finish.
Let me talk about that finish. It’s doesn’t feel hard, like wood. It feels incredibly soft and smooth. The wheel finish is indescribable.
After the final coats, I went up through the various grits. 400 to 800. 800 to 1000. 1000 to 2000. Then I hit it with the fine steel wool. The last thing to touch it was 000 wool.
Yeah. I went overboard.
Installed
I installed the wheel in Sharka and stepped back. It looked horrible. I didn’t take a single photo.
I drove a mile. It feels horrible. The grip is super thin. The wheel feels like a boat wheel – huge. It’s only 350mm, but the thin grip makes the whole thing feel like driving a school bus.
The wheel came right back out of the car. It’s hung on a nail in my office ever since.
It took me until October to even blog about this. The wheel was THAT disappointing to use. I did all of the work above in April and May. I was too disheartened to type about it until now.
You can’t win them all.
And I put too much work into the wheel to consider selling it. It’s too pretty.
Much sadness.






Good excuse to buy a boat though Adam
Yes. I need a boat. We don’t really have that wet stuff that one floats in, but… this wheel demands a boat.
dammit.
You should write for game of thrones- you know just how to pump it up then punch me right in the gut. At least it makes good decoration
HA!!! Thanks man! That’s some pretty high praise. And here I was just typing about a steering wheel project.
It’s going in a shadow box shortly. I just need to drill out the box for it.
You should paint the spokes black and send it to me. I need a wooden wheel to replace the Momo that was supposed to be temporary.
PAINT?!?!!? The silver finish on the spokes is quite nice. Sacrilege I say! hahaha
That’s just because it would match my car better…. Lol
Astounding work I should mention. I’ve apparently underestimated how much wood can be saved.
My experience is minor, but it seems like a wood wheel can be a LOT farther gone than a leather one can and still be brought back to better-than-new condition.
I do love reading all these posts. Elliot said it perfectly its like reading a story
Thanks Todd. Really makes me smile that folks have enjoyed this post.
I always thought a wooden wheel required some leather gloves to get the full experience out of it. Or maybe it’s my strange fashion sense telling me a Miata should be driven with a leather jacket, leather gloves, leather helmet and flying googles.
Anyway, I immediately thought at the begining of this post that this would look out of place in your black interior full of shiny bits. The restored wheel and knobs look awesome, you definitely did a very good job, but they just don’t fit the theme here. Give them a BR green car with tan interior though, and they’ll shine gloriously.
I know its not my car, but I could’ve told you Sharka’s interior doesn’t really fit a wood wheel. Not when everything is black, chrome or silver.
I did a fair bit of research on black interiors and wood wheels. There’s more of them out there than I’d guessed. I didn’t expect it to be a good match or anything. I just expected something… else. I guess. ha
But the killer was how thin the grip on this wheel is. It’s not fun to drive with or use. I don’t mind an ugly or out of place wheel (one of my favorites has YELLOW stitching) but a wheel that’s not fun to use? It doesn’t get used.
That was not the end result I expected after reading this. You’ve got a fantastic looking wood wheel and shift knobs just waiting for something else, though.
I’m enjoying them! They’re currently residing in a shadow box… hahaha
By the way – I love the horn button! I mocked it up on the steering wheel the other day. It’s going to look great.
Excellent!!!
Looks like it could have been made yesterday if you ask me.
Since I always seem to comment about my experiences with the Supra in your posts, I’ll share something. I’ve put a LOT of time, energy, and money into building the Supra.
However… there is a small, lingering, ironic thought in the back of my mind that says there is a chance, albeit small, that the stock-ish Miata I have could be every bit as much fun as the Supra is when I’m done with all this effort into the Toyota.
It’s a scary thought indeed.
I truly enjoy your Supra comments. Please continue to make them. They really make me smile.
And I know what you’re saying. I’m pretty sure a Jeep would be every bit as fun as Sharka given 10-15 years of work. I often wonder what would have happened if I’d stayed with Wranglers and CJs.
You and I have great timing, mind you. I want to re-do my shift knob and handbrake in my NB2 as they have marks all over them, and I was looking into advice, so…perfect timing once more! Thanks!
BTW I would not change my wooden steering wheel for anything in the world, just love the feeling! Well, okay, maybe for another wooden steering wheel…
Thanks as usual for the detailed photos and great write up! You’ve helped me finally decide to tackle the restoration of a very sad 320mm Nardi I picked up a while back. After reading this, it will be a glorious wheel once again when it’s finished. (hopefully)
Even after the whole wood debacle, I *still* want a wood wheel for my collection. I want a darker one that would match my Nardi NB wood. I want something with a thicker grip. I might want something with a polished center.
SOMEDAY.
hahaha
I don’t own a miata anymore, but I absolutely love your blog and write-ups. That wheel came out gorgeous.
*opens new tab, starts ebay search for a wood-rimmed wheel for my amazon*
Im so star struck by you. I think your like me. sometimes its just about the experience not the finish… live and learn. What makes you an amazing person is the passion and steadfast to carry on even after a blow. And aren’t you happy you did.. I watched some retro film of a guy in a mg and def loved the wood thing. but Yea at the end of the day the feel might not be right.. Think chrome and leather is better for a DD maybe some show car would would be neat.
Oh man I would totally buy that NB shift knob off you if you are willing to sell. I’ve been looking for one forever and can’t seem to find a decently priced one.
In 2000 I bought my first Miata, a 92 B&T. It had the Nardi Classico wheel, which like your wheel was thin, but felt surprisingly good to my hand. But it was slightly larger than stock and interfered at my knees. It always got lots of comments from folks though. I ended up with a tan leather d shaped wheel by Isotta, slightly smaller than stock. I currently have a 94 R&T and managed to find possibly the last example of that Isotta wheel in Malta, of all places. Isotta is only making marine wheels now. Thicker is better.
If you do any other finishing/refinishing, a few tips.
1. Buy a very good brush for the product you are applying-it makes a world of difference in the end product, and once you learn to clean and care for properly, it will last a long time.
2. I find spar varnish overly difficult to work with and avoid it mostly. There are wiping varnishes, such as polymerized tung oil (not just plain old tung oil), that are easy to apply, offer good protection, and dry more quickly than spar.
3. Forget that old butcher’s tale of saw dust and glue. As you experienced, it does not match well. There are wood fillers that work pretty well and match some woods well. Another technique is to not fill the crack/gouge/hole until after first coat of varnish is applied and dry. They fill with color putty, which comes in numerous colors and can be blended to match almost anything. Then apply the remainder coats of varnish and the color putty will stay put. If one uses color putty before fist varnish it will smudge the surrounding grain and you will hate it.
Sorry for the long comment.
I really enjoy you blog.
Wow. That was a FANTASTIC comment. Wish I had read it before restoring my wheel.
Thanks Les!
What did you use on the black stripe of the NA nardi knob? Mine looks horrible and it was the main reason i took it out of the car. If there’s a way to restore it that would be great.
Not sure what you mean. I just did the marine varnish on all wood items.
It looks like you were able to replace the rubber parts on the Torino shift knob.. can you share where you sourced that ?