
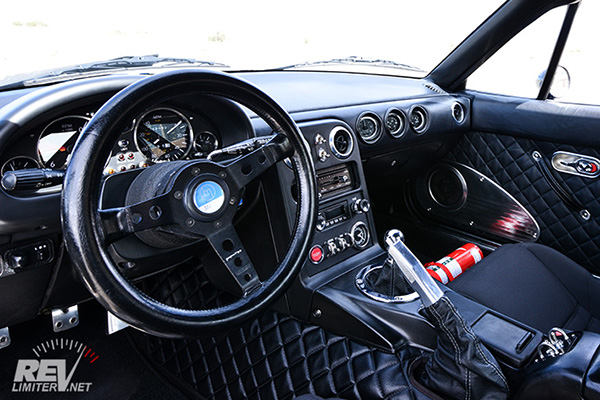
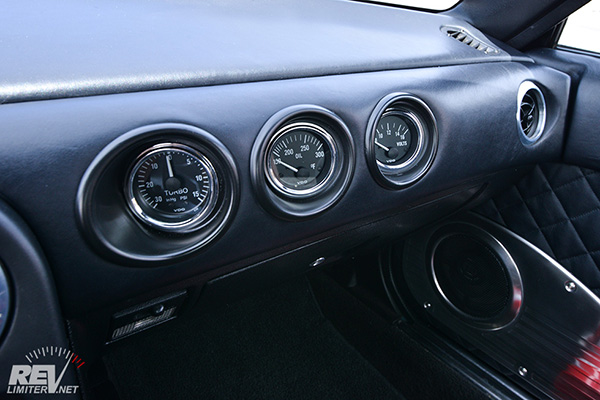
Sharka's Gauge Cups - installed
Your Shopping List
- A set of NA6 Crash Pad Gauge Cups. - You can buy them right here on this site or from several other sites! Check out the revlimiter.net Store.
- Mounting solution. The revlimiter Gauge Cups come with mounting clips, metal plates, and safety wire.
- A template to help locate the mounting area. I ship this with each order. You can print one for yourself here.
- Dremel tool with cutting attachments. I like a drywall cutting bit (#560) and the Dremel cutting guide. A sanding drum will also help with final gauge cup fitting.
- Glue and clear silicone. To stick the metal plates to the back of your crash pad and to stick the crash pad back on your car.
- Pliers. For twisting safety wire.
- Satin black paint. To get a close match to the OEM plastic.
- Microfiber towel. This will protect your gauge cups from being scratched on the work surface.
Frequently Asked Questions
- I have an NA8 with the airbag. Will this work?
No. These cups are extremely specialized. They're meant to work only in the NA6 dashboard without the airbag. - My car is right hand drive. Will the cups work?
The answer depends on which cups you're using. The revlimiter Cups will work in either Left Hand Drive or RHD. - Do I have to paint these?
Probably. While the black plastic I use is a pretty good match, a satin black rattle can will produce even better results. Just wash the gauge cup before spraying to get the mold release off. - Where can I get the parts in these pix???
I sell them here on this site! Check out the revlimiter.net Store.
Preliminary Work
Wash and paint your gauge cups. You will get the best results if you paint your gauge cups. I like Krylon Dual Paint + Primer in satin black. It eliminates the primer step and gives a finish extremely close to the OEM plastic. And before you paint, make sure to wash and dry the cups. Mold release leaves a sort of slick layer on plastic parts. That has to be washed off before paint will stick.
Remove your Crash Pad. There's not really any good way to do this. At least, no good way that I know of. You must remove a lot of surrounding factory parts (the gauge hood, the air vents, the center tombstone, etc) and then you have to pry the crash pad off. Be careful and good luck.
Crash Pad Hacking
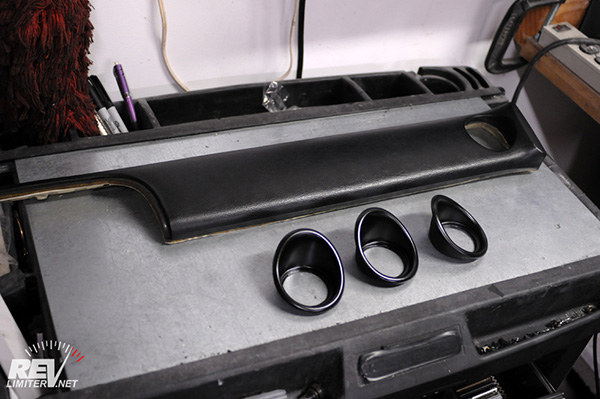
Ready your work area. Get your dremel plugged in. Organize your tools. Get your template ready. You can leave the microfiber towel alone. You don't want it around for this phase.
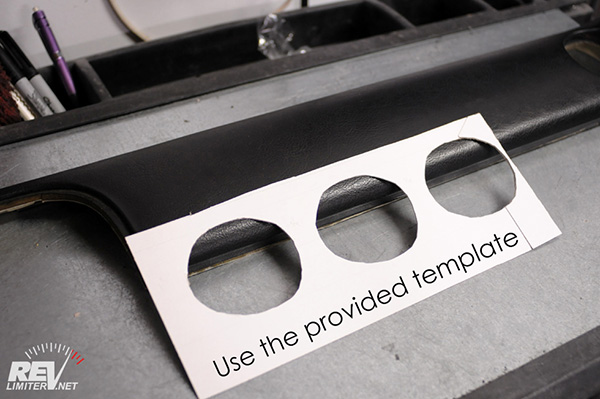
Sorry to not have the right template in the above photo. Use the one that came with your gauge cups.
Lay the template out carefully. Make sure it is not crooked and the cups are indeed in a straight line. You can either tape it to the crash pad and carefully cut it out that way, or you can cut out the holes and draw on the crash pad with a sharpie marker.
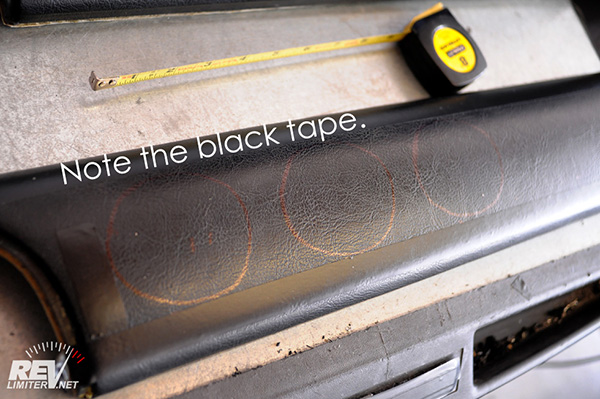
I put black tape on my crash pad to make sure that I was cutting a straight line and I'd not have crooked gauge cups.
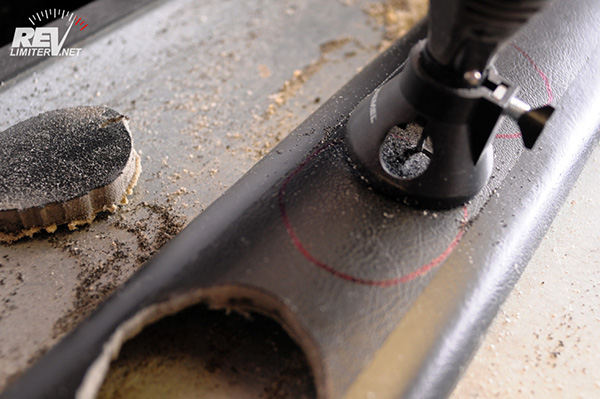
When you're ready, turn on the Dremel and start cutting. You can use many tools to do this. I like the drill bit-like drywall bits. They make quick work of the holes.
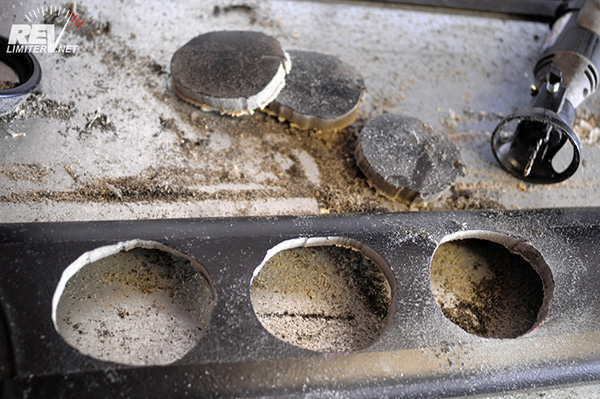
Once the holes are cut, you have to get the holes matched up to your gauge cups. A lot of careful work is required and sanding just a little at a time. Your gauge cups should all be identical, but it still might help to number the cups and the holes so that you're always working on the same hole with the same cup.
Gauge Cup Mounting
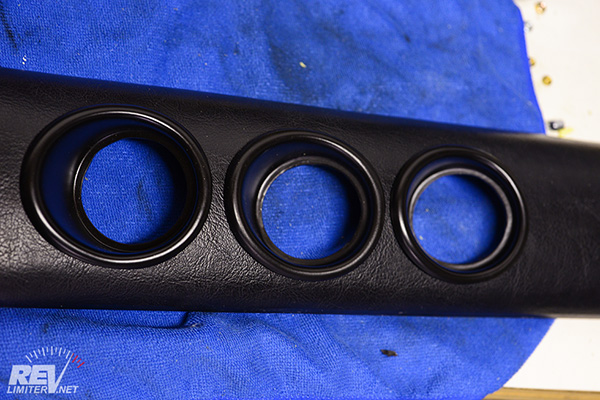
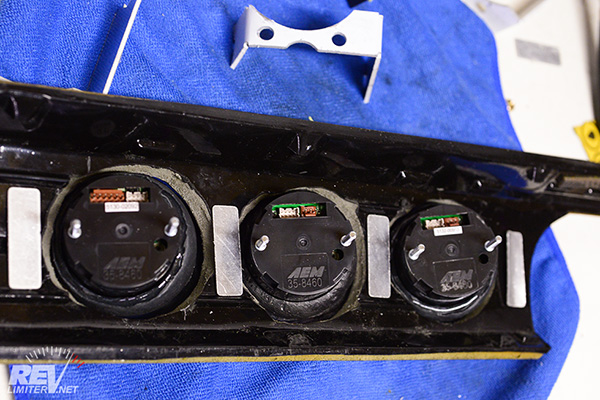
Once your cups fit perfectly in the crash pad, it's time to get out the microfiber towel and flip the crash pad over. Note: a perfect fit on the pad means the cup sits in the hole without any effort. No edges exist to keep the cup from sitting all the way down in the hole.
The mounting clips I supply are as close to universal as possible. However, all 52mm gauges seem to be different. Some are thicker than others. Some are more shallow. You might have to adjust the mounting clips a bit.
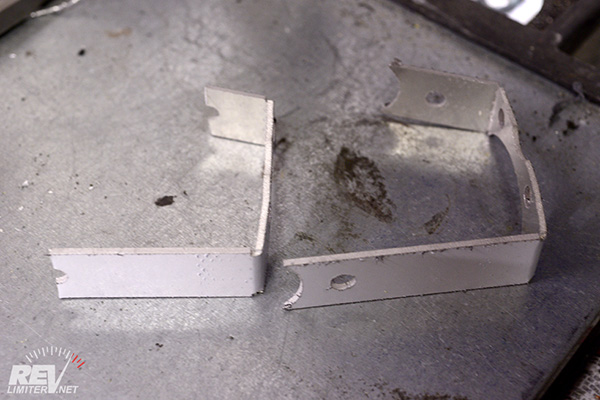
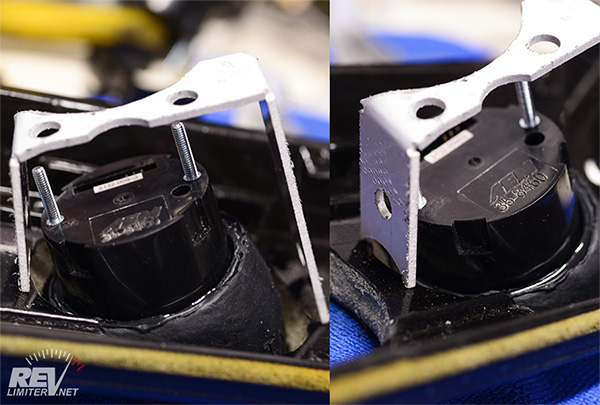
If there's some space between the top of the clip and the mounting screw on your gauge, you'll have to cut the mounting clip a bit.
Measure exactly how much space is between the clip and the gauge mounting screw. Add enough to let the thumb screw get threaded on. Then cut that much out from each leg of the mounting clip.
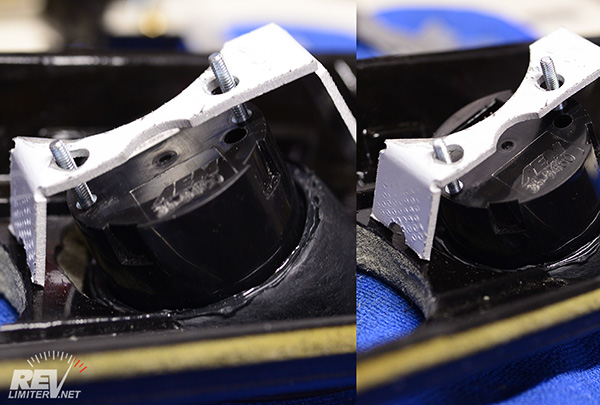
This is how the mounting clip will look when trimmed to fit your gauges. The AEM gauges just happened to need cutting right in the middle of the hole in the arm.
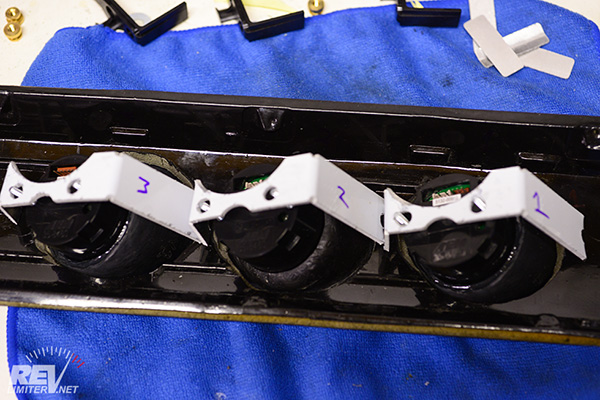
This is how the panel should look with the mounting clips in position over all three gauges.
You will have to bend each leg to touch its neighbor. I try hard to get the angles right before shipping, but a bit of fine adjustment will always be needed. Pliers or a vise will help. The metal is pretty easy to shape.
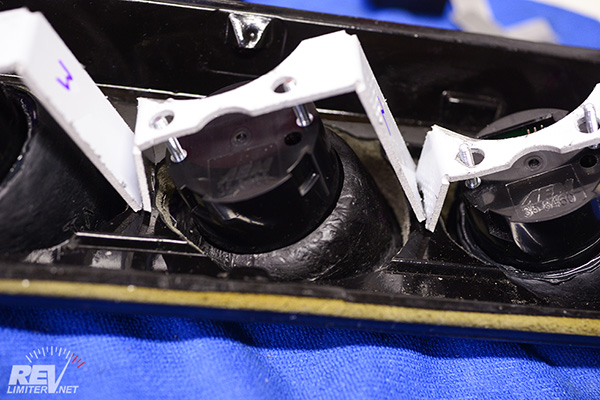
Next step: Get out your little metal plates and put them into position. Two ship with each gauge cup, so you should have some extras if you're installing a set of three cups.
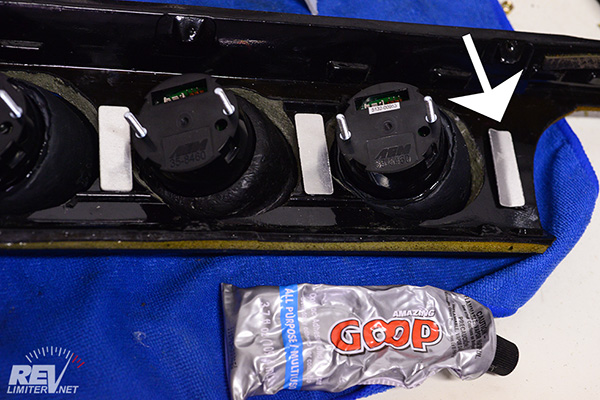
The front and rear metal plates really benefit from a slight bend. That lets the mounting clip have a place to rest without sliding out. Anything you can do to keep sliding to a minimum is helpful.
Use your favorite brand of glue and bond the metal to the plastic. I like this Goop stuff. It dries pretty quickly (like 2 hours) and holds like nails when cured.
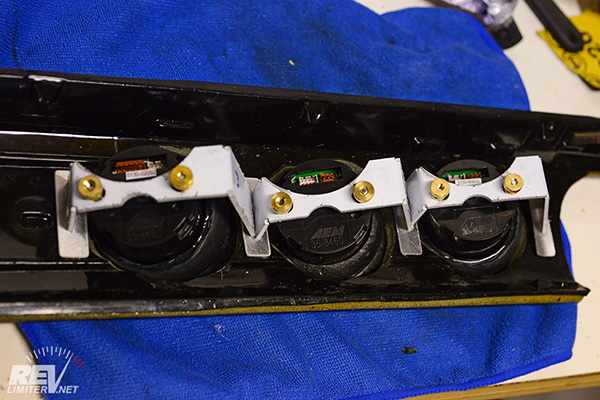
Carefully install the mounting clips on your gauges and lightly clamp them down. You're doing this to help hold the plates in position while the glue cures. Leave the pod like this for a couple hours, or until the glue is workable.
When the glue is cured, loosen the mounting clips and make sure you like how the gauge pods and gauges are rotated. Spend some quality time fussing with it. You want the gauges and the pods to be straight. It'll bother you later if they aren't.
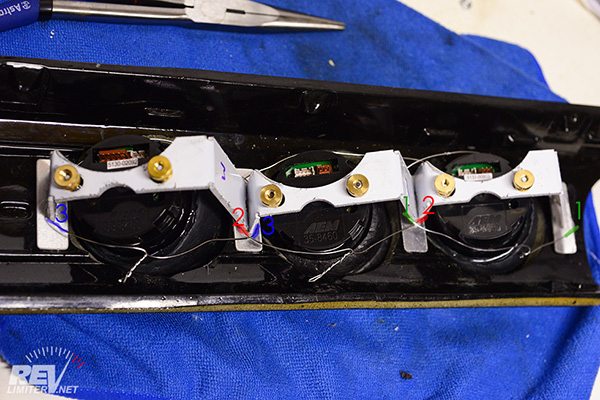
When you're ready, tighten the thumb screws down and get the safety wire out. Note the photo above. Each wire is routed in a specific way to tighten both itself and its neighbor. You don't need to get the safety wire crazy tight. In fact, it will break if you tighten it too much. Just go for snug. The safety wire is a final line of defense against the legs moving around and rattling.
Final Cup Fitting
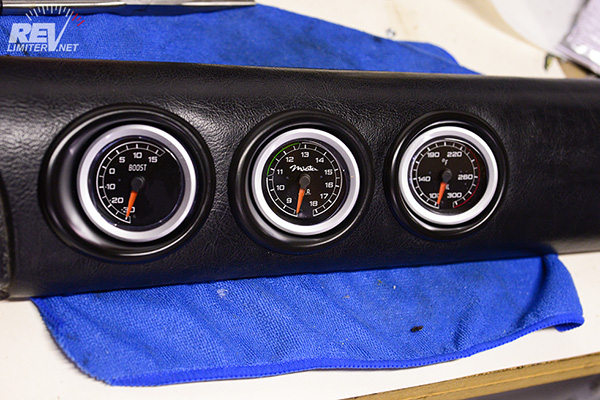
Flip over the gauge pod and take a look. Pat yourself on the back. You did an excellent job! And if that statement isn't correct, work on the fit and finish until it is.
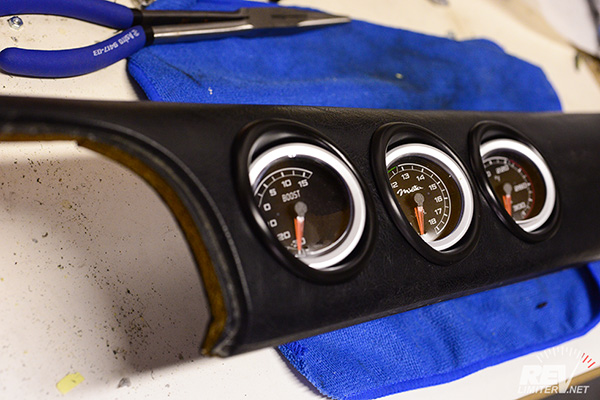
There shouldn't be any gaps on any of the edges. Every edge should be sunken into the crash pad about the same amount. If one is a bit too high or too low, you can tighten down various thumb screws to adjust things without undoing the safety wire.
Now take the crash pad back to the car, wire the gauges in, and glue it back onto your dash.
Dash Hacking
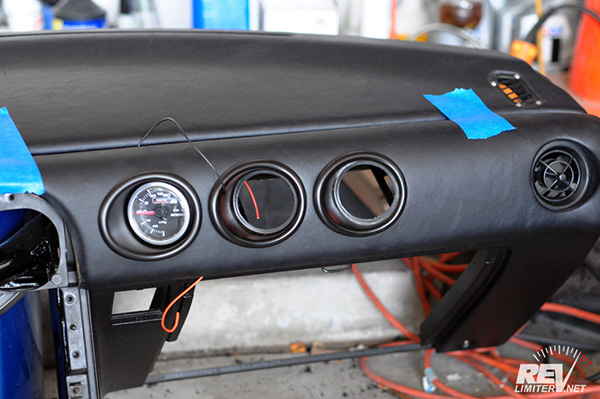
There's just a little bit of work left to do - hacking a big hole in the front of your dashboard. This is pretty simple. A Dremel cut off wheel will work and a Dremel sanding drum will clean up the edges. Note: you do NOT need to remove your dashboard to do this. I just happened to have mine out for photos.

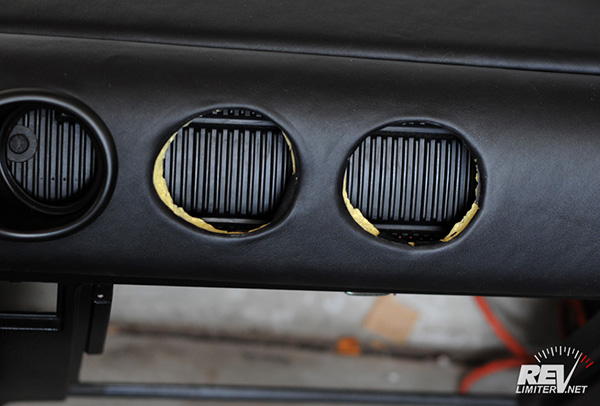
Roughly trace the hole you think you'll need. You can kinda see my Sharpie marks on the photo. The red outline is pretty close to my final cut. Always cut less than you think. It's easy to cut more, but it's much harder to add material back to the dash.
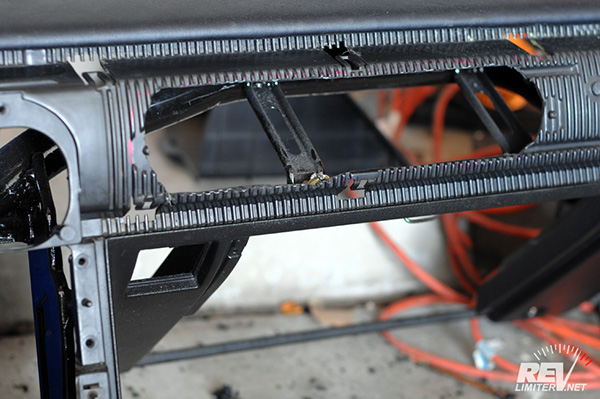
Cut and test fit. Repeat. You want to make sure the edges of all mounting clip feet have enough room and aren't touching any part of the dash front. If a mounting clip touches the dash, it means the crash pad will stand away from the surface a bit.
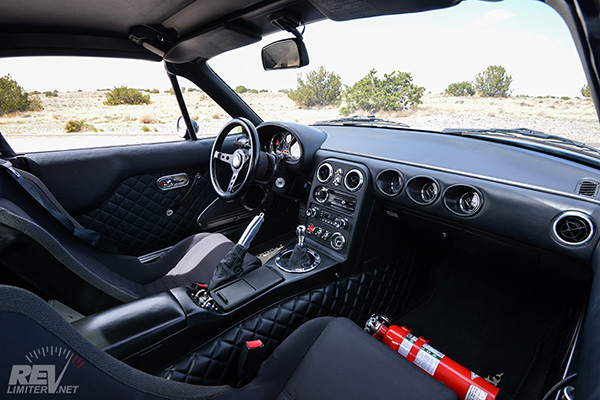
When the crash pad mounts easily to the dash, you're done. It's time to get out the clear silicone and glue the pad back on. Then wire up your gauges and go for a drive!
Additional Images
Site Navigation


Latest Blog Posts
Where’s all the blog posts?!?!
Posted on Fri, 27 Jun 2025 19:59:51 +0000
 Why are you seeing 2013 blog posts in the "new posts" list? It's been a hard month for the revlimiter site.
Read more...
Mabel
Posted on Sat, 29 Jun 2024 03:42:43 +0000
 Who’s the dog that keeps showing up on the revlimiter Instagram? It’s Mabel, my ACD/Pomeranian service dog.
Read more...
CarbonMiata Vent Window Install/Review
Posted on Sun, 29 Jan 2023 14:57:01 +0000
 After waiting 23 years, there’s finally a pretty vent window kit on the market for the NA/NB Miata. Unfortunately, it doesn’t actually work well.
Read more...
NA Miata Ignition Switch Replacement / Refurbish
Posted on Fri, 12 Mar 2021 19:25:57 +0000
 Is your NA Miata not starting anymore? A bad ignition switch may be the problem.
Read more...
XIDA ND Suspension Install
Posted on Mon, 20 May 2019 20:01:01 +0000
 Mona dumps the soft GT suspension in favor of a set of XIDAs from Supermiata.
Read more...

Products sold on this site are for Off-road and Competition use only. This website intended solely to provide general guidance on matters of interest for the personal use of the Reader of this Page, who accepts full responsibility for its use. All products as well as information provided "as is," with no guarantee of completeness, accuracy, or timeliness, and without warranty of any kind, express or implied, including, but not limited to, the warranties of performance, merchantability, and fitness for a particular purpose.