
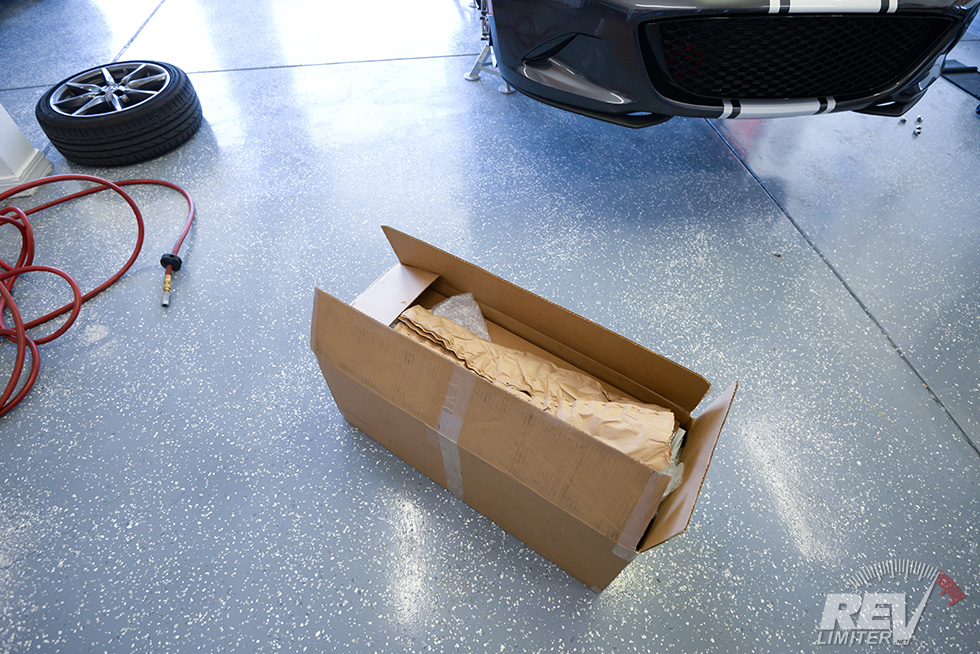
A big box arrives…
I wanted to get this the same week I brought Ramona home, but time and finances conspired to keep it in the future… until NOW.
I’m very pleased to be able to say that every Miata I own rides on XIDAs.
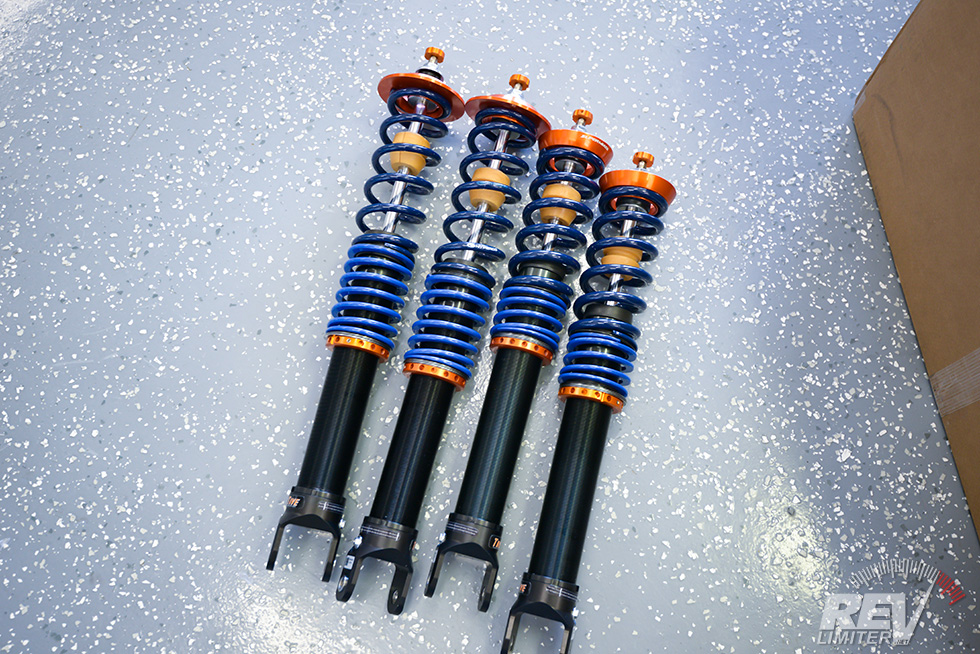
Xida ND Suspension
So pretty.
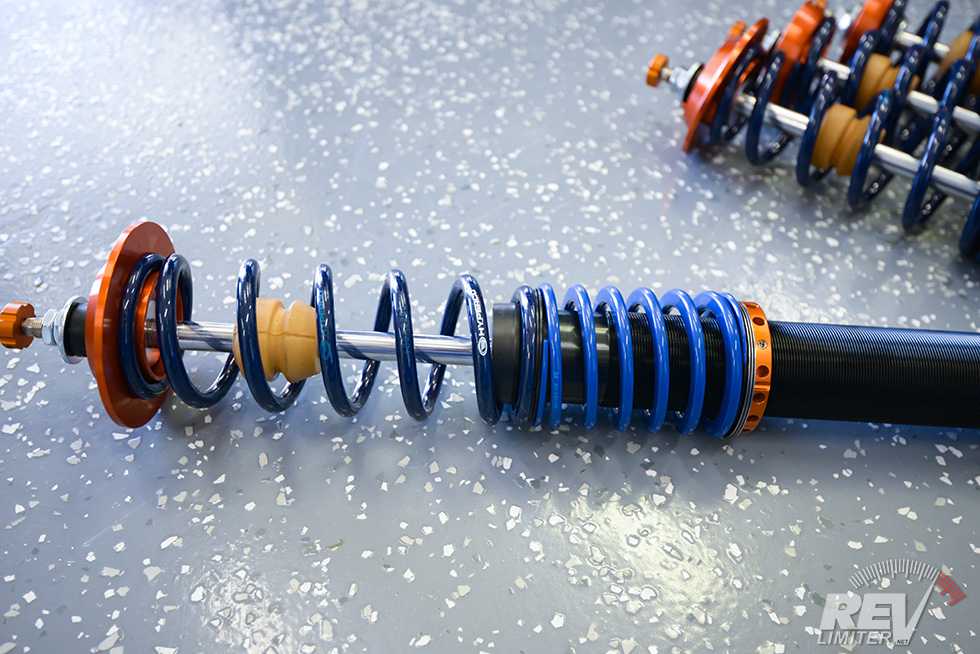
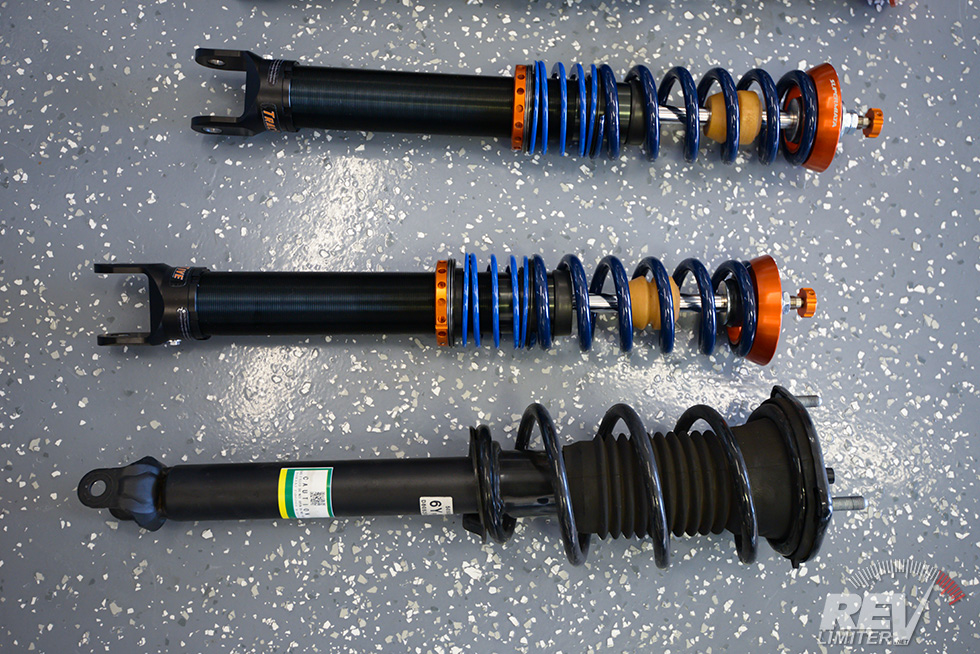
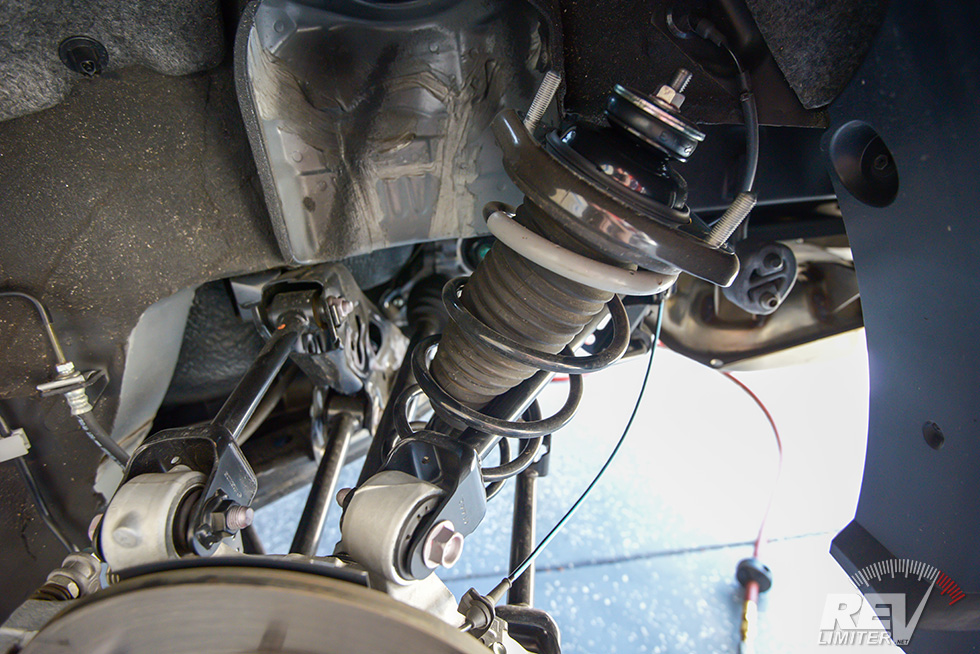
And there it is. Shocks by Tractive. Blue Hyperco springs with helpers. Various other bits to keep it together, all developed and tested by 949Racing / SuperMiata.
You’ll notice the lack of something at the tops. I opted to use my OEM top hats to keep the shocks together instead of the billet/coaxial mounts. This is supposed to help reduce a bit of road noise and not make much performance difference in a mostly street-driven Miata.
I’ve chosen the Sport setup on these. That gives 400 lb front springs and 200 lb rears. The ride will be slightly stiffer than the Touring (300/150 lb) but it should be a bit more fun. The squishy Grand Touring ride that Mona came with has been driving me nuts for months now. I wanted a bit more feel.
You can read more about the XIDAs on the Supermiata page. I could try typing a ton of detail here, but I fear I’d be inaccurate and boring.
One quick thing – the front ND shocks are the short ones. THIS is one thing that’s different from the NA/NB. The longer shock combo goes in the back.

Stock ride height.
Stock rear
That’s a lot of wheel well gap. It’s not as bad as some Miatas. Not nearly as bad as the 06 NC. But… yeah, it’s a lot. The car looks rather goofy way up in the air like that. But that won’t be a problem much longer.
Stock measurements were:
15.25″ front passenger hub-center-to-fender.
15″ rear passenger h-to-f
15.1″ front driver h-to-f
14.8″ rear driver h-to-f.
5.75″ front pinch weld to the ground
6.25″ front pinch weld to the ground

Up on the stands.

Jackstand shoutout
A quick shoutout to my trusty ESCO jack stands. I did a review of them and a bunch of others back in 2010 and have been enjoying them with every use these past nine years. I’ve considered going to a Quickjack, but just really enjoy the secure feel of these ESCO stands.
Use a set of safe jack stands whenever you work on your car. Those in your family and your future self will greatly appreciate it.
Onto the install.
Front Suspension Install
Remove the top A-arm bolts
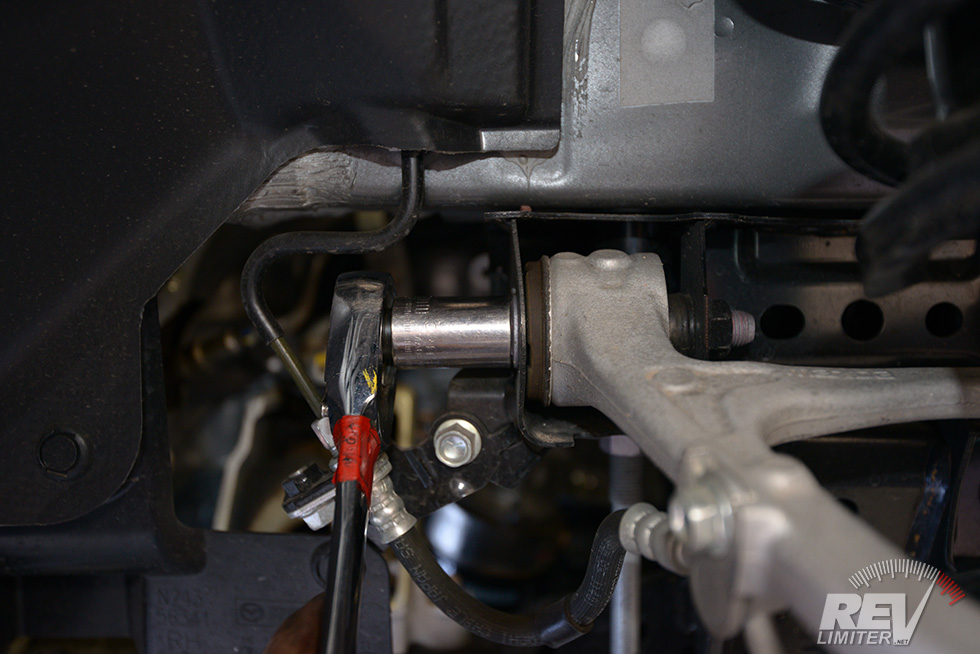
Unbolt this wire bundle.
There’s not a whole lot to this. It’s actually easier to do an ND suspension swap than it is to do an NA/NB. But… if you’ve not done those, read on.
Disconnecting the swaybar comes first. I seem to have not taken a photo of that. No need to remove it, just unbolt one end of each end link.
Then remove both of the big bolts holding the upper A arm to the frame. On the NA this is a single long bolt. The NB split it into two, saving some weight.
My GT had a sensor wire bolted to the top of the A arm that got unpleasantly tight when the A arm started flopping around. Unbolting this gets it out of harm’s way. Just don’t forget to bolt it back on at the end.
Undo the shock top bolts.
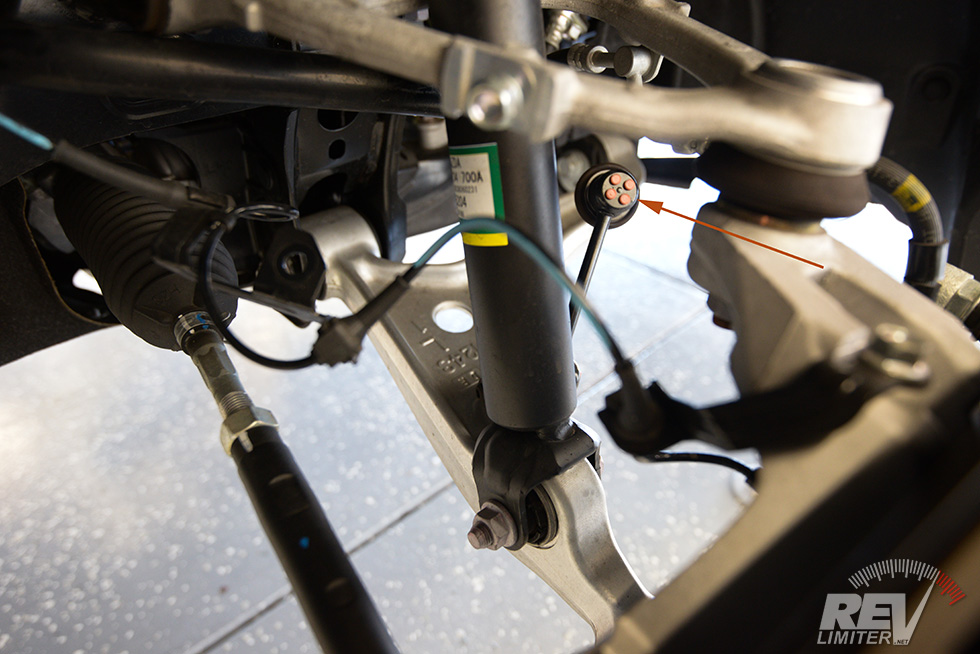
Remove the lower pivot bolt.
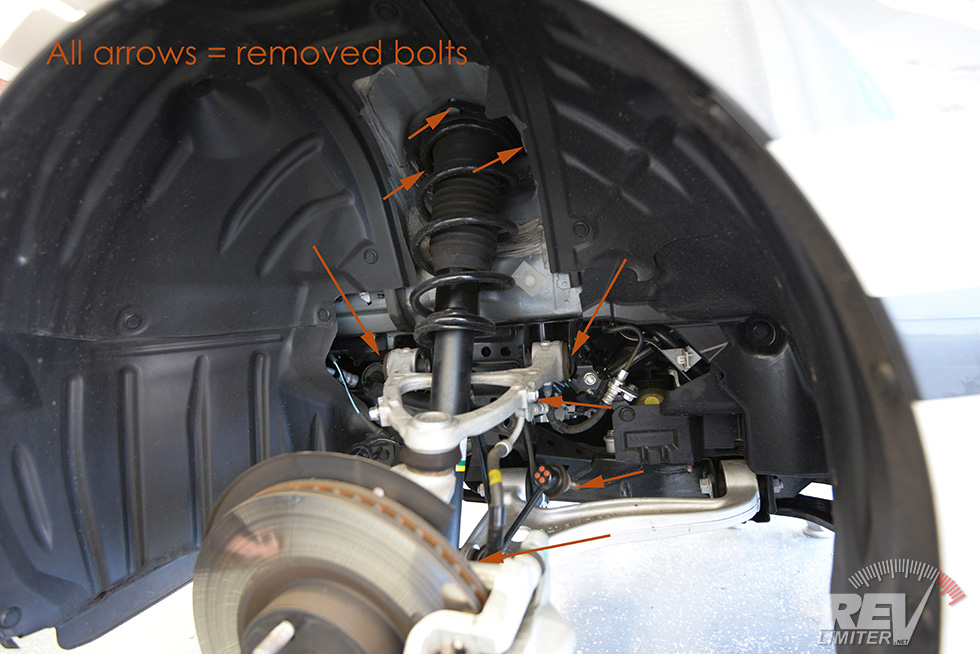
All the bolts needing attention.
Next up are the three bolts at the top of the shock. Undo those. I hear rumor that if you have a factory shock tower brace you don’t need to remove it. It’s designed to allow for suspension removal and stay in place.
The lower pivot bolt is the last to go. Once that’s out of the way the shock almost falls into your hands.
A recap – remove all of the bolts with orange arrows in that last photo. And then get ready to catch!

Out it comes.
Seriously the most easy shock removal in any car I’ve ever owned. It just falls into your hands. Bravo to the Mazda engineers who made this happen!
A word on reinstallation before I forget – it’s not quite as easy. You first lower the shock into the hole in the A arm that it came out of and then need to shove that A arm back into the two slots in the frame while holding the shock. It’s not difficult but it’s also not easy. It took me a few tries to get it all back into place.
XIDA vs Stock
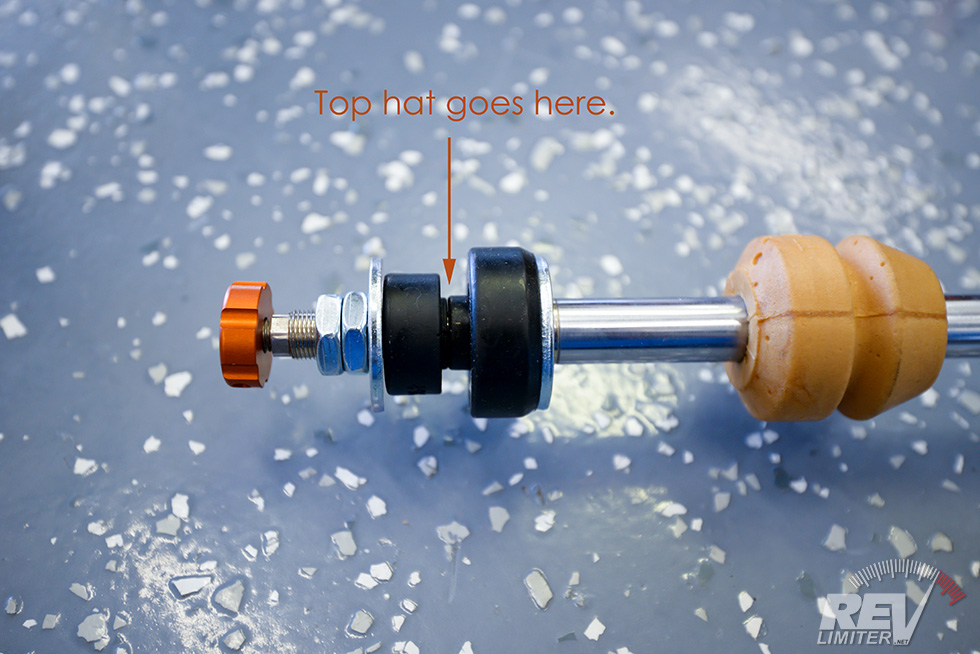
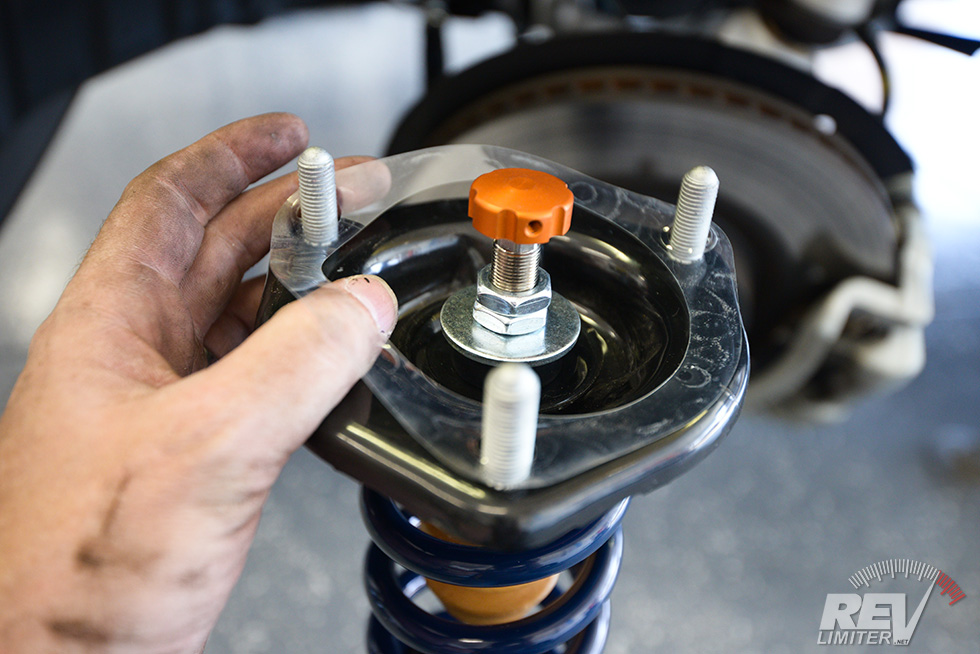
Top hat ready
Onto the tophat swap!! I assume everyone out there has a spring compressor to very safely unbolt the factory shock setup? I absolutely have these tools and certainly did not use a floor mat and impact gun to disassemble everything.
Always use the right tools for the job. And the right ones in this case are spring compressors, wrenches, and safety glasses.

Top hat installed.
Once you have the shocks taken apart, you just have to swap the top hat over to the XIDA stack. To do this, the best reference is 949 Racing’s own video of the process on an NA. In this video, they discuss installing the shock tops and using the small nipple on the top bushing to determine torque.
You don’t want to torque the top nuts on the shock too much. The shock shaft will tear itself apart. So you use that little nipple to figure out when the nut is tight. Once the washer is flat against the rest of the bushing, you’re done. For me this was about 3 full turns once the washer and nut were in contact with the bushing.
Done!
There’s not a whole lot to putting the top hats on the shocks. Be careful and go slow. And don’t forget the factory teflon washers that go between the shock top and the body.

raised and torqued.
Putting load on the suspension and raising it near ride height lets you torque everything correctly and have minimal suspension settling when dropping things back on the ground.
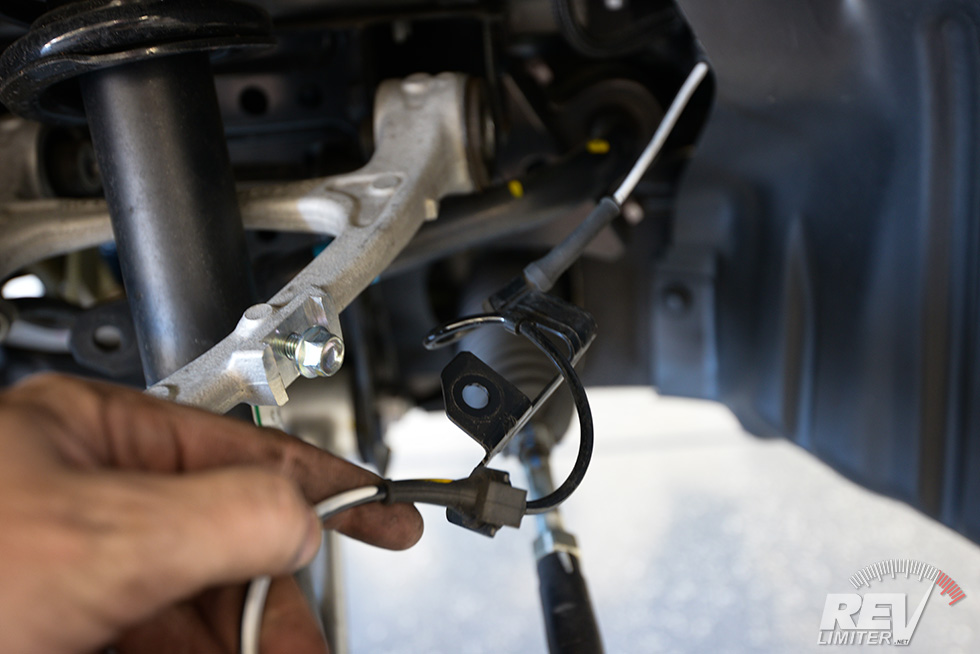
Don’t forget to bolt that sensor wire back onto the A arm.
Rear Suspension Install

Unbolt the rear swaybar.

Remove the rear trunk liner.
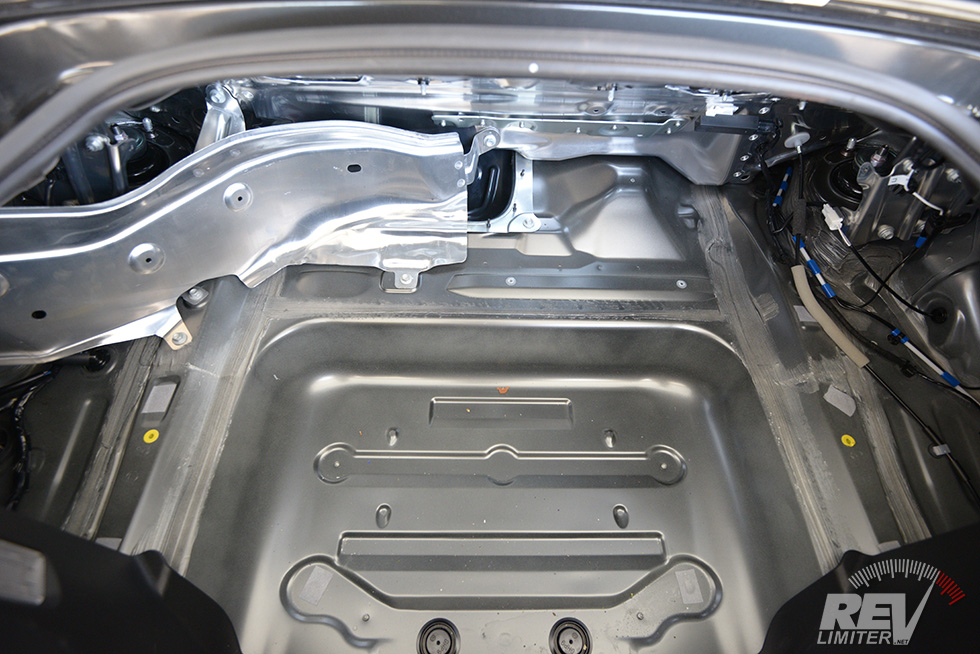
Bare ND trunk.
The rear suspension comes apart much like the front, but without the need to mess with unbolting an A arm. You just free the swaybar, upper shock bolts, and the lower pivot bolt.
You have to get the trunk liner stripped away. This isn’t difficult but there’s a ton of the little carpet clips to remove. Tools can help or you can break a few finger nails.
And once the liner is removed, it’s amazing how much the trunk looks like the NA’s trunk. Even that shield over the fuel filler is there.
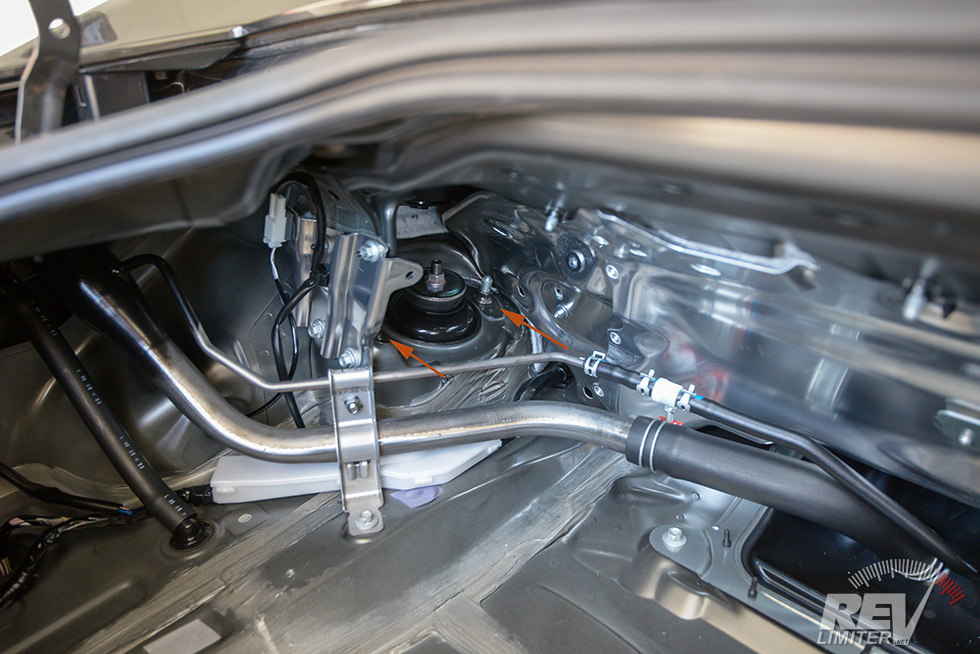
Hidden bolts.
Ugh.
Out of the whole job, the rear shock nuts are the only hidden hardware. No air tools or even ratchets will work. Just an open end wrench to get these nuts free. It’s not terrible, but it is annoying. Zipping these on and off with the air ratchet on the NA/NB is a joy.
At least the threads aren’t THAT long.
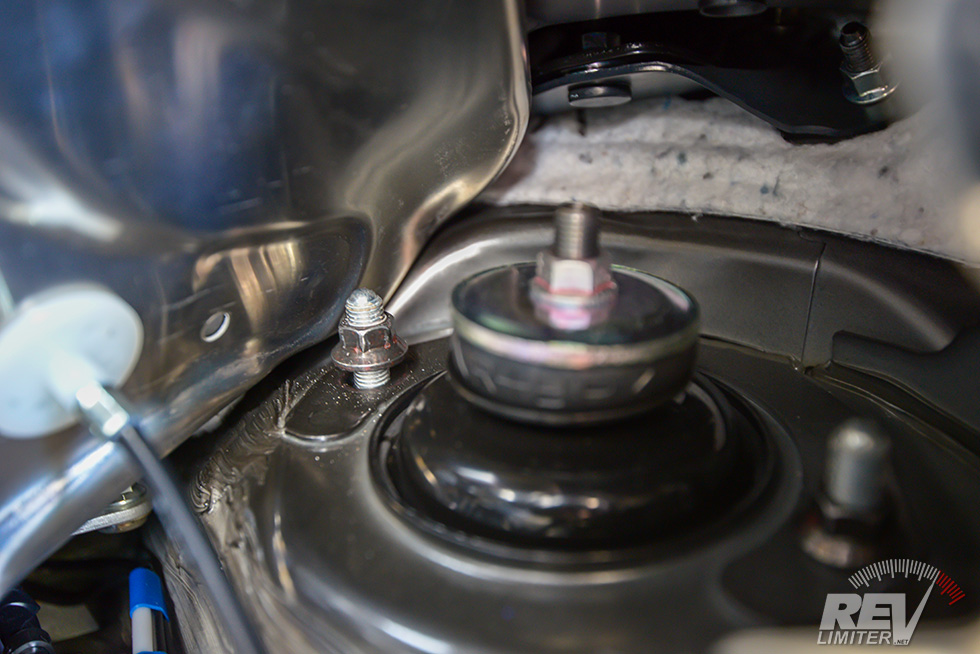
Rear shock free.
Like the front, the rear shocks are extremely easy to remove. Undo the two top bolts and the lower pivot bolt and the shock falls out.
Repeat your safe shock disassembly method with the spring compressor and build up the rear XIDA shock with the factory top hat.
Rear XIDA ready to go in.
The factory rear shocks have a captive nut in the lower pivot bolt. Apparently some shock jobs require stopping at this point and getting a nut from the hardware store. But not the XIDA! A captive nut is inside the shock just waiting for installation.
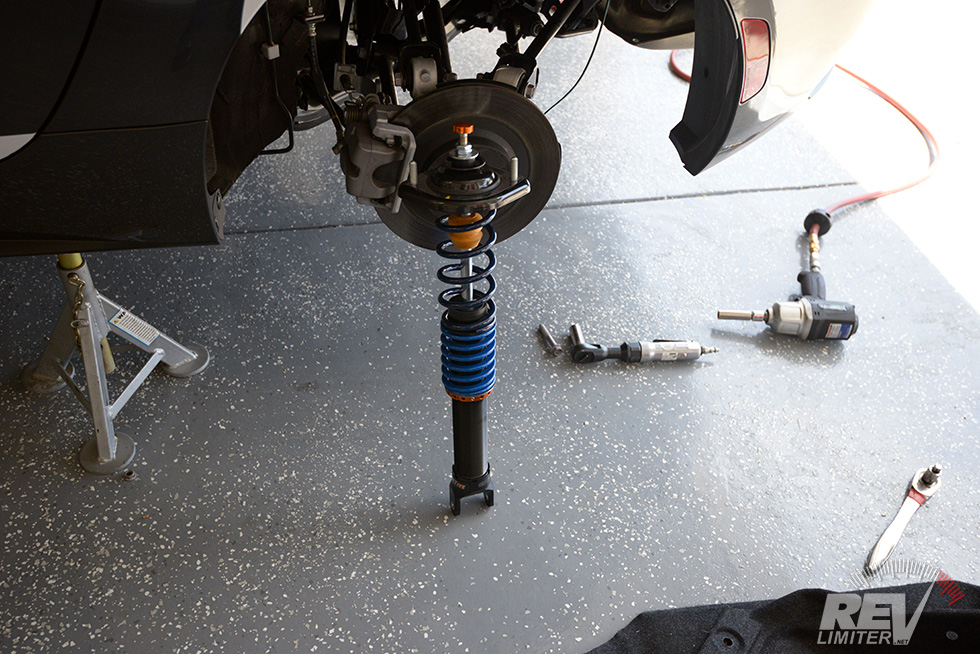
And that’s it! Nothing to do but put wheels on, drive around, and spend the next 2-5 hours getting the ride height just right.
Back on the ground.
Initial ride height guess.
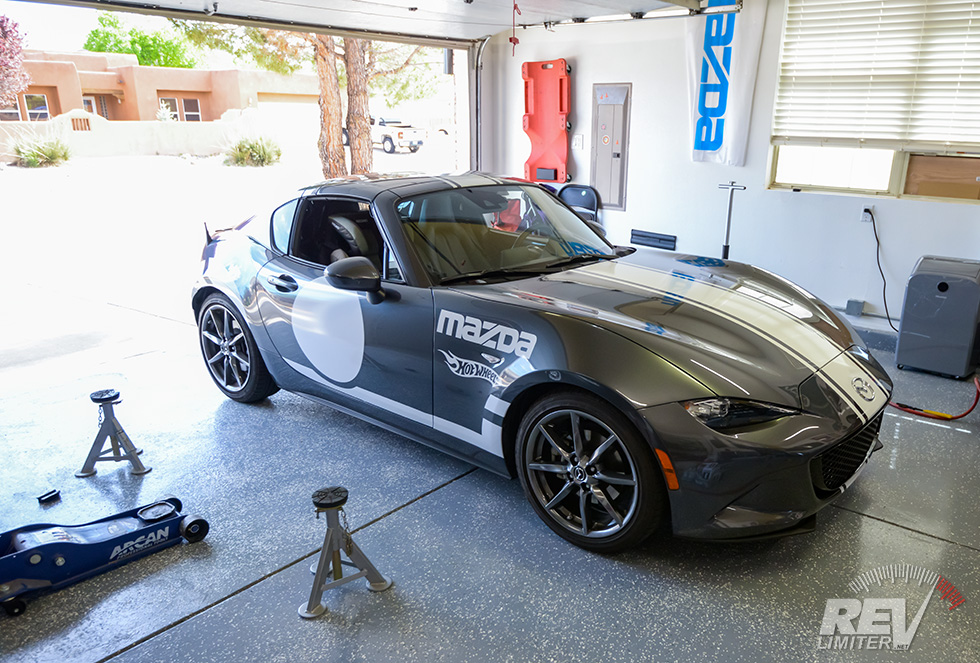
Isn’t that just better already? Factory goofiness removed.
New ride height:
12.5″ front passenger hub-center-to-fender.
13″ rear passenger h-to-f
12.5″ front driver h-to-f
13″ rear driver h-to-f.
4.4″ front pinch weld to the ground
4.75″ front pinch weld to the ground
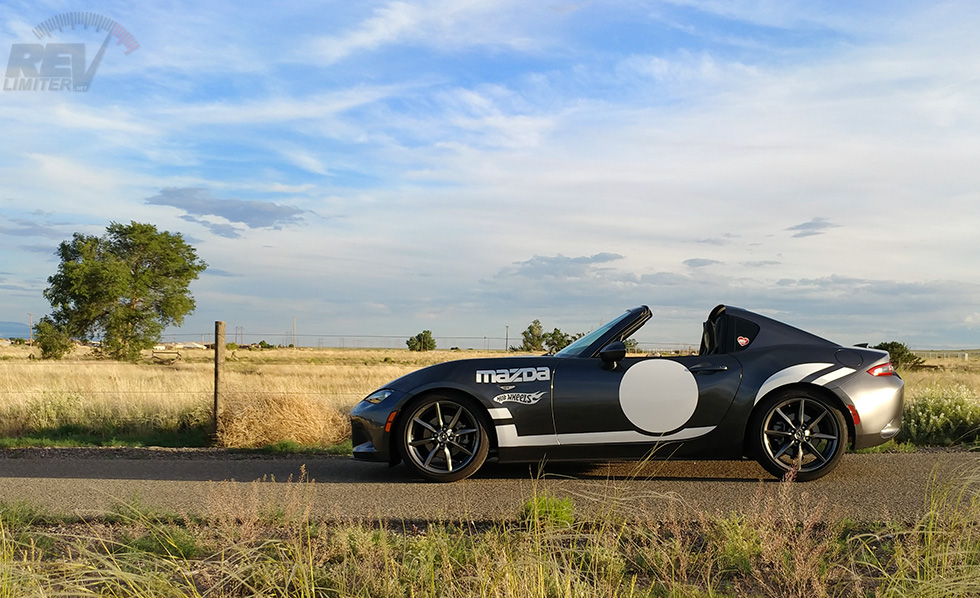
So about a 2 to 2.75″ drop all around. That’s not enough to slam it, but it does look a lot better. And it FEELS a lot better!!!
Turn in feels so much more precise now. Grip feels stronger. Body roll is less (though a nice set of swaybars are still needed). All together, it feels… like a Miata.
Shot on a test drive.
I mentioned spending hours to get the ride height right. And… yeah, I’ve spent hours. But that’s not to say the XIDA are hard to adjust. The collars are held in place with a small set screw that’s easy to loosen. Then you just spin the perches a bit. The recommended tool is a 5mm hex wrench. This fits around the suspension bits and lets you adjust things without having to remove the tires.
I spent a while adjusting the shocks to my liking as well. For street cruising, I like them closer to the softest setting than the hardest. I believe the fronts are at 5 clicks from full soft and rears are at 2 from full soft. I tweak them a bit here and there every few days as I continue to play with things.
The rear shocks are very easy to adjust. I just shove my arm through the trunk carpeting and have easy access to the shock tops. The lack of firm panels at the tops of the trunk lining make it easy… almost like Mazda was planning that.
Ready.
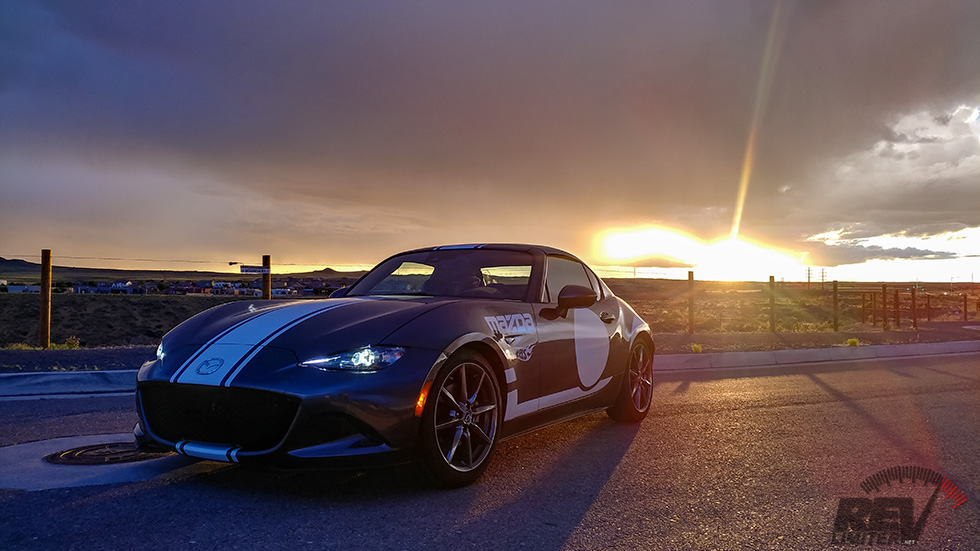
Overall, I’m thrilled with the ND XIDAs. They’re exactly what I wanted. I’ve only covered about 200 miles with them since installing, but feel very pleased with my suspension choice.
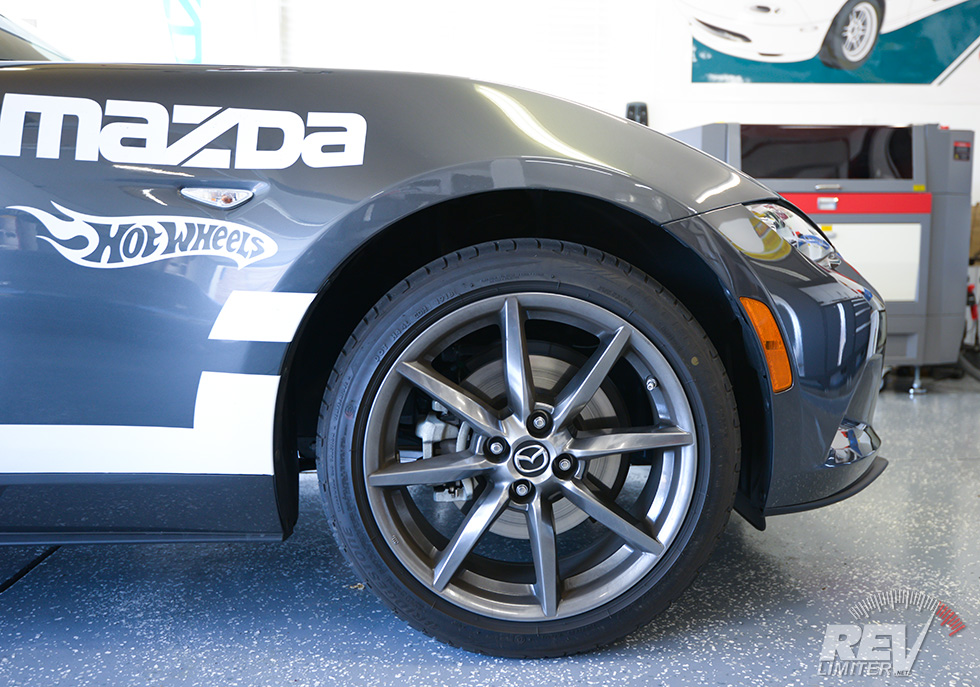
I’ll need some nice wheels to go with this new ride height… hmmm.

New wheels?
Already got something planned?
If not, how about some Meister S1s? Or some TE37s, maybe with the polished dish?
I have my eye on some SSRs. Just gotta save some cash for them.
So awesome. You are the real MVP putting all these ND guides out on the internet. I don’t own one, but I can absolutely see myself having one in the future. That is, if my NA I’ve had for 7 years ever decides to give up the ghost (not likely!)
Also, loving the constant blog posts. I really enjoy reading them all. Thanks Adam!
No need to wait for the NA to die. NDs are a great supplement and a nice long distance driving companion. 😀
And I’m trying to keep the blogs coming! It’s sometimes a bit of a struggle but always worth the time spent.
You really are the MVP of Miata guides. Every time I need to do work on my NA I check your blog first to see if you did the writeup for it. You have saved me so much time over the years.
If you get them, you will not regret quickjacks. Hands down one of my favorite tools I’ve ever bought. Super fast and extremely stable and secure.
I WANT A QUICKJACK! Like… bad. I’m pretty sure I’ll be getting one for my new project taking up garage space.
See, it’s doritos don’t spin any more.
And thanks for the kind words. 🙂
Hello,
I have just installed same Xidas as yours. I don’t understand how you got ride height to be so low? If I get my pinch weld to be same height as yours, then my front Xidas are basically sitting on the bumpstops (rear are fine).
I don’t know if you still run Xidas, but are you sure yours had any suspension travel and didn’t just sit on bump stops?
Yes, I’m still on the XIDA. No problem with travel. I’m near the maximum height in the front actually… I can’t go much higher. I could go a lot lower though.
Great post and very informative!
I’m actually looking into switching over from my Ohlin RTs to the Xida set up and was curious how the Sport spring rates were? I’m looking to have my ride height right at where you ended at – so about 12.5″-12.70″ Front and about 12.80″ – 13″ Rear. It seems like the folks at SuperMiata don’t recommend the Touring rates at such ride heights, and so I was curious how the Sport rates along w/ the overall Xida dampers were working out for you.
Thanks!
The Sport spring rates are something I’ve considered swapping for a while now. They’re a bit harsh and the Touring rates I have on Sharka are just so much more comfortable, compliant, and usable in daily driving. They soak up the bumps. The Sport springs kinda jump over them.
I’ll probably update my setup to the touring rates eventually. Just haven’t had a chance yet.
Awesome, thanks for the responses guys. I’ll probably go touring rates for my next set up. Just curious if you ever got around to swapping up to the touring rates. Thanks!
Did you ever do touring springs? Is a touring xida really going to be a big step above a koni/fm spring setup? Likely similar spring rates? Is the shock that much of a difference?
Sharka has those but I left Mona on the sport springs. They’re honestly fine. Maybe 10% harsher. Not enough for me to spend the effort on swapping out springs.
Appreciate the response! And love your blog!
I like the Xidas over my Ohlins as well. I have a set of both touring xidas and long stroke ohlins (the ohlins on my 124 spider) and I feel the xida ride a bit better and more comfortable on my RF ND than the ohlins do on the 124.