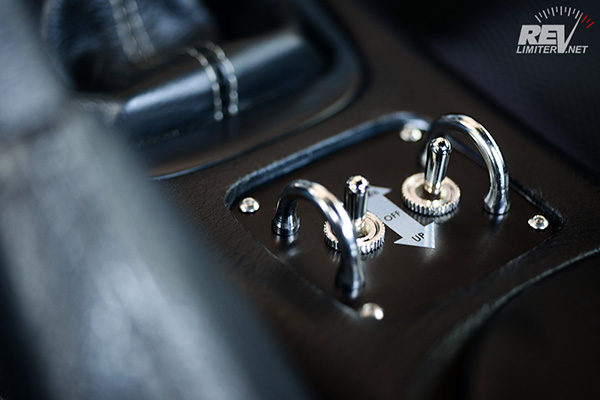
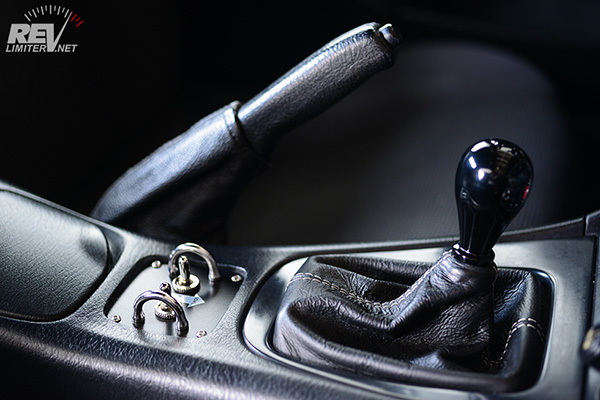
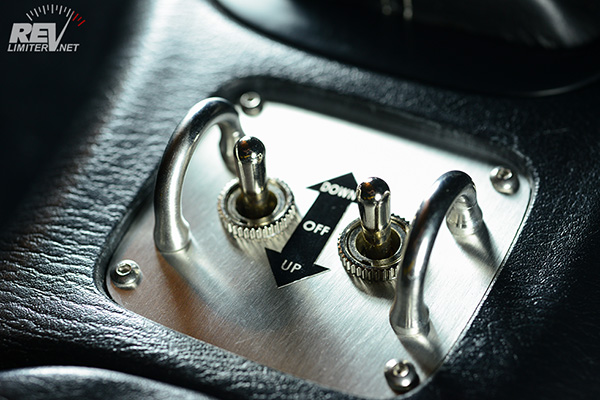
revlimiter NB Retro Window Switch - installed.
Parts and Shopping List
- The revlimiter NB Retro Window Switch - accept no substitutes. It contains the following.
- 1 window switch assembly with wiring pigtail attached.
- 1 receiving wire harness.
- Six (6) Posi-lock connectors.
- Two (2) slim metal switch mounting plates.
- Four (4) tiny button head cap screws and nylock nuts.
- A wire cutter / stripper - to clip off the factory window switch connector and strip the wires.
- 5.5mm or 7/32 socket - this is the correct size for the tiny nylock nuts.
- 2mm hex key - this is the correct size for the tiny corner capscrews.
- #2 Phillips or JIS screwdriver - to remove your NB's center console.
- Dremel or other cutting tool to remove a bit of plastic from NB2 center consoles.
Frequently Asked Questions
- I found this on a search engine. Where do I buy the switch?
Right here! I make these up by hand out of the finest components available.
- Whoa. Cut off my factory window switch connector?
Yes. This product was delayed for a year while I searched for a window switch connector. I couldn't find any shops to make one for me, so we're going to cut off your factory one. Don't worry. The Posi-lock connectors I ship with the switch make it very easy to reconnect your OEM switch and connector if you choose to. - Do these have auto-down like the NB2 switches?
The auto-down feature is built into your finger. You just hold the switch until the window has rolled all the way down. It's pretty sweet. I think you'll like it.
In other words, no. These are simple industrial switches like the NA model. There's no auto-magic down function. That is built into the actual NB2 window switch itself. - I have a shorty console. Will your switch fit?
I don't know. It was a huge challenge figuring out a wiring solution to fit on both the NB1 and NB2 center console. You're on your own with an aftermarket console. However, if you have one with 2 inches of space below the top surface, my switch should fit. - Do you have an NC window switch for sale?
Nope. - Can I get one with the switches reversed / backwards / and with a different arrow symbol?
No. I make these in batches to keep labor as low as possible. However, they're modular and easy to take apart. You can buy one and switch it around to your dream configuration in just a few moments.
NB2 Center Console Modification
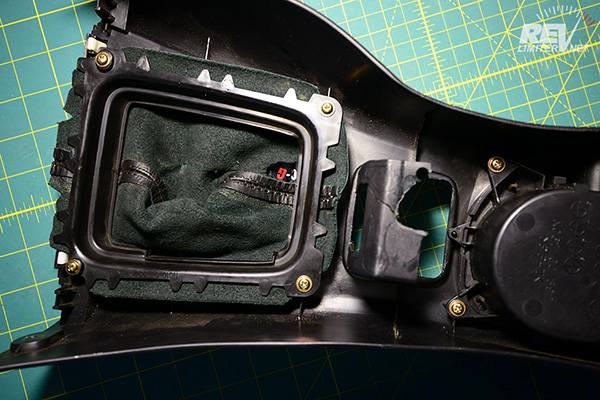
Remove your NB's center console. They are held in by either four or five screws. Not much to it. Also, unplug the window switch. Take the console somewhere comfortable to work on it.
Mine appears to be broken. It's always been that way. I assume the previous owner broke it while doing a stereo install and it did not come from the factory that way. Sorry to not have an intact example to show you.
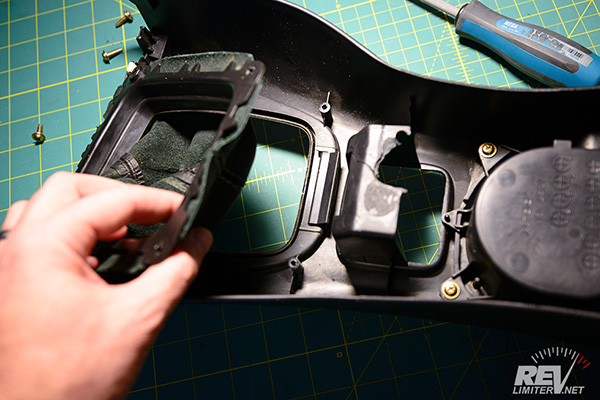
You'll be cutting the small plastic frame that sits below the window switch. This doesn't really have a purpose and the NB1 console doesn't have it at all. There's no harm in removing it.
Remove the shift boot. It's held in by a few screws and easily pops off. You might also want to remove the trim around the shifter to give yourself all the extra room possible. It just pops off and is held in by clips on the front edge.
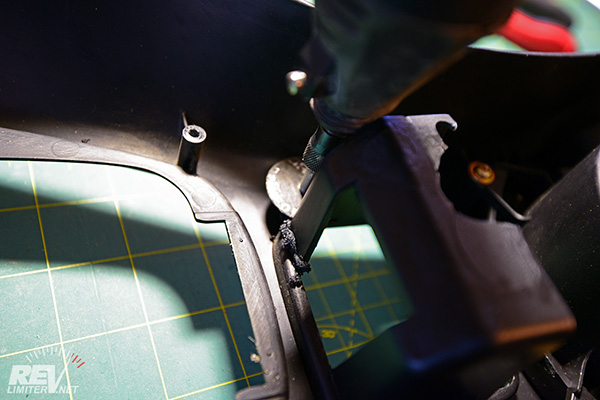
A dremel and a cut off wheel make quick work of this little frame. The plastic is soft enough to use an X-acto knife. No matter what you use to cut the plastic off, don't forget your eye protection.
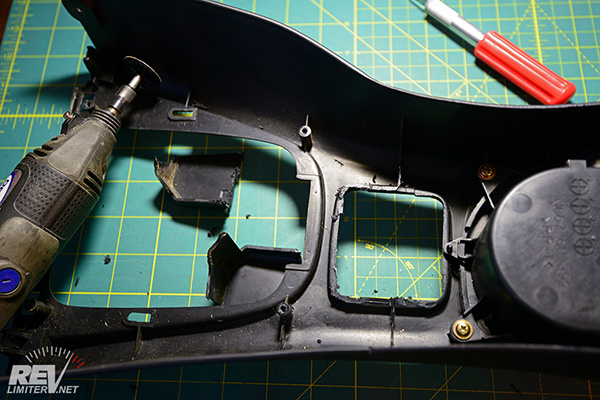
This shows the plastic removed. I smoothed the edges with my X-acto knife. You don't need to get it perfect, just pretty flat so that the metal mounts will have a solid place to grab.
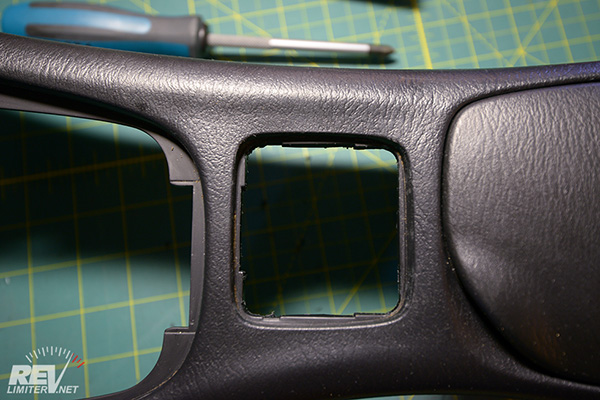
Note that the lip that's visible from the top is not cut at all. This is where both the factory switch and your new retro switch sit. It must not be cut off. You're just removing the frame below this lip.
Switch Install and Wire Routing
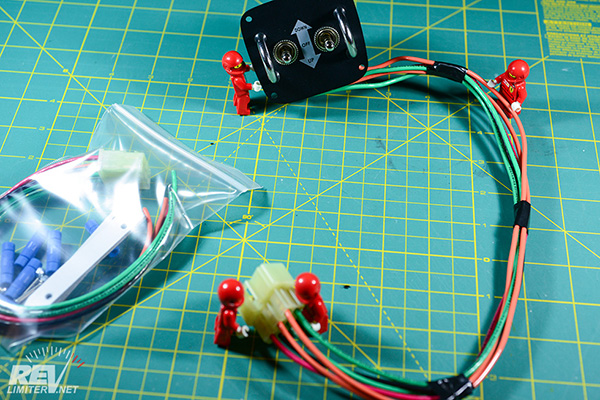
Your wiring might be somewhat circular in shape after being in the package. Stretch and bend it into this rough bracket shape. The shape will make more sense when you have a center console around it.
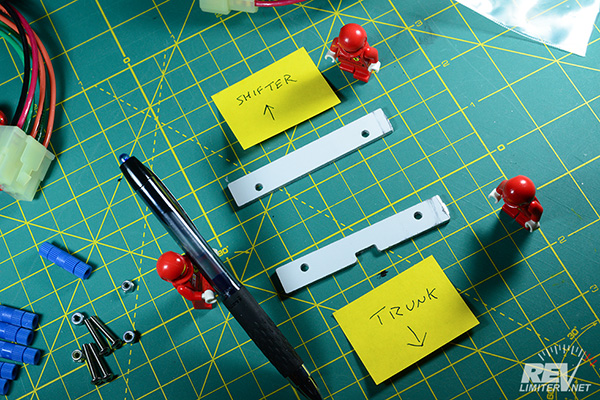
This is how the two metal mount plates should be oriented. The holes are offset toward the center of the switch. The plate with the notch in it goes in the back, with the notch giving room for the cup holder plastic.
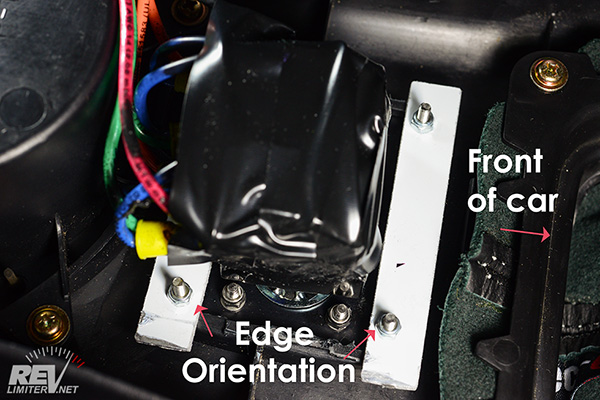
Here is the window switch installed. Use your 5.5mm (or 7/32") socket on the tiny lock nuts and your 2mm hex key on the small button head capscrews. Be very careful not to scratch the window switch plate.
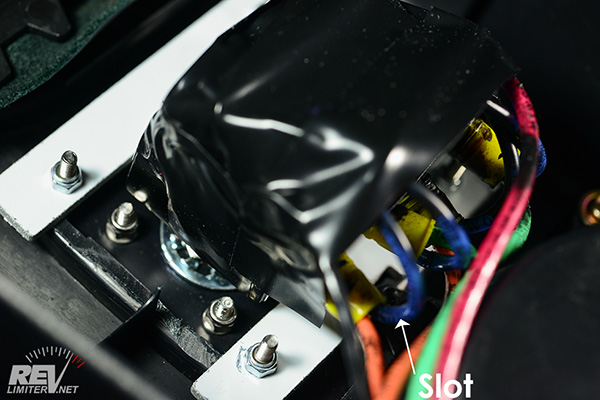
It was really hard to get this shot and I might have not been successful. I was trying to show the orientation of the slot on the back mount plate.
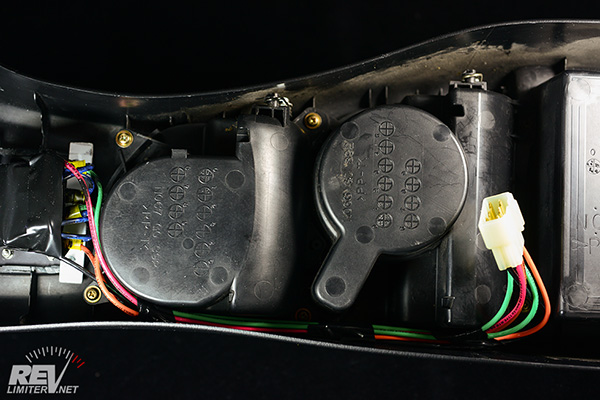
This is how the wiring is routed on the NB2 console. It takes a left turn around the cup holder and uses the small bit of empty space in front of the cubby to connect to the wiring harness.
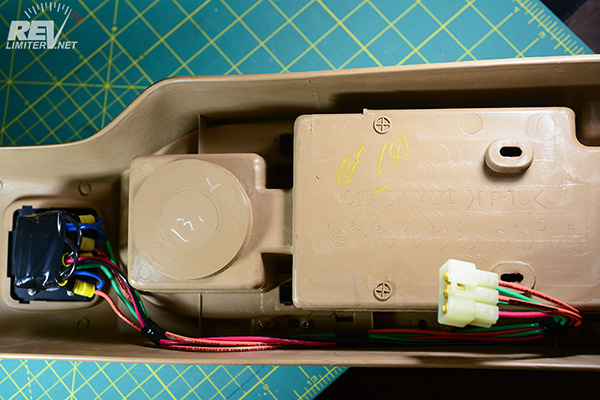
This is the wiring route for the NB1 console. It still takes a left at the cup holder, but it uses the generous free space and doubles back on itself to connect to the main harness.
Wiring Harness Modification
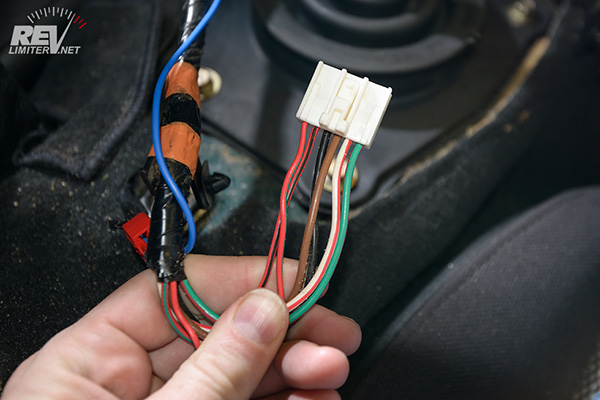
Due to the inability to buy a correct plug for the switch side, we have to cut off the OEM connector and splice in a new one. This is not as bad as it sounds. Thanks to the Posi-lock connectors, this is easily reversible.
Disconnect your battery. It's always a good idea when playing with wiring to not have any juice in the system.
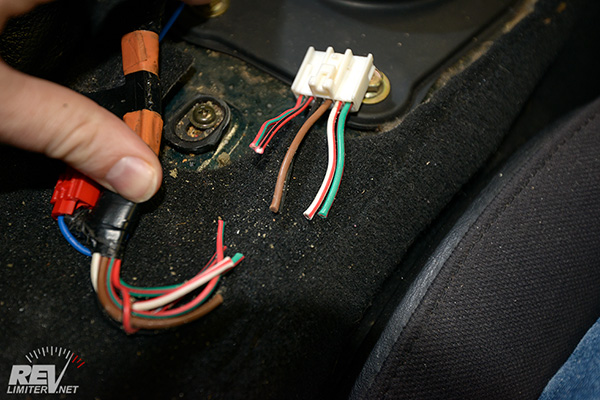
I staggered my cut for some reason. You don't need to do that. You can cut straight or you can stagger. Just don't lose your OEM connector if you want to go back to the factory switch. I'd suggest plugging it into the factory switch and stashing them both somewhere safe.
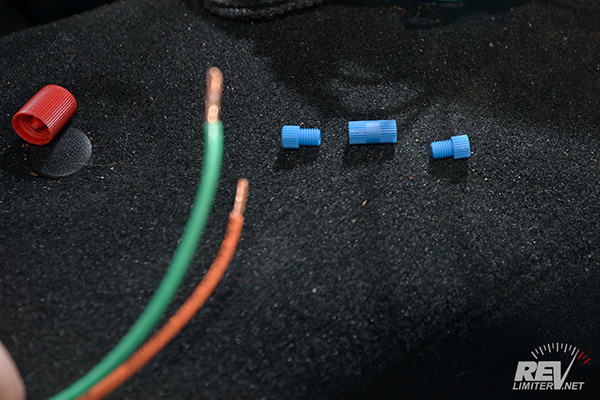
This is the Posi-lock connector. It's sort of like a butt connector that you can easily remove and re-install. And it's generally a lot more reliable. Connect the wires on the car's wiring harness first! It's much easier to start a connection that way.
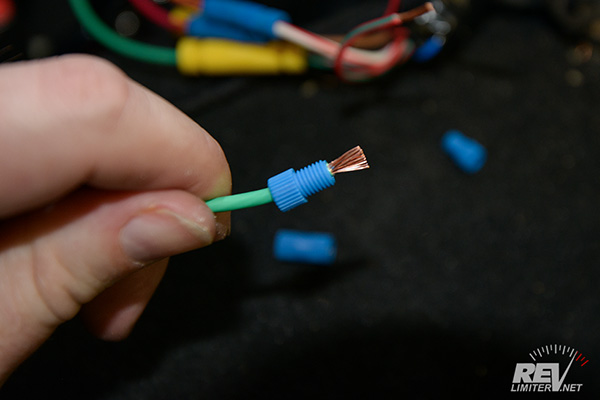
To connect wires with the Posi-lock, slide the blue screw over the wire and then flare out the copper. The connector has a metal center that the thumb screw forces the wires into to make the connection. Again, start on the car's side first. Do the side with your new wiring connector second.
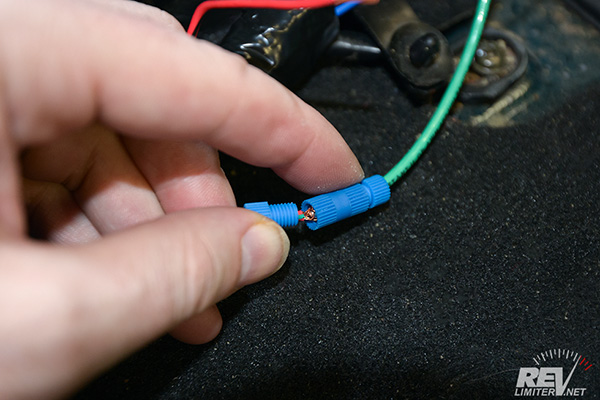
Then you just screw the wire into the connector. Simple! But if you strip too much insulation off the copper, it will not be very easy. Take a look above to see about the right length of wire to strip to make this easy.
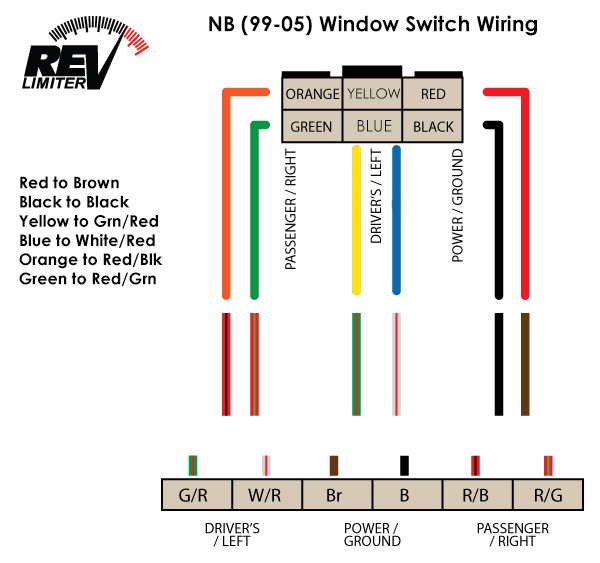
One wiring diagram! Study it. The wiring is the same for all NB cars. The OEM window switches themselves are different from NB1 to NB2, but the wiring is the same.
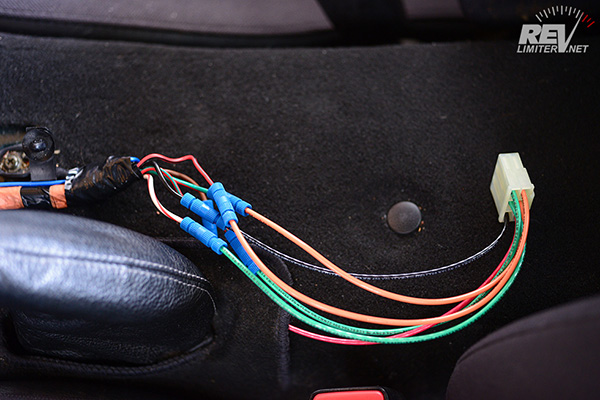
Your harness should look similar to this once you're finished.
Plug in your new switch. Then test it out and make sure you got the wiring correct before buttoning up the console.
Additional Images
Site Navigation
Latest Blog Posts
Where’s all the blog posts?!?!
Posted on Fri, 27 Jun 2025 19:59:51 +0000
 Why are you seeing 2013 blog posts in the "new posts" list? It's been a hard month for the revlimiter site.
Read more...
Mabel
Posted on Sat, 29 Jun 2024 03:42:43 +0000
 Who’s the dog that keeps showing up on the revlimiter Instagram? It’s Mabel, my ACD/Pomeranian service dog.
Read more...
CarbonMiata Vent Window Install/Review
Posted on Sun, 29 Jan 2023 14:57:01 +0000
 After waiting 23 years, there’s finally a pretty vent window kit on the market for the NA/NB Miata. Unfortunately, it doesn’t actually work well.
Read more...
NA Miata Ignition Switch Replacement / Refurbish
Posted on Fri, 12 Mar 2021 19:25:57 +0000
 Is your NA Miata not starting anymore? A bad ignition switch may be the problem.
Read more...
XIDA ND Suspension Install
Posted on Mon, 20 May 2019 20:01:01 +0000
 Mona dumps the soft GT suspension in favor of a set of XIDAs from Supermiata.
Read more...

Products sold on this site are for Off-road and Competition use only. This website intended solely to provide general guidance on matters of interest for the personal use of the Reader of this Page, who accepts full responsibility for its use. All products as well as information provided "as is," with no guarantee of completeness, accuracy, or timeliness, and without warranty of any kind, express or implied, including, but not limited to, the warranties of performance, merchantability, and fitness for a particular purpose.


