Update! 6/2016
My own personal experience with the BEGi spacer reroute solution has not been wonderful. My reroute spacer started to leak like a sieve after five years of use. Read about it here. And please think very hard about what you’re about to read in my blog post below.
A reroute is an important modification for a Miata engine. I’m not saying it isn’t. Just be careful with the parts you install. Really research all of the reroute options.
—
Okay… where were we? Back in Coolant Re-route part 1, I had installed all of the cool BEGi coolant reroute stuff on the head and was ready to drop it on the engine and do the actual work of routing the coolant back to the radiator. Easier said than done, right?
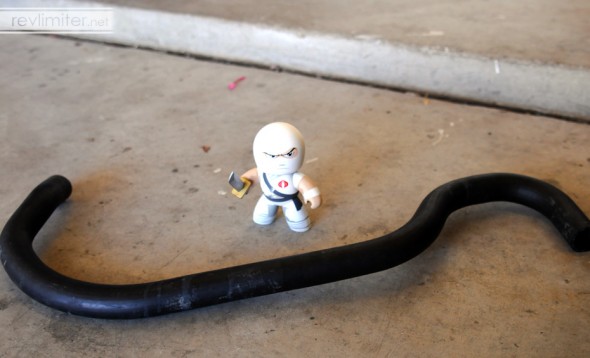
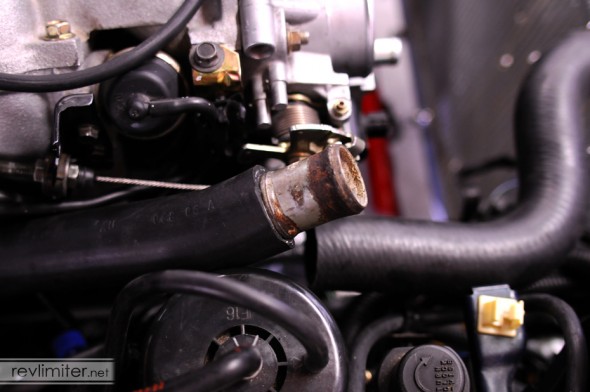
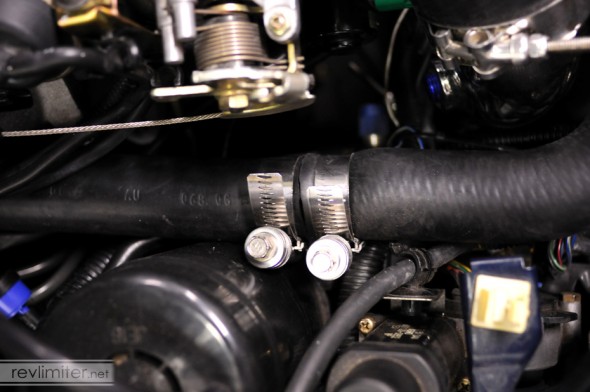
The big hose above is the “easy” part. It is… unfortunately becoming less easy with every passing month.
Update – 2/2015
When I wrote this in 2011, Autozone part number XL-1215 was the right hose. They seem to have changed it. That Autozone part will MOST LIKELY NOT WORK ANY MORE. Go out and find a Gates #22436 hose or a Dayco #E72380 hose. These are reported to work as of February, 2015.
Back to our blog post, already in progress.
—
I have MiataTurbo to thank for this excellent hose. In fact, I decided to do this re-route because of this hose. Check out the thread on MT for more info.
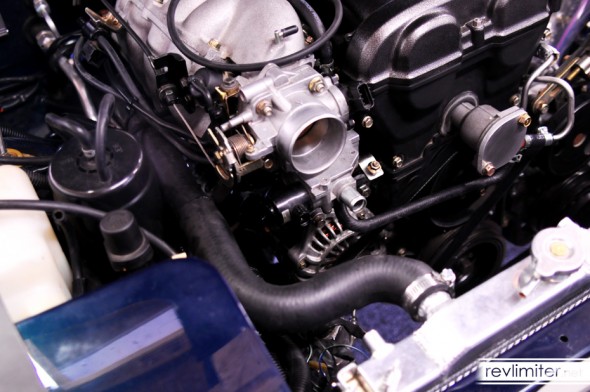
This hose seems to be from some sort of American truck (Cadillac Escalade?) and is juuuuust right. You slice off the front U-turn and it routes nicely from the back of the Miata head all the way up to the radiator. This hose is why I titled my initial post “Easy” Coolant Reroute.
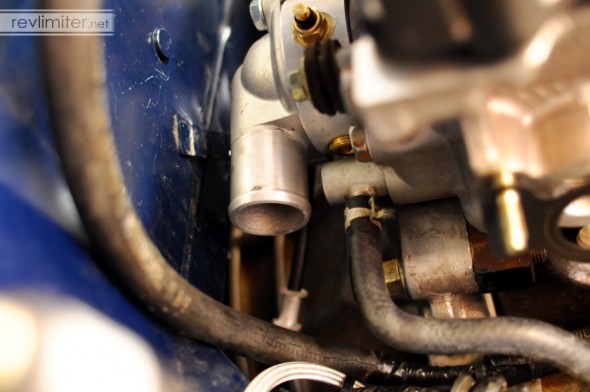
That’s where it sits. There’s juuuust enough room to clear the firewall. And with the gaskets installed on the spacer, there’s a little bit of extra room between the neck and that bung to slide the big GM hose on the Kia water neck.
In case you couldn’t tell, the little speedometer cable holder needs to be flattened.
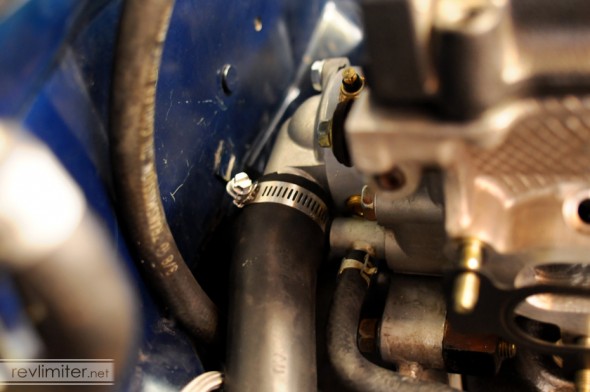
Spend some quality time tightening this hose clamp. After torquing it down, let it rest for a while. Then go back and add more tightness. A leak back here is a pain in the ass to fix.
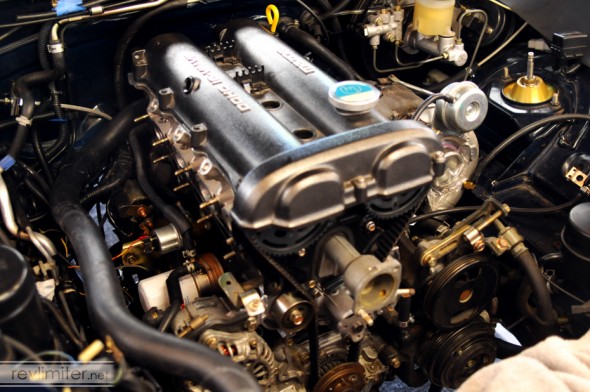
Really, it wasn’t hard to bolt the intake manifold in place with this hose installed. There’s still plenty of space around it. Sadly, topside oil filter changes are now a thing of the past for me.
And that is the end of the Easy Coolant Re-route.
For most folks.
MOST.
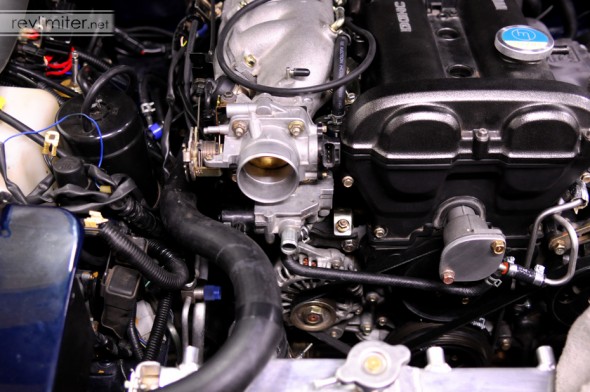
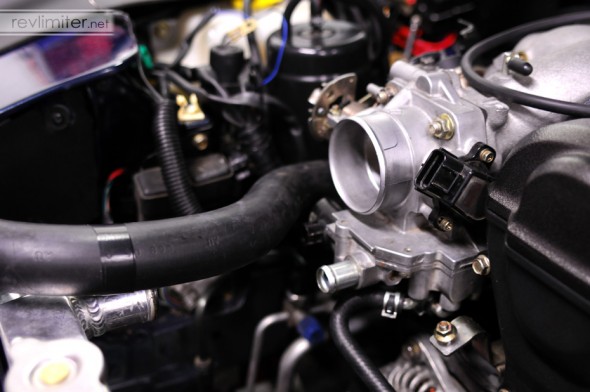
For those of us with Flyin’ Miata’s FM2 turbos and a 94-97 throttle body, things just became less easy. Uneasy. Sorta-not-very-easy.
This is a problem. But we can deal with it, right? We can just go around the other side of that intercooler pipe! No big deal!
er…
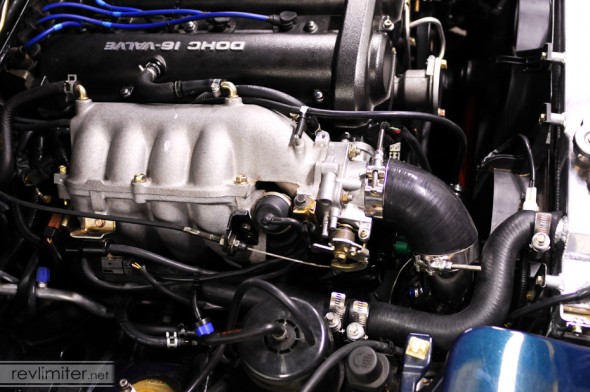
Nevermind how close the big coolant hose is to the intake hose, the big problem here is how the 94-97 throttle body routes the idle air bypass hose. Sure, I could be fancy and get a coily hose, but that’s… really shitty. Let’s be honest. I can do better than this. WE can do better.
So… another hit on MiataTurbo’s search engine and another trip to the parts store.
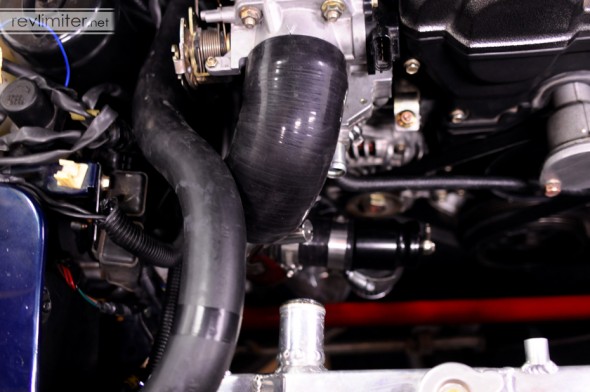
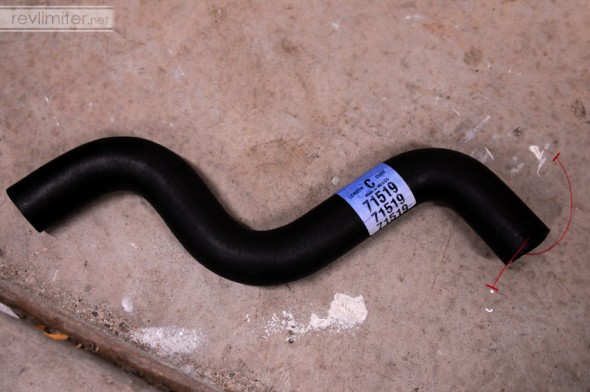
Thanks to this fine thread of coolant reroute photos, I found just what I needed. Dayco hose 71519 (Pepboys sells Dayco brand) which seems to be for a 91-94 Oldsmobile 88. And just look at it. Those tight 90 degree bends! It’s a beauty.
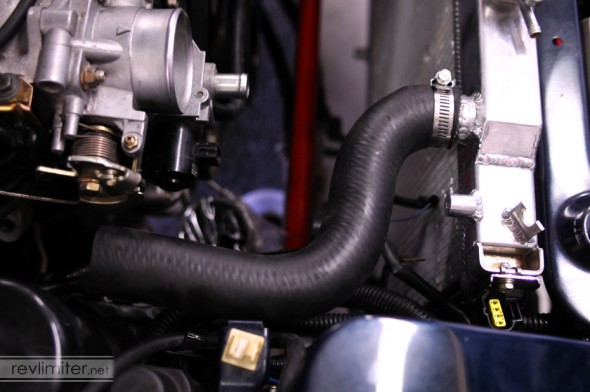
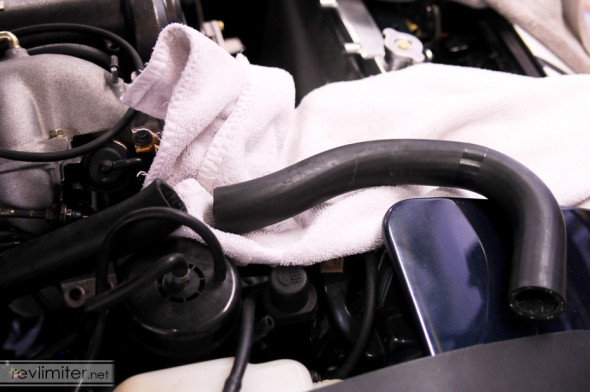
A quick snip to cut a small “V” from the end transforms the M into a Z. I also sliced off a tiny bit from the leading arm of the Z to bring the hose as close to the radiator as possible.
Just look at all of that clearance in front of the throttle body!
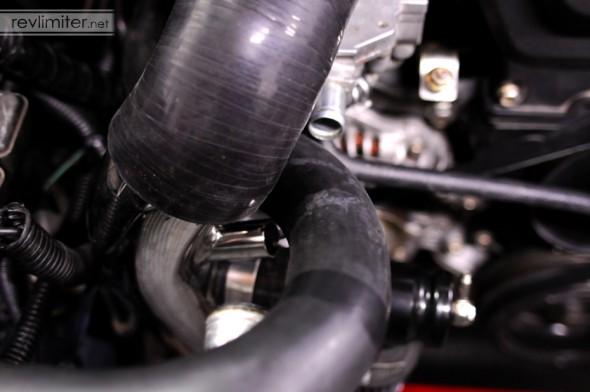
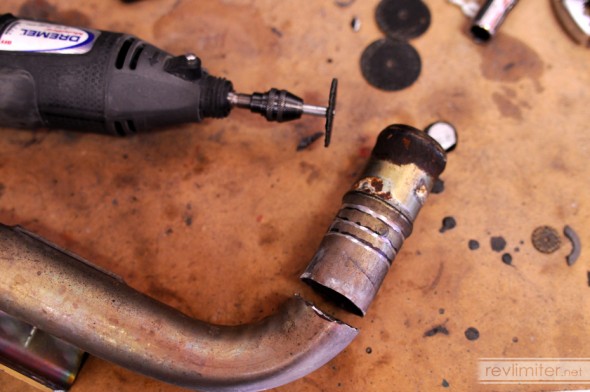
The metal tube is a stock Miata part that normally lives on the exhaust side of the engine bay. There’s a pipe that goes out one side to the radiator and the other to the water pump. Flyin Miata gives you a molded silicon hose with their FM2 kit that takes the place of the metal tube and two hoses. So I just had the metal tube laying around.
One side has a nice flare. The other side has 3 badly done score marks I cut with my dremel to hopefully keep the big hose in place. Time will tell how good a solution this is, but so far there are no leaks. Knock on virtual wood.
Update – 2/2015
That metal tube thing sucked. No idea WTF I was thinking. I replaced it with a very nice metal hose coupler from Jegs a few months later. Check out The Coolant Reroute Strikes Back for more info.
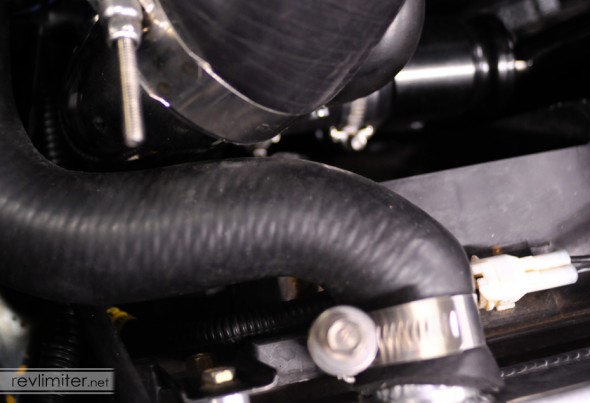
I wasn’t getting a very nice seal on my radiator neck with a regular screw-drive hose clamp, so I splurged on some nice Constant-torque clamps from intakehoses.com. The 1.5″ ID clamps are the ones you want. They’re nice and strong. No leaks yet.
So. Not quite “easy” but really not that bad. And I’m much happier with the hose routing with this extra Dayco M-hose in the system. Time will tell, but I’m tempted to call this coolant re-route project a success.
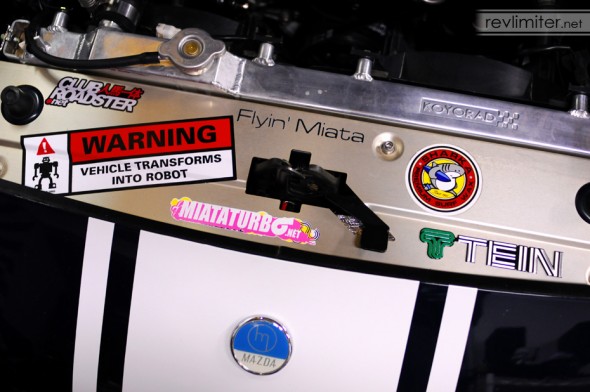
One last shot. I updated Sharka’s sticker book (otherwise known as the top radiator panel). Sharka is proud to wear a MiataTurbo sticker. And who can resist this robot decal? Not me.
The Coolant Reroute Part 3 is right around the corner.



I would have expected that homebrew coupler to be an excuse for you to buy a pipe flaring tool! There are some pretty affordable models out there.
I really wanted to BUILD one. I found some excellent pix of a modified visegrip turned pipe flaring tool. But I don’t have the necessary welder to put it together. 🙁 I might go bother a buddy and build one of these shortly, then redo my coupler.
This is just what i need! Thanks!
I’ve copied the front half of this reroute (in conjunction with an M-Tuned rear half and with the t-bolt clamps from your later post in order to work with the new FM CAI.) Thanks for yet another informative post. Do you know what those H450 boxes (relays?) are for? They make it difficult to route the Dayco hose so that I can put the hood prop down.
Those are for either part of the A/C or for the cooling fans if I remember right. A buddy had one short out once and his fan(s?) stopped working. Fortunately, I had a few spares.
I’ve got mine hiding under my charcoal canister. There’s just enough room under there.
Thanks a million for this post! You just saved me about $100 on my re-route. Did the parts you got from begi include the gaskets or did you have to get them seperate?
I got… 3? I think it was 3 gaskets from BEGi. I was impressed, but I had a lot in stock anyway. I buy them by the handful at my local NAPA. They are the source for those nice sticky-backed gaskets.
I once was caught out without one while needing to change a thermostat. I never let that happen again.
[…] links so we get up to speed on this subject: http://forum.miata.net/vb/showthread.php?t=464626 https://revlimiter.net/blog/2011/06/coolant-re-route-2/ […]
[…] Skou, I can get you the total height of the BEGI spacer + Kia Water outlet if that would help. By round water header, do you mean the aluminum press-in fitting that goes to the oil cooler? Also, here are some pics showing clearance from the BEGI+Kia to the firewall. Sorta-easy Coolant Reroute – part 2 — revlimiter.net […]
[…] you need this: XL-1215 radiator hose. you cut, similar to revlimiter's blog post. then get the spacer from begi. I ended up with a kit with barb fittings and two […]
I was wondering if anyone has had any issue with the stock radiator and this setup, because using the escalade hose, the hose is way to big for the stock radiator. Any advice is greatly appreciated. Have a great day!
Sincerely, Jacob
Hello, can you tell me if there is any difference in diameter between kia and mazda thermostat housing ? In other words can I use big hose with mazda ´s original thermostat housing ? (moved back) I asking because I found that, that big hose diameter is little bigger than mazda use (32mm) while big cadillac hose is somewhere around 33.5 mm ?Thanks !
I believe the diameter is the same. In fact, I’ve seen folks on Miataturbo use the 1.6 water neck. It just comes out pointing the wrong way. The kia neck sorta angles it up correctly.
thank you adam ! keep the work up, I really love your page, it´ s always great inspiration
I think I just noticed the same thing. The Escalade hose and the Kia Neck have 1.375 ID and the Mazda hoses have 1.25 ID. Escalade hose fits well on BEGI sourced Kia neck but doesnt look like it will fit on the Stock Radiator?? I used digital calipers to measure everything.
A buncha guys on MiataTurbo haven’t had any problems. I wonder if they’ve just cranked it down?
Since I used the M-tube and hose connector, I can’t really comment on this. Sorry.
[…] internet, tho. Sorta-easy Coolant Reroute ? part 2 ? revlimiter.net Part three is helpful, too. Alternatively, just remove the charcoal canister. You like […]
Adam, I’m wondering: that M-shaped hose, the elbow you cut off–could you use it to come off the Kia water neck behind the engine, and connect it to the front hose with a long section of hard pipe?
Sorry, but I have no idea at all. Super difficult for me to try it too. Why not go for it and report back?
[…] #22436 hose or a Dayco #E72380 @ RevLimiter googletag.cmd.push(function() { googletag.display('div-gpt-ad-14'); […]
How did you get the hose through the fuel line area?
I have a stock 95 and it looks like I have to go under the intake manifold or else. Which I don’t think the dayco hose can route to since the stock fans push against it for that angle.
Might have to trim the fan plastic….
A pic would do wonders if you could.
Cheers