Disclaimer: Anything you read in this blog may or may not kill you. I’m not suggesting you follow along or modify anything in a similar manner on any car anywhere. This is simply a documentation of my own choices with my own car.
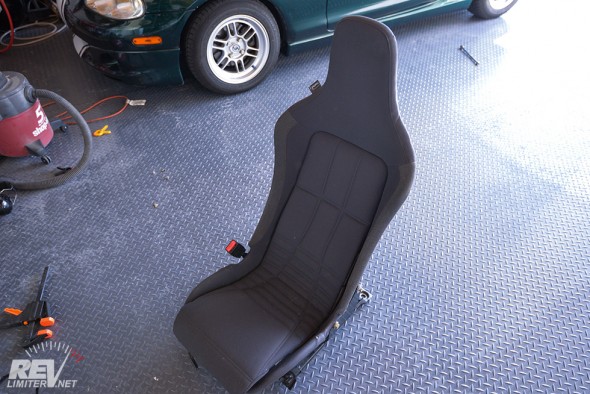
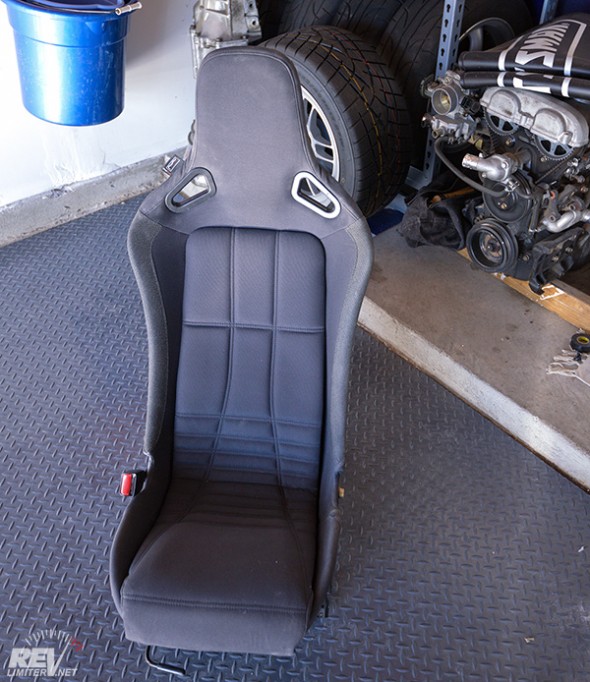
Really, this blog post was only a matter of time. I’ve been thinking about doing this for years. The right day finally came and it was time to hack a few holes in my Elise seats.
This is not a new or groundbreaking mod. These little Elise seat harness slots have been around for years. They are super controversial on the Lotustalk forum. Because of that, there’s a little disclaimer at the top of this post.
Honestly – I don’t think any badness will happen from these harness slots. The Exige harness slots are in exactly the same spot (while having larger wings to provide larger harness holes) and none of the structural area of the seat is touched. However, lots of things can happen and I’m REALLY not advocating that anyone should do this mod. Since I’ve already voided the warranty on my seats with the Kemmler foam, I felt it was time to make some holes for harnesses. I’ve had the grommets for years. They finally got to come out into the light.
While there are tons of post about this on the intartoobz, there’s not much in the way of step by step actually showing the seat cutting. Even the official Sector111 instructions don’t go much in depth about the actual seat cutting. It’s more about measuring before hand and cutting the seat material (leather) after.
So. Here’s what I did.
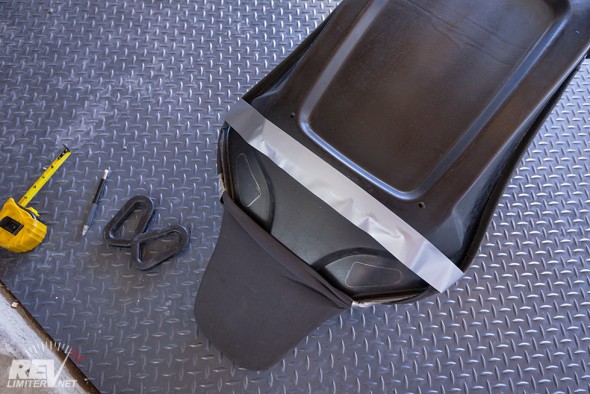
Figuring out exactly where to cut is the hard part. The slot’s outer lip doesn’t allow you to be too close to the actual seat backbone (thick part in the center) or too close to the seat edge. And the seat has a pretty good curve to it on the shoulders. I discovered there is exactly ONE place that the seat grommets fit.
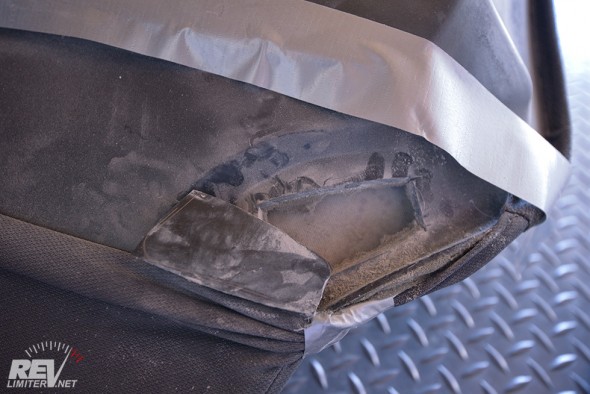
After tracing the inside of the slot hole with a pencil, I sliced with the dremel. Accuracy is always important with this sort of thing, but the hole needs to be enlarged quite a bit over the inner slot diameter. Accuracy isn’t really huge on this step. I used a reinforced cutoff wheel to do these cuts.
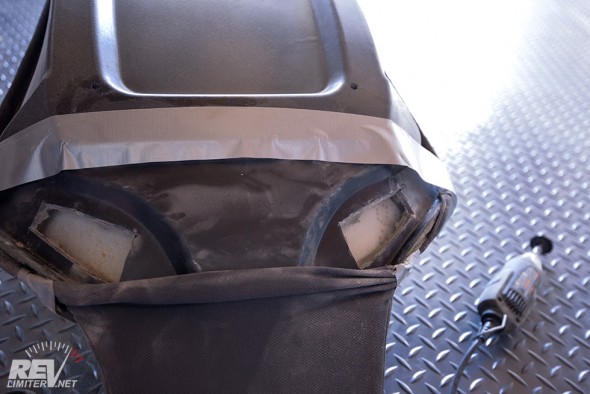
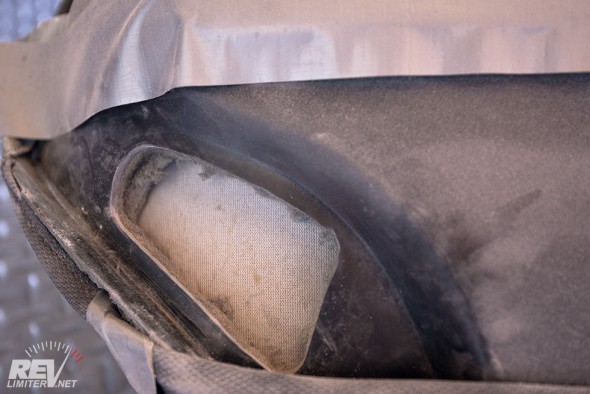
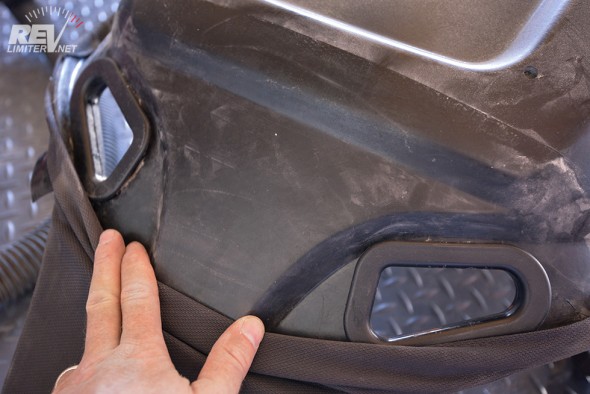
And this shot is the result of about 30 minutes careful work with the dremel sanding drum. That tool turned out to be the best thing to carefully worry away on the fiberglass. The burrs and metal cutting bits didn’t do nearly as good at this as the spinning sandpaper.
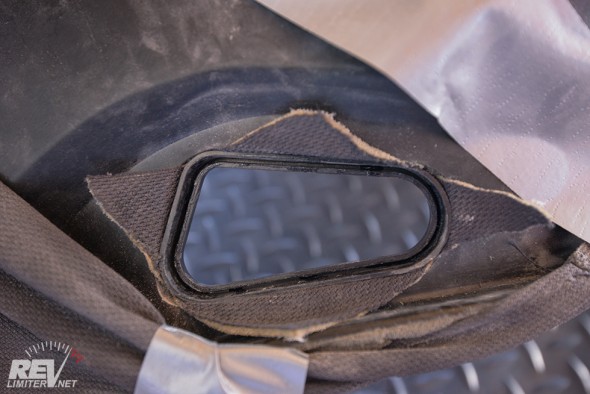
The hole has to be big enough for the large side of the seat grommet to pass through. I discovered this on the first seat (you’re looking at the 2nd). I got my hole all perfect so that the back half of the grommet pressure fit… and then I discovered the front half was way way bigger. Heh – back to work.
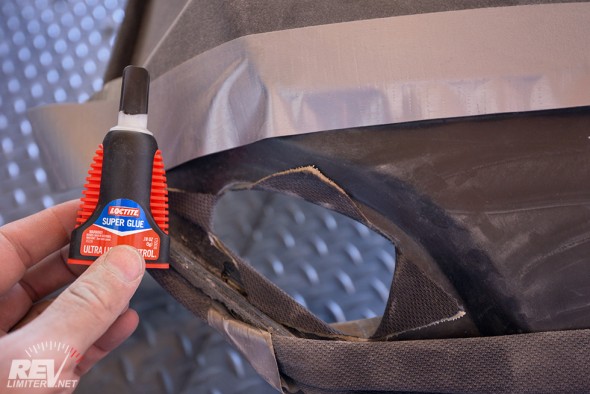
The seat grommets are not sided. In other words, the “large” half pokes through the front of the seat on one side and the back of the seat on the other. It’s really hard to get it to poke through the back half while arguing with the fabric. I had the idea of gluing the fabric down temporarily to let me install the slots. It was kinda brilliant.
After I got the grommets installed and “done,” I sliced the visible fabric edges with an X-acto knife. It’s not really visible on the back anyway, but I wanted clean edges.
Another thing I discovered – the grommets are mated pairs. Maybe it’s because mine have sat together, pressed together, for like 4 years? But my 4 grommets ONLY fit into each other in a single combination. I discovered this when I went to snap my first pair together and found that they didn’t fit. I had to pull them out of that seat (I’d already taken each pair of grommets apart) and test fit all of the halves into each other to find slots that would work together.
Annoying.
Also – fiberglass gets everywhere. Every time I stopped sanding a hole, I’d turn on the shopvac for a second to suck up the fiberglass dust. This wasn’t just to make the pix look good, it was so I could see what I was doing. The sanding drums really love to send dust everywhere.
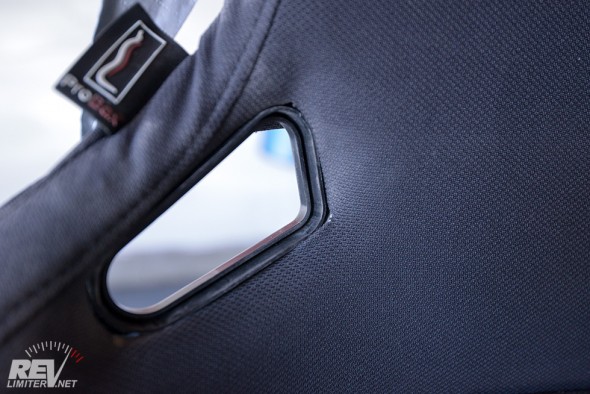
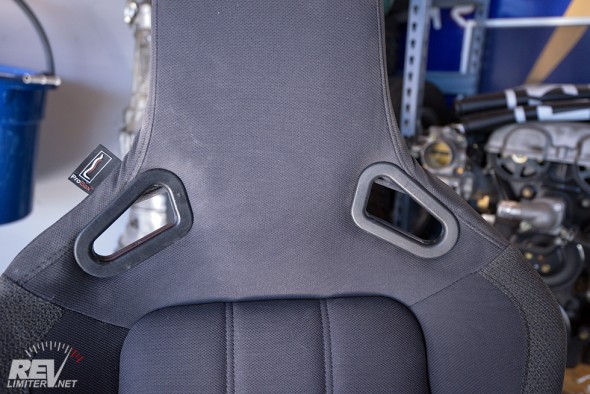
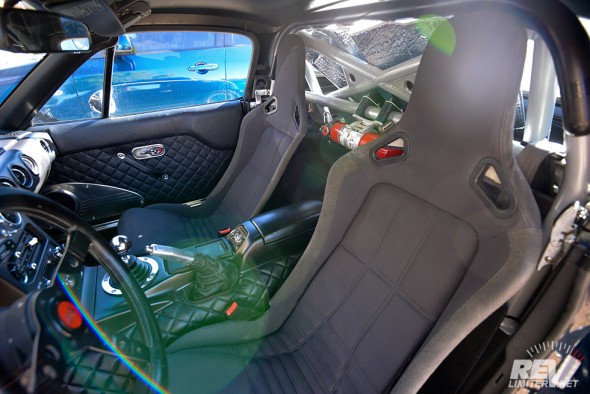
DONE!!! So excited! The slots even hit my at a nice spot. They ride right above my shoulders, just where they should.
Now I just need to figure out an anti-sub passage…
Again, I’m not advocating that anyone cut their seats. This is just something I wanted to try.



Looks great. If I may ask, where did you get the grommets from? They look like they maybe a good replacement for the ones I’ve lost/broken on my old Corbeau Forza.
They’re a Sector111 part. http://www.sector111.com I think. And I think they’re actually a Recaro part, but am not sure.
I do know that Sparco sells seat grommets separately as well. Kinda hard to find on their site, but you can get them on amazon.
I’ve read all the controversy about these grommets. All in all, I think the same way about the seat structure, cutting here probably won’t weaken it, and this is supported by the fact I never heard any story of somebody dying because of these grommets. Hope you’ll get pictures with harnesses installed soon to see how they’ll wrap around you.
About the sub-passage : if you don’t have it already, sector111 also sell a 5th point grommet, which can be ordered separately : http://www.sector111.com/parts/interior/seats_and_harnesses/elise_5th_point_seat_grommet.cfm
I saw that part. It’s super super narrow. I’ve got a set of 6 point Schroth belts and need a wider sub passage than the S111 ones.
A lot of guys cut the seat and then sew in a leather sleeve to protect both the cushion and harness. That’s my plan as well.
Definitely an interesting way to do it. Plus, that eliminates the “will that part fit nicely with the custom padding” questions.
Love the “new” seats Adam. They give the interior a real sense of purpose.
As for the sub-pass through, if the S111 is too narrow and you don’t want to sew in a fabric tube, I could possible print you out a wider version if you’d be interested?
-Paul
Lovely seats, Adam.
You should make a blog post about the fire extinguisher mounted on the BFW-rollbar. It definitely looks better than when you had it on the Brey-Krause mount. Sharka just keep gettting better & better – will it ever stop? :-]
ARG! I’ve meant to do that blog post. I installed it last November or something like that. It just slipped my mind to post about the new fire bottle mount.
Perhaps this is obvious to some, but not all, BUT… protective gear when using power tools is a good idea folks. Especially one that spins as fast as a Dremel does.
I love my Dremel, but you won’t catch me operating it without the face shield, since I only have one face, and I’m somewhat partial to it.
At a minimum, eye protection, a dust mask (depending on what you’re working with, but generally breathing dust is pretty rough on the lungs), and ear plugs, those three things make working with the Dremel stuff a lot more enjoyable. Perhaps not so much with fiberglass, but running that thing on metal causes quite a racket.
Anyway, “parental/lawyer” advice aside, good work Adam, seats look nice. Good set of belts always help keep you in place!
HA! Thanks Brad. I seriously should have mentioned something like that in the above post. I will likely go back and edit. Seriously, thank you.
I’m a nut about eye protection. I wear it constantly. I have no fewer than 7 sets of protective goggles throughout the garage. I’m doing a radiator install right now and have 3 sets in Sharka’s engine bay so that I can easily grab one. (they’re always migrating from underneath the car to on top…)
I wore glasses and earmuffs (same ones I take shooting) to do the dremel cuts. It’s much MUCH more enjoyable to cut for 2 hours in a hot garage when you’re not worried about eye or ear damage. I didn’t wear a ventilator as the dust wasn’t really getting in the air. It was just glomming onto the seat and staying in those slot holes before getting sucked out by my shopvac moments later.
And again, thanks!
Sure thing Adam. My one wish is that I had naturally good vision, with no need to wear glasses. Unfortunately, got some brick dust in my eyes as a kid on a construction site, and things haven’t been the same since.
We only have one set of eyes, folks! That, and hearing loss is such a gradual thing that we take it for granted, so I tend to advocate hearing protection any time you’re working with metal and power tools.
Also, in general, don’t worry about what people think about what YOU do to YOUR car man! Criticism is one thing, but letting it stifle your creativity is a crime against your cars. If I let people tell me not to do some of the things I’ve done, I would have had a lot less fun with this hobby over the years. =)
Hi Adam,
Just one question: Are you suggesting that we should all follow along and modify our cars in a similar manner? In other words, are you REALLY advocating that we should do this mod?
j/k. Couldn’t resist!
Bruce
HAHAHA! Yeah. Pretty much. 🙂
Adam…
Is there a way that these seat grommets can be 3d printed or resin cast (similar to gauge cups)?
I honestly don’t know. I’m sure they could be printed in ABS. You’d just have to spend some time designing the two sides. They sort of click together and then get glued.
Resin cast – probably? But making the molds and spending the time to cast would be the cost of about 4-5 full sets of the grommets from the Lotus shop that sells them. You’d need to buy 1 full set anyway.
sorry I forgot to reply to your reply. Sector 111 has been sold out for months! finally found MSAR.co.uk sells the grommets. Cant wait to get the rest of them installed.
Did you ever end up using a harness with yours?
I’ve had harnesses on a few times. The fit is okay. I just hate it without the crotch strap. I need to hack the seats up some more and have an upholsterer do a leather passage for the sub belt.
Adam,
You rock. I cannot wait to give my Elise Seats this treatment. Will tag you on the gram when it’s done!
Thanks for documenting this, Adam! I recently put these seats in my Triumph GT6 and was looking to do this exact thing. (I’m on my 4th Miata, too, but that one is staying stock. Mostly 🙂 )
I’d like to add that these grommets appear to be the exact same as the ones sold by Summit and Jegs for their Procar/Scat series of seats.
https://www.summitracing.com/search/part-type/seat-components/seat-component-type/seat-belt-grommet
Might save someone a few bucks…