
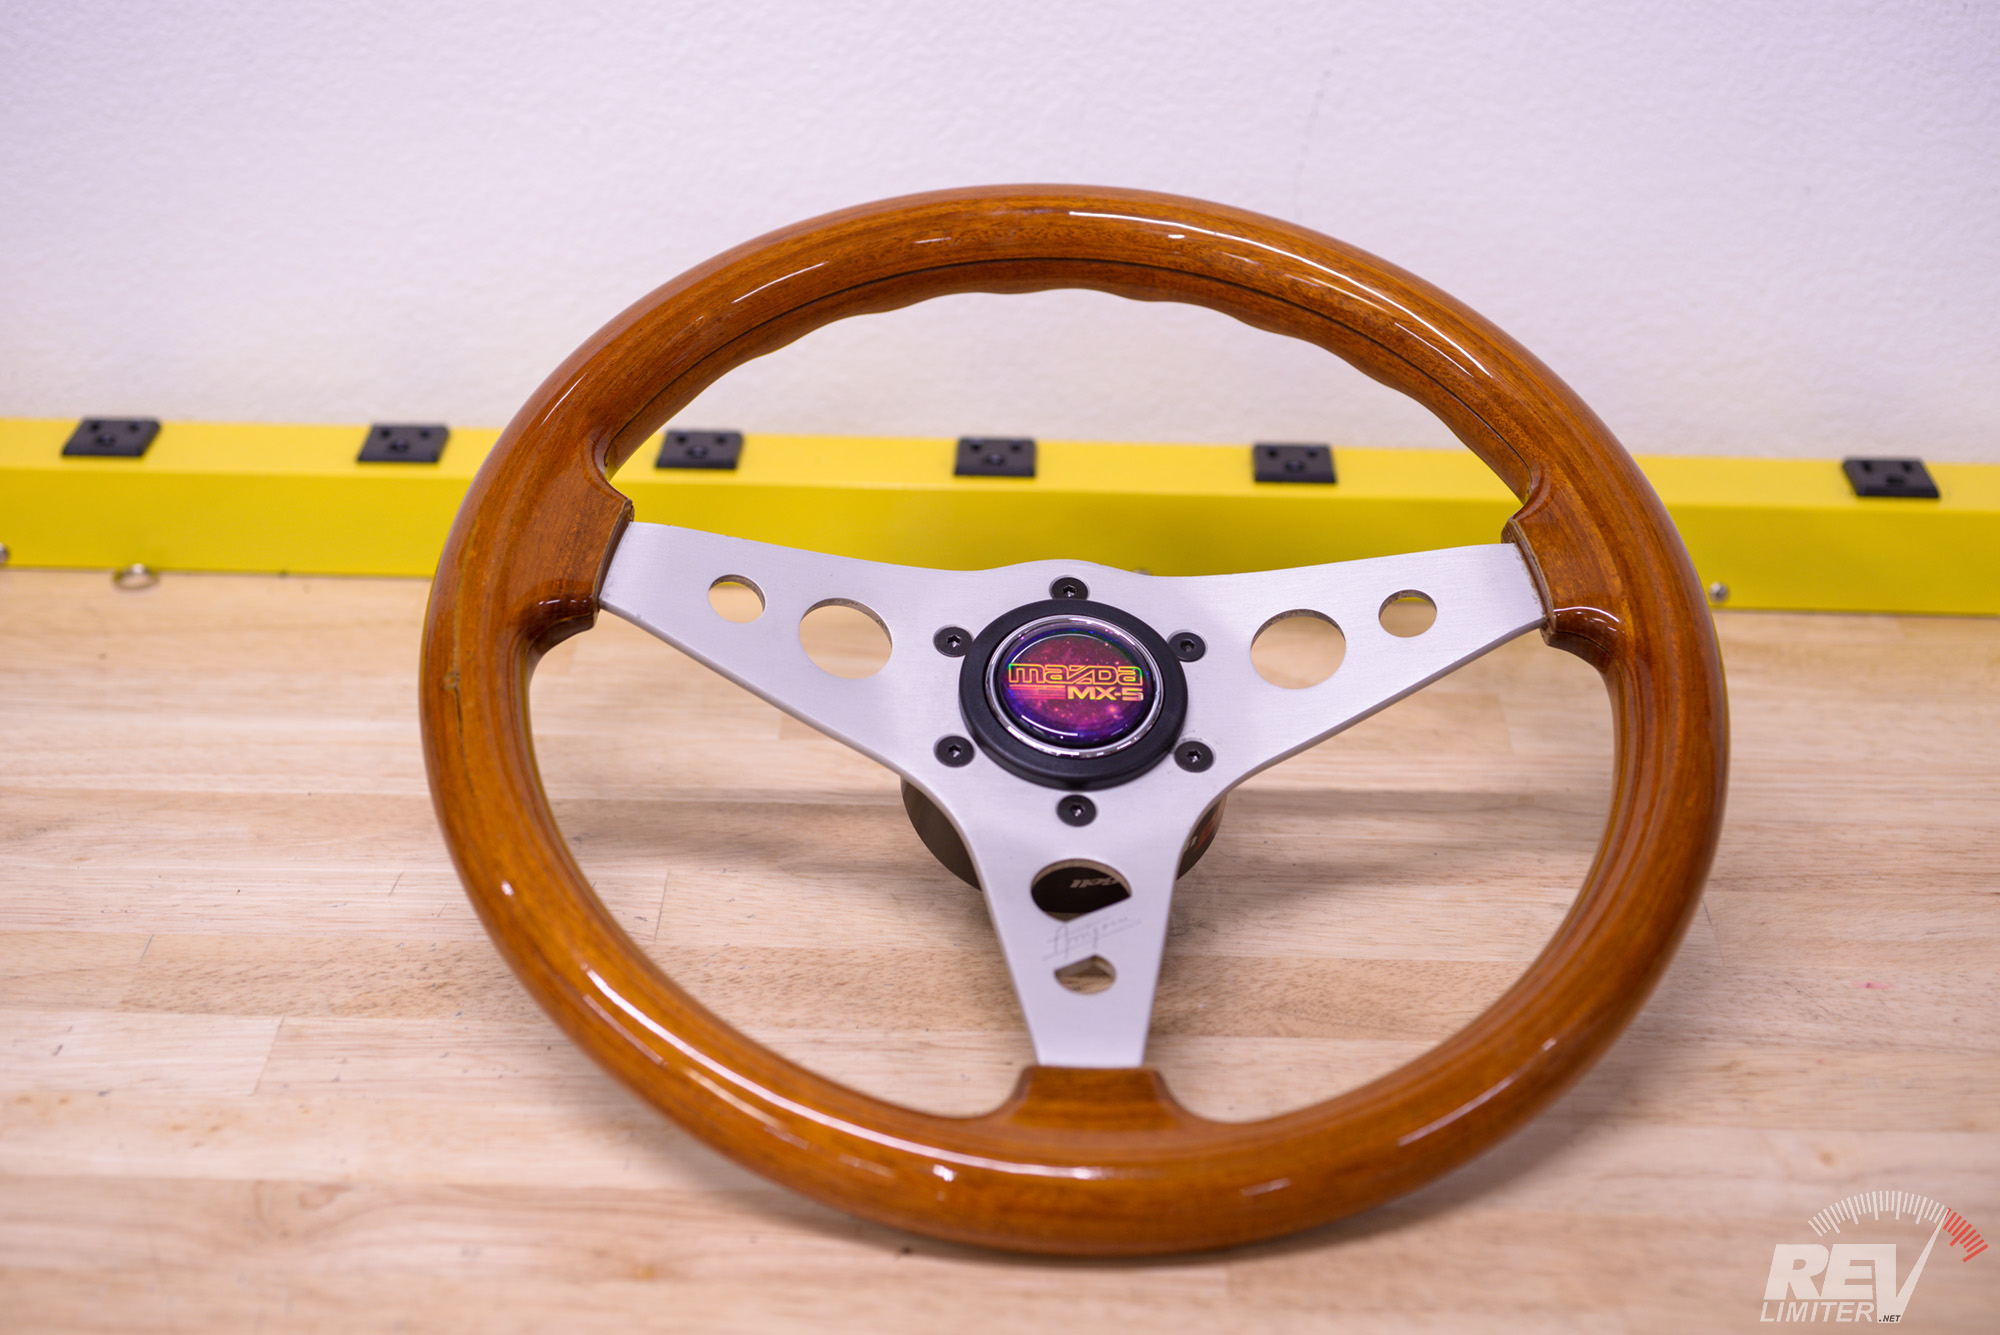
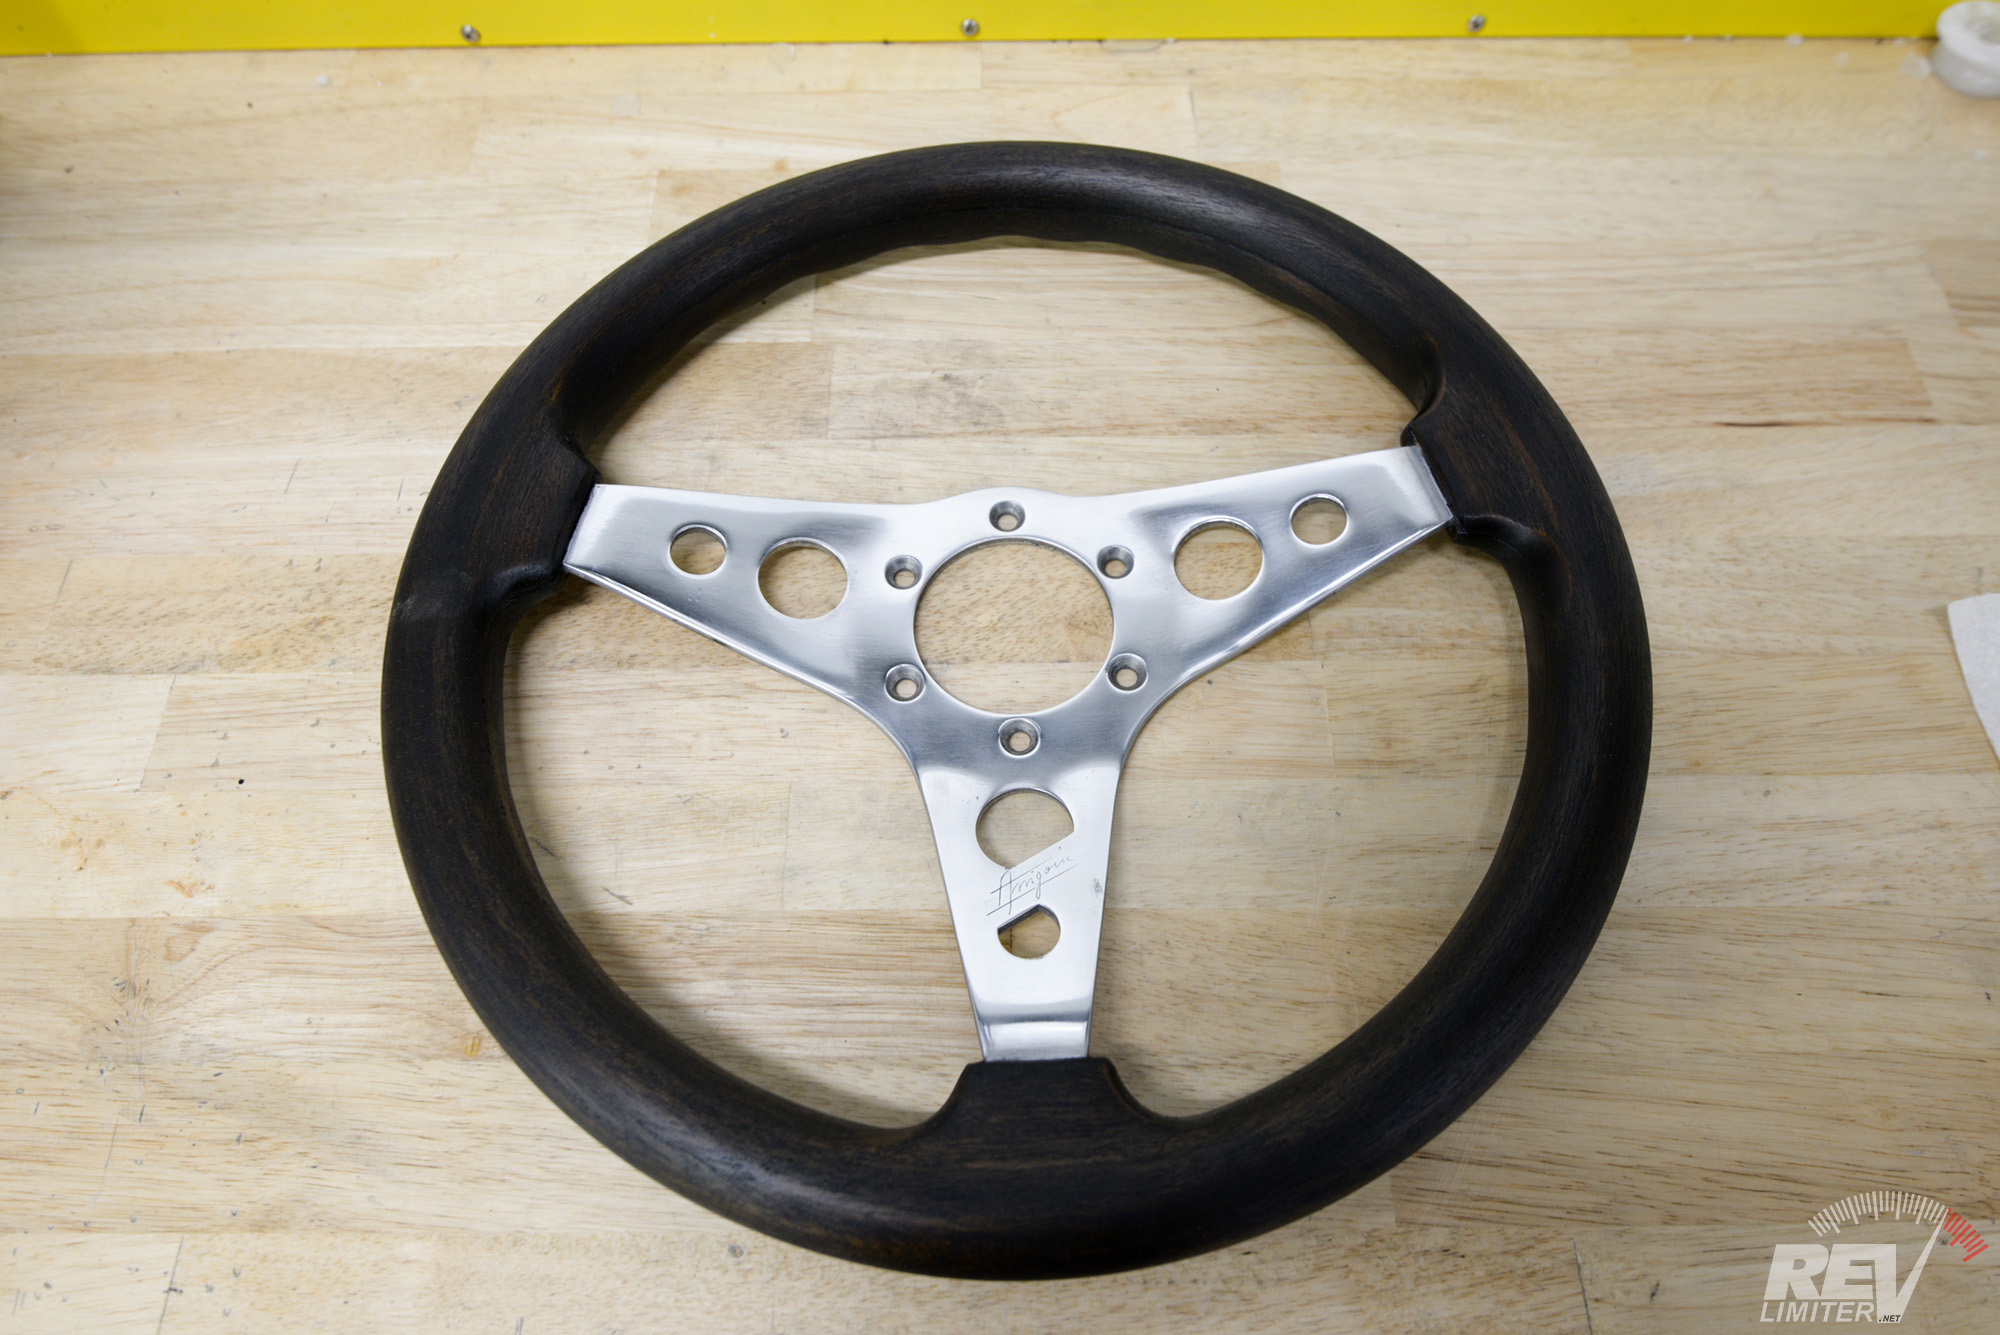
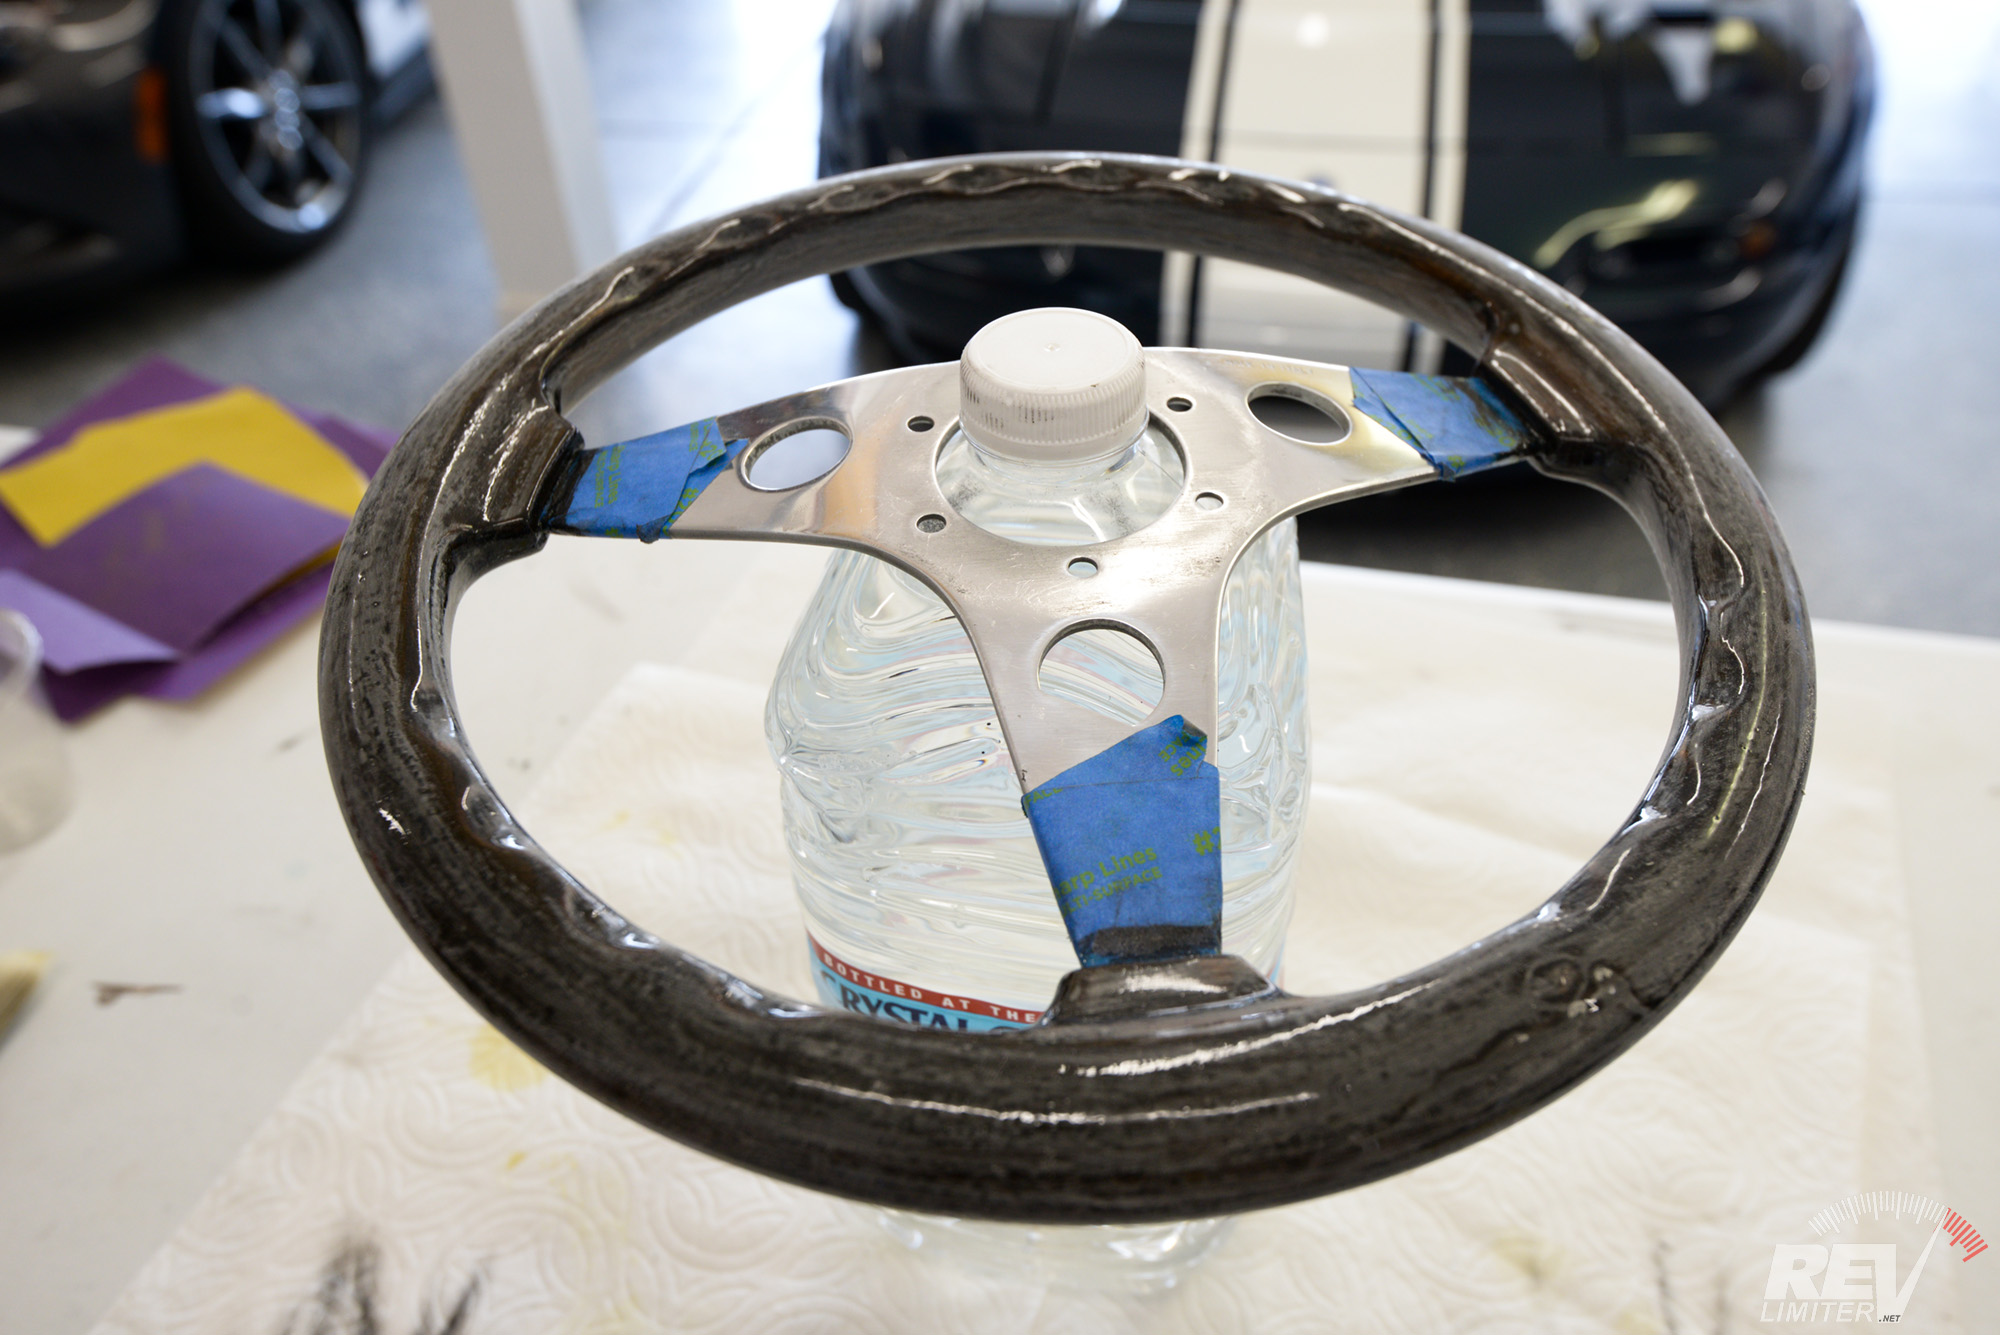
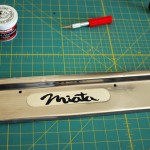
The Arigorni in original condition.
Back in 2017, I added this Arigorni, AKA the Wood Watanabe Falcon, to my collection. And, bit of backstory, that’s what you’re looking at here – the wood version of the legendary Watanabe Falcon steering wheel. It has the same oval cross section as the leather wheel, the same spoke design, and the same great driving feel. It’s just wood and not branded as Watanabe.
These wheels are nowhere near as rare as the Falcon steering wheel and they’re nothing near the price that the Falcon commands. You can have a wood Watanabe for several hundred dollars if you don’t mind searching. That’s a tenth of the price of a Falcon. I highly recommend adding one to your collection.
The lack of rarity and fact that it matched nothing in Sharka’s interior is why I did what follows in this blog post.

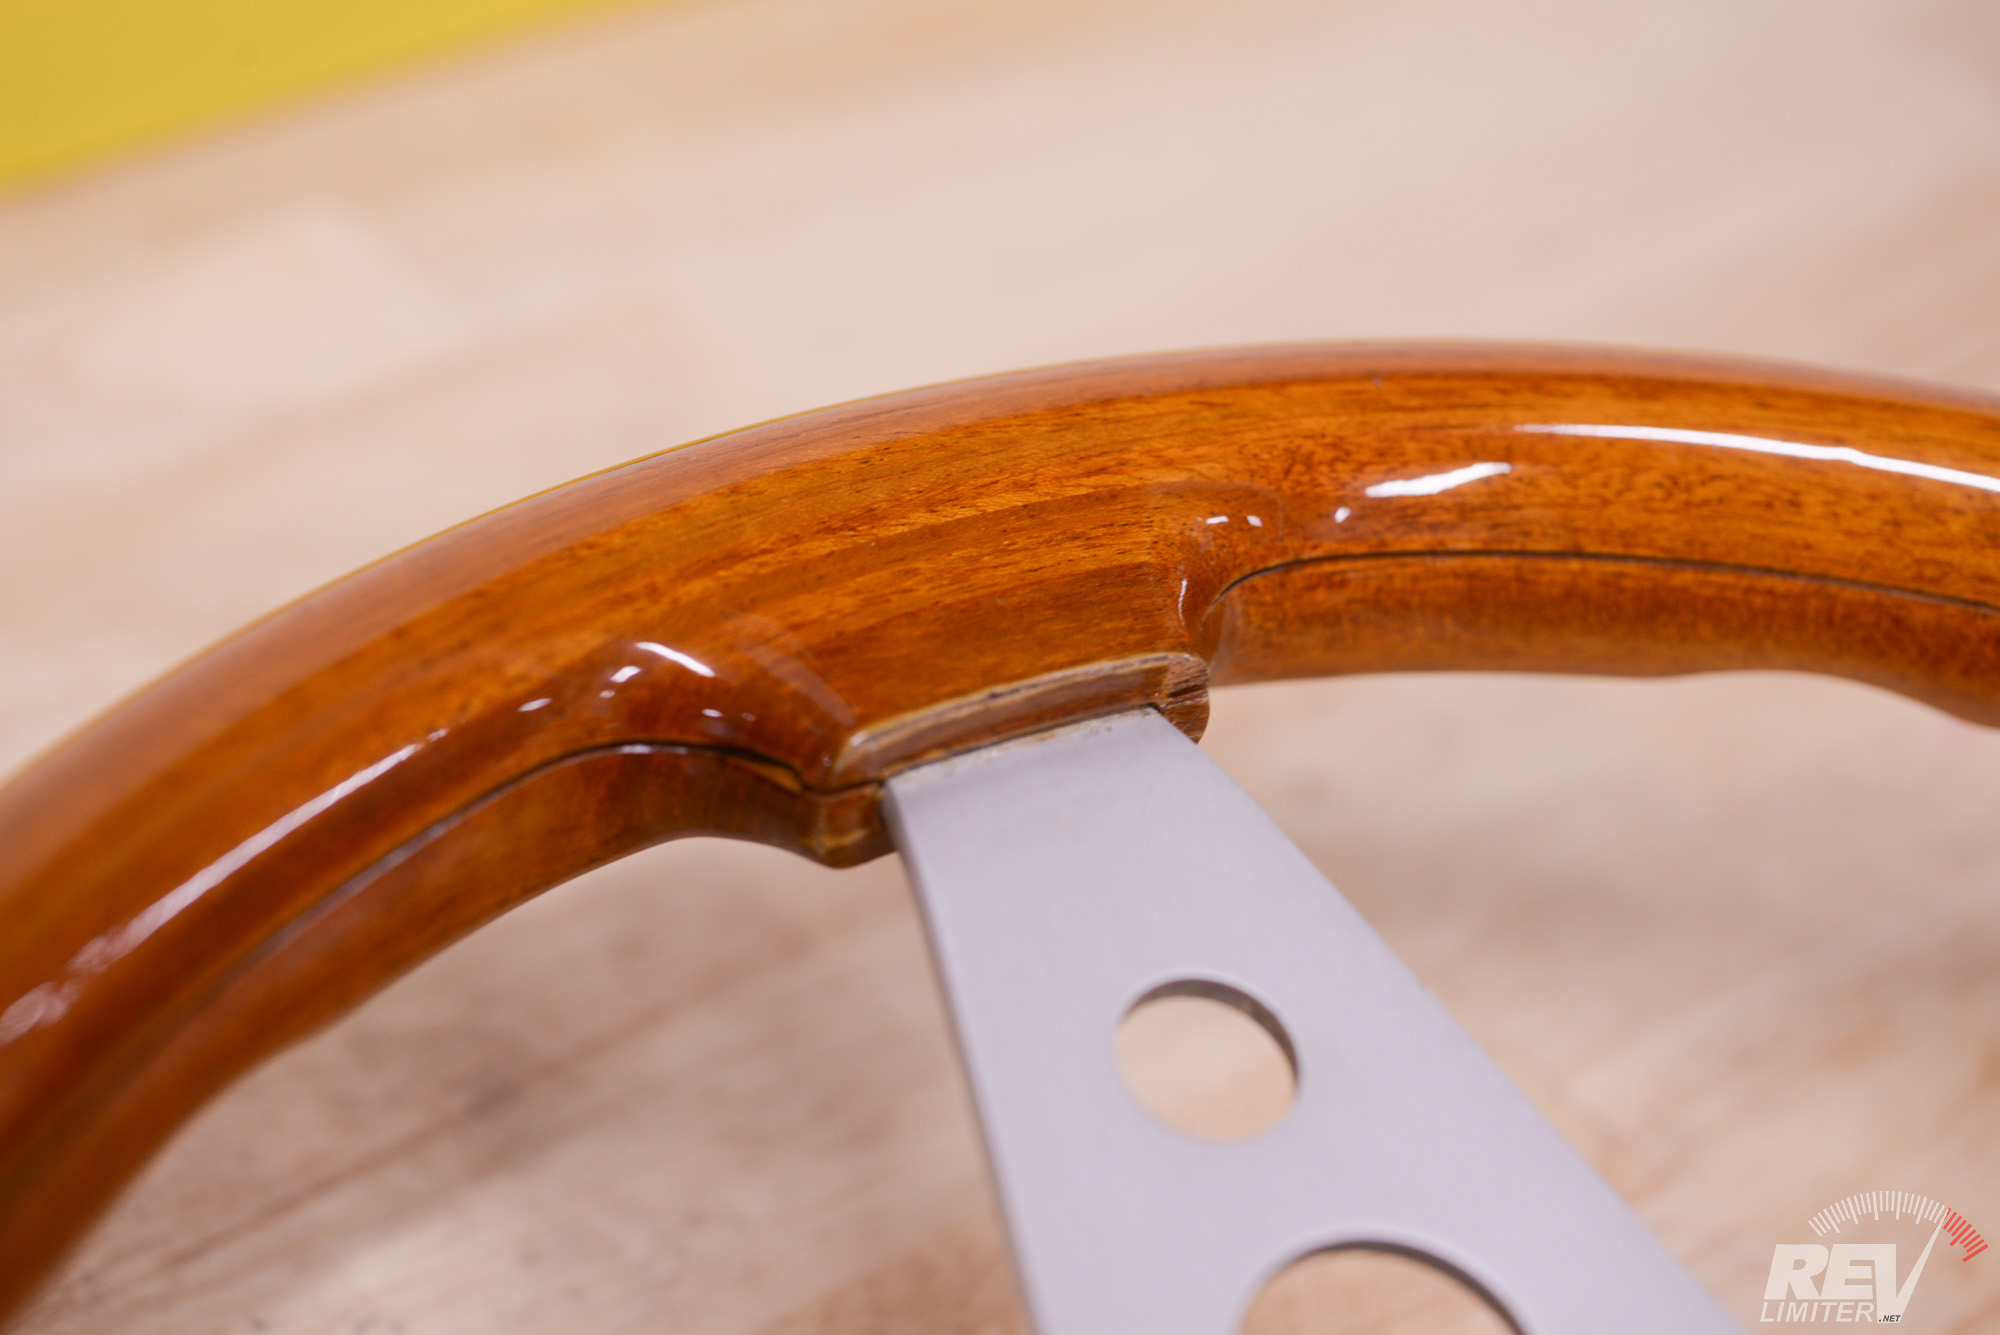
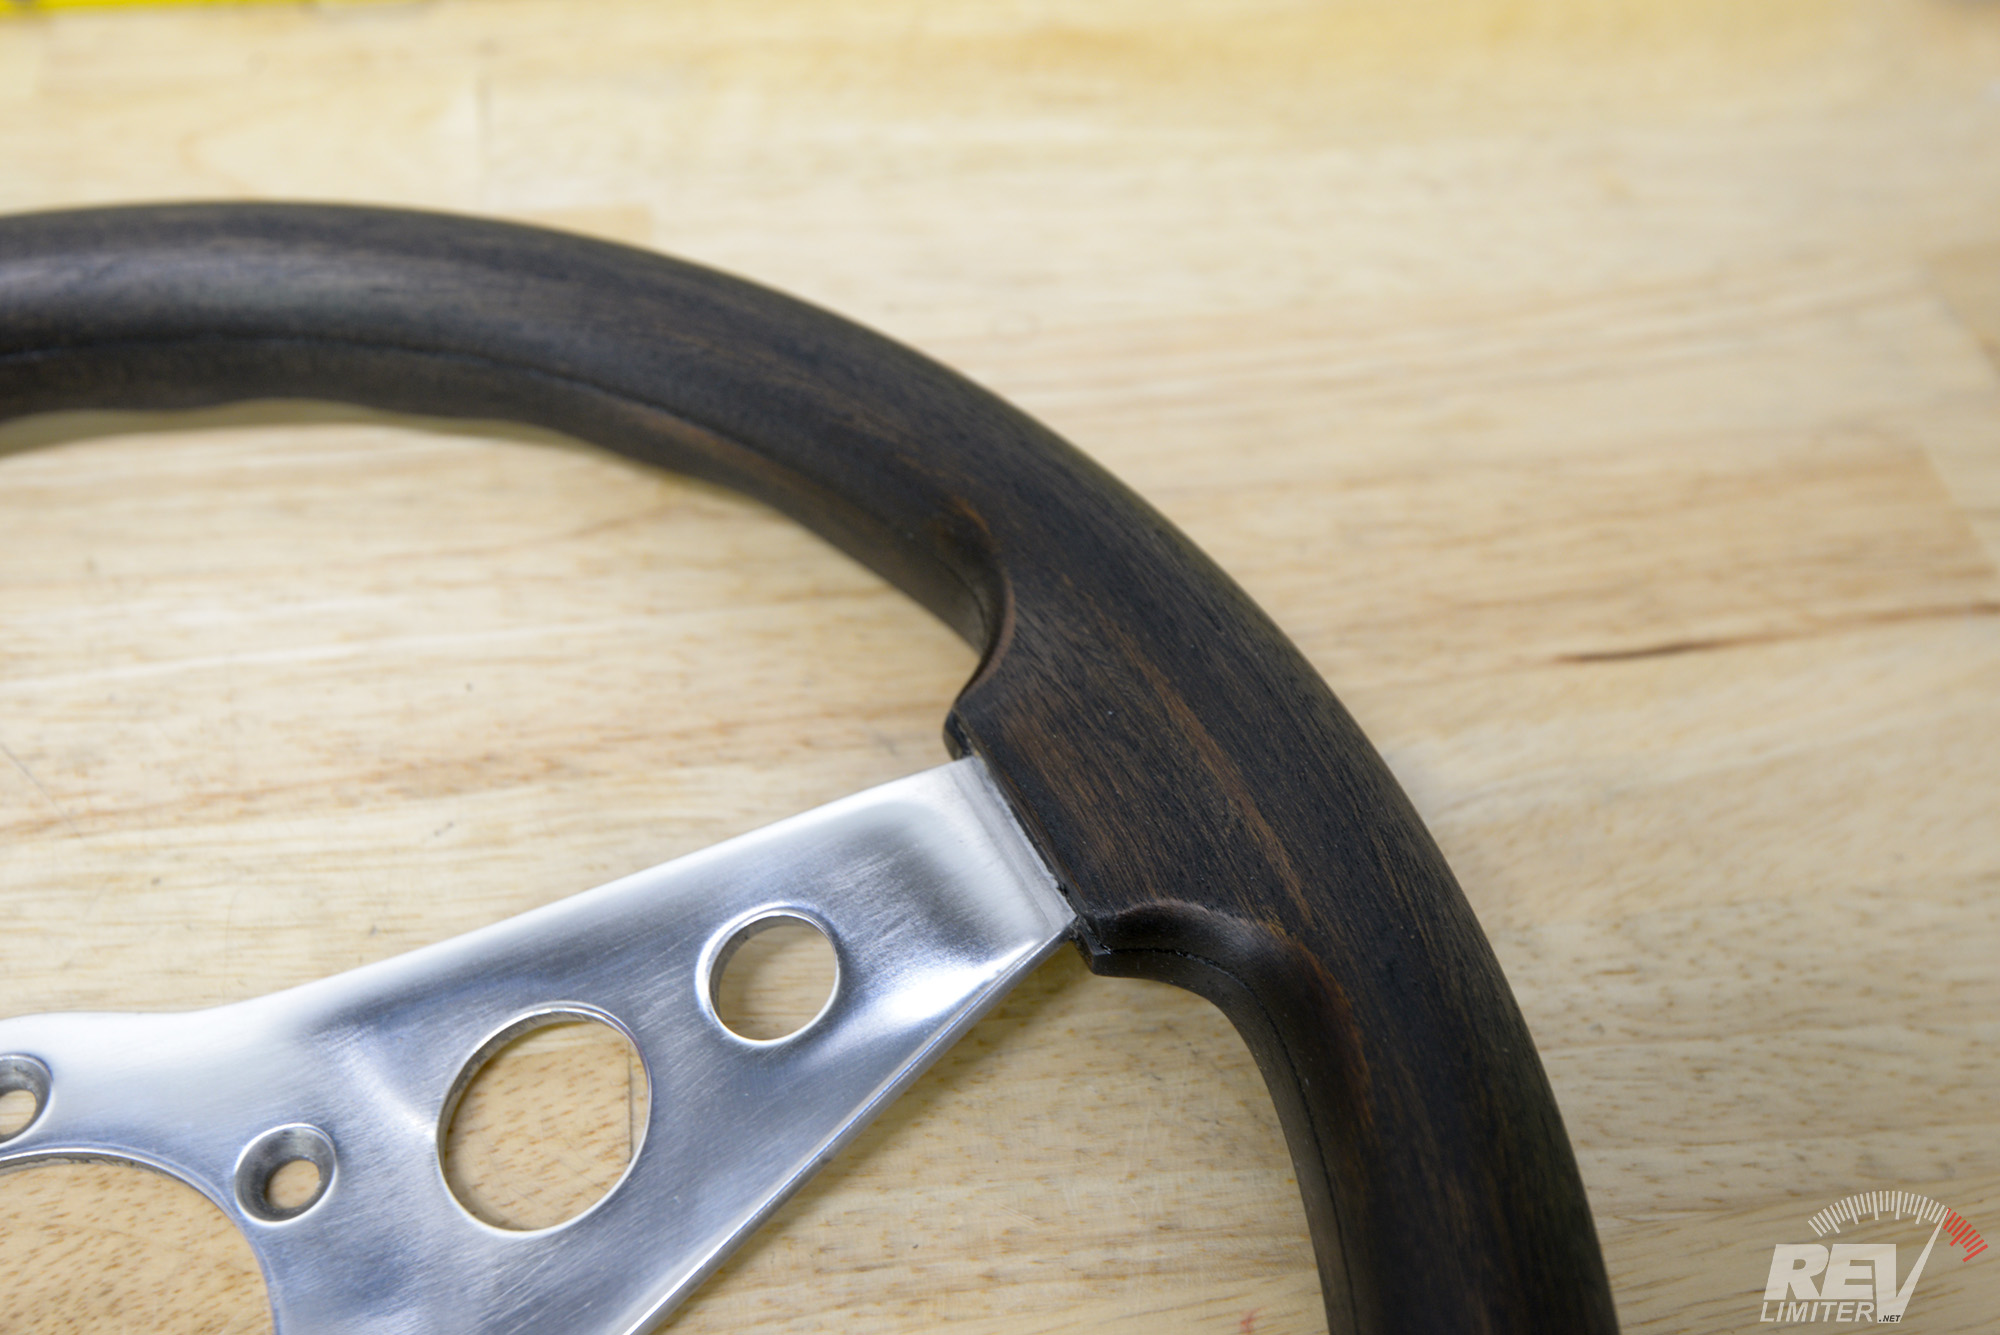
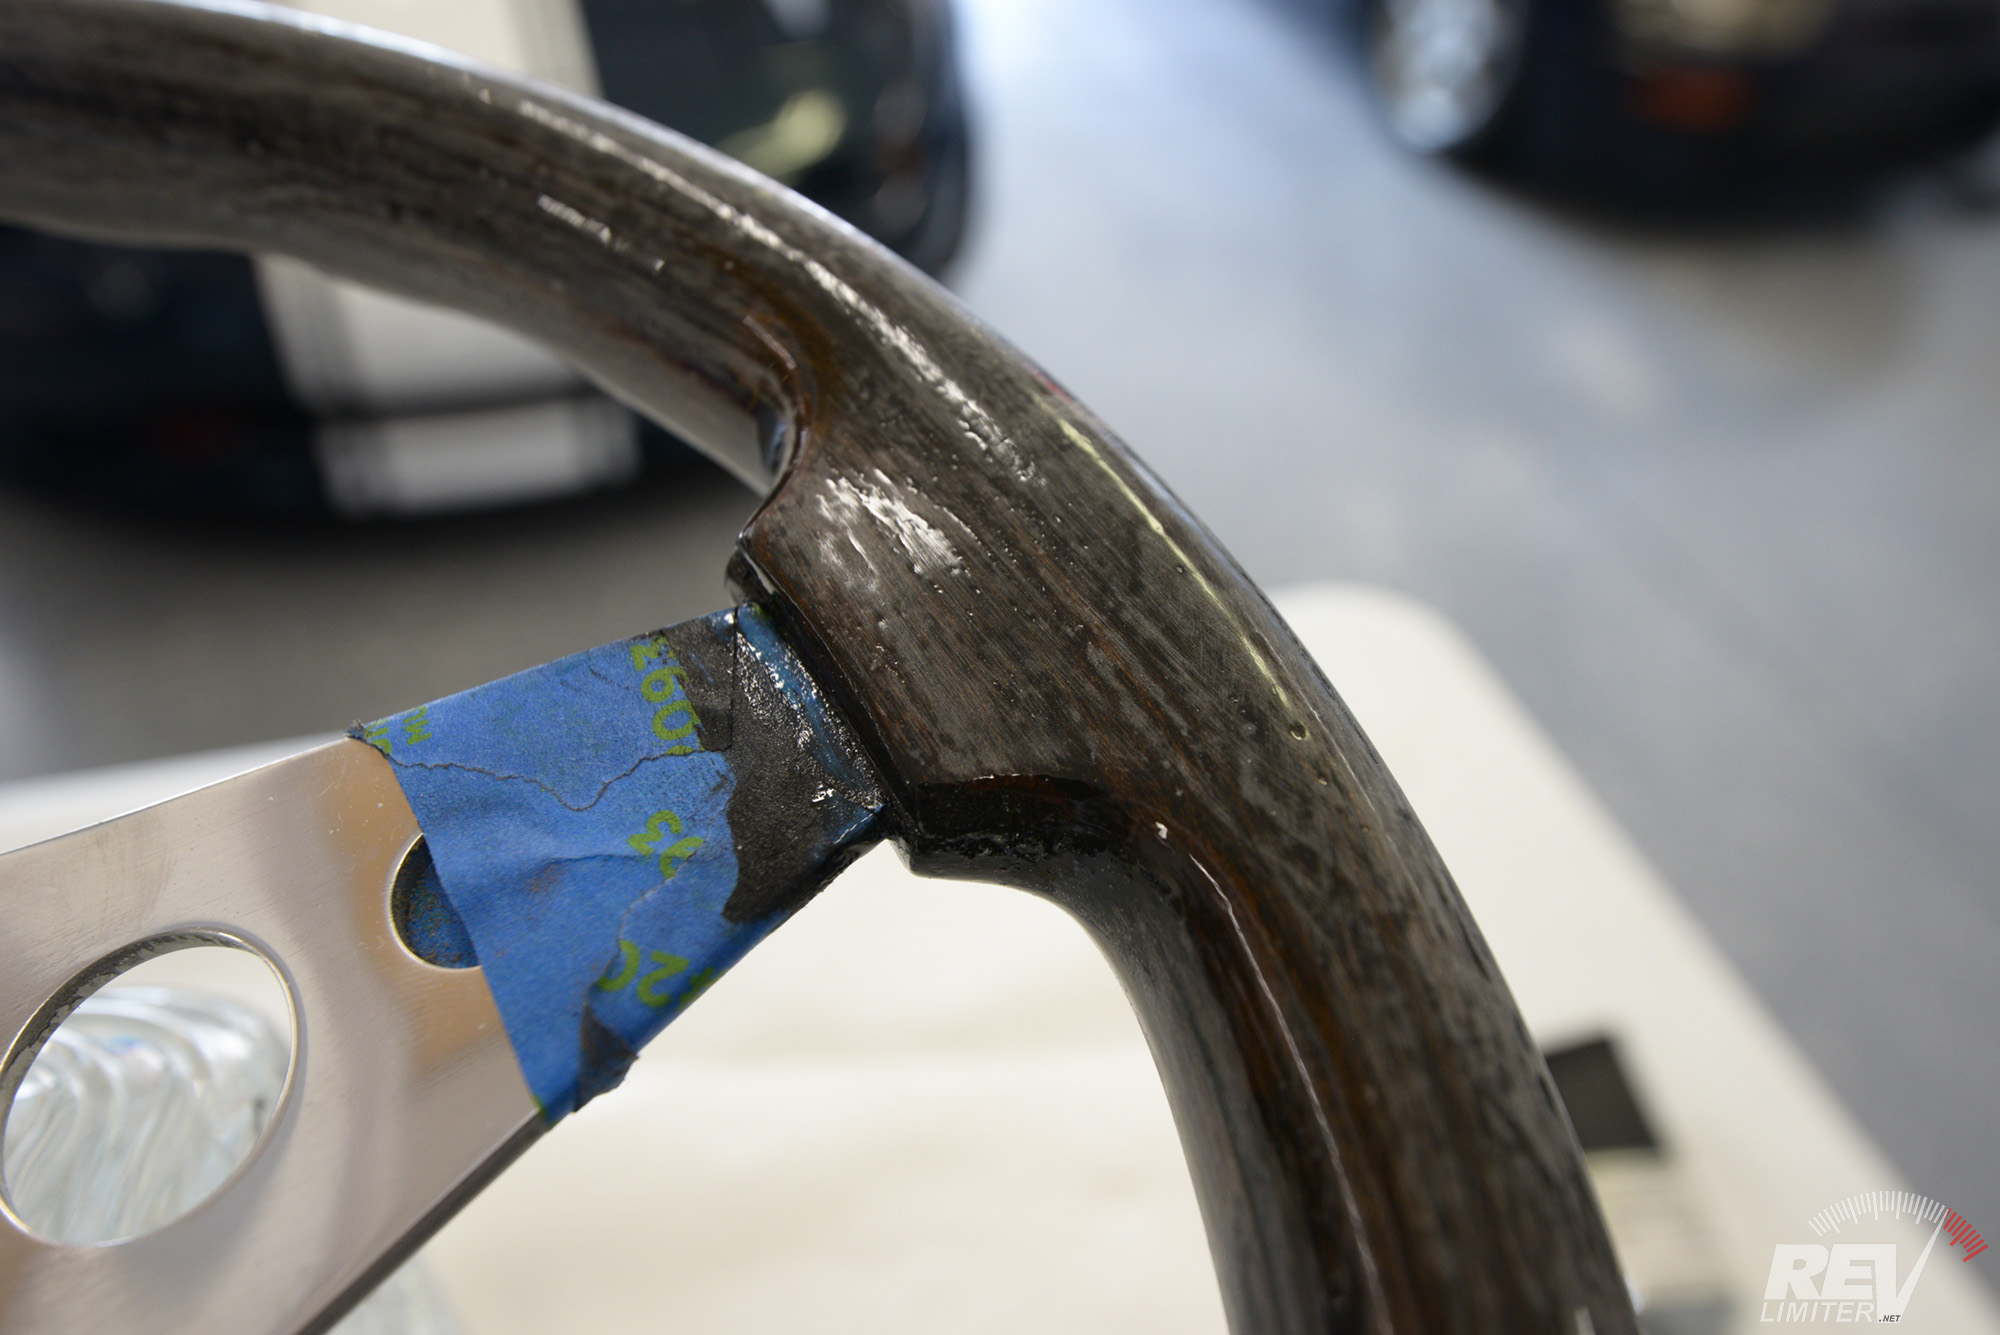
Big split.
Wear and more split.
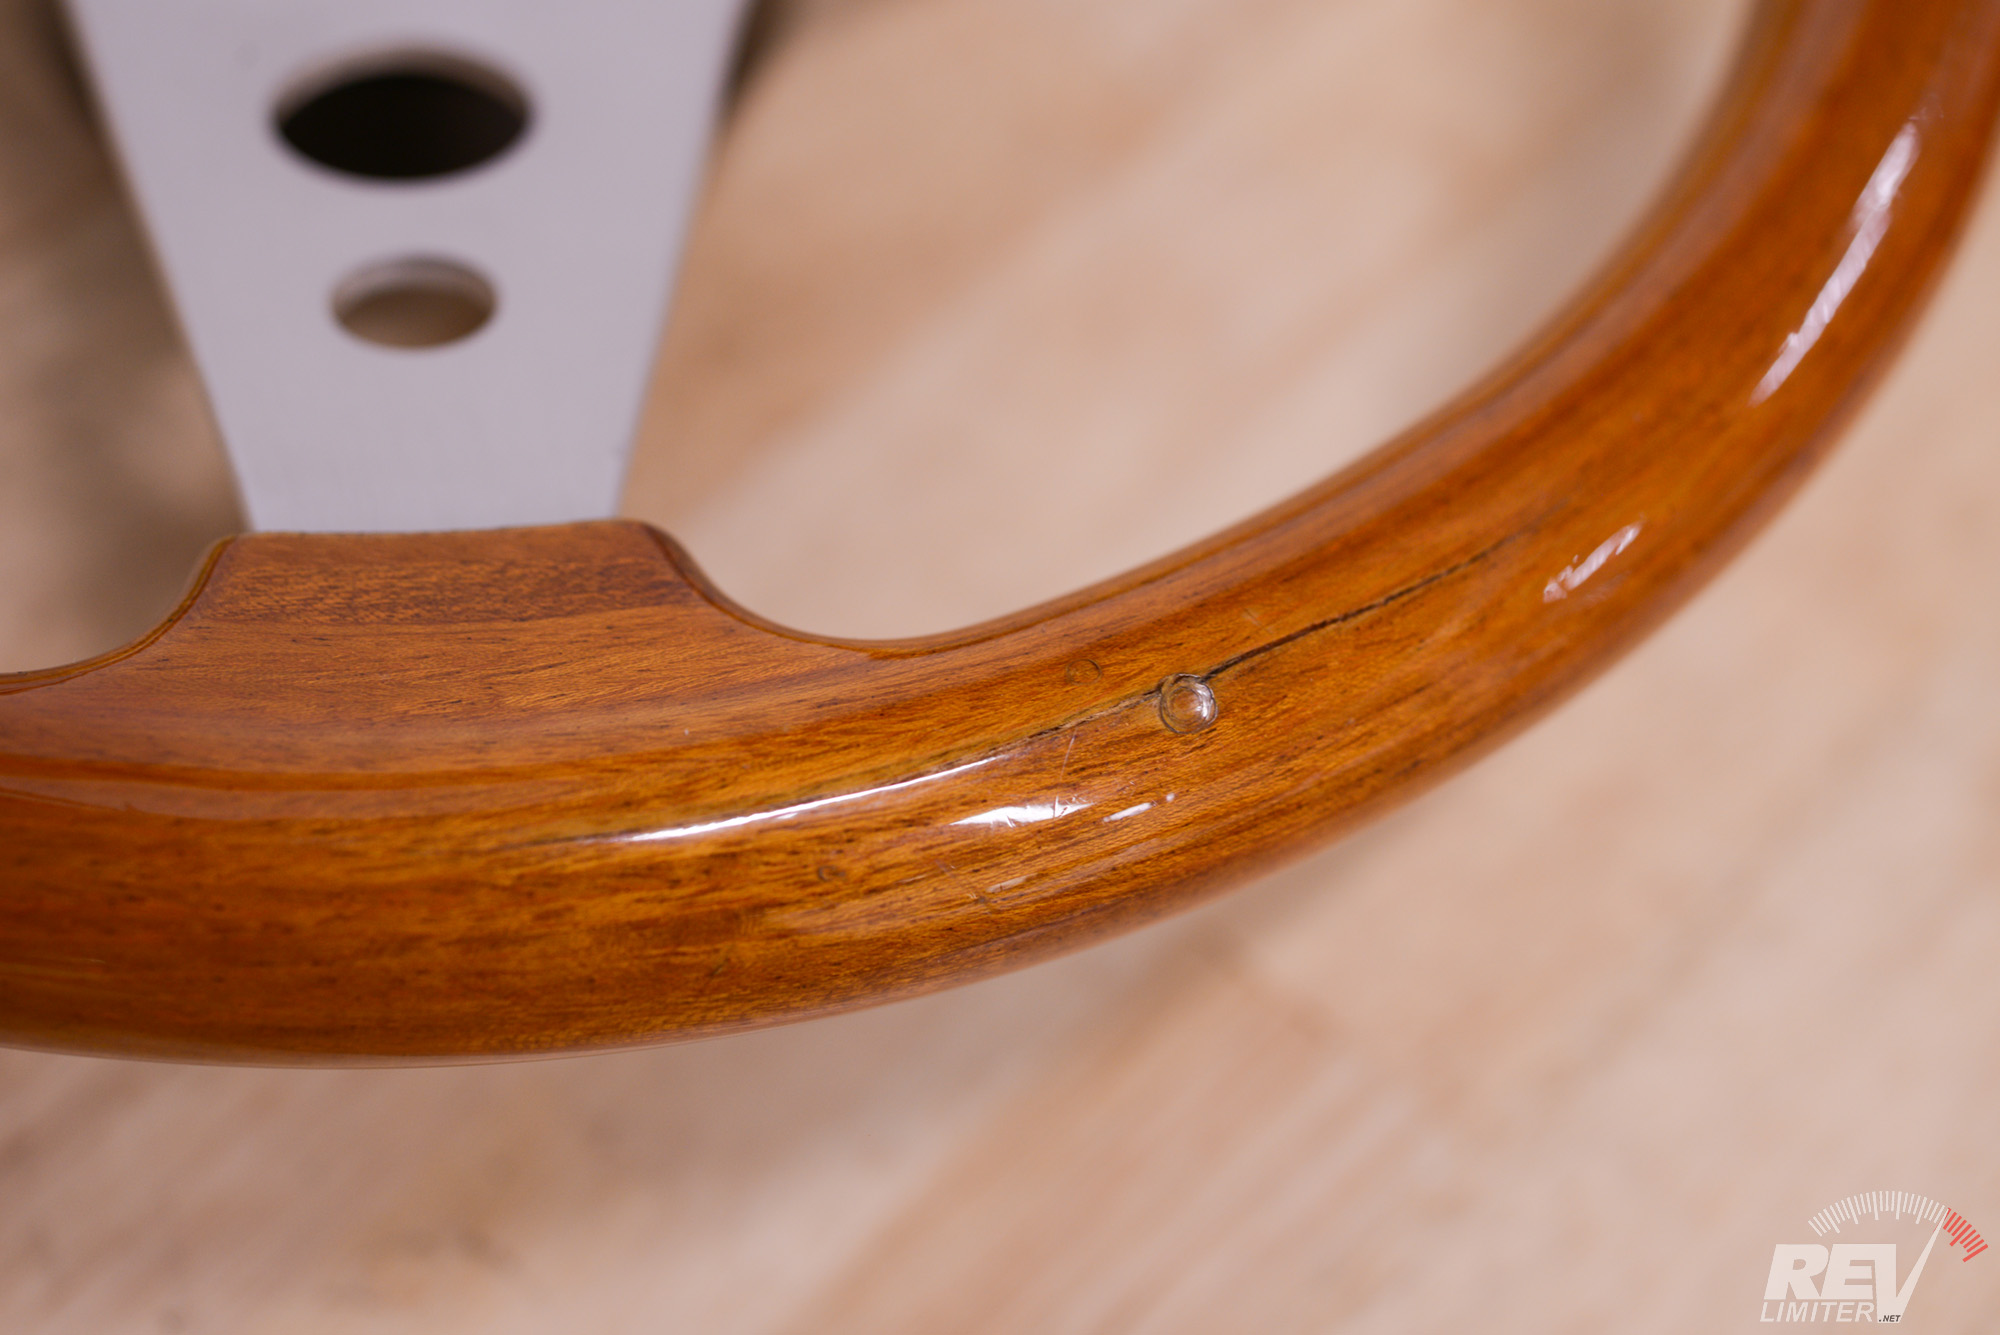
Cracks and dings.
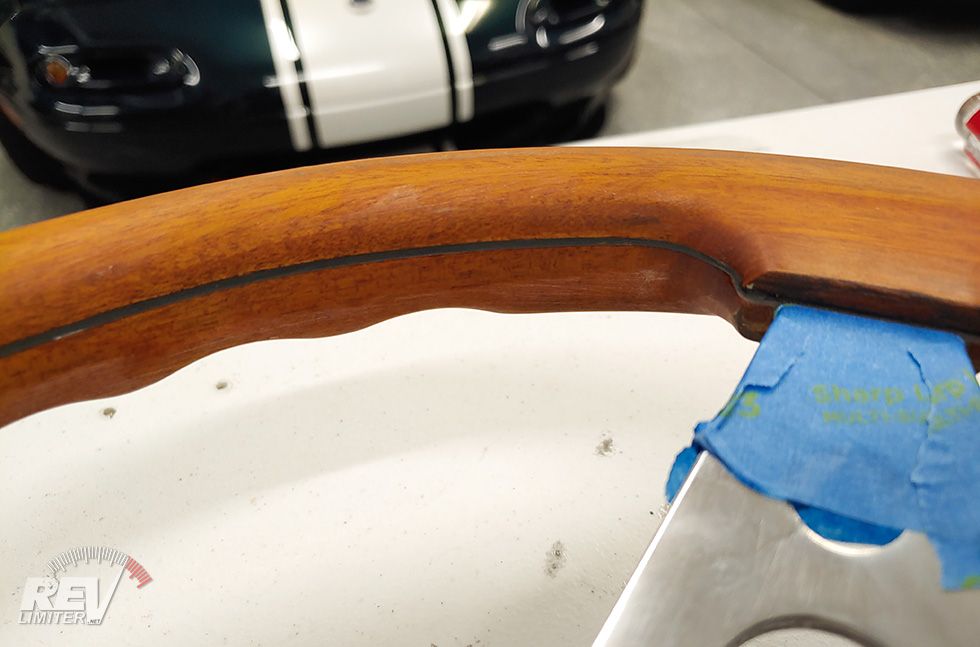
My own Arigorni wheel was not pristine. It had a big split going all the way around the inner rim as well as a few other cracks and dings. The overall finish on the wheel was really quite nice and it was lovely to drive with, but I’ve wanted to repair that crack for the past three years.
See, I’m not really a fan of wood steering wheels. I always can find something wrong with them. But this Arigorni? It’s fantastic. For me, it’s a keeper and deserving of being refinished and fixed up. I wanted to be really sure of this before I tore into it.
As I mentioned above, it also didn’t match anything in my NA Miata’s interior. The wood was too light and the silver painted spokes weren’t… they just weren’t. A plan formed in my mind.

Sanded down.

Polished up.
A bit shinier.
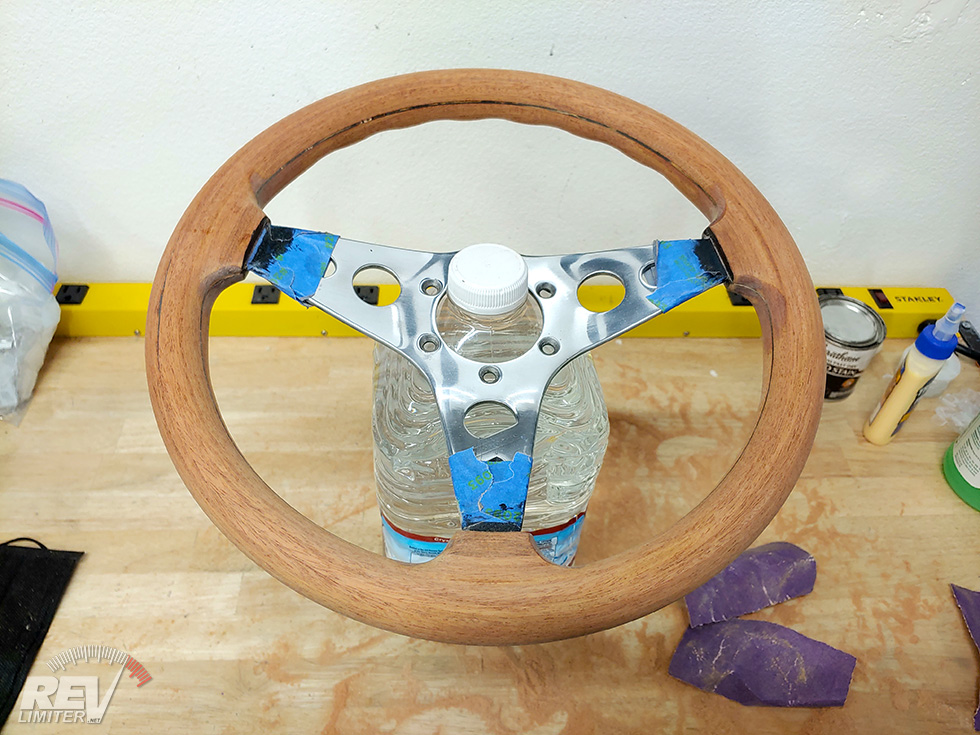
The first step was to strip the old varnish and stain off the steering wheel. A few hours of work with some 60 grit had it pretty well bare. Then I worked up to about 200 grit before I was happy with how the wheel was stripped. The overall finish needed to be uniform and free of the old cherry stain if it was to take the new stain well.
Yes, the new stain.
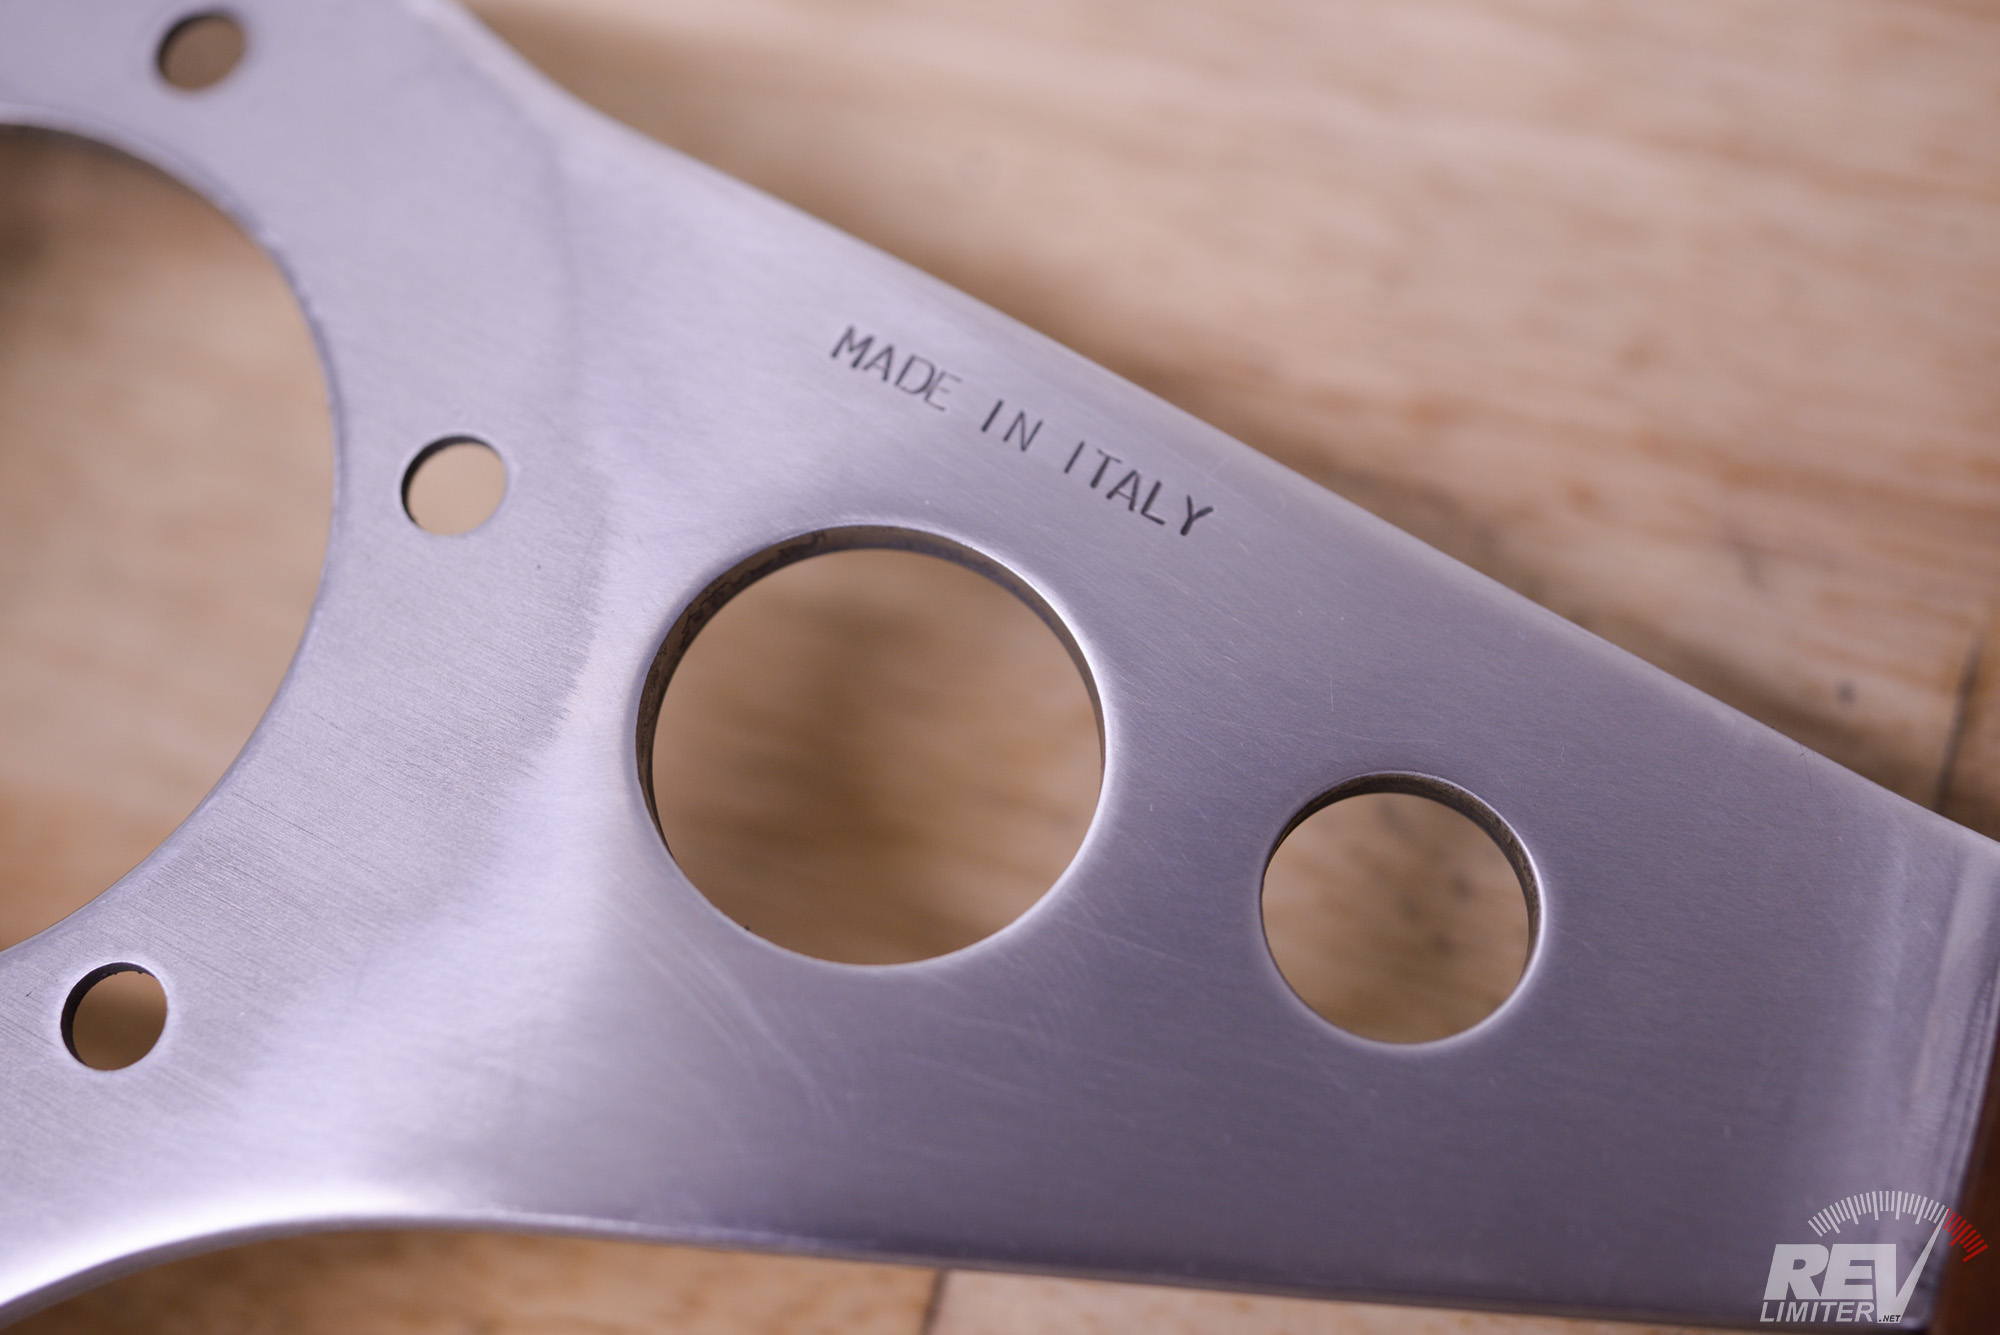
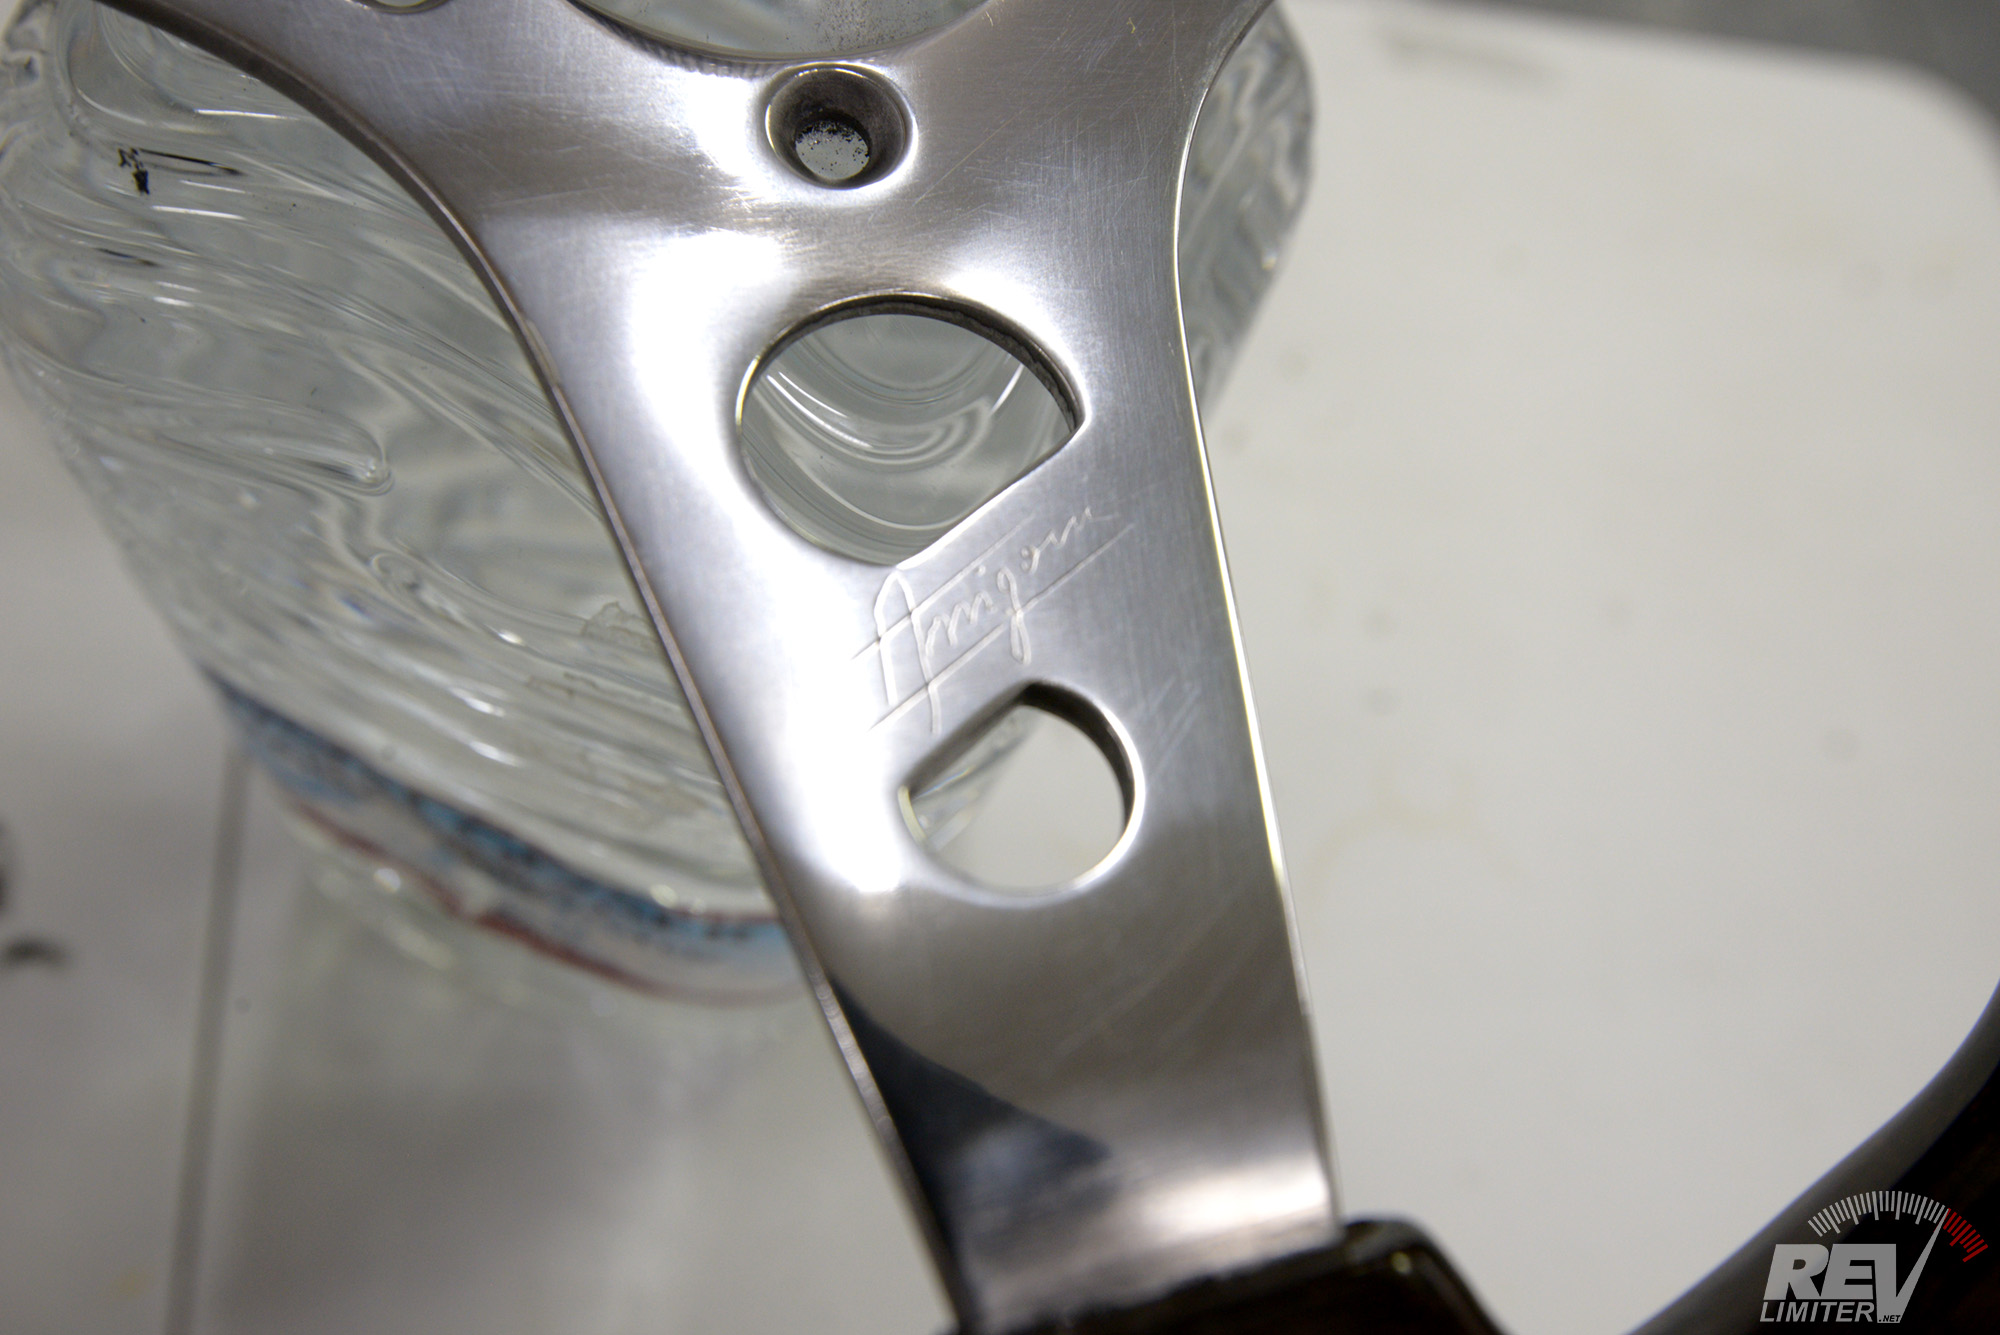
Then I went to work on those spokes. Let me just say how that metal really didn’t want to be polished. It was a struggle and about a week of effort. And… it could be a better polish. There’s some fine sanding grain visible, but that seemed to be what the wheel wanted. It didn’t want to look new and pristine. I believe it to be about 30 years old. The wheel wanted to have some character.
Repair time.
No more split.
Ready for refinishing.
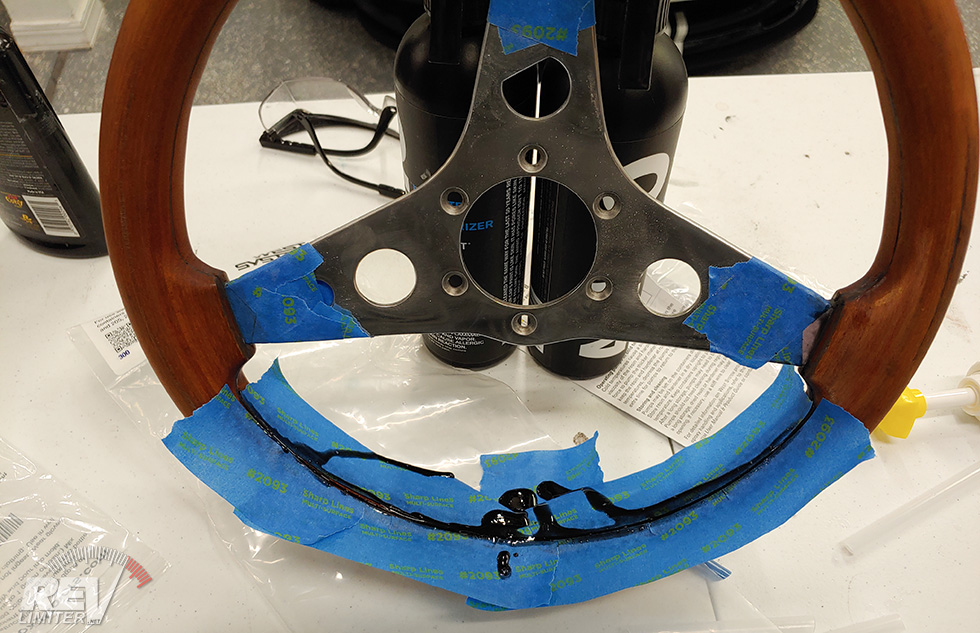
Next, it was time to fill that big split and all the small cracks. I used West System 105 resin to do it. Annnd…. it kinda worked. The resin flowed very well into the split, but getting a smooth top was just not happening. I taped, filled, rotated, and repeated for a good week before giving up on a perfect epoxy filling. It DID fill the crack nicely, but the final smooth edge was created with wood putty.
I’m not sure but it’s possible the wood putty would have worked for the entire job. I didn’t want the wheel to split further, so something like an epoxy seemed like the correct fix to re-bond the two wood halves back together. But… maybe the split was stable and wouldn’t have expanded further. No way to know.
All I know is that epoxy was damn difficult to work with while the wood putty was amazingly easy.
And you’ll notice I chose black.
Stained.
Ready for varnish.
Stained wood grain.
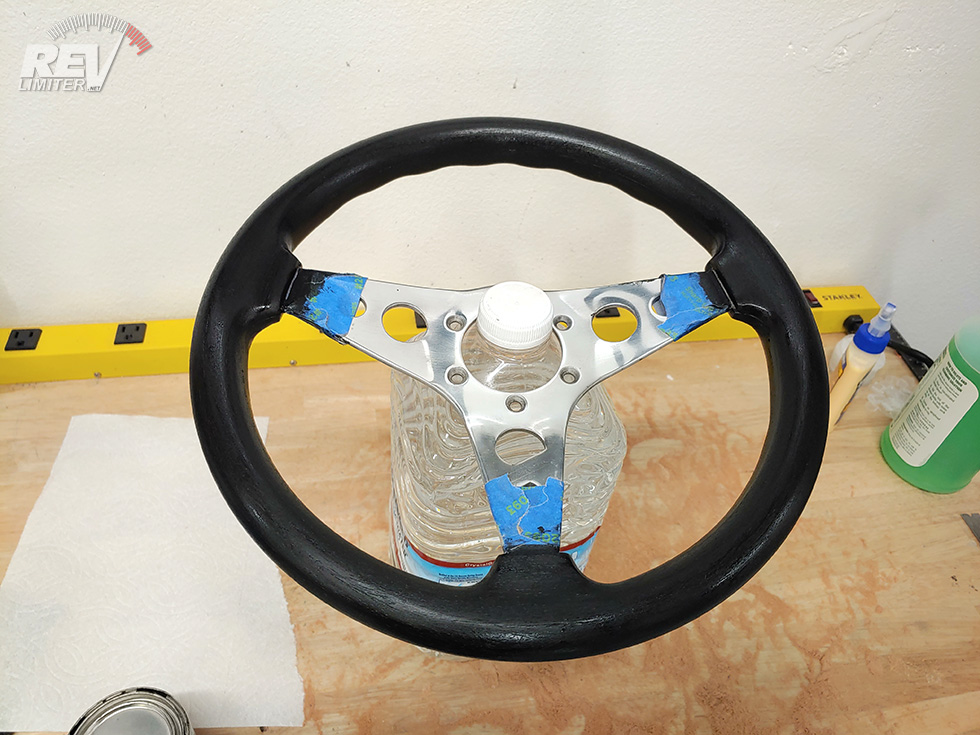
BAM! Stained ebony black.
Those three photos represent about three weeks worth of work. It was the first time I’ve ever tried to re-stain something a different color than it was originally. I learned how very very much sanding was required to get all of the original stain out of the wood and expose fresh so that it would take new stain correctly.
So very much sanding. Weeks worth.
I sanded, stripped, and re-stained this wheel at least 10 times to get a good dark color with nice penetration. 10. Times.
Why not just paint it black you might say? I didn’t want a black painted wheel. I wanted to still see wood grain. And that desire cost me many many hours. But it was worth it.
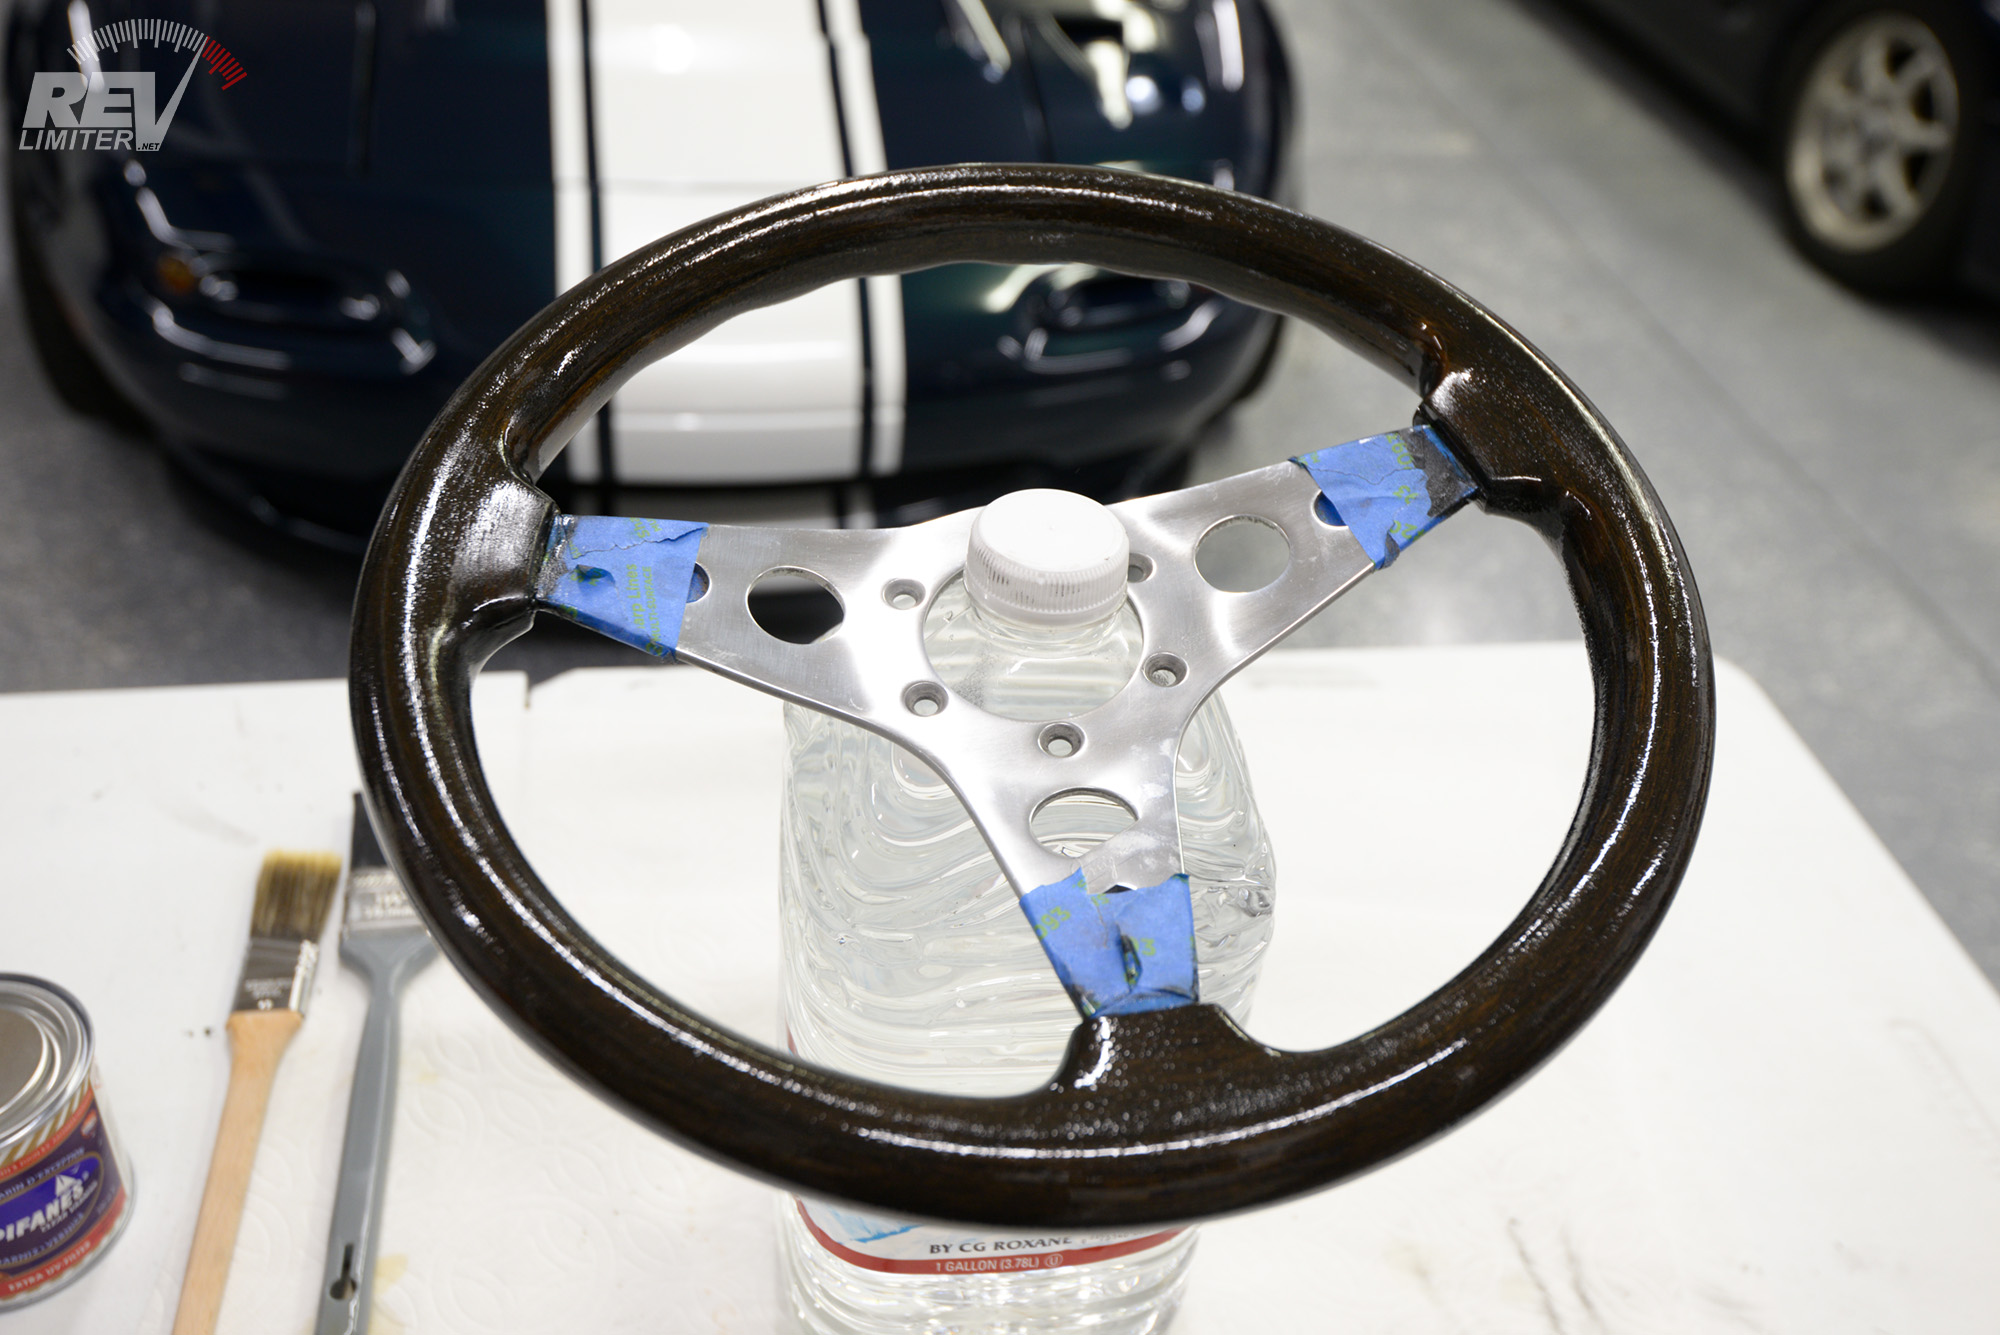
Varnishing begins.
And then there was the varnishing.
Let me mention this was not my first time re-finishing a steering wheel. I documented that one back in 2015. And I’ve revarnished wood items since then. It got me a bit cocky and sure of myself.
I decided to just pick up off-the-shelf spar varnish from the local hardware store and slap that on there.
Yeah… mistake.
The brand name varnish I used went on very bubbly (as you can see above) and thin. I scuffed the surface and added more layers until I got to about four, then I went to mow the bubbles down. And I mowed through the varnish.
Straight through that brand name spar varnish. It had all the thickness and strength of tissue paper. And when I went through it… I got into the black stain.
So I got to completely strip the wheel a second time and then re-re-stain it black. The last photos of the black stained wheel are actually the last ones before I stepped up and ordered the good varnish.

Epifanes Spar Varnish.
That’s 1 coat.
I used Epifanes on my last wheel restoration. It was incredible and amazing. And this time, in 2020, it was no different. Such a night and day difference to that big-box hardware store varnish. There’s just no comparison.
Why didn’t I just want the week and use Epifanes in the first place? I don’t know. I learned my lesson though. For any future wood projects, I’ll just use the good varnish in the first place.
In progress sanding pix.
In progress sanding pix.
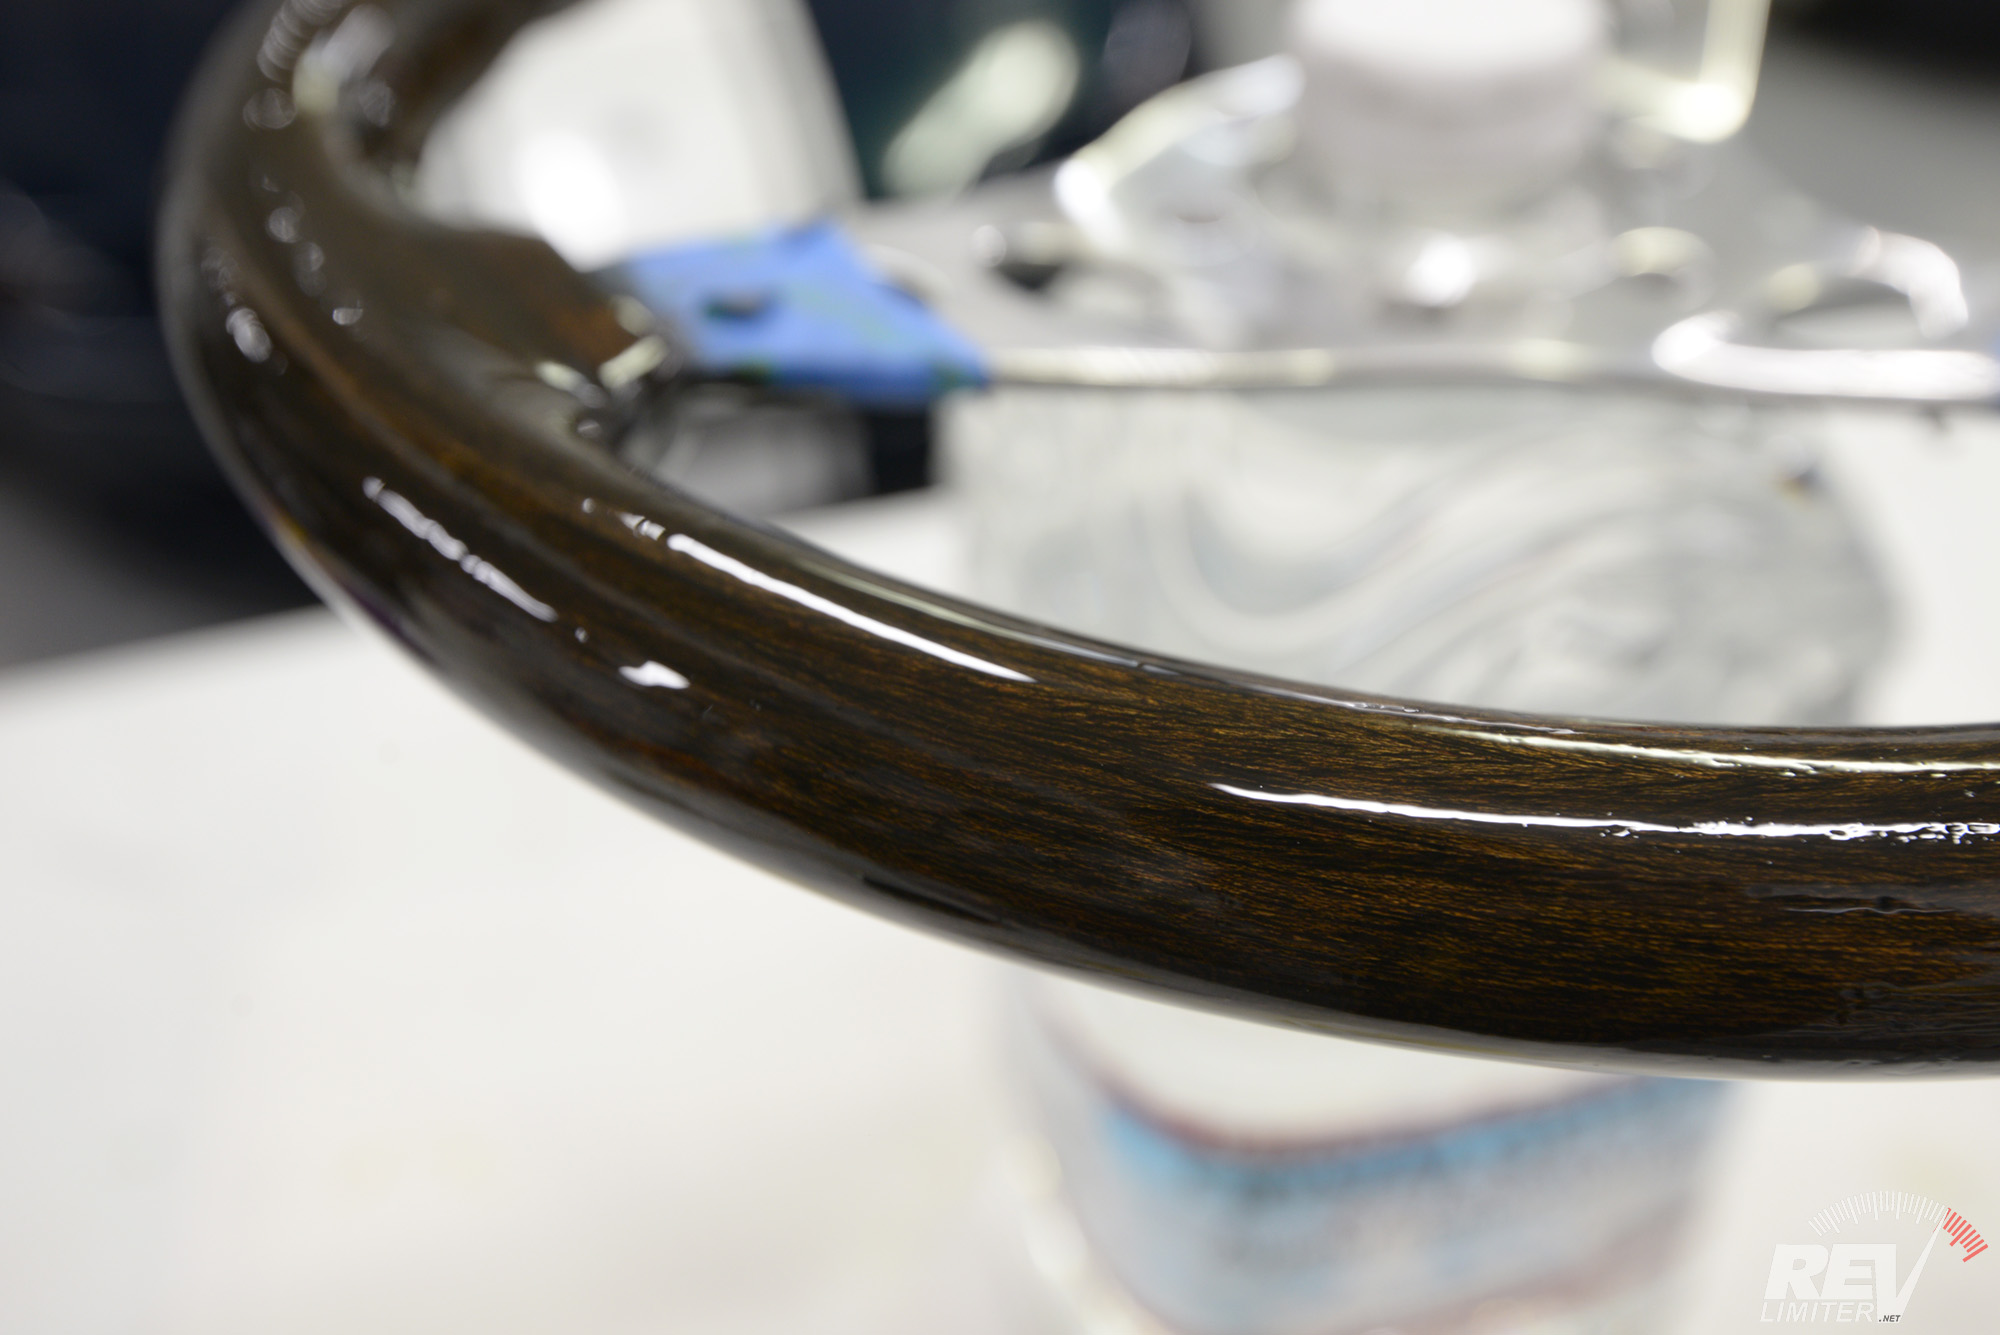
The very first coat of varnish was fantastic. It went on smooth and even with minimal bubbles. 2-3 days dry time per layer. 10 layers with minor sanding and scuffing in between.
I took some in-progress sanding pix. I really only scuffed gently for about 8 layers. Just mowing down high spots with 400 grit while being careful to not blast away too much varnish. Then, on the 9th layer I got serious and tried to create a perfectly smooth surface. A 10th layer to fill a few dips got me the finish of my dreams.
And here it is.
Finished.
Sanding grits consisted of 400, 600, 800, and 1000. Most time was spent with the 600 and 1000. Once I was happy with the 1000 grit, I went to 2000 and 3000 to get as many 1000 grit sanding marks out of the varnish surface as possible. Then it was rubbing compound time.
Yeah, rubbing compound. I started with medium grit and worked up to ultra fine polishing compound.
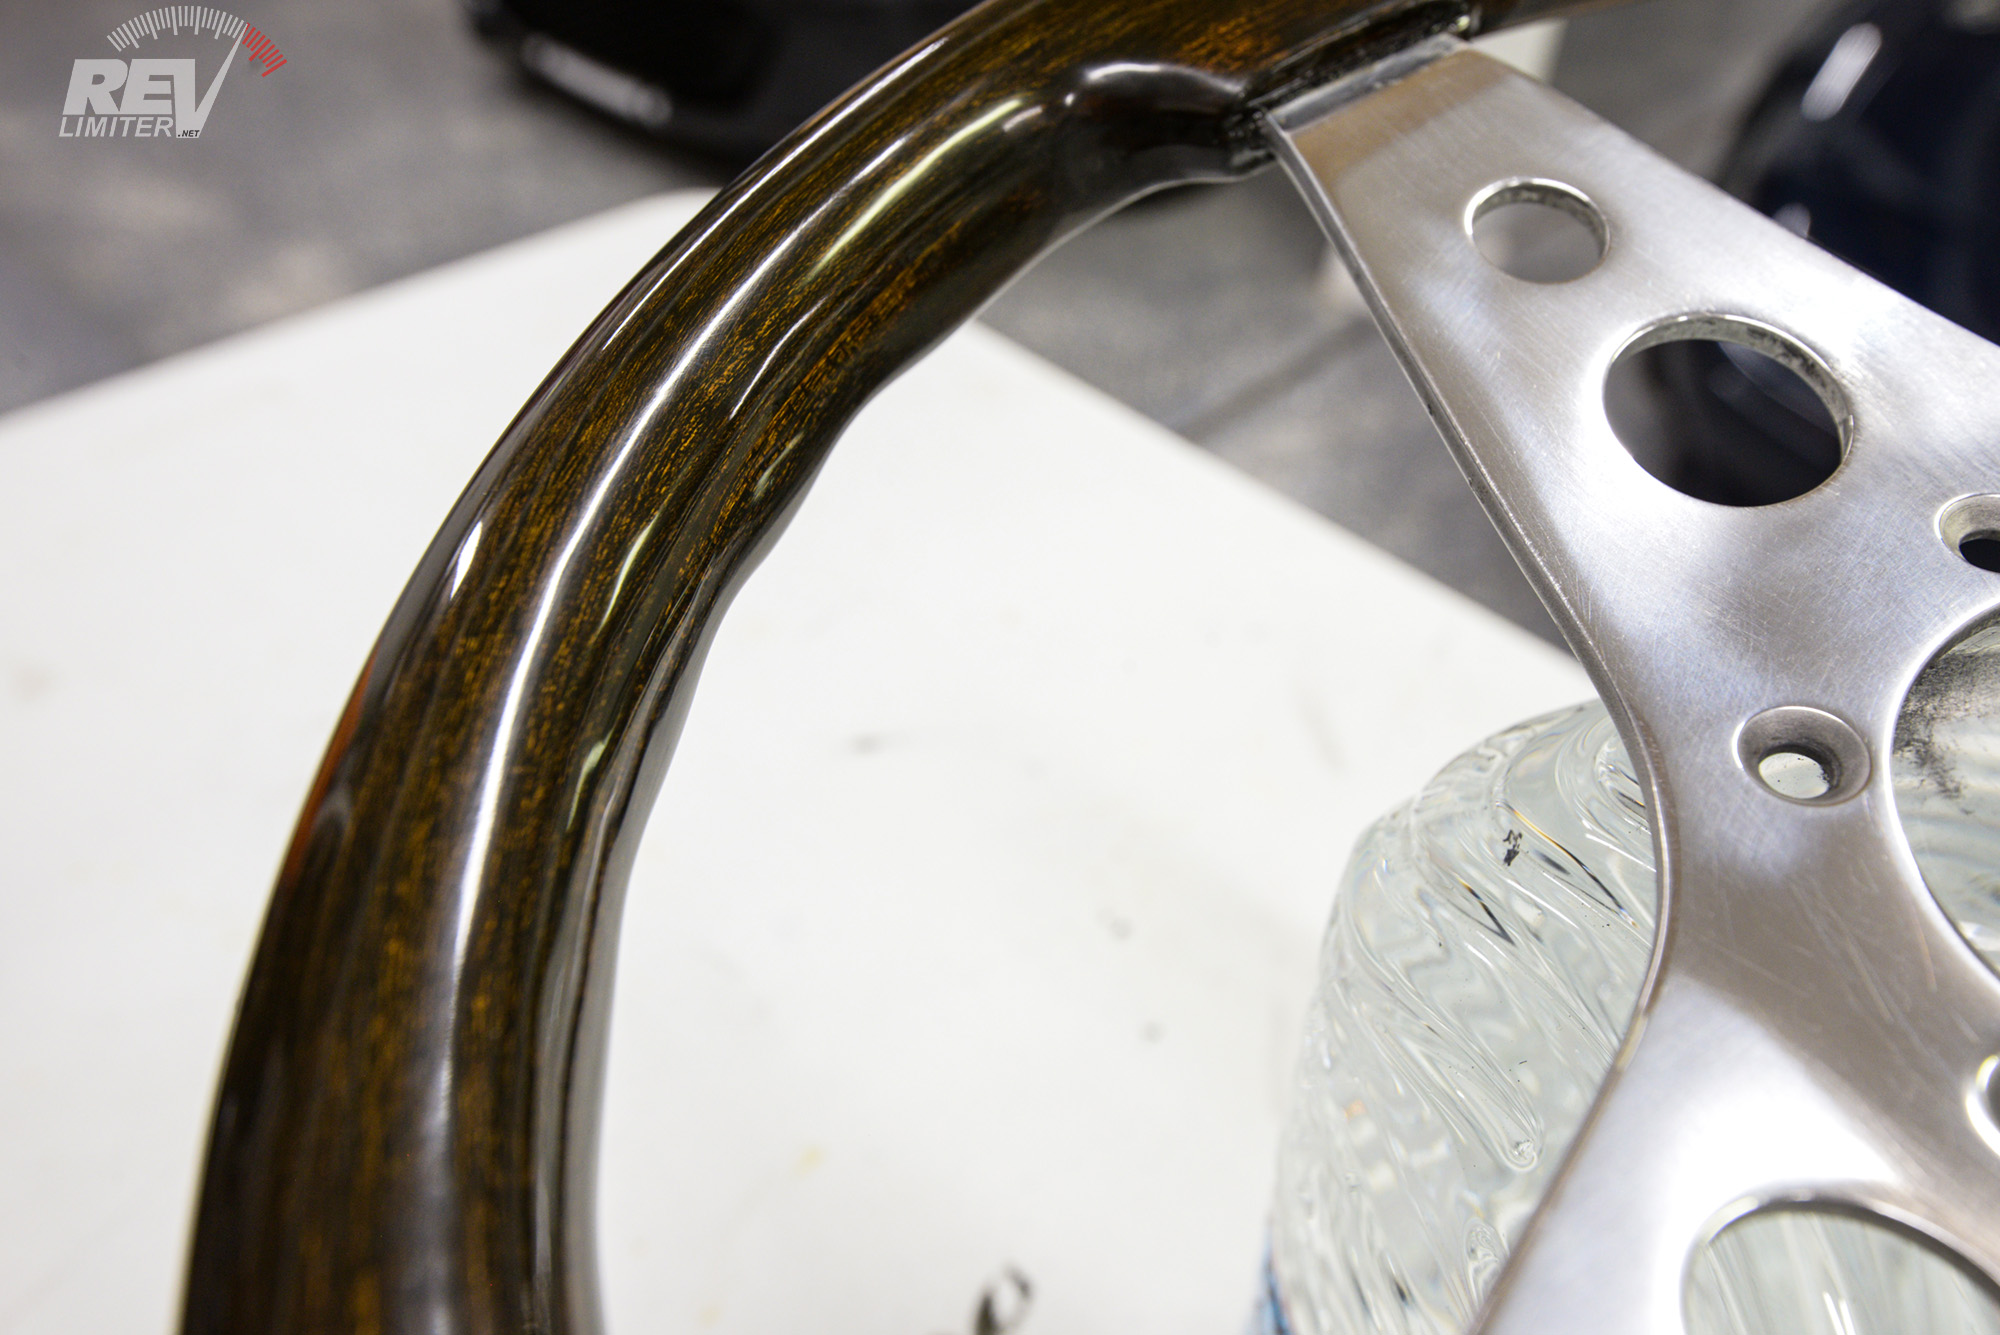
It’s glass. It feels otherworldly to touch.

Finished.
Finished.

Finished.
Finished.
Like I said above, I tried to listen to the wheel and not impose too much of my own desire for perfection on it. It’s an old wheel and it felt like it wanted to keep some of its original character.
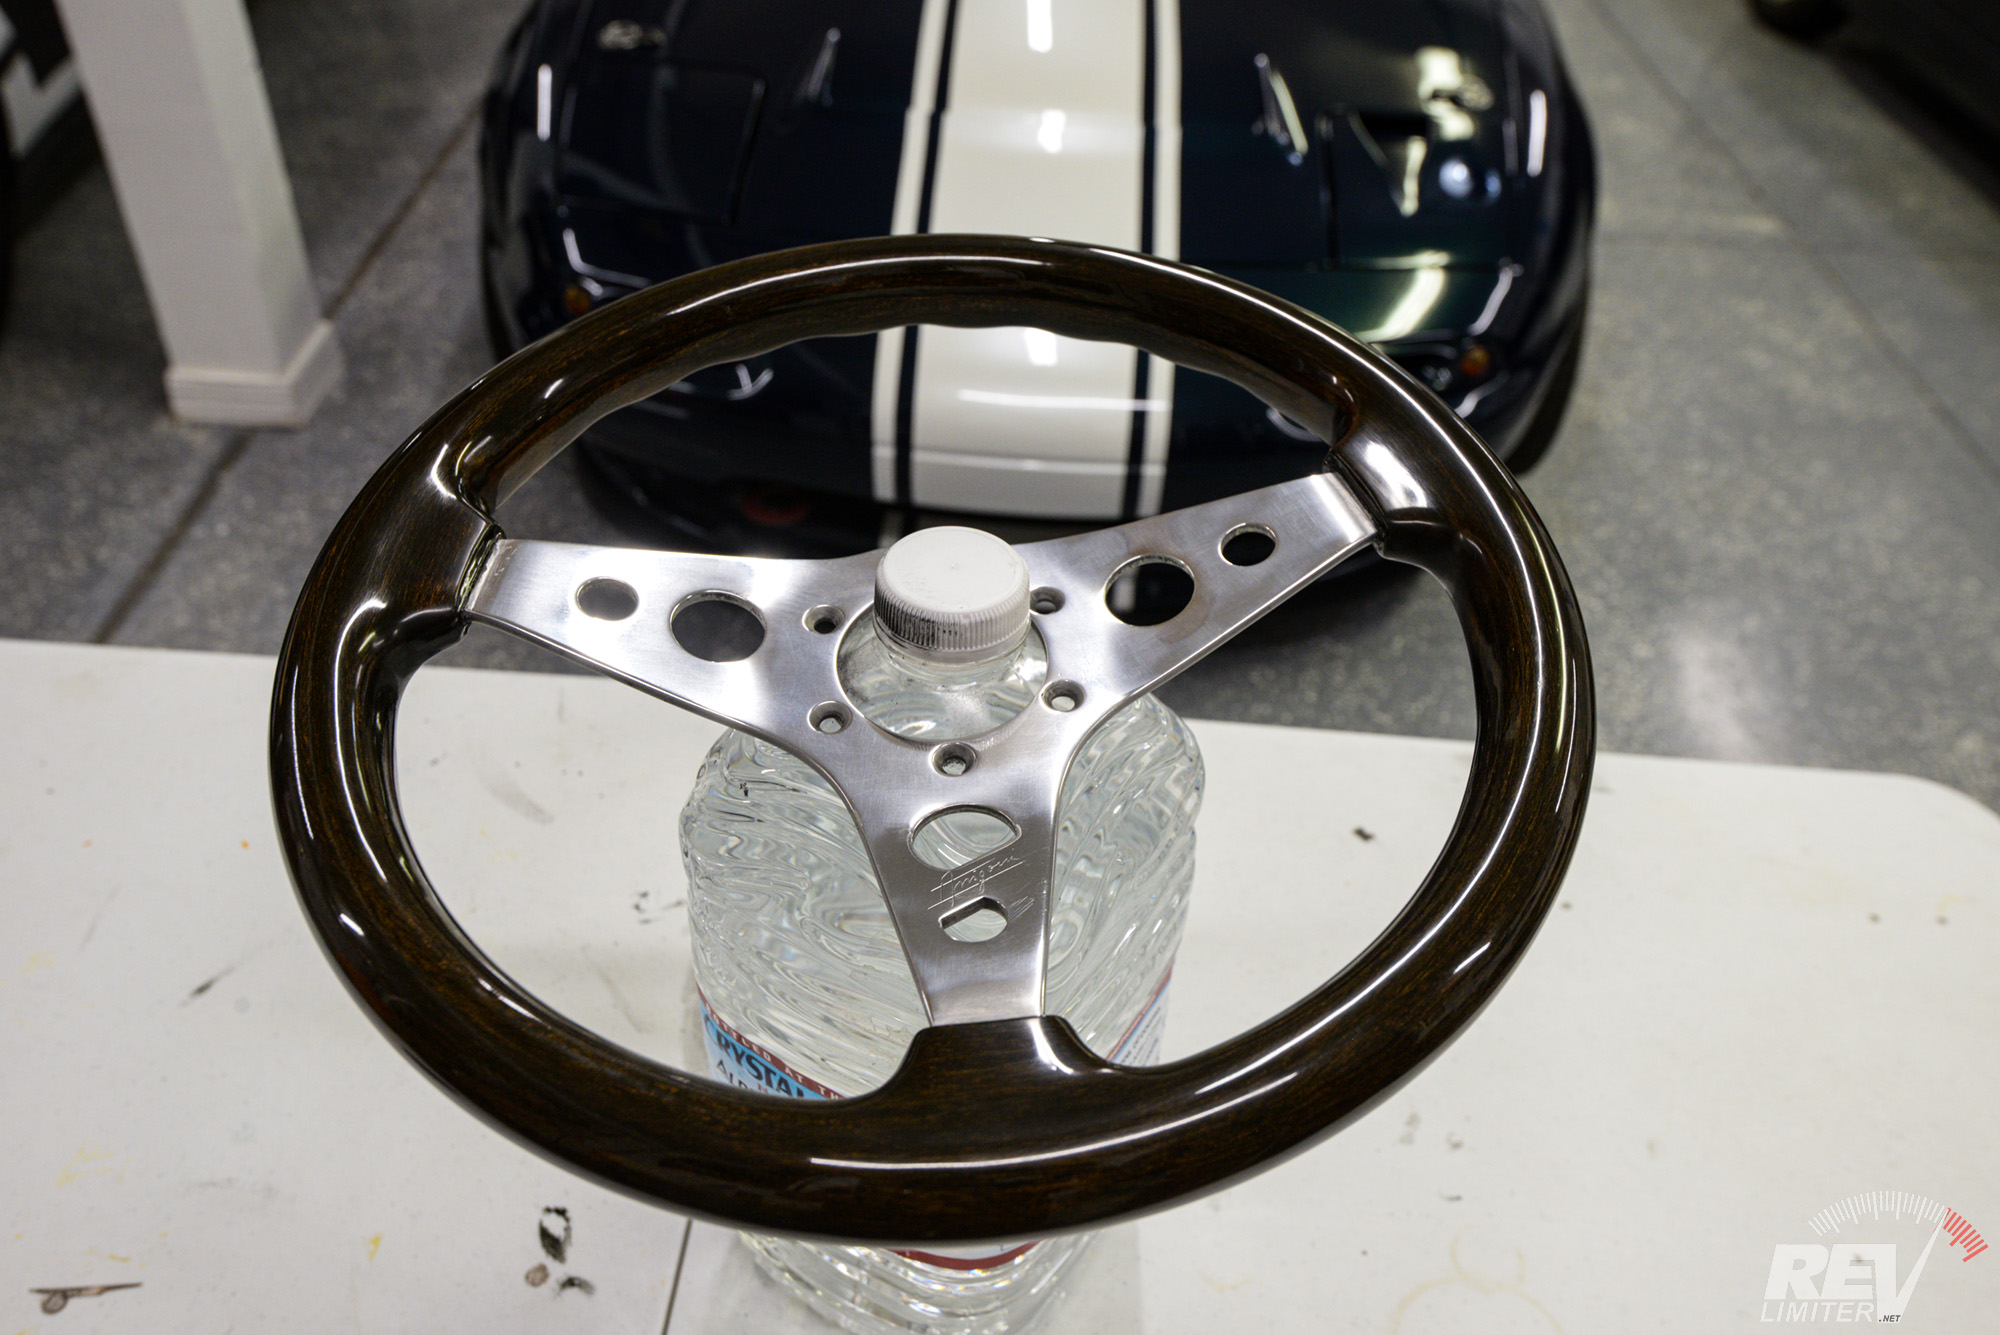
There’s a good bit of variation in the wood color. It’s very dark but shows reds and golds when the light hits it. And while the varnish finish is as close to perfection as possible, the subtle dips in the wood and small scratches on the spokes gives it a nice vintage feeling.
But really, it’s all about that perfectly smooth varnish surface. Like holding glass.
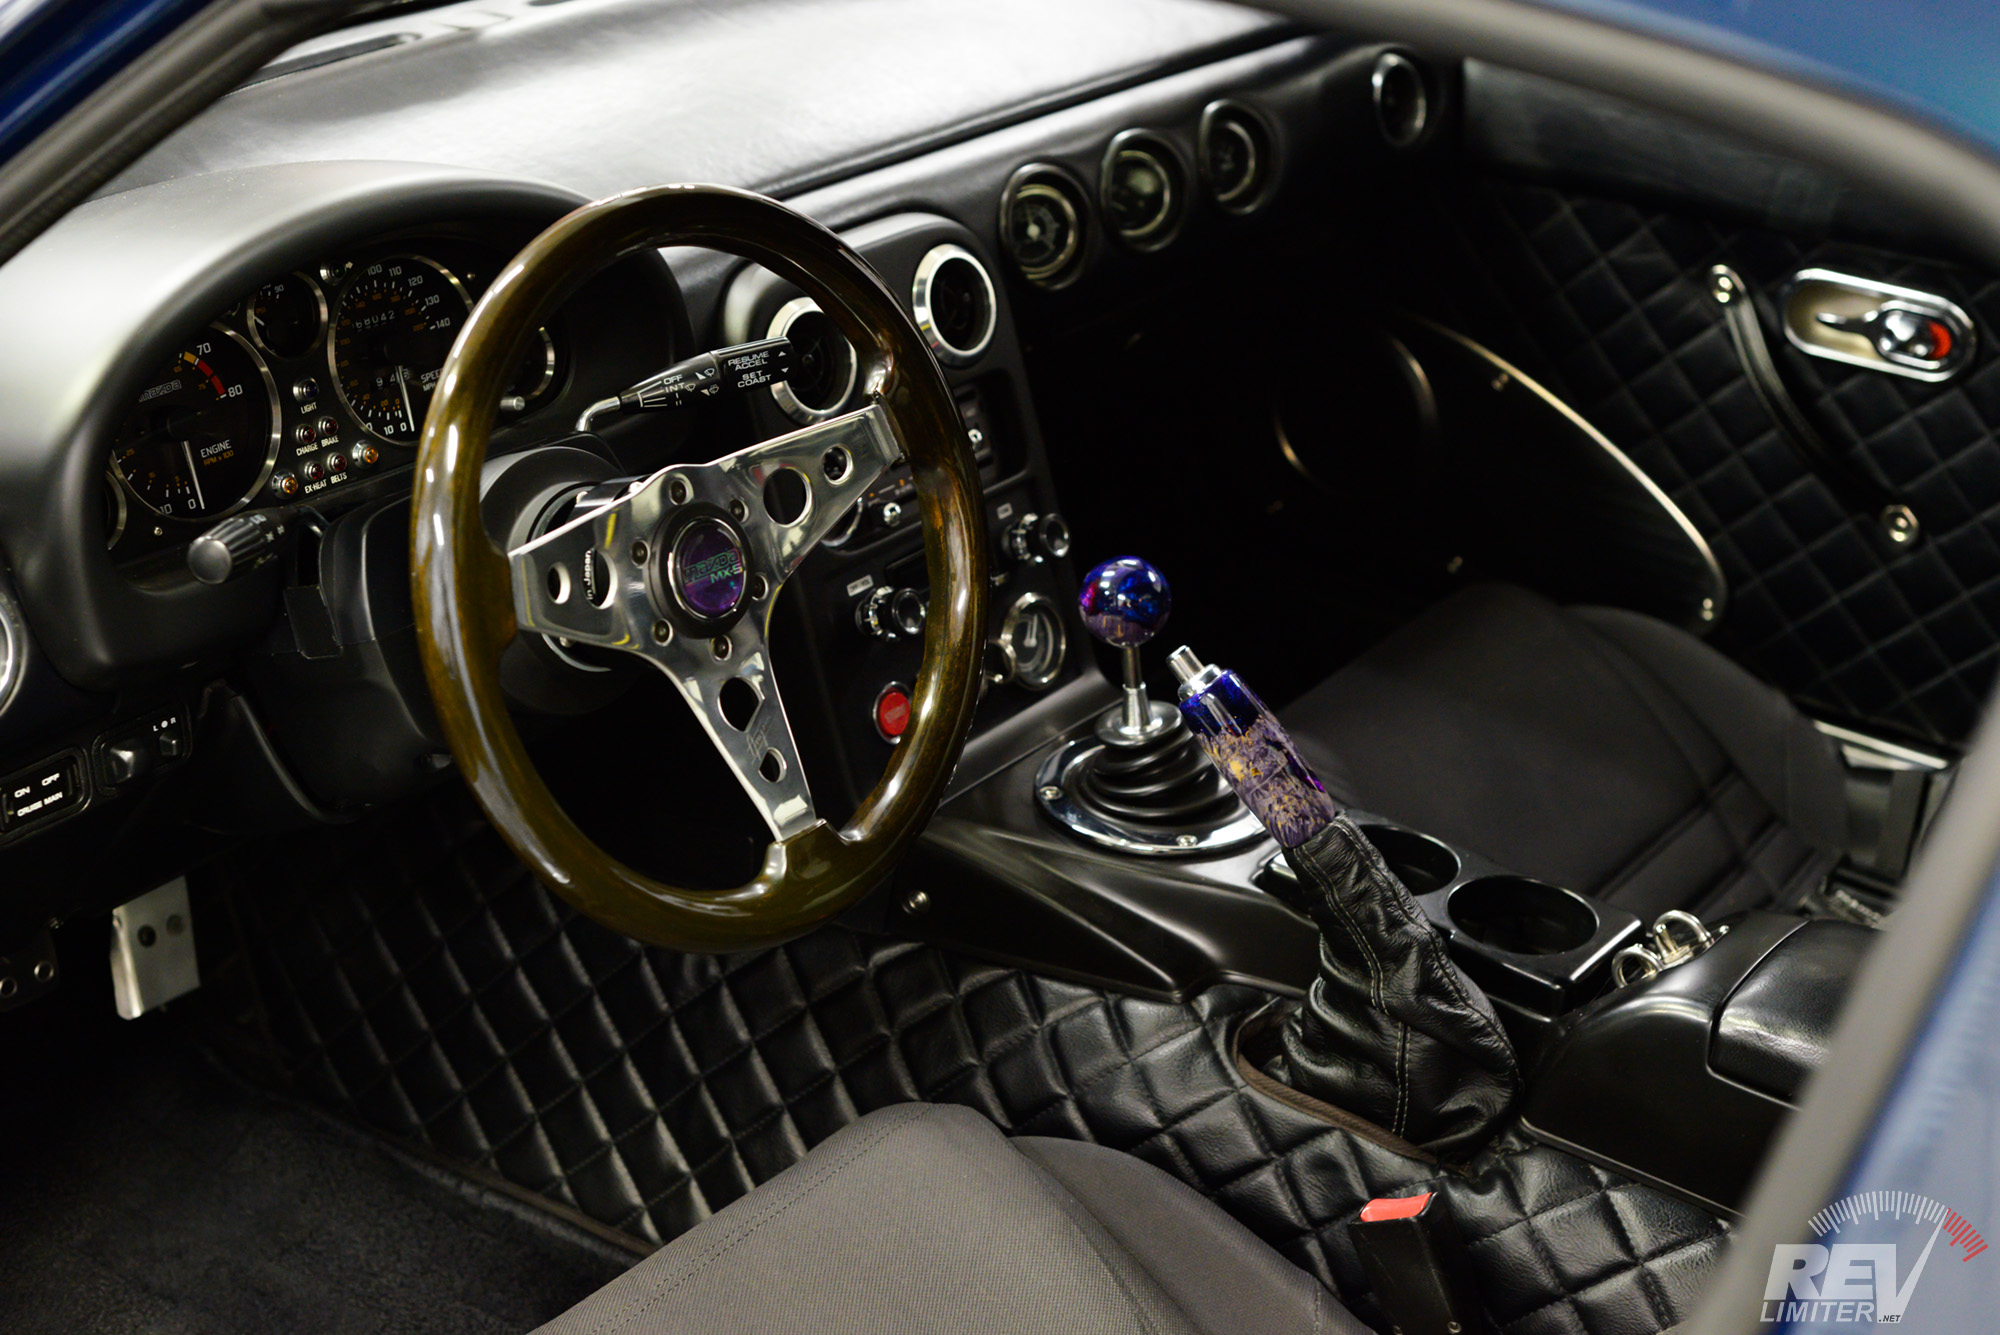
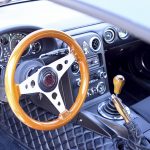
Installed.
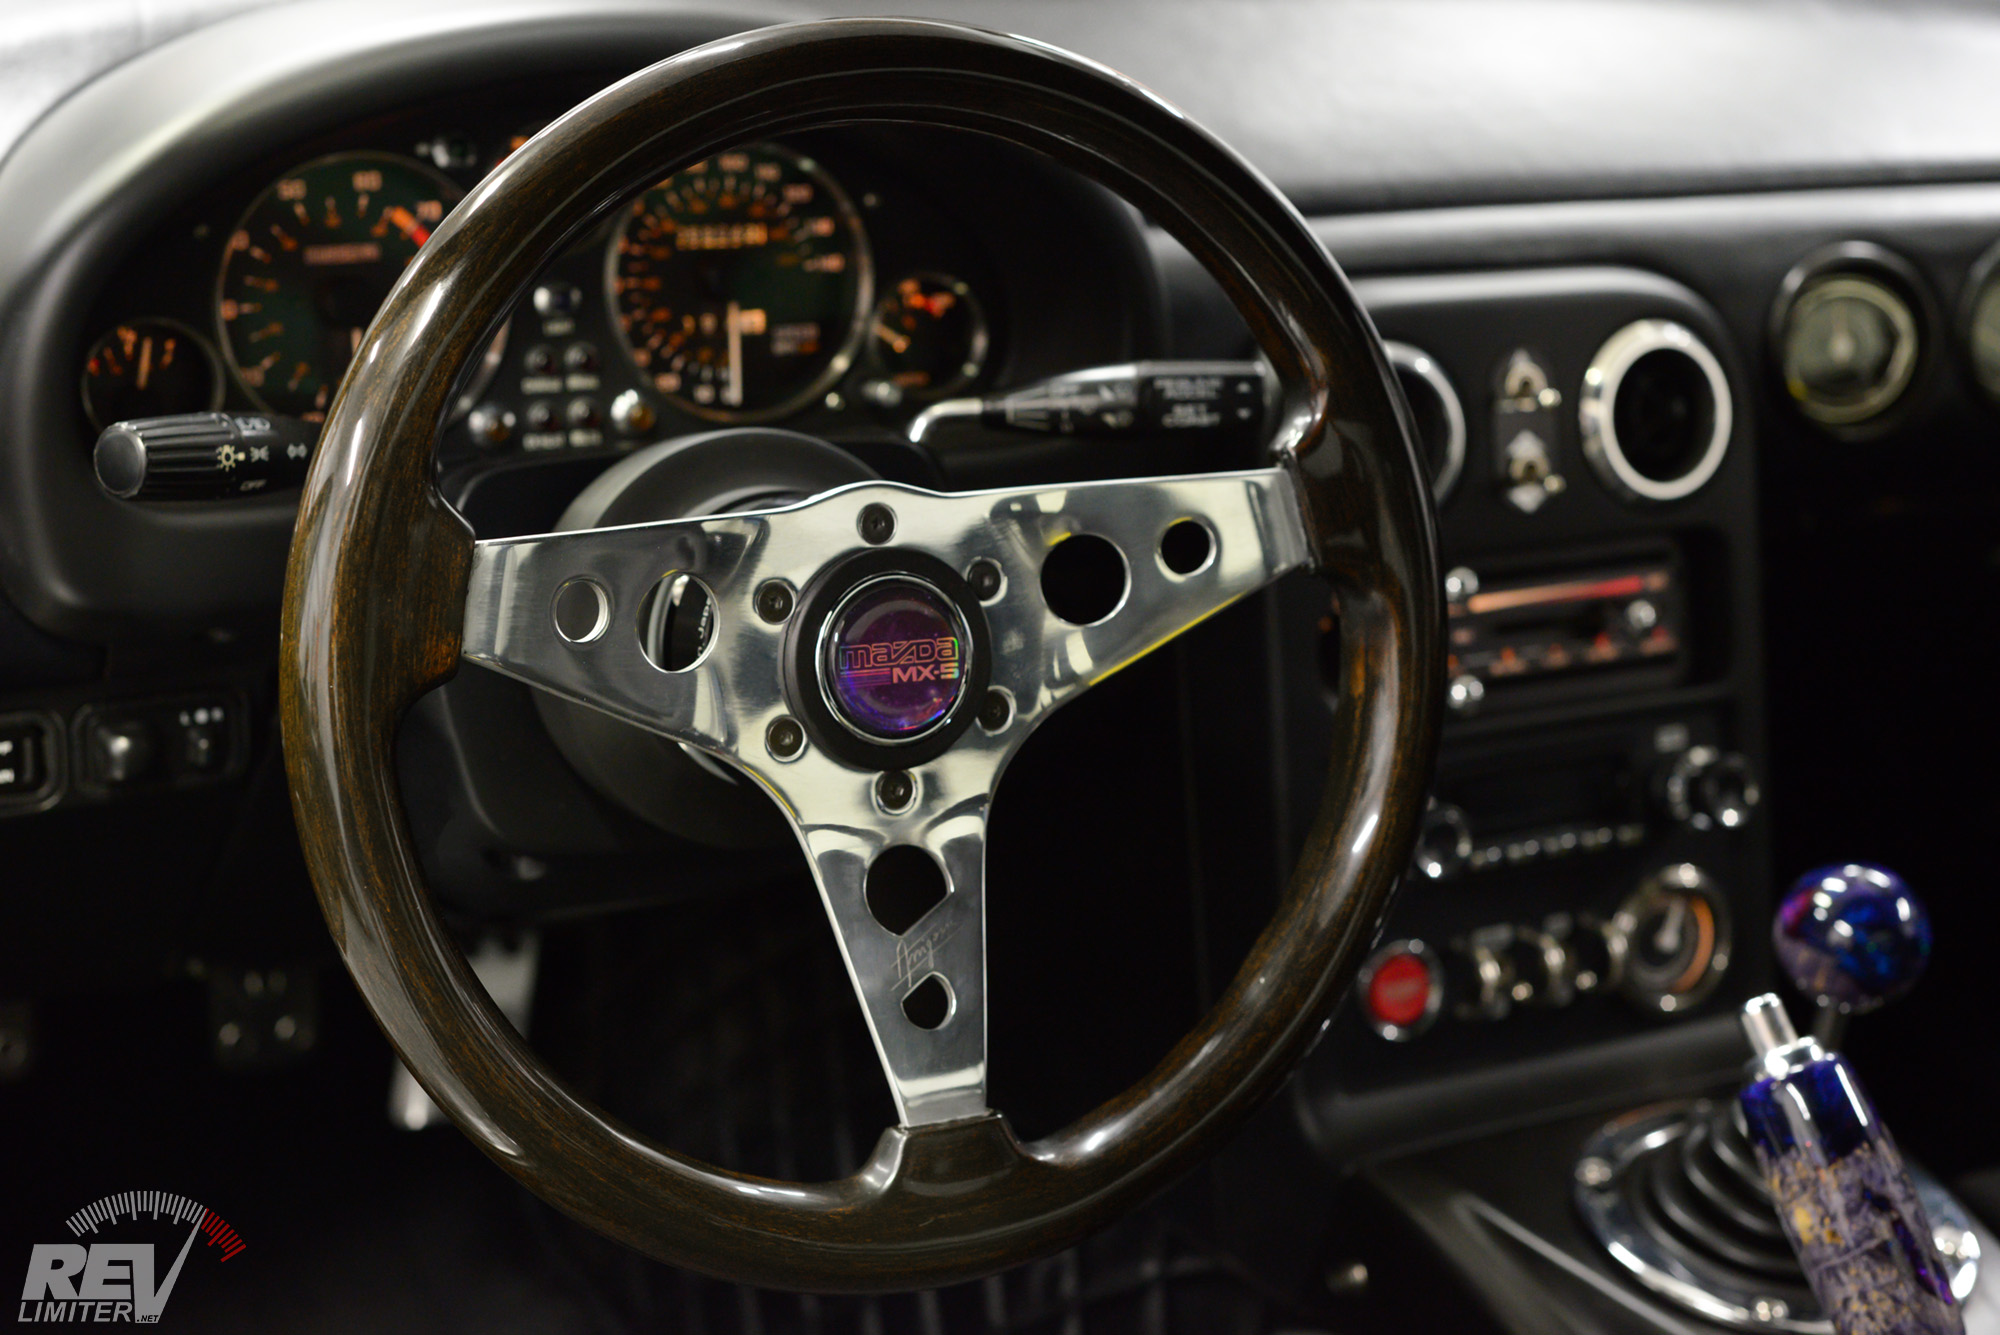
Perfection.
I’m very very pleased with how this project turned out. The Arigorni now matches Sharka’s interior well, yet retains a very unique color. Most of the time it just looks like ebony wood, but then the sun hits it and there’s a hint of gold sparkle. Lovely.
And perfect with my Form Function Wood shift knob and brake grip!
Lastly, I should mention how long this project actually took. I started back in May. The first photos were from May 11. Right now, as I’m writing this, it’s 12/23. Two days before Christmas.
Seven months to refinish a steering wheel.
2020 has been an insane year. I’ve been blessed with (and crushed by) an overwhelming volume of orders all year. I haven’t had much time away from making gauges and filling orders to do projects like this. But I made it through. And I sincerely thank everyone who helped keep my little business flourishing in 2020.
Here’s to 2021. May it be a little kinder to all of us. And may we all have epic steering wheels to hold when we can all go to race tracks again.


Wow! Just all the wow I can probably muster at any given moment. This is taking it to the next level – again! I‘d soooooo love to see that in the wood
It really complements Sharka‘s interior, doesn‘t stand out but still just catches the eye. Very well done, indeed!
Very merry X-mas to you and your loved ones and everybody else!
This wheel just looks so JDM, I don’t know how to explain it better than just “it’s the msot JDM looking steering wheel I’ve ever looked at”. Great job once again !
And merry Christmas !
There is a lot to unpack here and even more to love. I’ll pick two to highlight. Your patience is inspiring. And my favourite part of this project is the voice you let the wheel have throughout the process. If you listen closely you can hear the wheel speaking, even now, in the photos. And that is something to behold. Well done, Sir. Well. Damn. Done.
Wow, I haven’t done anything with my own hands for a long time, but when I saw your wheel, I really wanted to! It looks perfect! I really fell in love with him, now when I look at mine, I urgently want to change it)) I think I will do something similar in the near future) I just want to do something with my own hands, otherwise, I will soon forget how it is!) So I want to wish everyone a Merry Christmas and wish everyone health, this is the most important thing now. And what else would you all be hungry! And they were never sad! Thank you for the article!
Thank you!!1
Wow. Just Wow. A lot of work and lessons for others on the process and getting the right product to start with.