
The good stuff.
This is something I’ve meant to get for a while – the MiataRoadster Short Shift Kit. It’s one of those kits that garners universal praise, especially from MSM owners. You’d be very hard pressed to find anything less than a rave review of this kit. According to the internet, it transforms the already-great Miata shifter into an instrument of sublime precision and grace. With rainbows. And perhaps ponies.
I’ll be very honest – I’ve always found the praise hard to believe. SO many gushing reviews on this thing… it seemed impossible that it could improve things that much. I mean seriously, the Miata shifter is really really good from the factory. Journalists constantly sing the praises of the OEM shifter. It’s widely regarded as a benchmark to measure all other shifters by. HOW could it be improved?
Not to spoil the ending or anything, but the shifter actually can be improved. Bill Wilner, owner of MiataRoadster, found a way.
MiataRoadster Short Shift Kit
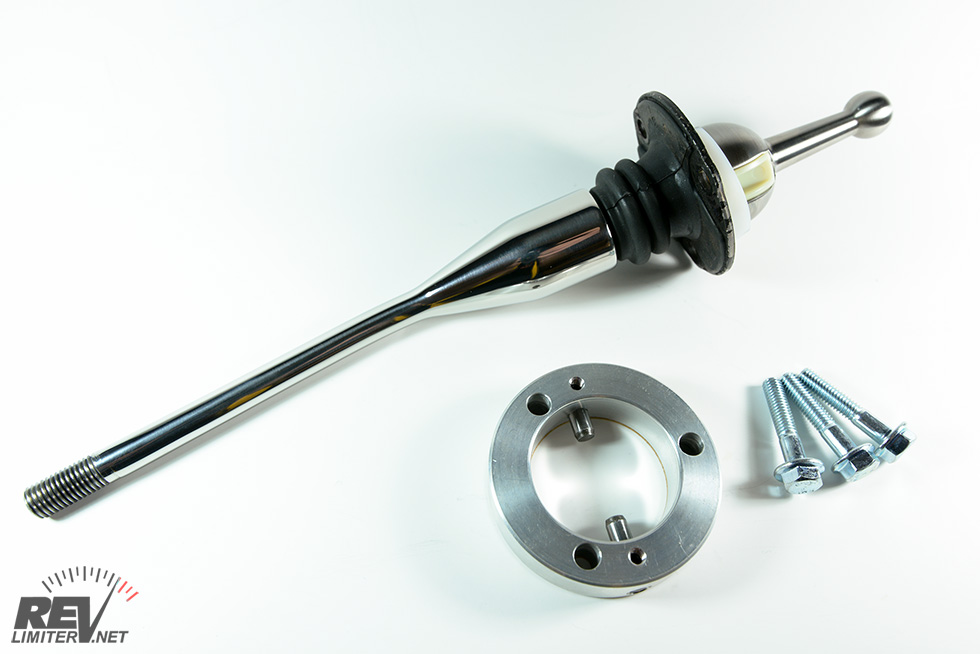
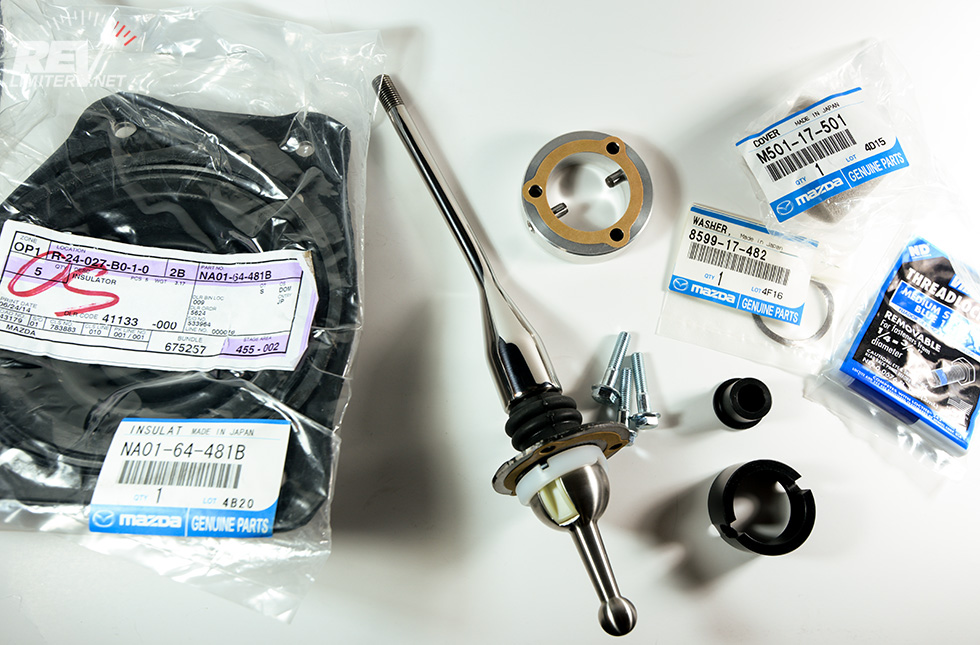
The photos above show the shifter kit. Notice how incredibly complete it is. Scads of OEM parts are included; everything you need to completely replace your shifter. It would be a great kit just with the aftermarket parts (shifter, metal spacer, new bolts, and the two black delrin pieces), but Bill goes the extra mile and throws everything in. EVERYTHING.
A bit of info before I forget and start typing about the install – this is a true short shifter kit. The fulcrum is raised (note the extension collar), thus reducing the throw on the shifter. This means you can have an extended shifter that has roughly the same throw as the short OEM stick. And that’s pretty awesome. It also comes as you see above, with the shifter already pre-assembled (I think there are 6 pieces that make it up) to keep install errors at a minimum.
Sharka’s short shifter is the tall angled version. It has a thicker shaft just like the OEM shifter to hold the shift boot in place. There’s also an option with a standard height shifter and one with a 10mm shaft all the way down to work with a bootless console. I admit, even after having ordered and installed, I still want to try some of the other shifter options.
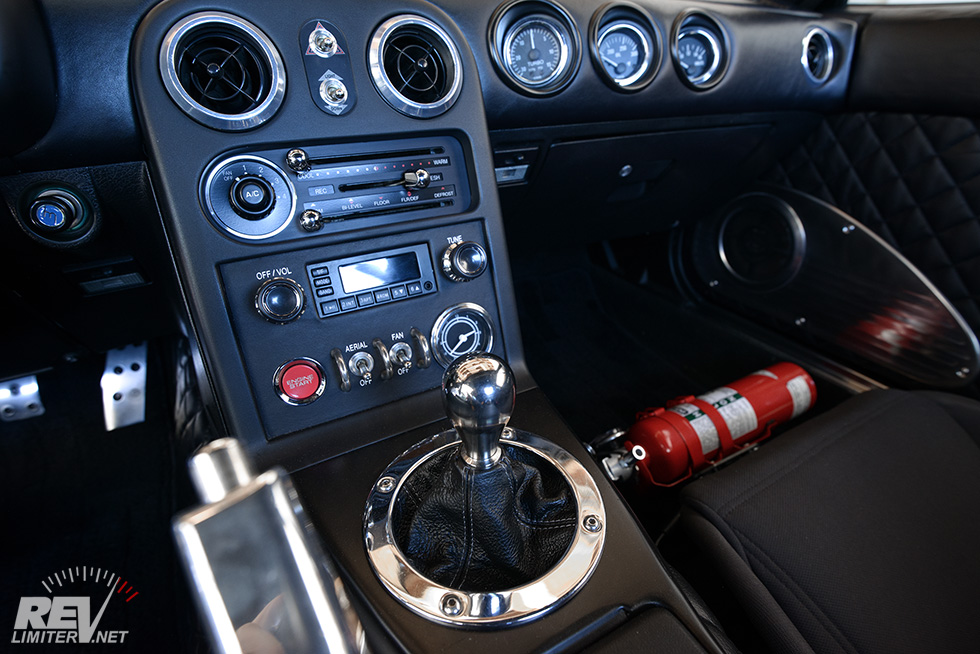
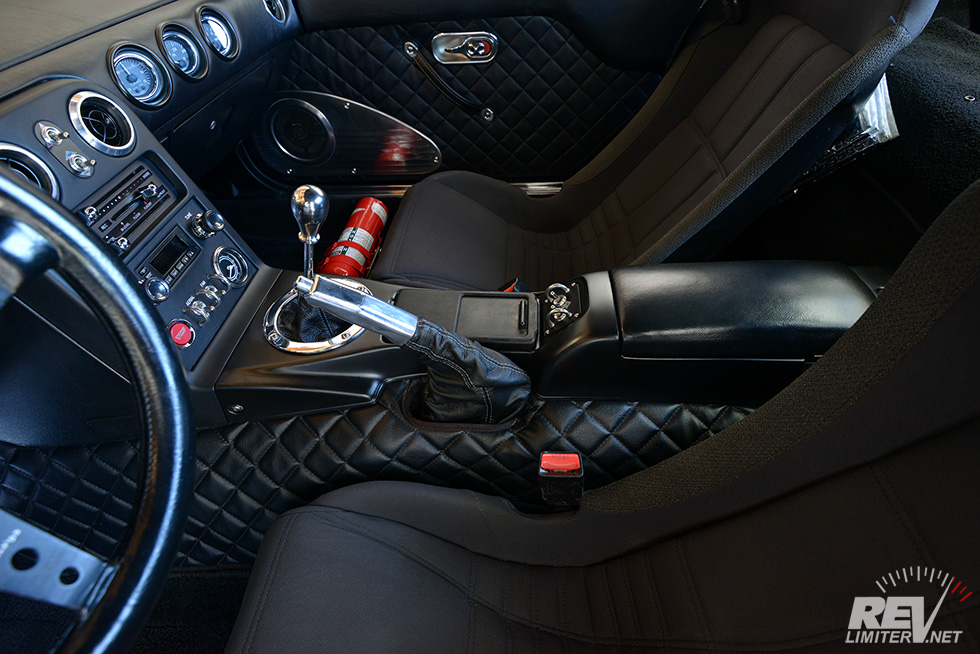
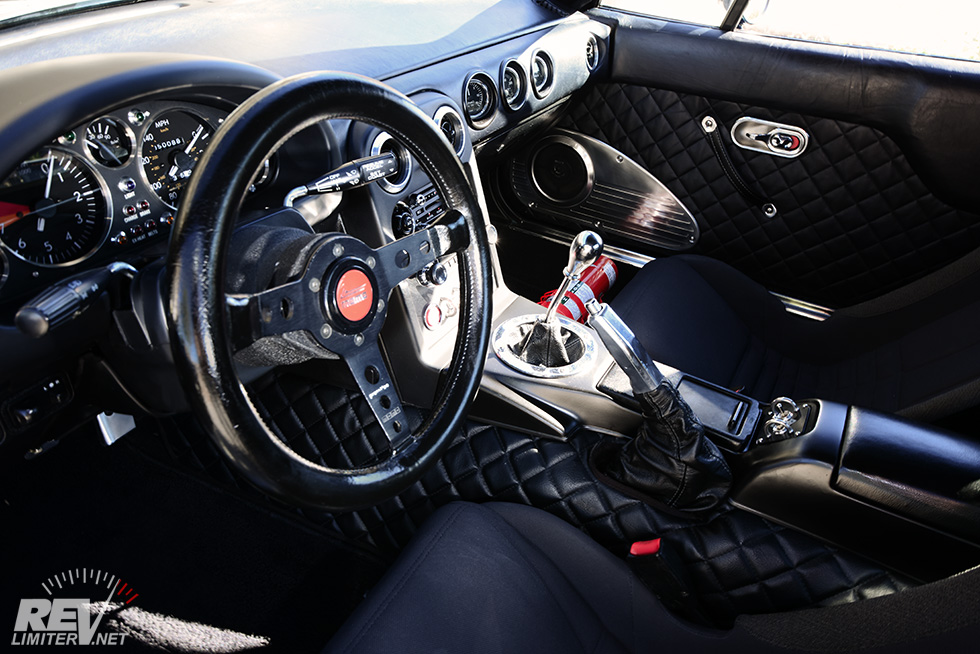
Instead of the standard 30 degree angle at 9:00 (toward the steering wheel), I asked Bill to make mine with a slight (10-15 degree) angle backwards (at 6:00) and away from the console. It was something he’d never done and he very kindly agreed to give it a try. The result is in the photo above.
Onto the install!
Install
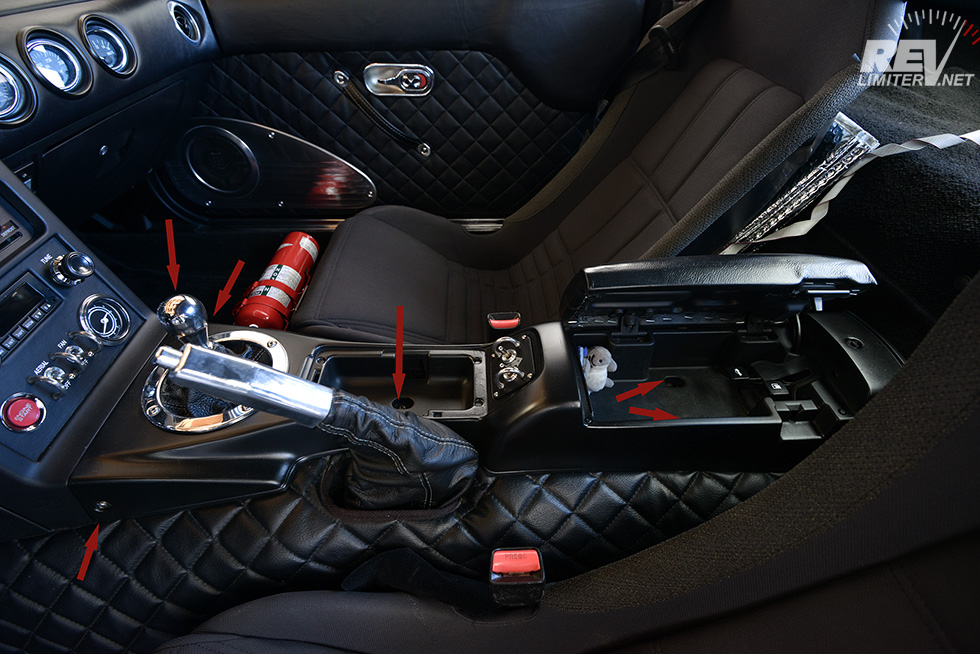
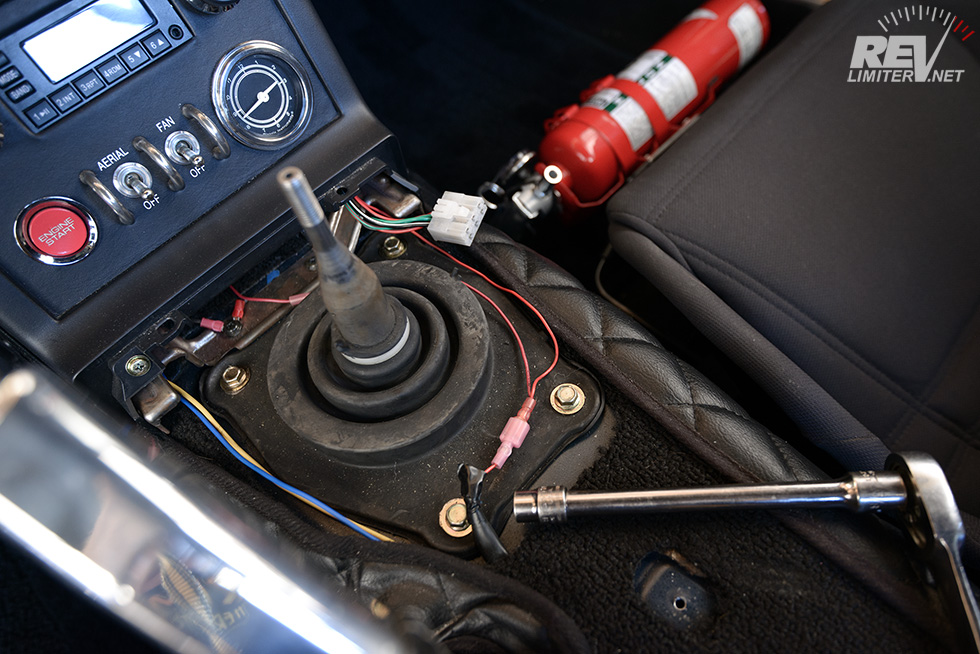
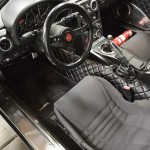
The Before photo
Remove 5 screws and a shift knob, then remove the console.
I’m very proud of Sharka’s interior. I’ve spent tons of time working on it and researching new stuff to try. Literally years worth of time. But there’s room for improvement. There’s always room for improvement.
After all, a shark has to keep moving or it will die.
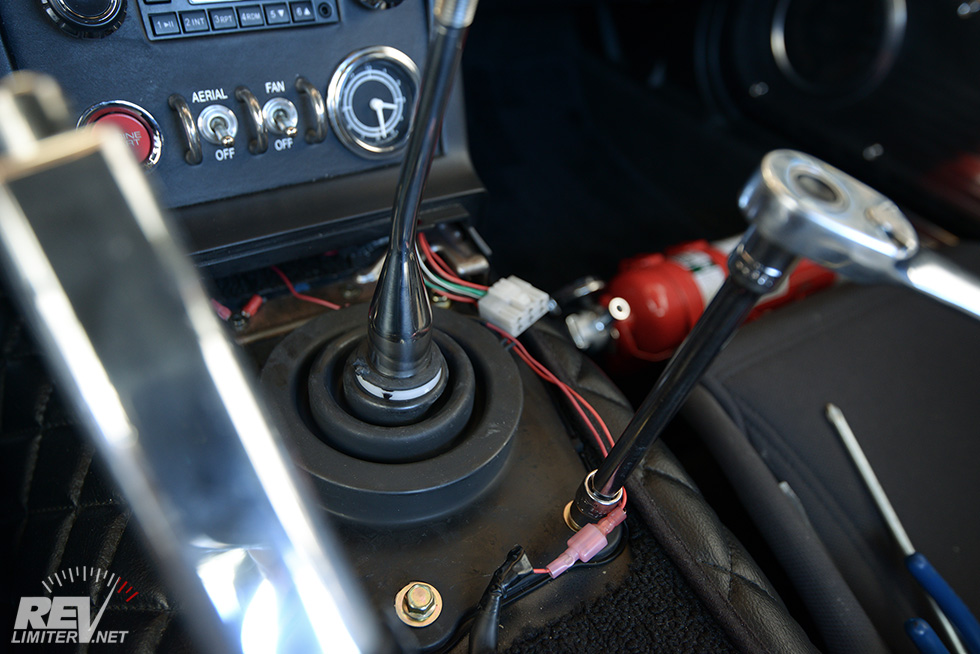
Remove outer shift boot. 4 bolts with 10mm heads hold it in.
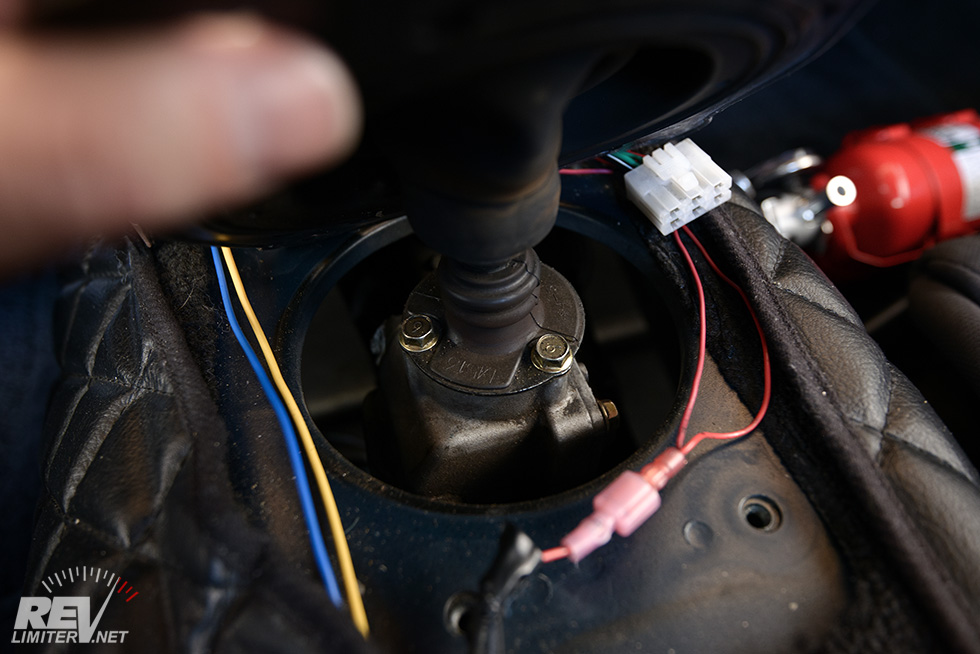
Three more 10mm bolts hold the shifter in place.
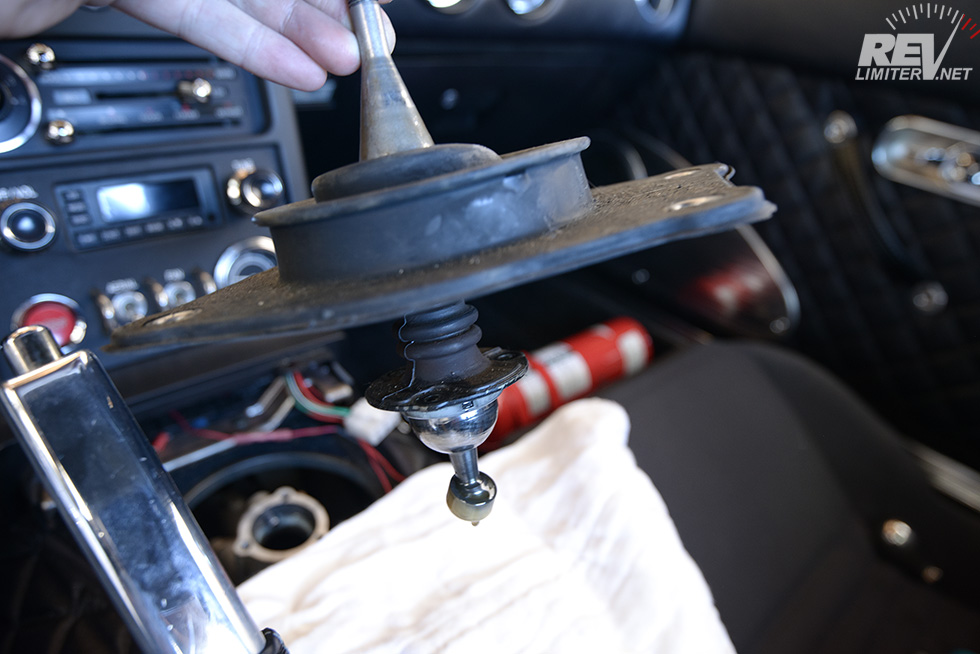
Just lift the whole thing away from the transmission tunnel. Keep a rag handy to catch any drips.
I’d be lying if I didn’t say I was pleased that my shift boots were not all torn and ratty for these pix. I think I changed them 4 years ago.
These steps are probably nothing new to 90% of the readers, but I thought I’d include them anyway.
Drain the shifter oil.
Draining is optional, but recommended. I mean, you COULD do this without draining the shifter… but why? I’m not into mine very often. I drain and refill mine every time I change shift boots, which is about every 4-5 years.
A note on the turrets: on NAs, the turret is a separate chamber from the transmission, but on NBs they are connected. So, NB owners- if you’re due for an transmission oil change, you can refill the transmission oil through the turret and avoid the hassle of pumping oil into the side of the transmission from under the car.
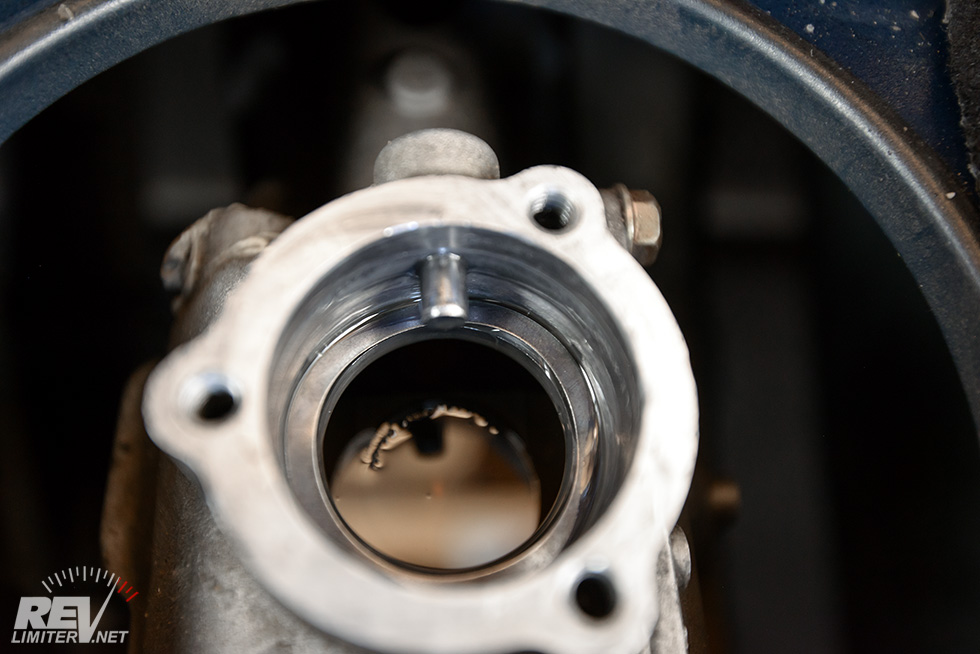
Check that the old tip bushing is still intact, attached to the end of the removed shifter. If not, see that no pieces of the bushing are left in the turret.
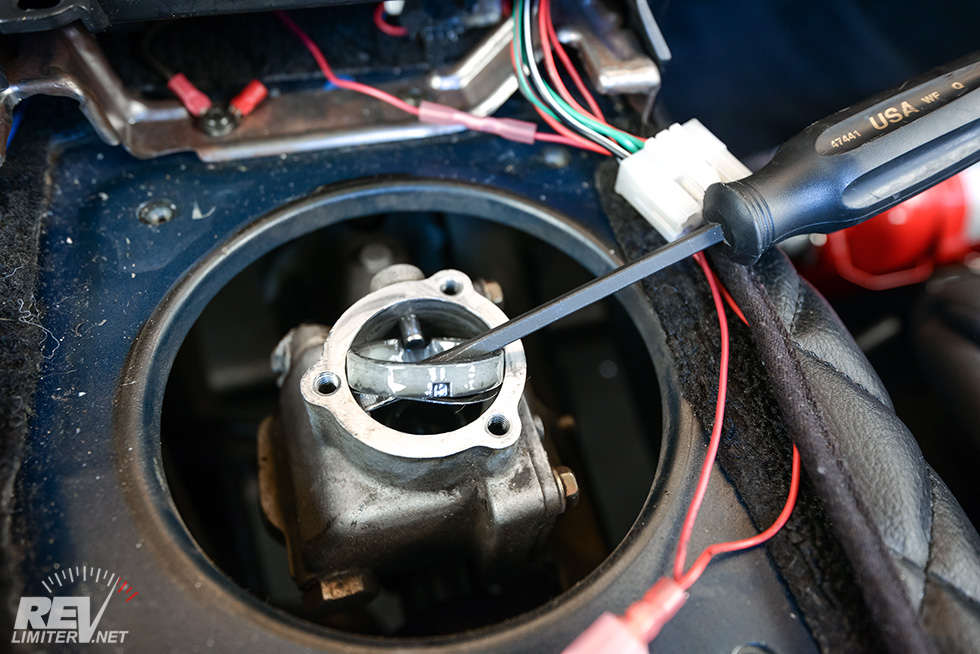
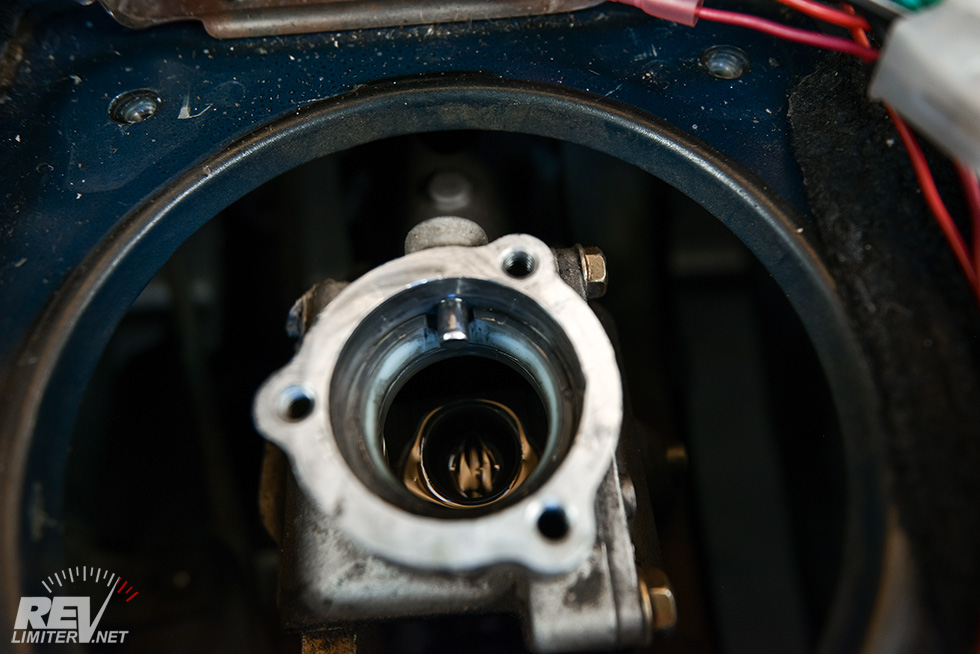
Pop out the round lower plastic bushing and spring washer. Be careful not to scratch the I.D. of the turret.
I honestly never knew there was a plastic spacer or spring washer down in the shifter turret hole. I’ve never dug into a transmission much. But they were quite easy to remove. Prying (GENTLY) directly back at the 6:00 position got mine out with no effort. I rotated the screwdriver a bit for the photo.
Bill explained to me that NB transmissions have two dowel pins trapping these parts beneath them. On NB transmissions, the best way to remove them is to tap a chisel or flat-blade screwdriver at 12:00 and 6:00 and split the plastic bushing into two pieces. New replacements for the bushing and spring washer are included in the kit. Be careful not to scratch the I.D. of the turret. Gouges on the walls of the bore could restrict the free up-down sprung movement of the Delrin slotted tube that supports the shifter as it goes through its motions.
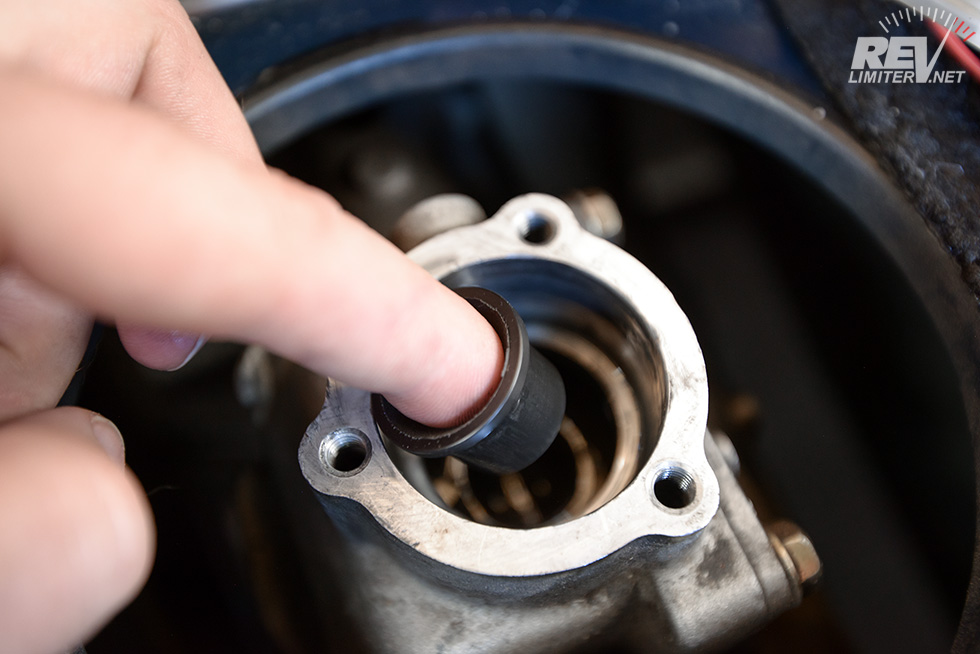
Use a fingertip to lower into place the Delrin shifter tip bushing.
Wiggle the new spring washer into the turret beneath the dowel pin.
Really nothing to it. The spring washer is very easy to install in the NA transmission. NB transmissions have two dowel pins (at 12:00 and 6:00) so the replacement spring washer has to be wedged in from the side, beneath both pins.
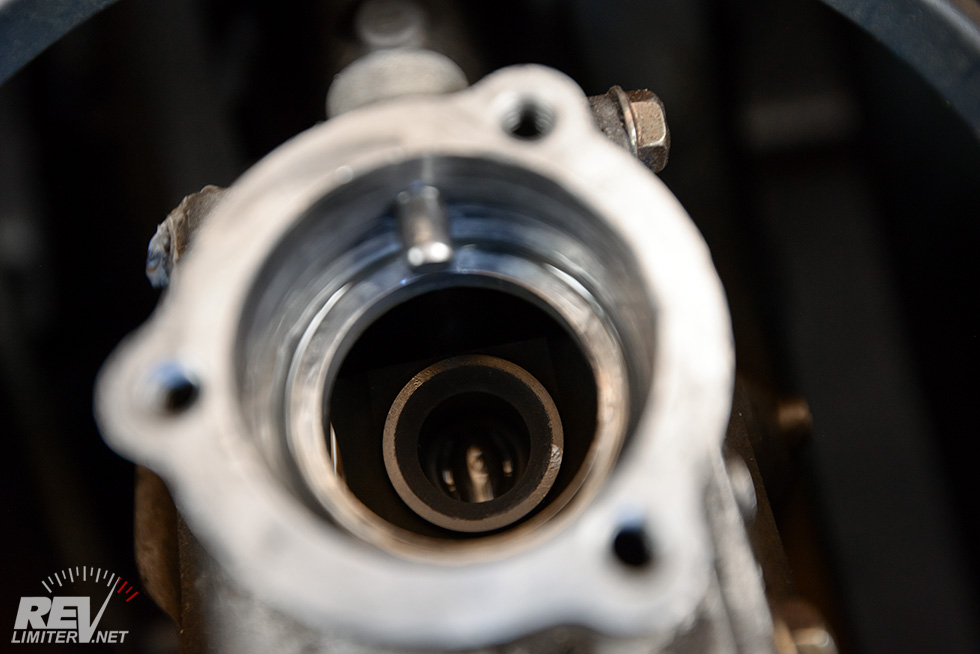
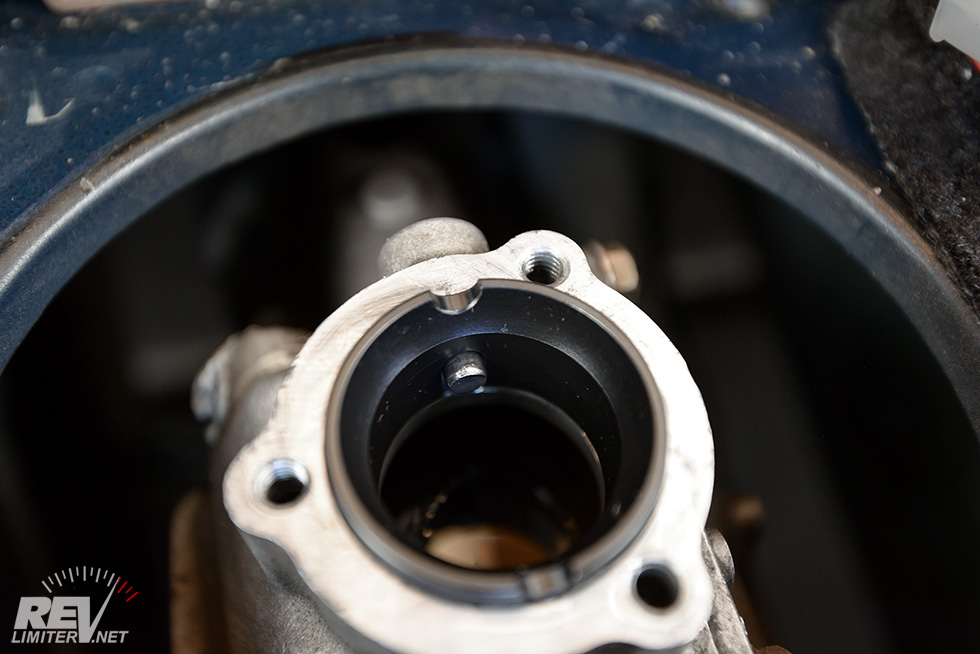
Fill the turret with oil.
The correct level. You can BARELY see the black Delrin “top hat” tip bushing under the oil.
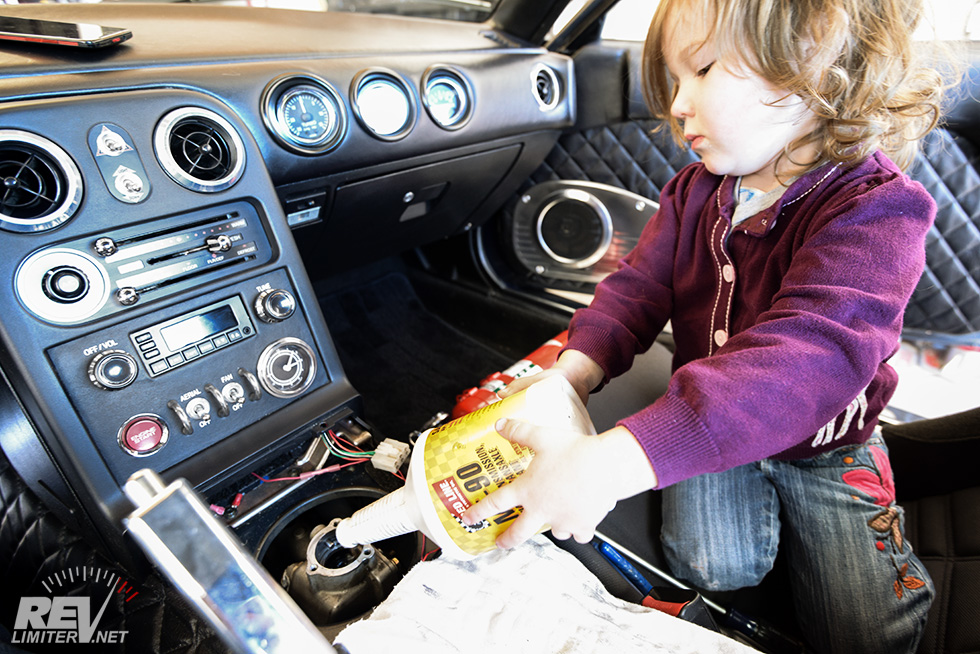
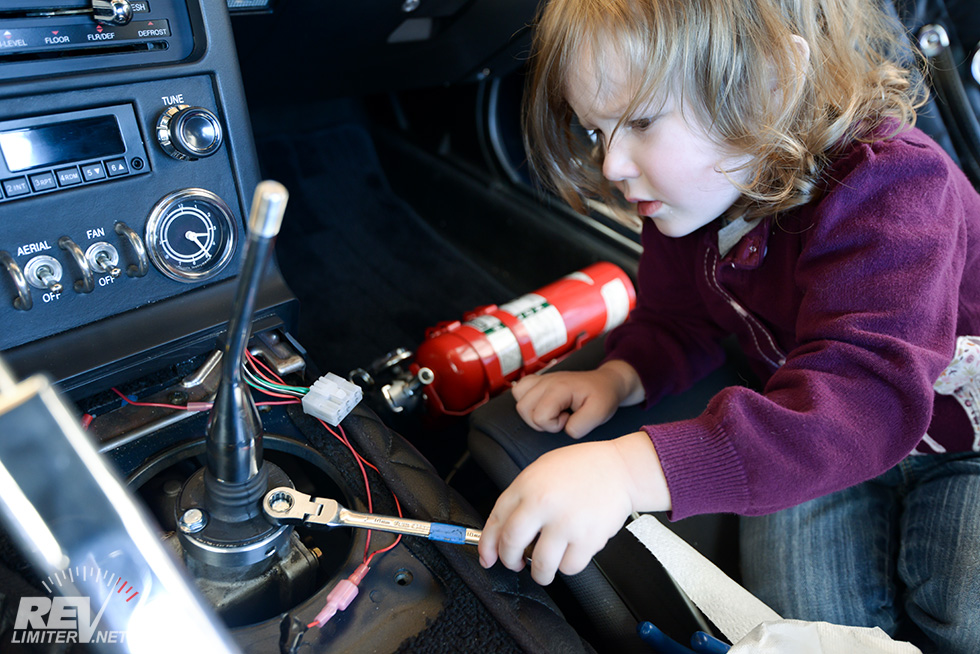
My assistant finally let me get her picture. She runs all over the garage when I work on Sharka. Usually, she works on Bucky while I fix/break/tinker with Sharka. Today, it was a daddy/daughter project.
And yes, I let my 2 year old have gear oil to pour inside Sharka. She didn’t spill a drop.
Install the Delrin slotted tube. It only goes one way.

Then install the spacer collar. It has a new Mazda factory paper gasket that Bill has pre-glued to the bottom side of the ring for you.
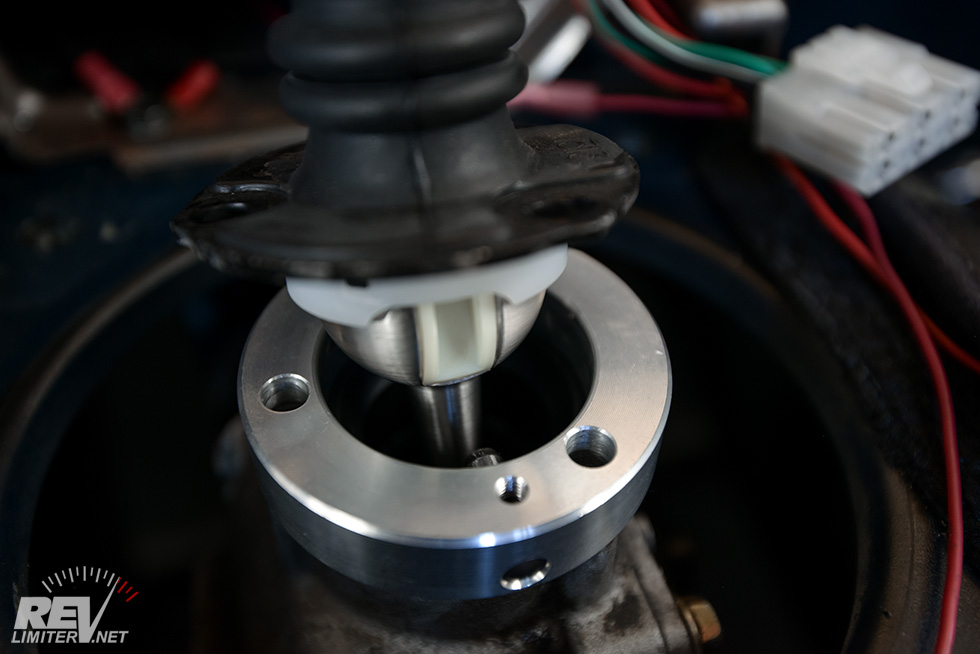
Lower the shifter into place, checking the the notches in the upper bushing are aligned with the dowel pin(s).
There’s really nothing to this. The parts only fit one way. These three photos show it better than I can type.
Almost there!
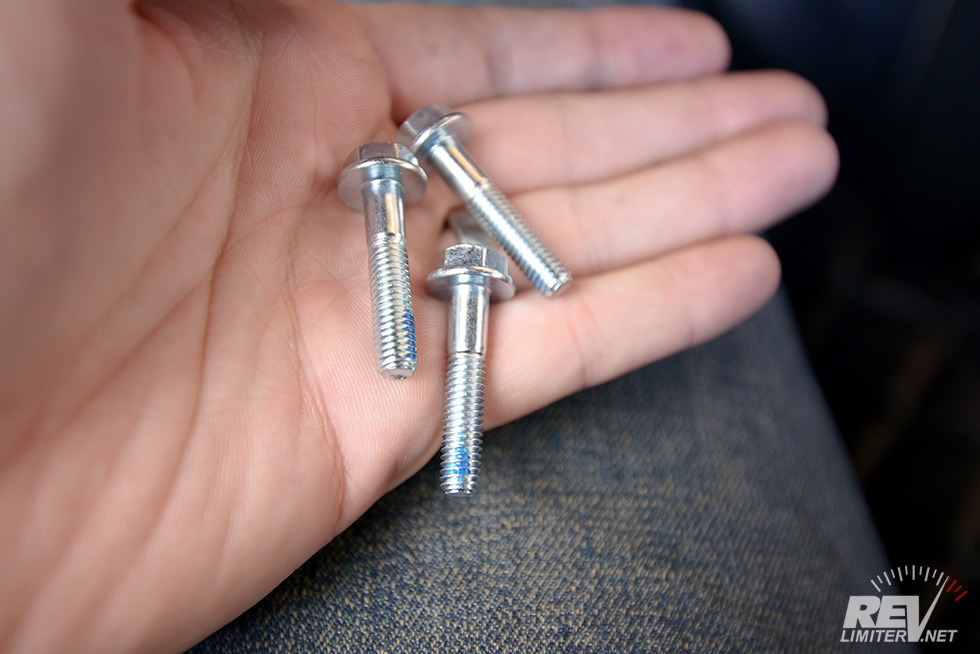
Apply a drop of the included blue thread lock onto each of the three Grade 10.9 bolts.
Torque them down gently.
Install the new Mazda factory upper dust boot.
My torque wrench beats your torque wrench.
But seriously, you don’t wanna go crazy on those three bolts. Tight is fine. If you use a small wrench like my daughter is, you shouldn’t be able to produce too much torque. Leave the 3/4″ drive wrench in your box.
And that’s all there is to it. All that’s left to do is install the console and shift knob and go for a test drive.
How does it work!?!?
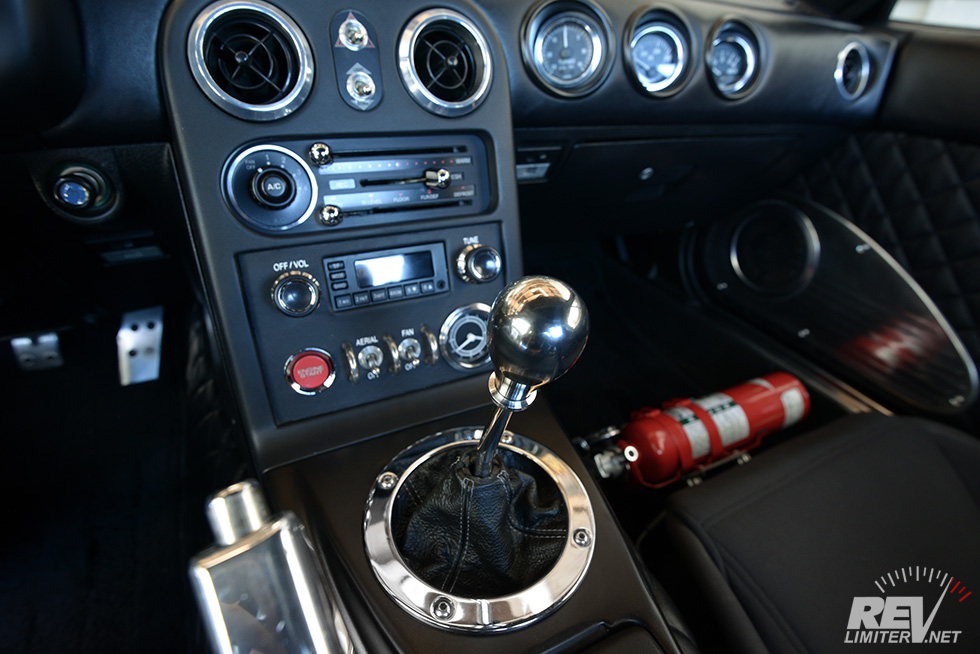
The new hotness.
I even like how the Joyfast knob looks on top.
I’ve had this installed for about a week. I’ve been stuck in traffic, cruised back roads, and driven mountains in a spirited manner. I’ve also switched between Bucky (equipped with a stock shifter and the same knob) to give a good control subject. I’ve not had a long time to test it, but I have had a pretty good test.
This short shifter kit takes the Miata shifter and just elevates it. Any notchiness goes away. Shifts are precise. Shifts aren’t really that much shorter compared to a stock shifter, but the shifter is 3″ longer. I’m saying that poorly, but I’m not going to backspace over it. Shift throw is roughly equal to an OEM shifter even with the tall shaft.
And the tall shaft is fantastic. It’s actually easier to reach than the stock shifter, which isn’t at all in a far-off location. The slight reverse angle on the shaft is also nice. The shift knob never gets too close to the console and 2nd/4th isn’t too far back.
It is, in a word, sublime.
The Scorecard
How did I live this long without it?
Build Quality: Wonderful. Every part is machined to perfection. Nothing fits too tight and nothing is loose. It is made equal to or better than the OEM part it replaces. A+
Kit Completeness: It is complete. Very complete. Nothing is left out. The sheer volume of OEM parts is quite surprising to me. I’ve never bought an aftermarket accessory that included so many OEM replacement parts. A+
Installation: Easy. A novice should have no problems. No tricks for any of it and no standing on your head required. A
Usability: THIS is the big point right here. Everything else could get A double-pluses, but if the kit sucks to use, the whole thing would fail. But it doesn’t suck. It deserves every bit of praise it has ever received. This kit takes the perfection of the Miata shifter and knocks it up a few notches. A++
Style: Completely subjective. Since you can order this kit with a plethora of different shifter sticks, style is what you make it. I’m totally in love with Sharka’s polished tall shifter, so I give it an A. And it didn’t get the plus because I’m thinking of adding a couple more shafts to the collection.
Overall: It could not get any better. This shifter kit lives up to and surpasses all the hype I’ve ever read. A+
Do yourself a favor and sign up for Bill’s next batch of shifters (batches are made each quarter). They’re more than worth the price. I really wish I’d bought one years ago. You can order a kit from MiataRoadster at http://MiataShifters.com.


NIce! You know that I love mine.
Thank you again for turning me onto this!!! It’s the best addition I’ve made to Sharka in a while.
So, maybe I’m a little dense. But why do they call it a “short shifter” if it’s taller than the stock one?
And, why the hell would you want to make it taller? If you’ve got a radio in the hole, it’s already hard enough to see.
It’s a short shifter because it shortens the shift throw. You could buy it with a factory-length shaft and it would be a much shorter throw than stock, but with about the same effort.
As for making it taller, just so you don’t have to move your hand as much between the wheel and shifter. Take a look at various rally and race cars. The ones with non-paddle shifters tend to have the stick very close to the wheel. That lets you get both hands on the wheel faster.
But for me, honestly, I just wanted to try out the tall look and see how it would be. And it is FANTASTIC, both in looks and in use.
Thank you for posting this. I’ve been putting off buying a shifter rebuild kit so I can purchase this setup. Great write up and review.
Glad I could help! It really is worth the price.
Gday great weblog! Guy. Stunning. Exceptional. I’m going to bookmark your site and use the feeds in addition? I am delighted to find countless helpful details with the actual upload, we would like develop a lot more methods for this reverence, thanks for discussing.
That would look even more awsome as a gated shifter! I would love to have that in my MX-5 some day, great review as always. And happy shifting!
The function may be there, but this thing is completely hideous to me. Maybe it’s my short legs in comparison to my torso height, but at my seating position, the stock shifter is exactly where it should be. I can’t imagine bringing it closer.
When it comes to apparent build quality and completeness of the kit, I’m on the same page. Glad there are well-made, quality products still being innovated for these cars. May that never end. 🙂
Bill at Miataroadster made a custom one for me, 1 1/2″ taller than stock and with a bootless stick, to wich I mated a 42mm stainless stell ball bearing that weight 800gr. The result is more amazing then you could dream of thinking you could maybe even imagine!
Okay, that sounds awesome. I might have to shamelessly copy.
Please send me pics of your install!
Bill
[…] […]
A good review.
What does the term “10.9 Grade” mean pertaining to the bolts? As there is no great torqueing to do then any old standard bolt should suffice.
A desirable and superbly made product but comes at an almost prohibitive price.
Check out this link. https://www.boltdepot.com/fastener-information/Materials-and-Grades/Bolt-Grade-Chart.aspx
It has some info on a class 10.9 bolt’s strength.
Maybe I did something wrong when I installed mine, but I couldn’t get the supplied bushing to fit properly in the turret, thus not allowing the shifter to sit flush on the transmission. I messed with for at least 15 minutes, but couldn’t get it to work. I ended up using my stock bushing and I haven’t noticed any negative aftereffects.
It sounds like you ordered the wrong kit for your transmission. Please get in touch with me to discuss and I’ll send you the correct bushing n/c.
Bill
[…] […]
Fantastic bit of kit, Revlimiters test of the product won me over as well as the install, highly recommended
Glad to help!!!
[…] […]
[…] and kits will ship in mid-December, to arrive before XMAS. See the rave review of the kit on RevLimiter.net. PRICING (IN USD): Stock height kit: $310 shipped in USA / $330 international Tall height kit: […]
Good review! I finally bought and installed it and now I wonder why I waited so long. Shifting into any gear is direct and effortless. Throws are just a tad shorter and definitely quicker. Excellent product from Bill.
I need to upgrade my NB’s shifter one of these days. A soon day I think.
[…] group buy will ship in mid-December, to arrive before XMAS. See the rave review of the kit on RevLimiter.net and testimonials from past customers in my store. PRICING (IN USD): Stock height kit: $310 shipped […]
In the instructions it says to coat the bottom assembly with grease, do I need to do this or not?
Definitely follow the instructions.
Is there a reason you did not? I read somewhere that it is not necessary to grease due to the self lubricating turret but I see the majority of people grease it.
I think I followed the instructions? To be honest, I’m not sure. I’ve worked on Miatas for so long that I tend to just do things rather than study the exact procedure. Plus my little girl was “helping” at the time.
For all questions, please contact Bill. I’m just a blogger.
[…] never done and he very kindly agreed to give it a try. The result is in the photo above. Parts Review ? MiataRoadster Short Shift Kit ? revlimiter.net I love the way that looks. googletag.cmd.push(function() { […]