
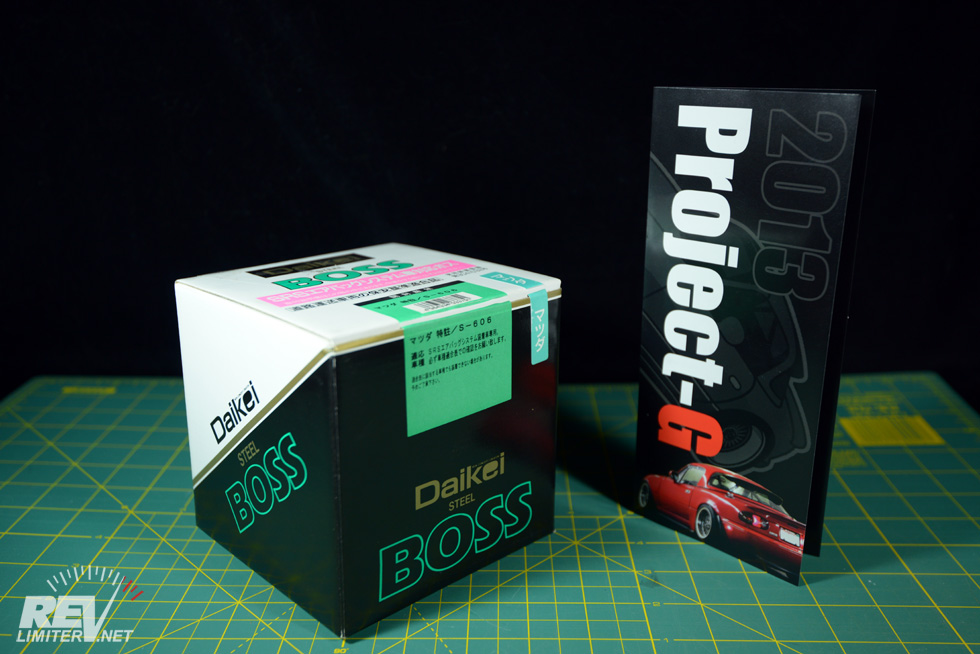
Daikei NB-specific hub from Project-G
This is a post that’s been a long time coming. I’ve wanted to change out Bucky’s stock Nardi (er… “Nardi”) steering wheel for years. The only thing that stopped me was it being Sarah’s car and my not having a hub on the parts pile. Now that I’m driving both Miatas, it was only a matter of time before the tired old OEM wheel was changed.
I should have done this so much sooner.
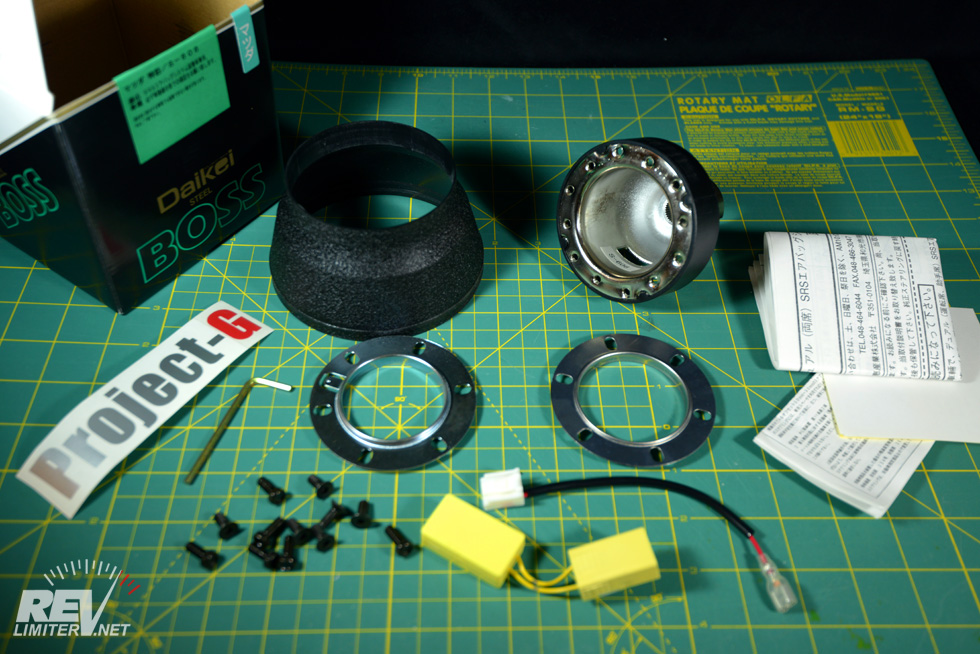
Everything you get.
Sharka has a Daikei hub. It makes the steering wheel swap incredibly easy. I knew I wanted the same hub for Bucky. There’s so little work involved thanks to the Daikei, that it’s barely worth writing a blog post about. However, that didn’t stop me from taking 20 photos of the process…
This is everything you get. The hub and cover, airbag resistor, NB-specific horn jumper, horn retainer rings for both Momo and Nardi style steering wheels, a full set of bolts for both Momo and Nardi, a hex key, and Japanese instructions. And if you buy from Project-G, you get stickers and brochures and candy.
I’d HIGHLY suggest Project-G as your source for steering wheel goodies. They have a huge selection and great prices. My hub was to me within 2 days. They really know how to treat customers well.
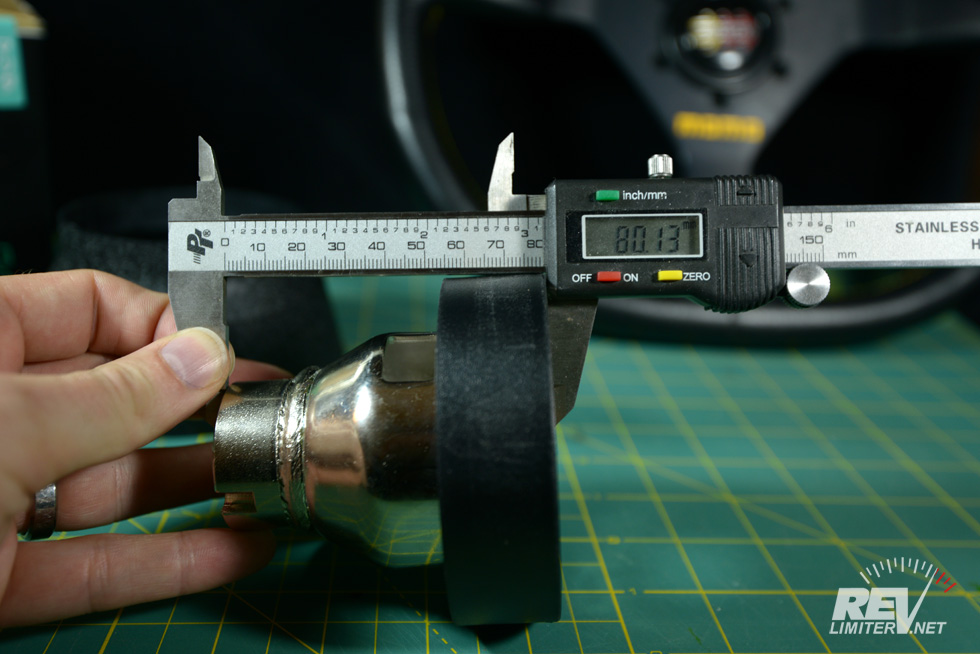
Daikei thickness.
Here’s one I’ve not seen on the internet – the thickness of a Daikei hub. It was hard to measure, hold, and photograph. The caliper opened up from 80 mm to 80.13 while I was taking the shot.
It’s not the thinnest of hubs, but it’s not supposed to be. The Daikei is designed so that you don’t need a spacer with most aftermarket steering wheels. It places the rim in about the same place as the OEM wheel.
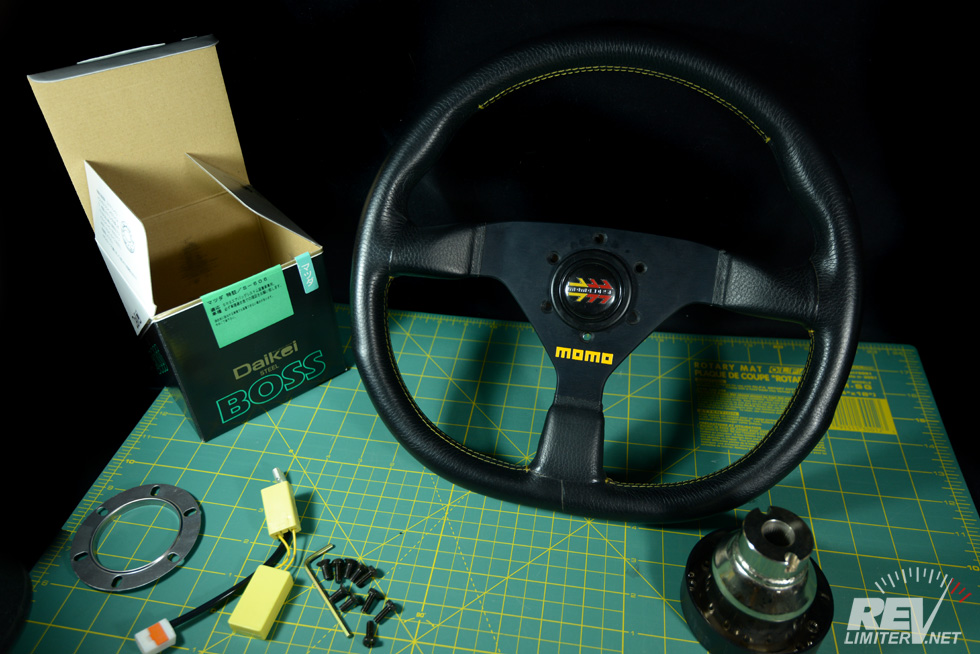
Bucky’s first wheel – the Momo F1.
This wheel has been in my collection for many years. It’s one from the late 80s / early 90s. One of the few D-cut Momo street models, the F1 or Formula1. It isn’t very common and there are photos of it in the late Road&Ster magazine. The perfect first wheel for Bucky.
I’ve been itching to use this wheel again. The problem is that it doesn’t really match Sharka’s interior anymore. Sharka is quite retro and this F1 is far from. But it is a nearly perfect match for Bucky’s more modern interior.
The Install
A couple quick words. This topic and all photos are for informational purposes only. I am not advocating you should use any of the photos or text below in order to remove your airbag. Remove at your own risk. While perfectly legal, it is a personal decision that you should not take lightly. Airbags can save your life. They can also hurt you very badly.
Out you go.
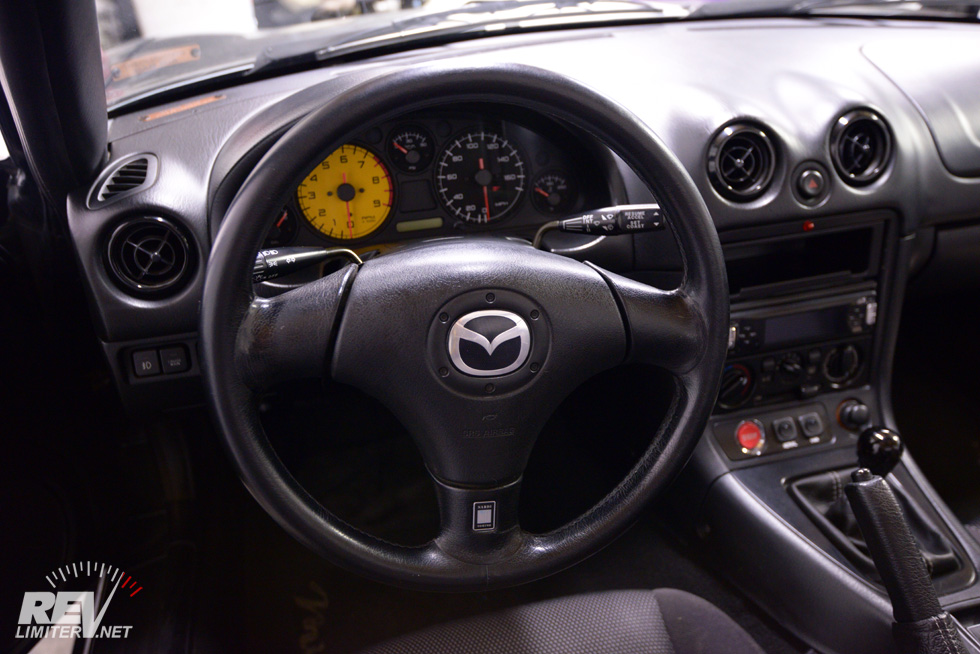
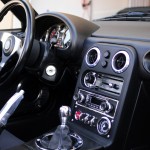
As factory steering wheels go, the NB has a very nice one. One of the least offensive OEM wheels I’ve ever encountered. That said, there’s room for improvement.
Insert woodwind intro music here.
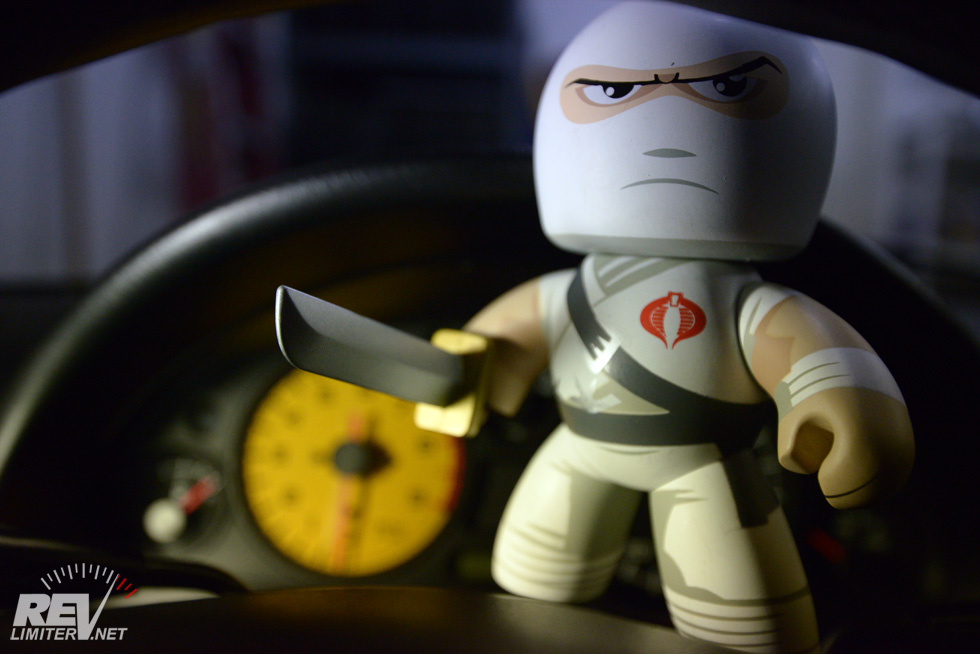
At this point, I realized I needed some help. Four hands are better than two, even if one pair is rather small and really enjoys his katana too much. Some of you might recognize Storm Shadow from a few previous blog posts.
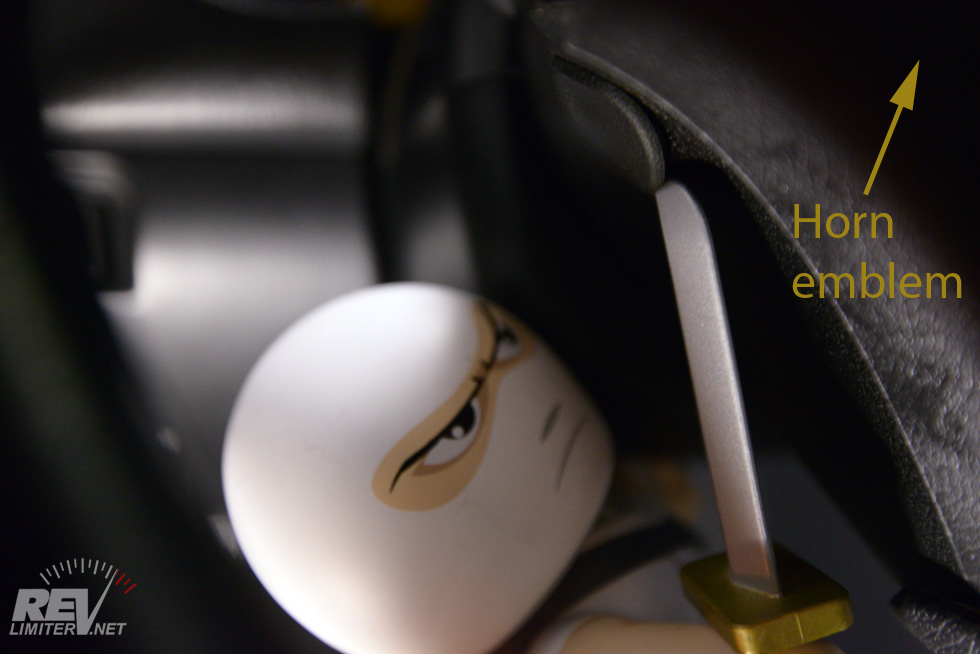
Remove the bolt covers.
There are two bolts holding the air bag in place. They’re on either side of the steering wheel on the bottom, covered by these two rubber plugs. Remove with something flat. Either a 10mm or 12mm socket was required after getting the plugs out of the way.
That sword is gonna get him into trouble…
Pull airbag forward.
It’s nice to do this with no power flowing through any circuits. I disconnected the battery earlier. Hitting the brake once ensures all electrons have left the building.
The airbag connector is a pain to disconnect and not at all easy to figure out. It is the main reason I ended up with 20 photos.
Take away your assistant’s sword sometime around now.

Slide free from the retainer.
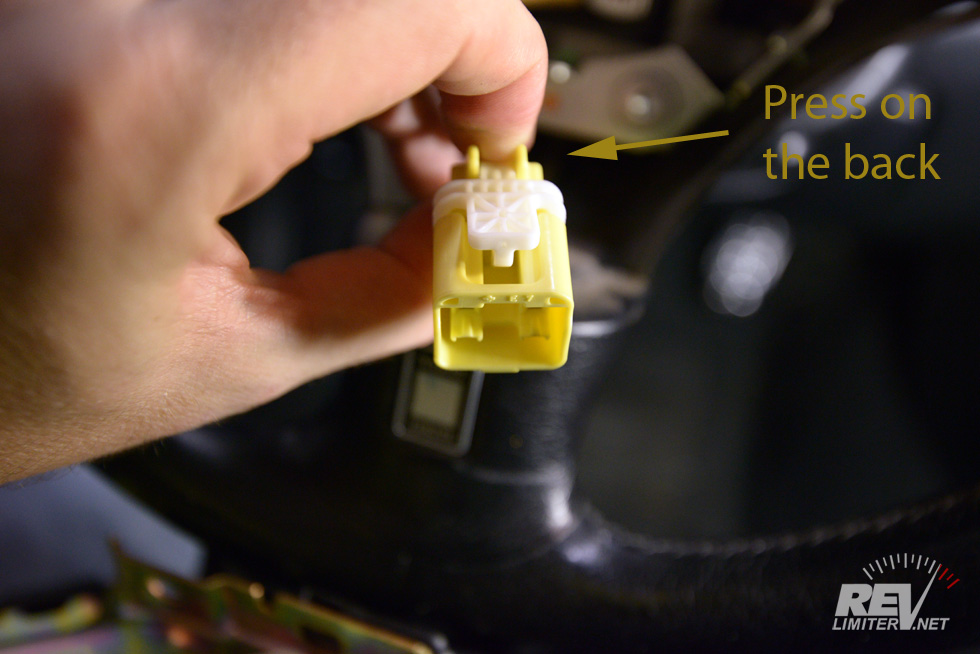
Press on the back to release.
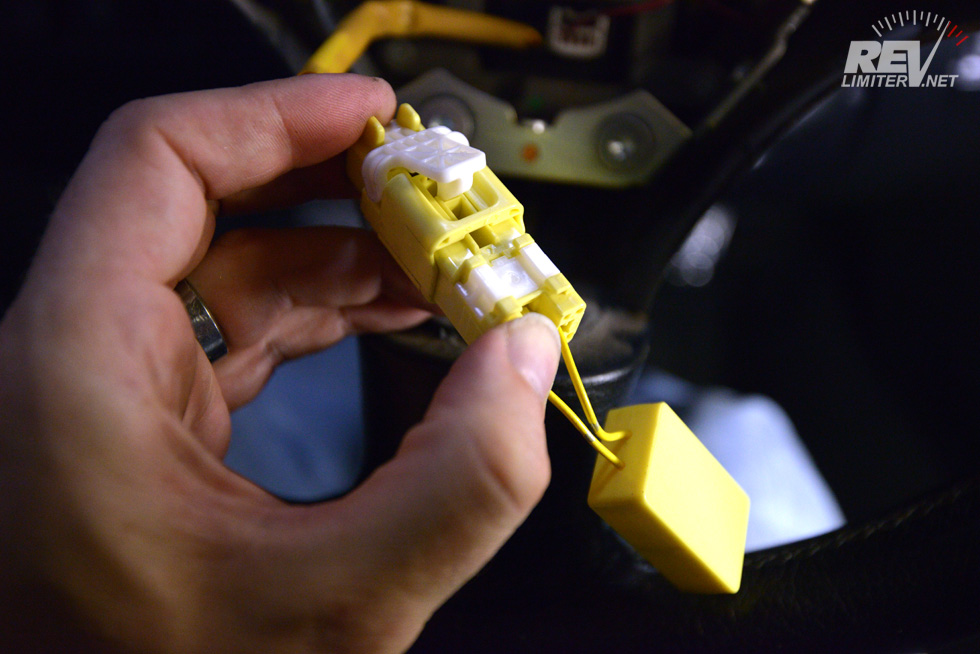
The connector fits together like this.
Not hard to figure out with a photo. However, I couldn’t find any. Not a single photo of the NB air bag connector. I will not share how long it took me to finally figure out where to press in order to unclip the bag.
Once I had the airbag free, I put it in an anti-static bag and set it on the shelf next to my NA steering wheel airbag. It’ll be comfortable there. I also plugged in the airbag resistor. It won’t interfere with any following steps.
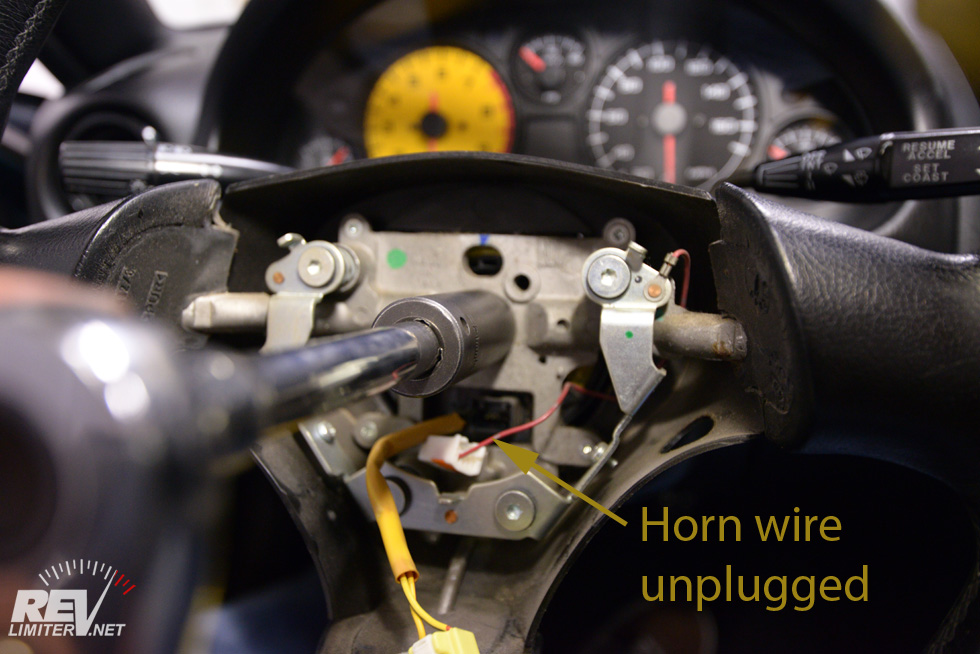
Removing the wheel.
The steering wheel is held on by a single bolt. A 21mm socket aids in removal. I also unclipped the horn connector.
I’m privileged to live where I do. We have almost zero rust in New Mexico. Folks in humid climates might have some work to do getting the wheel off. I understand there are devices called steering wheel pullers? I’ve never had to deal with one of those.
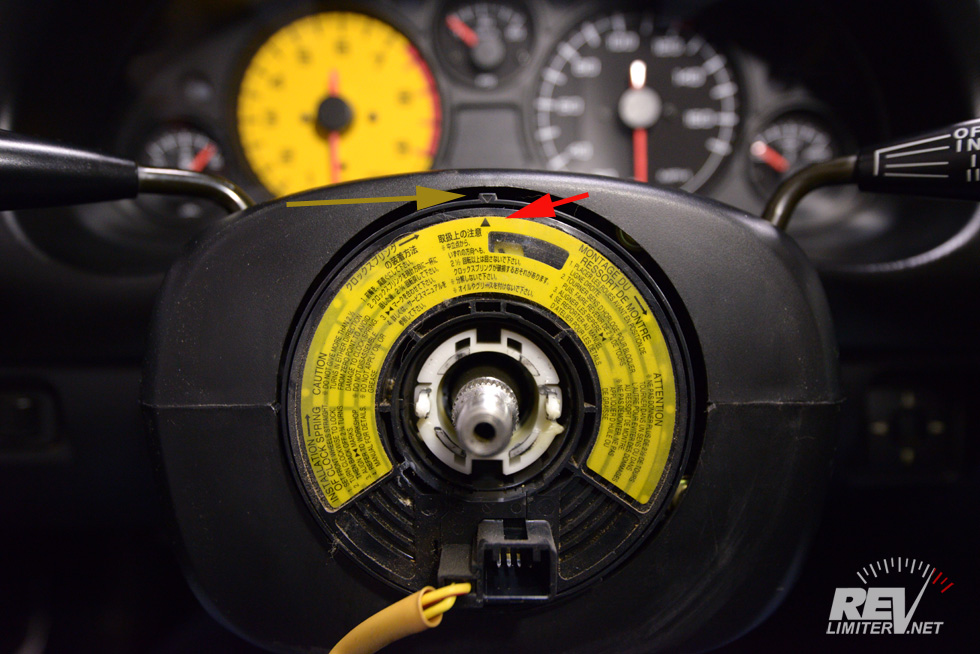
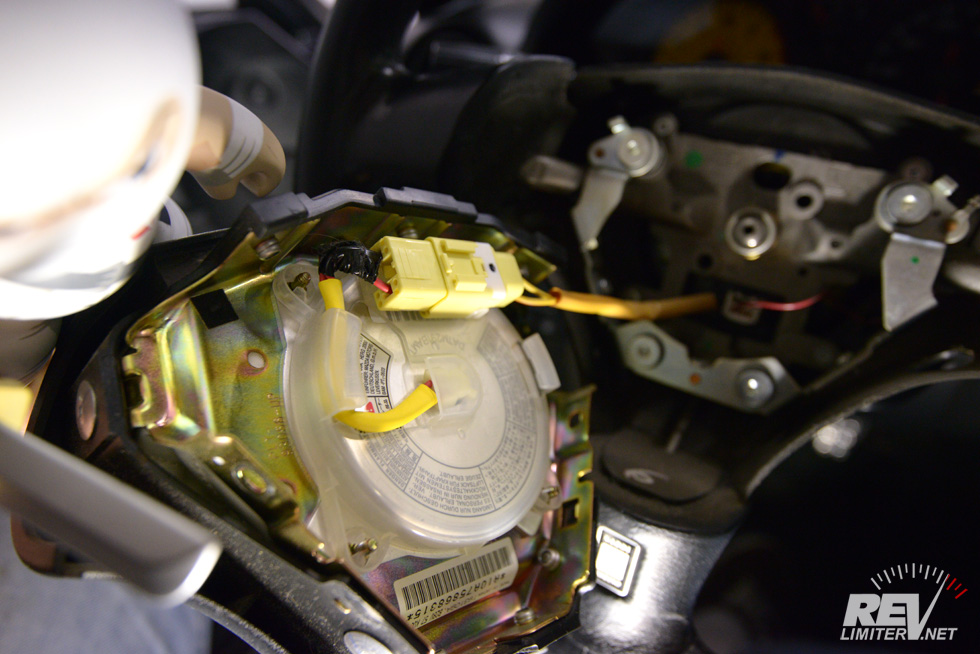
The airbag clock-spring.
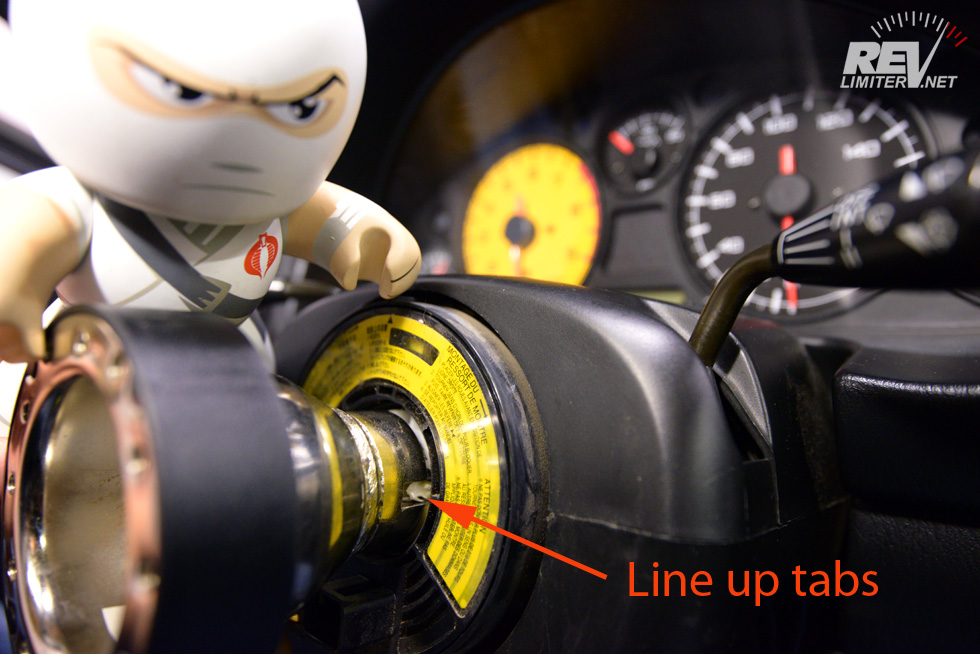
Sliding the hub in place.
The clock-spring is one of these parts. I think it’s the large disc that rotates, but I’m not sure. All I know is you need to prevent the large disc from rotating. It’s actually very easy and doesn’t spin by itself. At least mine didn’t.
I slid the hub on quickly. There’s a slot on either side that connects to the white tabs on the clock-spring. They push in slightly as you tighten the hub.
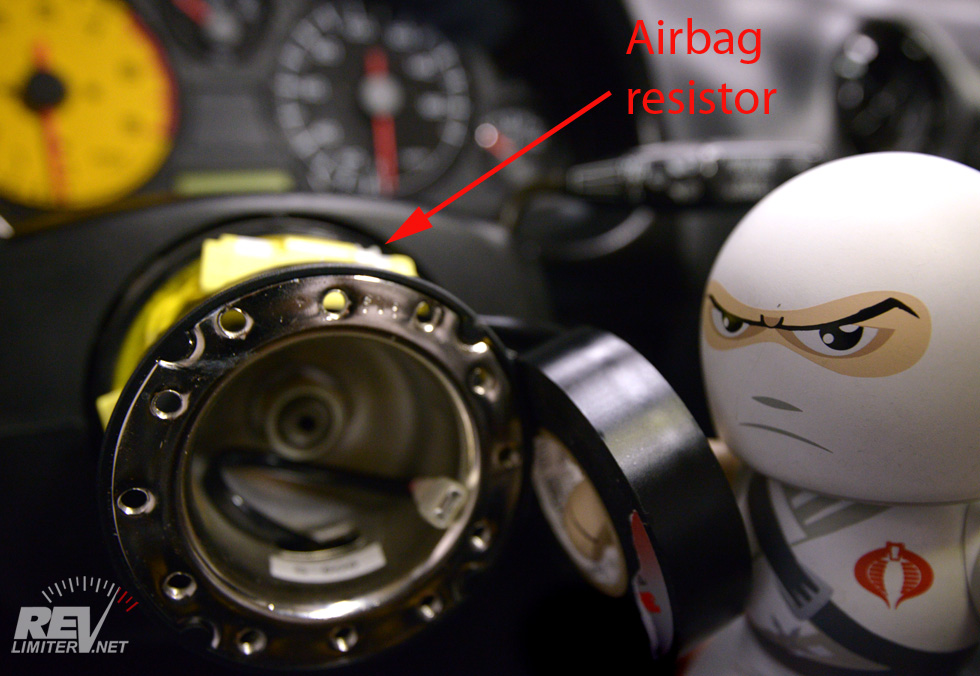
Tape up the resistor.
I put the big nut back on the steering column and just barely tightened it. I actually left the hub rattling a little bit. There’s no way to completely tighten that bolt without having a wheel connected, so I didn’t want to do a so-so job and forget later. Better to let it rattle and remind you that the big nut hasn’t been torqued.
And then there’s the airbag resistor. I wrapped it around the hub and taped it on. I’m not sure what normal people do. This is how Sharka’s hub is put together also. It’s worked quite happily for over a decade like this.

6 small screws…
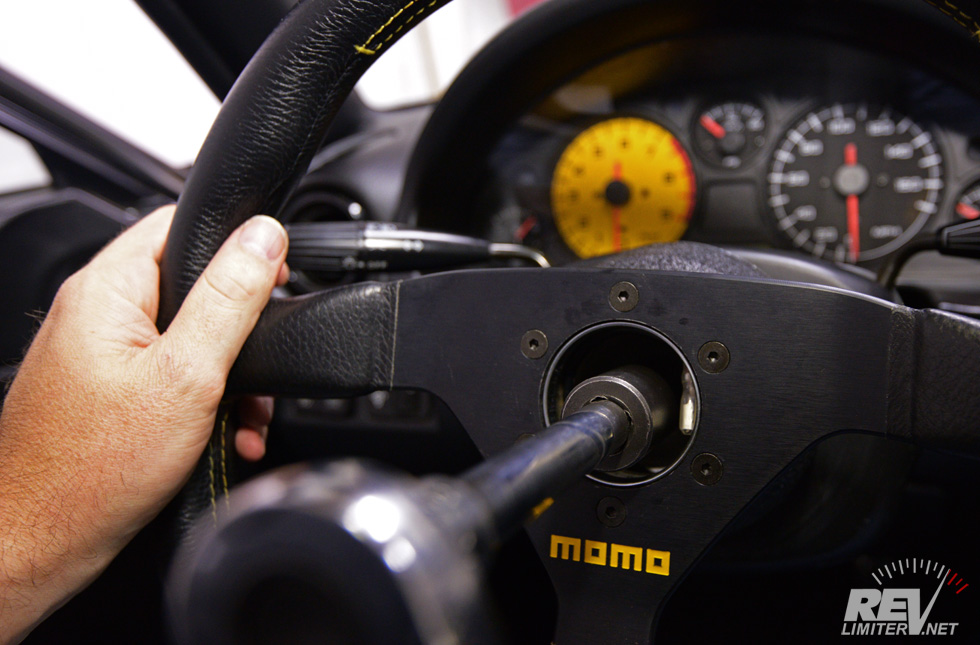
And one big nut.
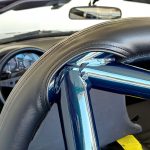
In the final stretch now. Notice the shiny circle in the middle of the steering wheel in the top shot with Storm Shadow? That’s the horn retainer ring from the very beginning. If you skip this, your horn button won’t stay in the wheel very well and will fall out constantly.
Last thing, I torqued the big locknut. Very easy to do with one hand on the wheel and one on a big socket wrench. Not sure of the torque value. I just got it really damn tight.
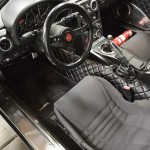
Done!

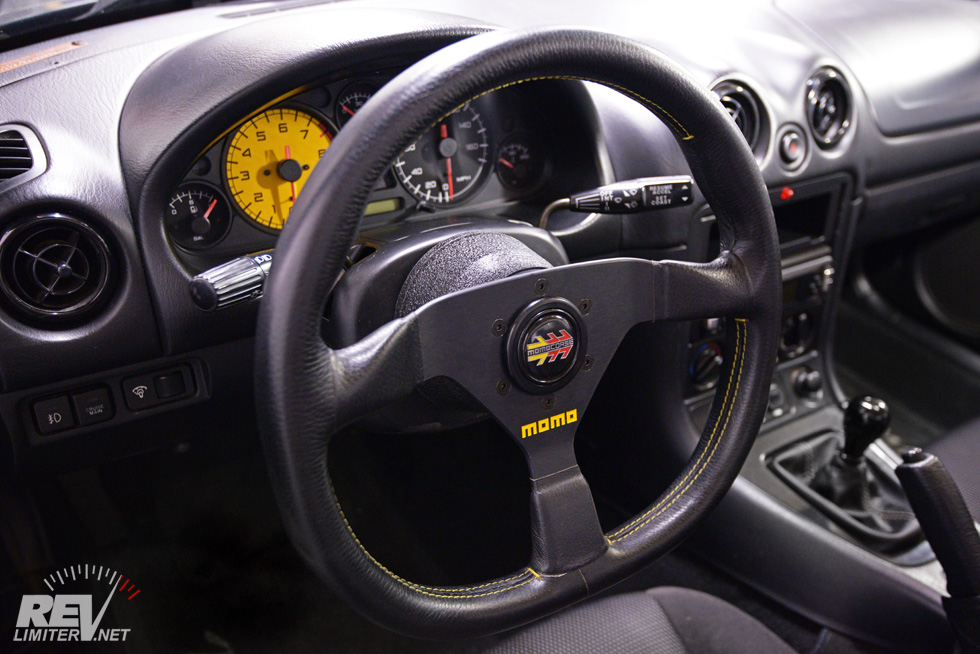
A thing of beauty.
All finished up. It looks so good! The yellow on my F1 wheel matches the yellow on my Sunstorm gauges so perfectly. And it FEELS great. The soft leather and anatomic hand grips are a world of improvement over the OEM wheel.
And best of all, Bucky can now participate in my steering wheel obsession. I’m sure the collection will be growing as a result.

Short help is better than no help.
Thanks for the help, little guy. And for not killing me in my sleep.


Congrats Bucky!
Bucky is really happy about all of this.
Ugh, lucky lucky you Adam.
In New Zealand, where I live, it’s illegal to change steering wheels on airbag-equipped cars.
I won’t ever be able to do this to my NB
That’s a shame. However, the OEM NB wheel really is nice. One of the best stock wheels ever, I think.
Still, there’s room for improvement.
The hub workshop on sparco steering whel?
Er… not sure what you’re asking? But the Sparco and Momo steering wheels have the same bolt pattern. Anything that works for Momo will work for Sparco.
Hope I got the question right.
Wow I love that momo! Got a quick question. Do you wear any type of driving gloves when you drive? I ask this because I have had people tell me that the oils from your hands degrades the leather over time and I was looking at getting a set of driving gloves and was not sure which to get. any opinions?
I wear gloves all winter, but not in the summer. It’s just too hot here in NM. I confess, I’ve never even researched driving gloves.
[…] + shipping + international shipping wait time) Check out this write up on RevLimiter's Site: https://revlimiter.net/blog/2013/11/n…wheel-install/ — Product Description — High quality product from Japan made by DAIKEI. Steering wheel adapter […]
[…] give you a complete solution removing all uncertainty. Check out RevLimiters Daikei Writeup Here: https://revlimiter.net/blog/2013/11/n…wheel-install/ So a NRG short hub is just under 100 bucks. Works Bell is only 30 bucks more and includes air bag […]
[…] Re: 2001 NB street, track, work… So today I set myself to change the steering wheel. I got a momo 78 (monte carlo) in suede and a Daikei Hub from Japan! This hub is an amazing piece of kit, not only does it look brilliant in the car it als comes with everything to make your task as easy as it can be, including the airbag defeat system. before: removing the airbag was quite nerverwrecking, I kept imagining the thing blowing up on my face during removal. I disconnected the battery of course, left the lights "on" and waited 30 minutes before removing it hub in place with the horn wire sticking out. I love the cosmetic plastic cover, just makes everything look OEM Job done! Love how the wheel sits in my hands, the rim is actually thinner than the one on the airbagged Nardi one. This is no tutorial, but if anyone is intersted revlimiter's tutorial is brilliant and I wouldn't have been able to do it without it: https://revlimiter.net/blog/2013/11/n…wheel-install/ […]
[…] I also went though Project G and got my daikei hub on Tuesday. It does not require any modification. Rev did a write up on it. https://revlimiter.net/blog/2013/11/n…wheel-install/ […]
[…] steering wheel hub questions https://revlimiter.net/blog/2013/11/n…wheel-install/ Daikei Hub > Anything […]
How did you hook up the horn? I just installed a Nardi wheel with this hub – with the hub, I’m only seeing the one horn wire and my horn button has two connection points. Also, not quite sure which one of the horn retainer rings to use and which way to orient it…
Any help would be greatly apprectiated. Thanks!
Your horn should only need one wire. The terminal that connects at the CENTER of your horn button is the signal wire. Connect the one wire to that. The horn should ground through your steering column with the little strap on the side of the horn button.
The second terminal (the one not centered) is a secondary ground in case you’re using a carbon fiber hub or something exotic like that.
Horn retainer rings: Nardi is larger than Momo, so use the one that fits your horn button. You can test fit the button in the retainer rings without actually installing the steering wheel to see which would fit.
Thanks for the pictures of how to unplug the airbag connector! That would have taken me 1/2 hour to figure out.
I replaced my 2001 Nardi with another Nardi I got on eBay for $25. Sunscreen residues on my hands had dissolved the leather over the years…
I think turning on the ignition after this operation is the scariest job I’ve ever done on a car.
HA! Changing a fuel filter while bathing in gas while a friend smokes nearby. THAT was a bit scary. haha!
Glad I could help.
I know this is an old post, but still very helpful!
I couldn’t figure out how to unplug the passenger side airbag clip (on a 99 JDM roadster) without breaking it – same connector as the one in your pics. This was a lifesaver (saved the life of the plug anyway, was nearing hulk smash time!) Thanks.
Whats up pal, i been a fan of your work and now i must ask for some help with this Daekei hub. I have a grip royal steering wheel that has he nardi bolt pattern. SO, i aligned the clockspring with the notches on the hub and now the Nardi steering wheel is slightly sideways. Im racking my brain on what the solution is. Is there some type of spacer adapter, so my wheel can be true and straight? Any help would be appreciated.
In any case I’ll be subscribing to your feed and I hope you write again soon!
Very cool install! Love the momo wheel. I got a Momo Mod 78 in suede for my nb2. I had one question about your install process. I thought we had to remove the thing with the big yellow circle sticker called the clock spring. Thats what I did in mine! Should I put it back in? Do I have to?
consists of the book itself