
Spoiling the end of the story
Here’s something I’ve ALWAYS wanted to do – an epoxy garage floor. However, with needing to work in the garage and not being able to move machinery to do it, I’ve never had the chance… until now.
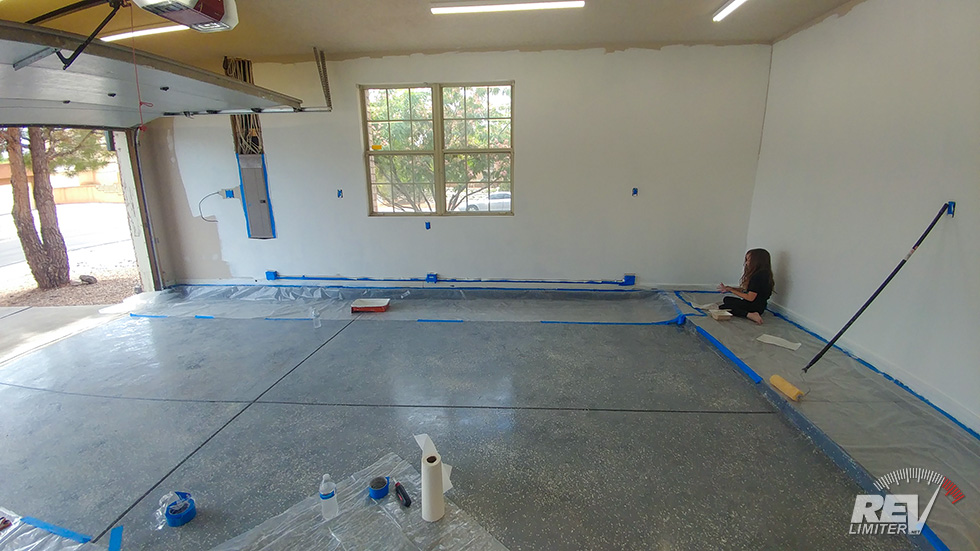
Pictured above is the new revlimiter HQ, which is SUPER exciting. There’s more room in the house for both living and working, off-street parking for a dozen Miatas, and a shop to house all of my printers and machines.
And an empty 3 car garage.
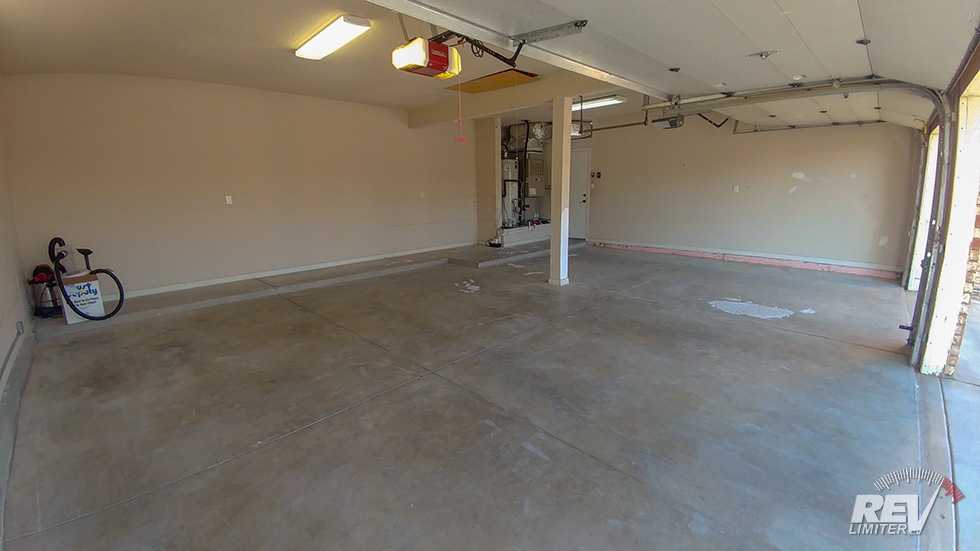
22 year old new garage
The new garage is 22 years young. It’s honestly in really good condition, but there was a good bit of work required to get it in shape for epoxy coating. And that’s what this post is about – everything required to get a garage floor coated.
I’ll list materials used, links I used to figure all of this stuff out, and rough costs of each item. I hope it helps a few folks out there.
Please note: I am not making any money on this blog post and did not receive any of the items mentioned for free. In fact, I spent a ton of money to do the things outlined in this blog post. This post exists to help those reading to do a garage floor of their own.
Step 1 – Remove Oil Stains
Cleaning up oil stains
Pour N Restore
No more oil stain!
Cleaned oil
First, sorry about the photos. While I have a bunch from the whole garage floor redo, they’re a bit sparse. Often there’s no “before” photo…
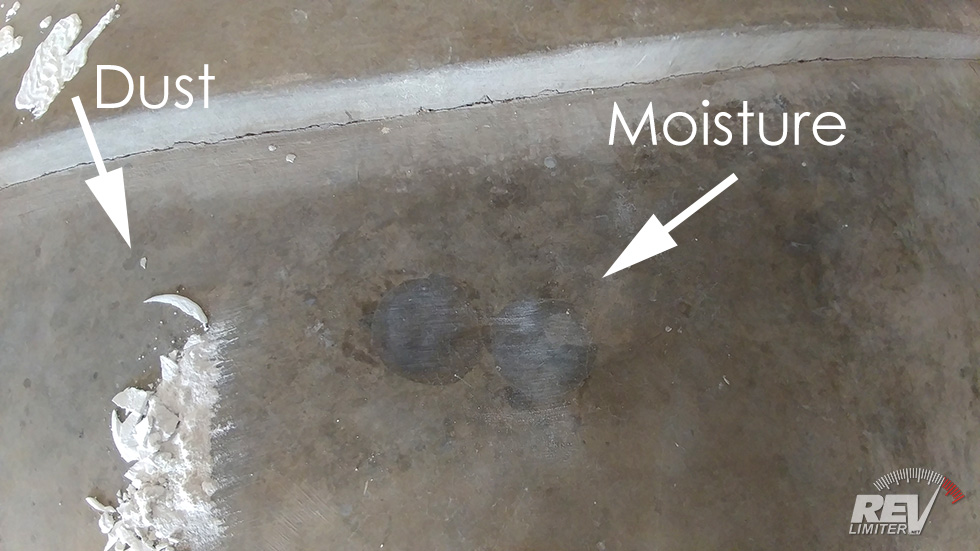
Anyways, first step – remove oil stains. Check out this great how-to from AllGarageFloors on removing stains. There’s a bunch of ways to do it. I chose “Pour N Restore” from my local Lowe’s.
Pour N Restore is a liquid that you pour on an oil stain. It sucks the oil up from the floor over the course of about a day while it turns into a solid. Then you just sweep away the powder that’s left. It usually leaves a bit of a dark area where some moisture from the concrete was pulled up. This moisture goes away in an hour or less.
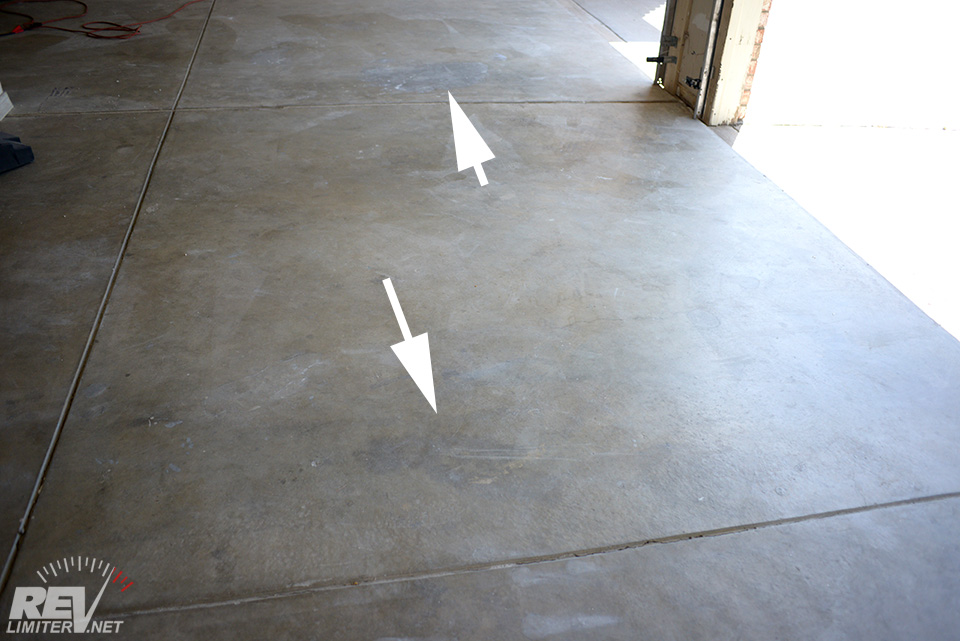
As I said, the garage was in great condition for being 22 years old. Still, I had to remove a bunch of oil stains. All came out with no problem thanks to the Pour N Restore. You can see very slight evidence of the oil stains in that last photo above with the arrows. Just a bit of darkness and no difference in floor feel.
Pour N Restore isn’t the cheapest ever. I bought eight bottles to do the three garage bays for a total of about $120. But it worked GREAT! I’d not hesitate to use it again.
Step 2 – Repair Cracks

Cracks!
You’ll be able to see cracks through the epoxy… and they’ll be ugly. So cracks should be repaired after taking care of oil stains.
I’m not talking about expansion joints in the floor – those need to remain. They’re basically weakened areas in the floor that tell cracks where to go. That’s a GOOD thing. What I’m talking about is random cracks across the slabs. Those need repaired.
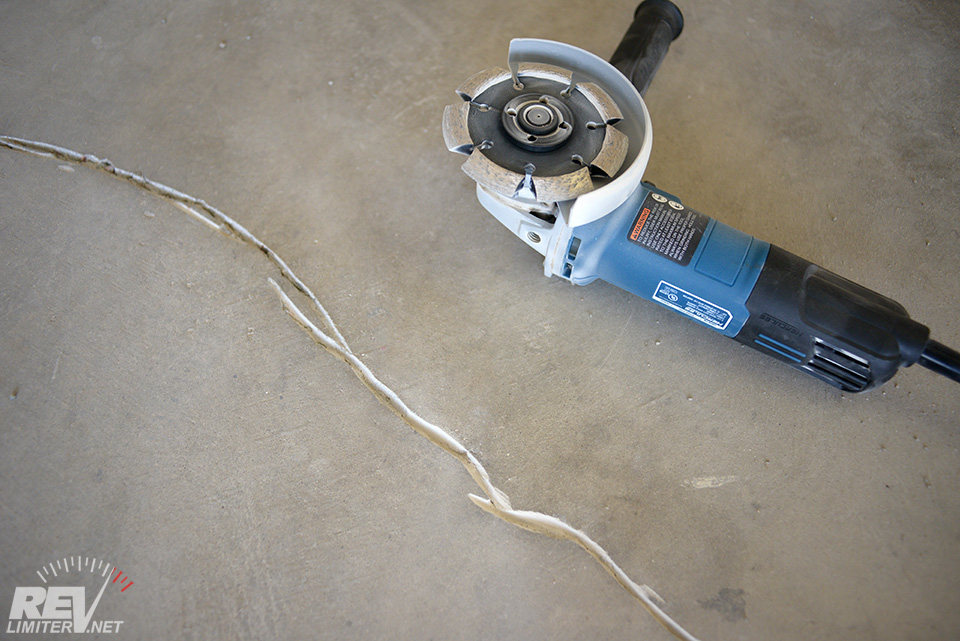
Angle grinder to the rescue
As with the oil, I looked up various how-to’s on fixing the floor cracks. AllGarageFloors had a great tutorial. To sum up…
1: Chase the cracks
2: Fill the cracks
3: Sand flat
You can chase the cracks manually with a chisel, or you can use an angle grinder and a concrete blade. That’s what I chose. For about $30, I had the cracks chased in a few minutes.
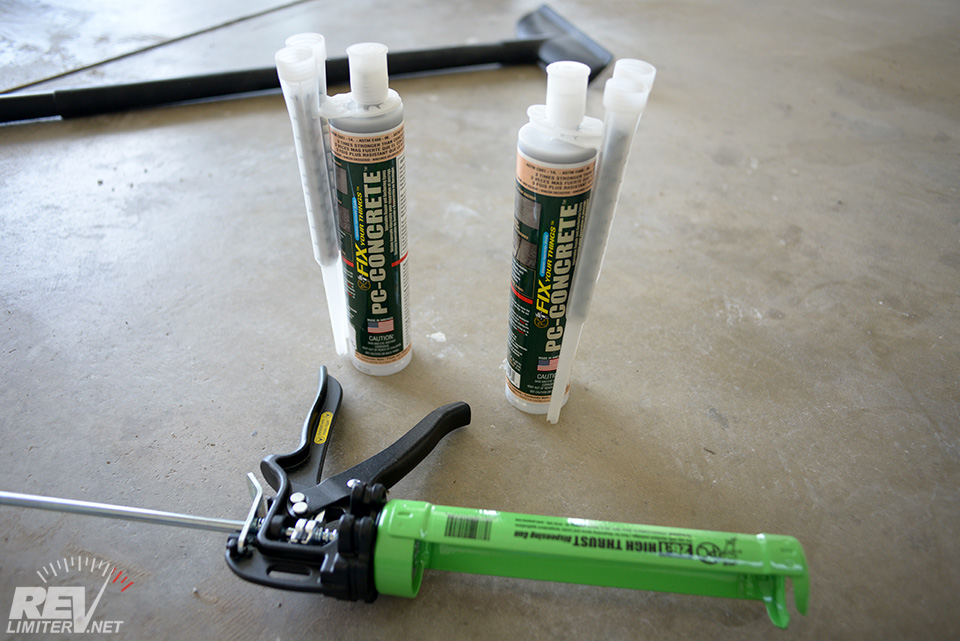
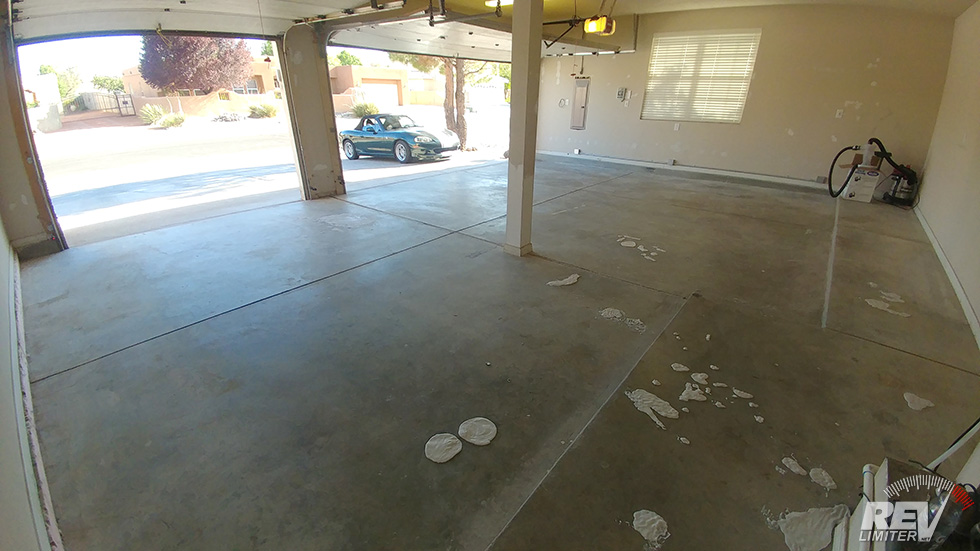
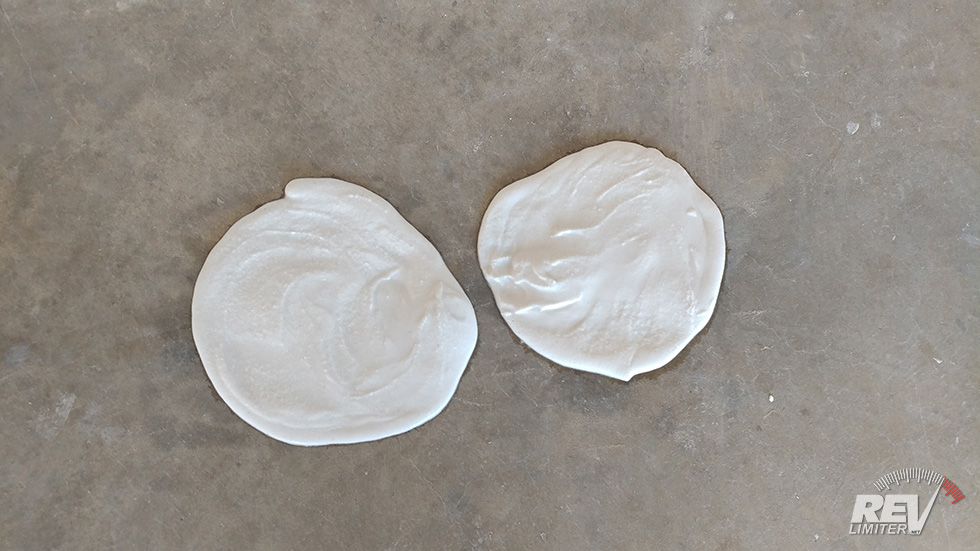
PC Concrete
I chose a 2 part epoxy called PC Concrete. It cures in only 4 hours and is extremely easy to use. 2 tubes took care of all the cracks in my garage – I’d estimate about 25′ worth of linear distance.
It’s a very thick epoxy, so the product suggests you get a high thrust ratio calking gun to dispense it. I got the epoxy and the gun together from amazon. Total was $65 ($20×2 + 25).
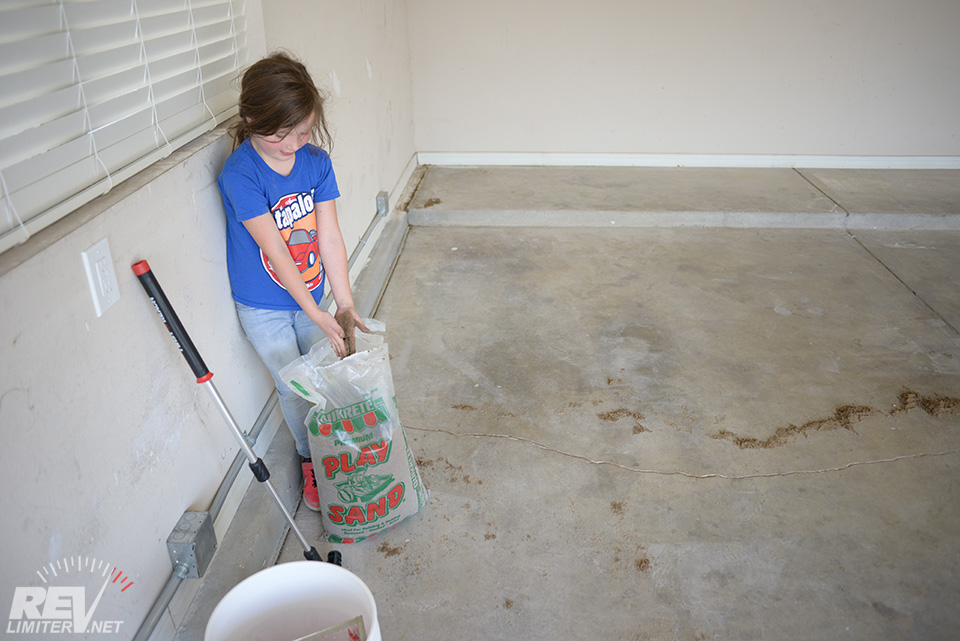
My assistant

Sand added

Crack filled.
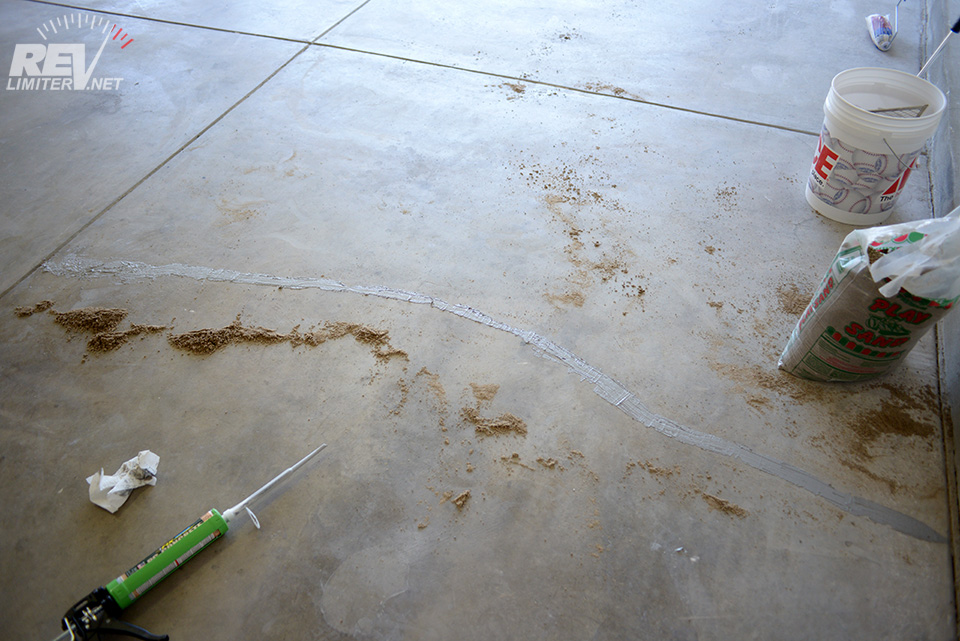
Smoothed down.
After chasing the cracks, the PC Concrete suggested adding playground sand to the base. This helps cover more linear feet than just filling with straight epoxy.
My daughter loved this part. Nothing’s better than playing with sand in the clean garage.
After applying the epoxy, it needs to be smoothed down somewhat. A quick swipe with a disposable putty knife works. The epoxy just needs to be mostly flat. You’ll get it planed down to floor level when you have the floor sander out.
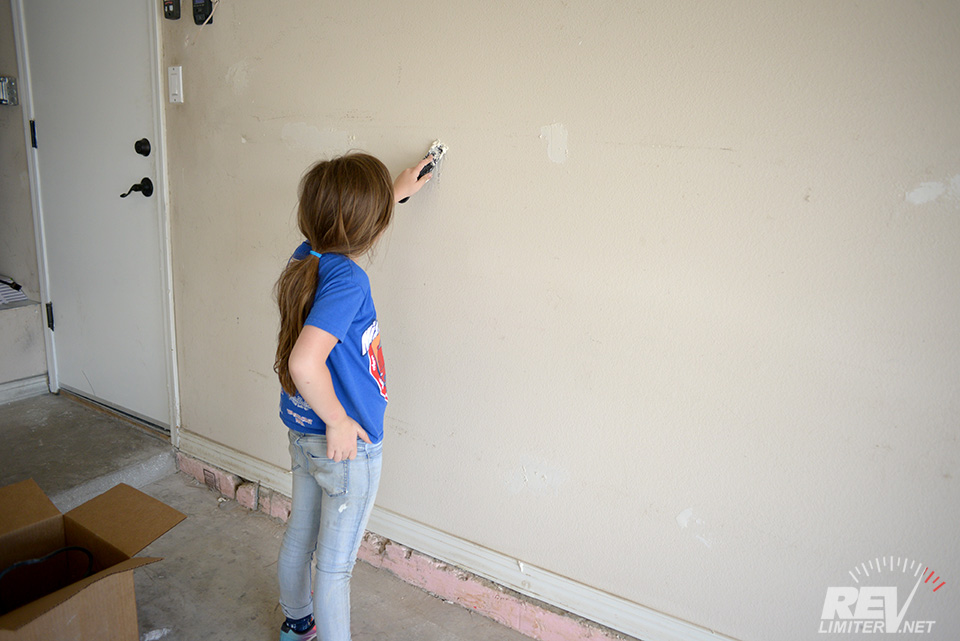
Drywall repair
We also took a bit of time to fill 22 years worth of holes in the garage walls. It’s amazing how much damage a garage wall can get. And, when you’re 6, it’s also a lot of fun to rub gooey stuff into a wall with a plastic blade.
Step 3 – Sand the Floor

Now it’s getting serious.
Use a respirator for this project! However you grind your floor, you do NOT want concrete dust in your lungs. I have a full-face particle filter mask (think Breaking Bad) and wore it the whole time. Change your filters every 8 hours.
And here’s where this project gets ridiculous.
Again, AllGarageFloors is the internet hero with a tremendous how-to on grinding a floor. Basically everything you need to know is in there. I’ll add my own experience to it.
Firstly, you have to rent these tools. I rented the floor polisher and blade from Home Depot locally for about $120 total. It’s not something you can do over the internet, unfortunately. You show up and choose from whatever tools they have to rent at the time.
My Home Depot had only the type of sander shown above. They did NOT have one with the dust catcher. So… dust got everywhere. It was horrible.
I was also given an extremely trashed out blade to grind the floor with. I discovered this after inspecting the blade I had (3 hours into the job) and comparing with photos of a new blade online. With a good blade, this job should take 60-90 minutes per garage bay. With a bad blade… it’s 2-3 times that long.
The blade I received had most of the grit missing from the tips of the teeth. The teeth were also all bent over. Some were missing.
Learn from my experience and demand to dig through all of the blades that your local rental agency has. Choose the newest looking one.
9 hours later.
NINE hours. It was pure torture. A whole day to grind the floor. It should have been a whole morning.
When I brought back the machinery and showed the folks at Home Depot the bad blade condition they literally laughed in my face and couldn’t believe I was given such a poor blade. It was thrown in the trash. When I asked for a refund on that blade rental, I was laughed at harder.
Perhaps you can hear my bitterness through this post? I’m extremely bitter. I’ll not shop at Home Depot again if I can help it and I’ll actively try to keep any of my friends or colleges from doing the same. Hopefully this post helps to keep others from making the mistake I did.
There’s other places to rent floor polishers. Don’t use Home Depot.

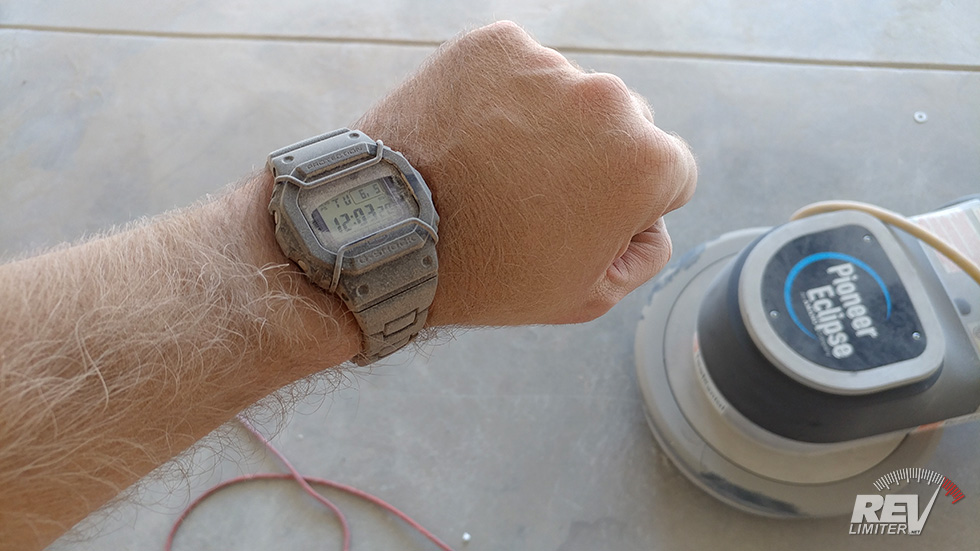
Floor profiled.

Another view of the floor.
The above two photos were something I searched for a while the day I was sanding my floor. The AllGarageFloor how-to was great, but it didn’t really say how far you needed to go into the floor. Did you need to see aggregate? Or was a bit of scuffing okay? And how much scuffing?
The above scuff level seems to be enough. Buried in a few pages of google results were some photos of floors that matched my above finish. Basically, you need to be able to feel a nice roughness with your hand but you don’t need deep etching. A nice swirl is sufficient.
Step 3.5 – Clean the Floor
I did a dry grind on my floor. That’s where you grind away… at a dry floor. It means you don’t have to wait for the concrete to dry, which can take a week or more. But it also means you have dust that gets everywhere.
This dust needs to be removed before applying epoxy. The best way to do it is with a Shop Vac. Now… this dust is gonna KILL your vacuum. It’s just too much for it and will clog the filter in moment. There’s a few products on the market to separate dust from your vacuum. I bought one called a Dust Deputy from amazon.
Do not buy a Dust Deputy. It was trash. I’m ashamed I bought it and am not going to link it to this blog.
But it worked. It allowed me to keep vacuuming and get all the concrete dust out of the garage.
So, I’m not sure what to recommend. There’s gotta be something better than the Dust Deputy (yuck), but I’m not sure what it is.
Just realize that one way or another, your floor must be totally clean before applying the epoxy.
Step 4 – Apply Epoxy
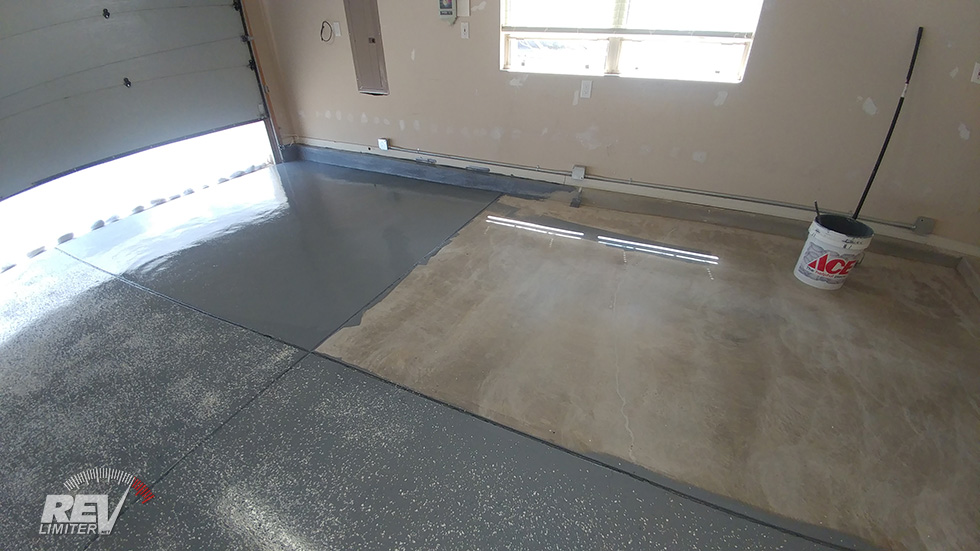
Awww yeah!!
Let me say this again – Use a respirator for this project! The gasses from just about any epoxy are not good to breathe for the day it takes to apply. And you do NOT want this shit in your eyes. It’s a good excuse to buy a fancy full-face respirator. I suggest that 3M one and at least 2 changes of filter (8 hours of use per filter).
Now – onto the fun stuff!
This is the polyurea garage floor coating from GarageFlooringLLC. I researched this a TON on garagejournal and the various other garage flooring site and polyurea seemed to be the current best-of-show on the market.
GarageFlooring seemed to have an excellent polyurea offering. They’re a small business and are active on GarageJournal. I decided to throw my money their direction. Total for a 750 sq/ft kit for a 3 car garage was $1098 shipped after applying a coupon. That’s a really competitive price for polyurea and the kit was extremely complete.
Two things about the kit – it shipped from different places using both Fedex and UPS. I received 3 large boxes one day and 1 large box the next. I initially thought I’d not received everything and caused the poor GarageFlooring folks a bit of work while they patted my head and told me that I’d have the full kit the next morning when UPS delivered. I just managed to not spot the dual shipping notices in my email from both shippers.
The other thing… I didn’t get much flake in my kit and had to order a 2nd batch to finish the floor. According to GarageFlooring, the 750 sq/ft kit should have shipped with around 9 lbs of flake. I neglected to weigh the bag-o-flake when I received everything, but the 4 lb batch that I had to buy to finish things up was a bit larger of a bag than my original shipment. So… advise to anyone ordering from GarageFlooring – make sure you get the full amount of flake you paid for. Weigh it and be careful when scattering it. You can blow through your flake quickly.
Cliff notes: Garageflooring has a great polyurea kit. They ship multiple boxes via both Fedex and UPS for your order. Check to see if you got enough flake.
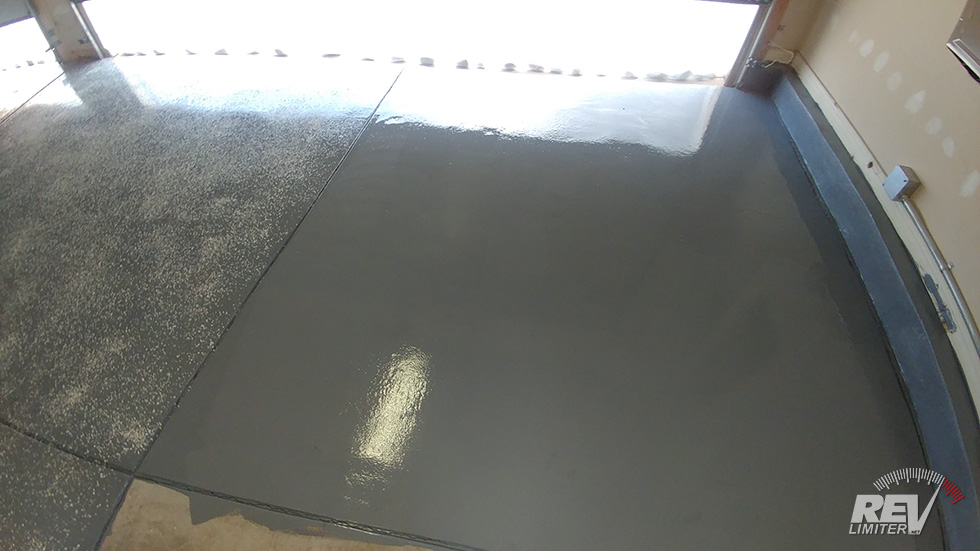
Mmmmm. Grey
Polyurea is a single part epoxy. That means an unlimited pot life. No rushing to use up all the epoxy, no mixing a second batch every 30 minutes – you just pour the polyurea into your big painting bucket and mix in the dye.
It reacts with moisture in the air to cure and does so over about 24 hours. They suggest 72 hours cure time before you drive on it. GarageFlooring has a ton more info on it.
Spikey shoes
Polyurea only needs 2 layers of coating. You’re supposed to scatter the flake right after you apply the first layer. So I just used the natural panels in the garage to divide it up – paint one completely, scatter flakes, move to the next one. Repeat 7 times.
After painting the floor completely with one coat, you allow it to dry for 2-6 hours before applying the clearcoat top coat. And… my garage is large enough that the first panel I painted had dried for about 4 hours by the time I was done with the grey coating. So I just started right in on the clear after I finished the grey.
A word about spiked shoes – they’re slippery. Walking like Frankenstein is advised.
A word about polyurea – it’s smelly. A respirator is TOTALLY required for painting a floor. Also, it’s awesome that I don’t yet live in the new house… because it was quite vapor-filled for the next 3 days while the floor cured.

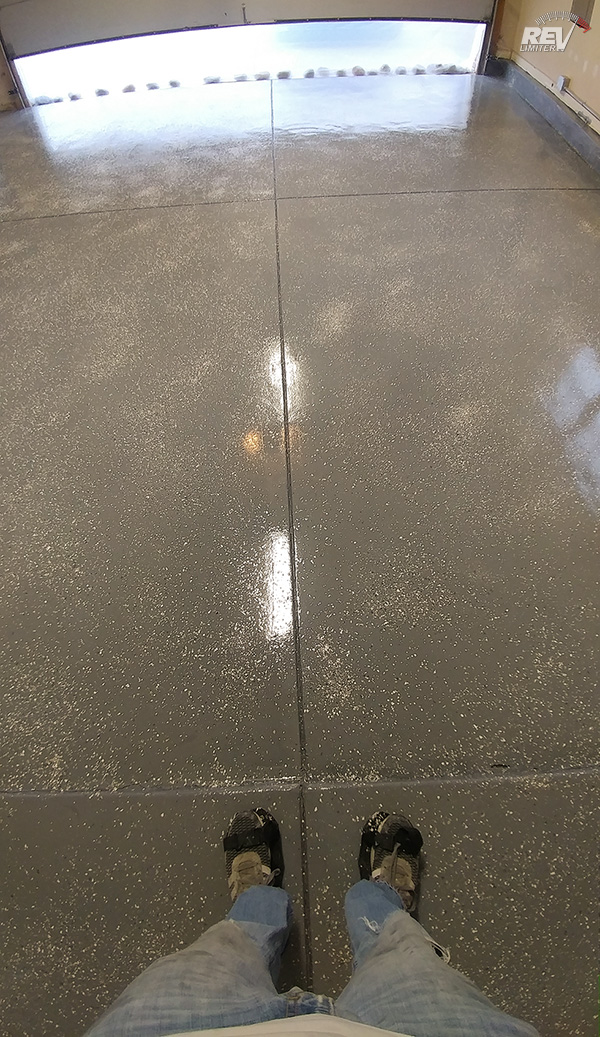
Just look at it.
With the clear coat, GarageFlooring gives you some sand (silica) to mix in for better anti-slip. It gives the clear layer juuust a little bit of a yellow quality to it and makes it easier to see when you’re painting it on. But it’s still pretty tough to see.
When dried it’s WONDERFUL. I’m sure it’s possible to slip on the floor, but it won’t be easy. Probably easier to slip on uncoated concrete than this stuff.
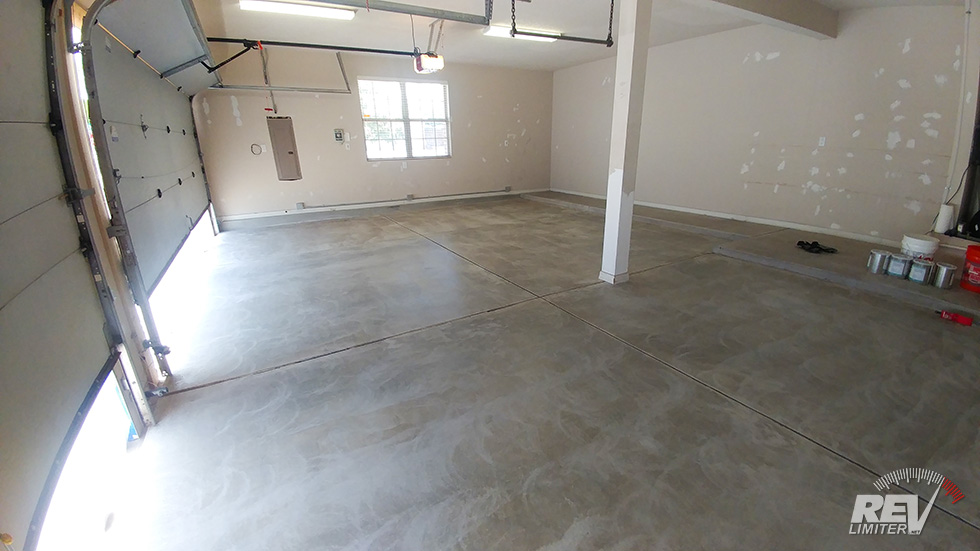
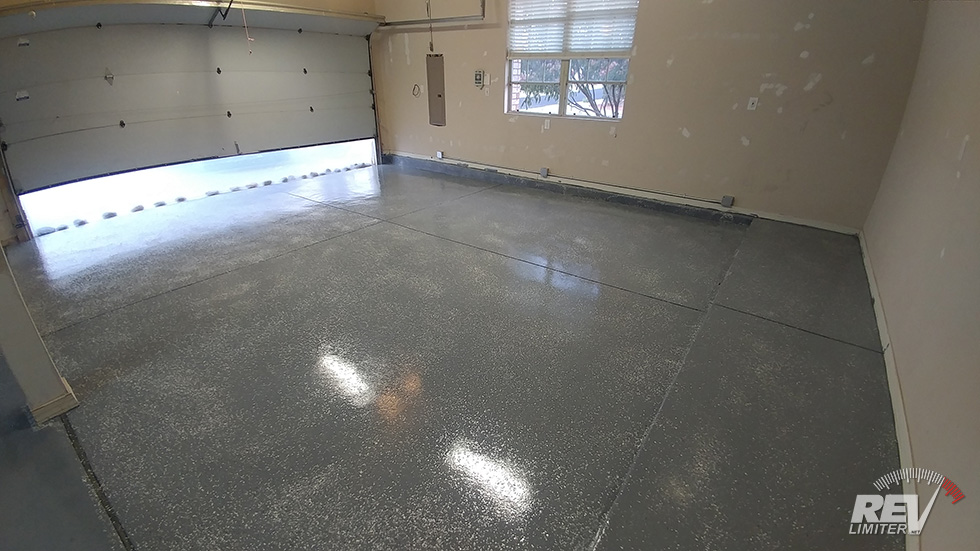
And the finish? Wow.
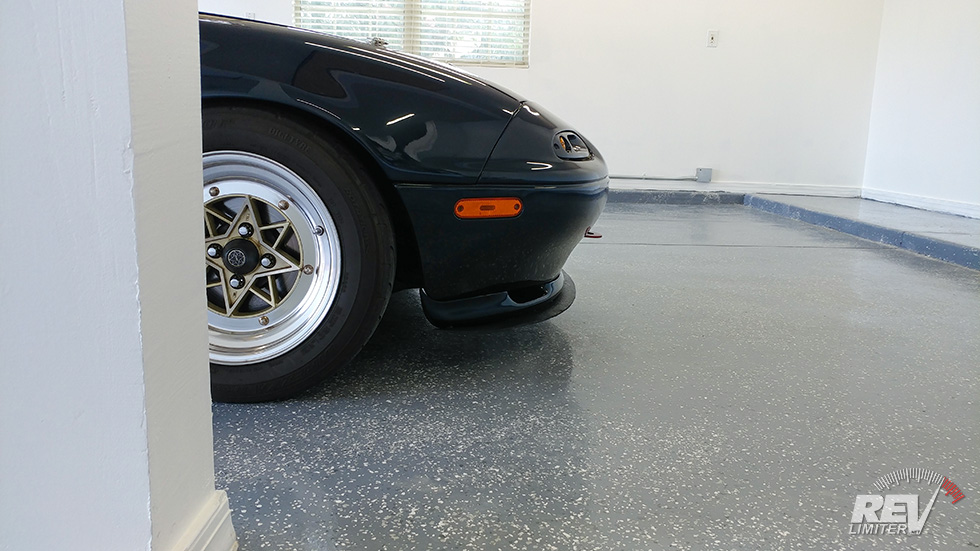
Finished flooring.
It’s lovely. It’s what I’ve wanted in a garage floor since I was old enough to have a garage of my own.
The white spots in the floor? Those are reflections from the new lighting!

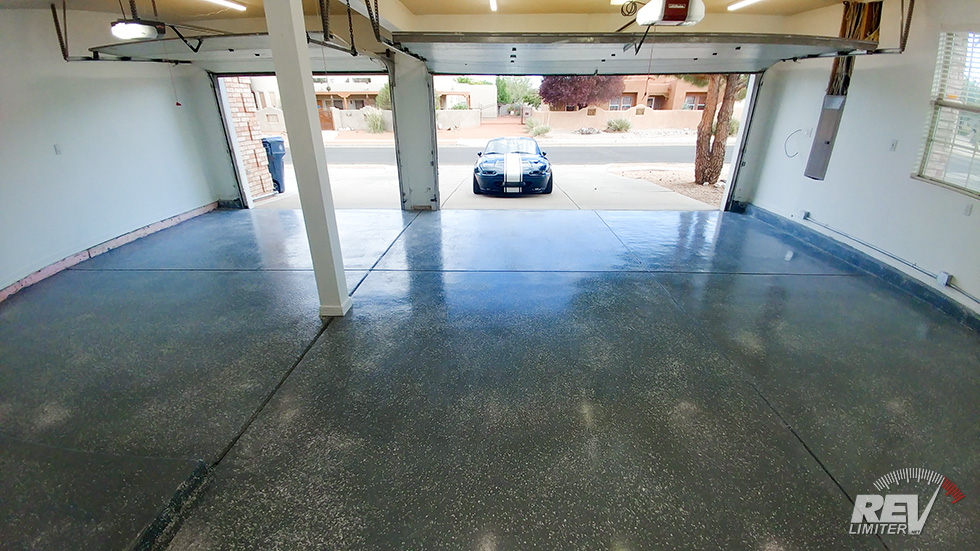
All the light!
The garage came with 3 very old fluorescent fixtures. They weren’t…. great. One was nearly burned up also. Now I have a total of 12 LED fixtures.
It’s like daylight in this garage no matter the time of day.
Paint
We also painted the walls white. The original color was brown. BROWN?!?! Who paints a garage brown? It wasn’t just dirty either. It was an even shade of light brown.
I left the ceiling brown which actually gives a lovely contrast and some depth to the room. The ceiling seems much higher than it is.
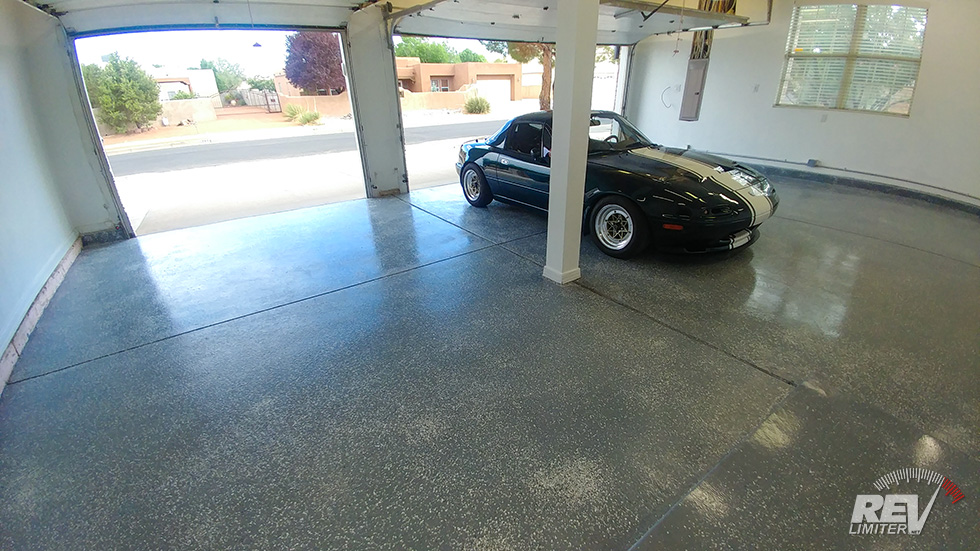
And, with that, the garage makeover is complete!
Extra Photos
Before the clear coat.
So much dust.

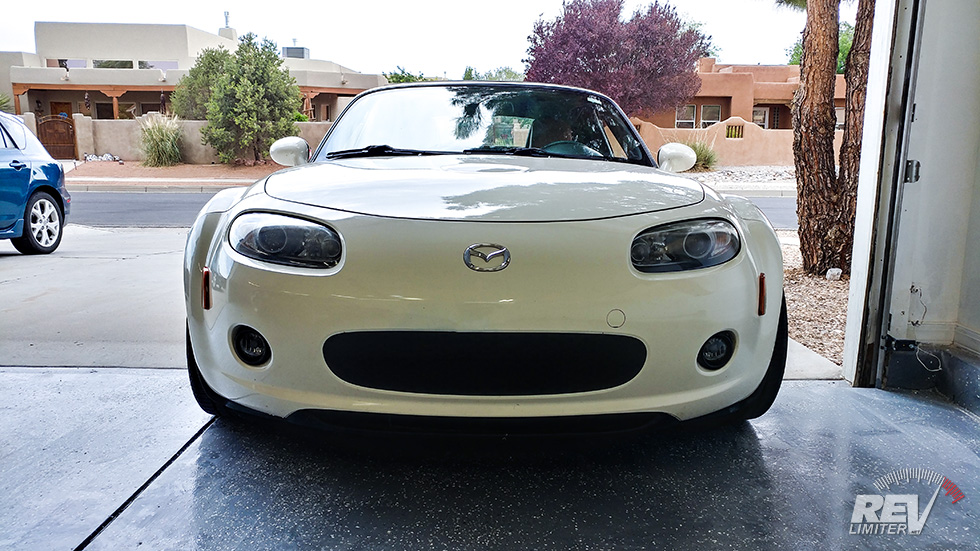
One happy car.
Can’t wait to live here.
Even Stormy came for a visit!
I hope the above post helps some folks out there. If you have questions, please comment below.


Congratulations! Happy to see the new place coming together, I hope you do a few more garage posts, these are always great to read. Do you have a good idea of the garage/shop layout already?
Home Depot customer service is real hit-or-miss. Maybe leave a poor review on Google if you haven’t already, seems to be one of the few ways to legitimately punish a large companies poor service.
Well jelly!
Great job Adam! Needs a two-post lift now
Swoon.
This garage/shop is going to be awesome! A lot of amazing things will be coming out from here!
I hope so! But the shop is another building.
And thanks!!!
“Do not buy a Dust Deputy. It was trash. I’m ashamed I bought it and am not going to link it to this blog.”
I laughed hard. Thanks for the brilliant write-up as usual Adam!
Looks too nice to park cars on.
What did your total price end up being, with all the extra stuff? Your post is simultaneously inspiring me to take this on myself and making the $5/foot soup-to-nuts price I’m seeing from highly rated local installers seem more than reasonable.
Seems like it was around $1500. I can’t remember off the top of my head though. Sorry about that.