
Blackbird in tha house!
Confession time: I’ve wanted one of these for a long time. Since Moti opened his shop and started shipping his rollbars, I’ve wanted one. Bad. Really really bad.
When my Harddog Harness Bar turned out to be a little underwhelming, I didn’t hesitate. I called Moti that same week and got a rollbar on order. It arrived about 3 weeks later.
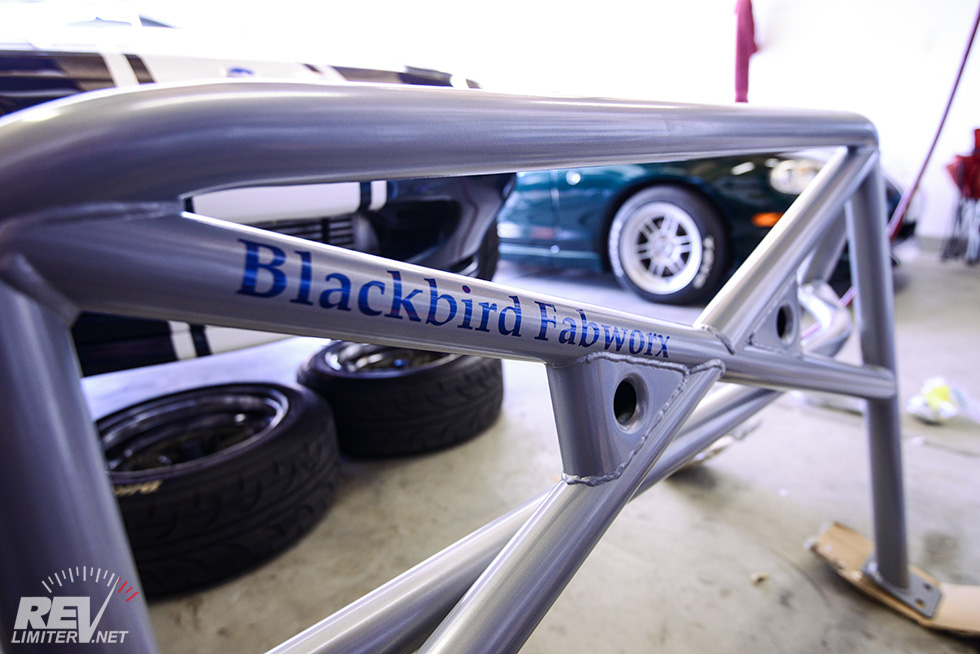
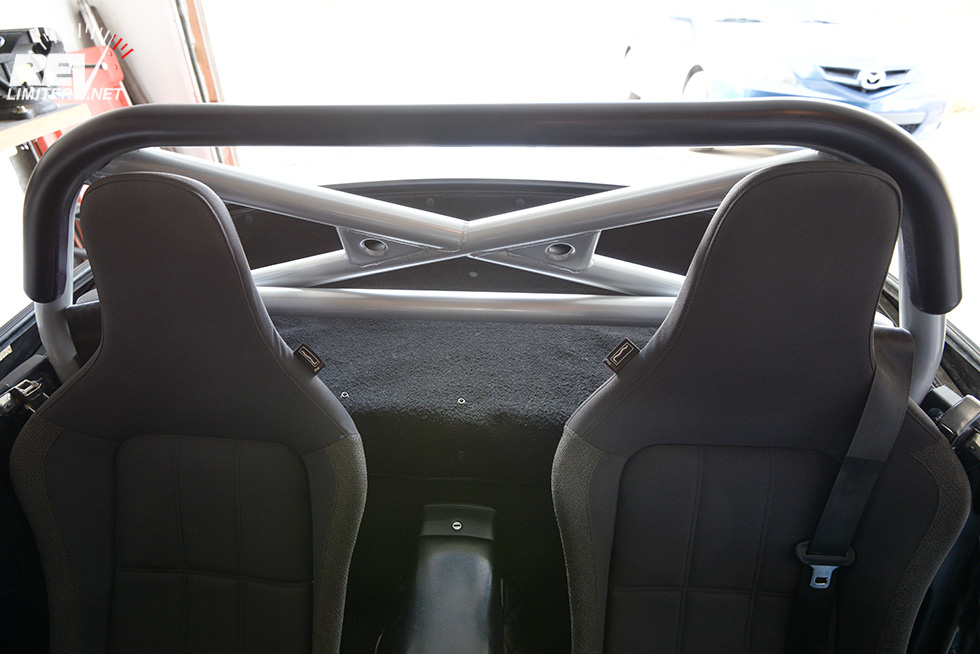
Isn’t it beautiful?
So shiny. Much tubes. Wow.
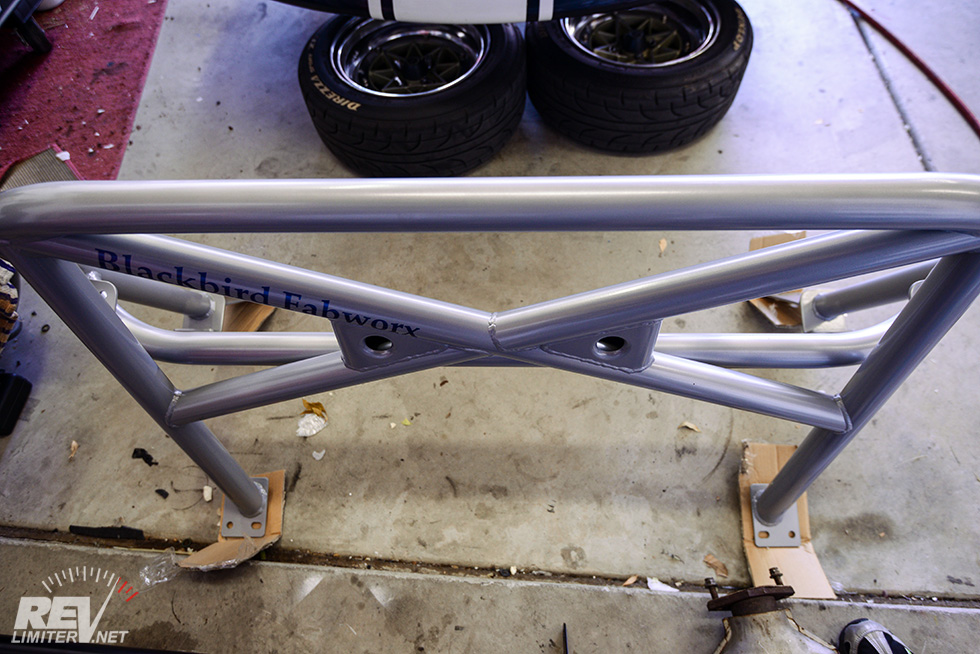
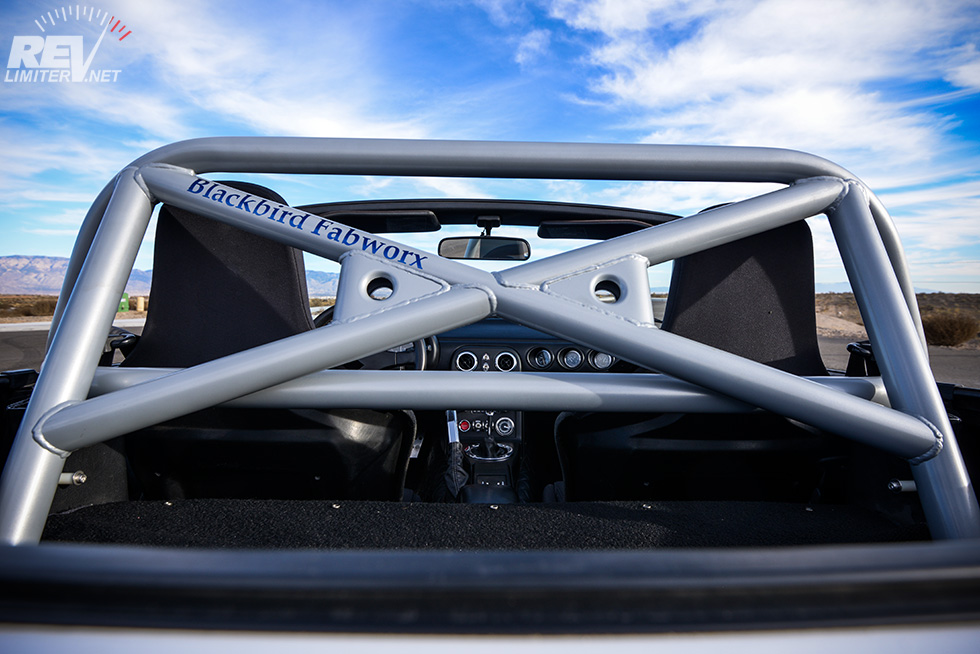
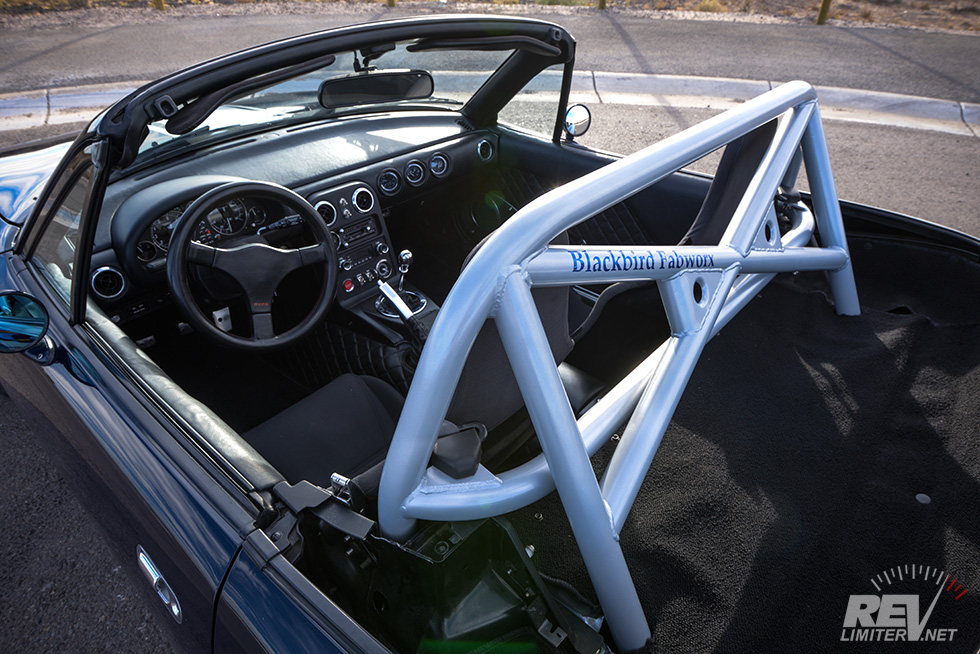
I ordered the Blackbird Fabworx GT3 NB rollbar. I really liked the integrated harness bar and relocated seatbelt guides. And, of course, the X brace and gussets. Gotta love the gussets.
I decided not to do door bars. Just a personal preference. My daughter rides in the car a lot and I didn’t want it to be impossible for her to climb in and out of.
The bar is powdercoated in silver. Something like 70% metallic silver? Moti had a couple powdercoat formulations and this is his favorite for a blue car. He even put on a sticker that matches the paint quite well.
Want one of your own? Check out the Blackbird Fabworx facebook page. Moti has a webpage too, but it’s a bit sparce at the time of this writing. http://blackbirdfabworx.com
Onto the wrenching!
HD Removal
HDHCDDM2 is on death row.
The harness bar that started it all.
Removing a rollbar isn’t the hardest thing ever. You remove a lot of the interior and the seats. Then you remove a lot of bolts. Then you remove the rollbar. SIMPLE!
The trick is not trying to save time with the interior parts. If you think something might be in the way or you find yourself working around something, just take the 5 minutes to remove it. You WILL be working around that same object for the rest of the day. Much better to just make life easy.
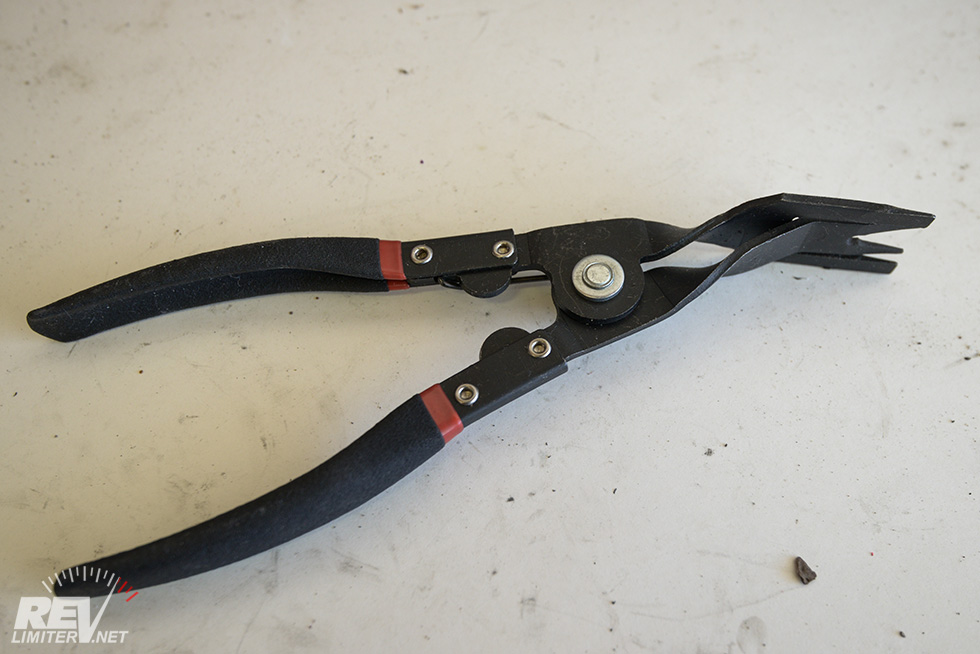
Interior clip puller
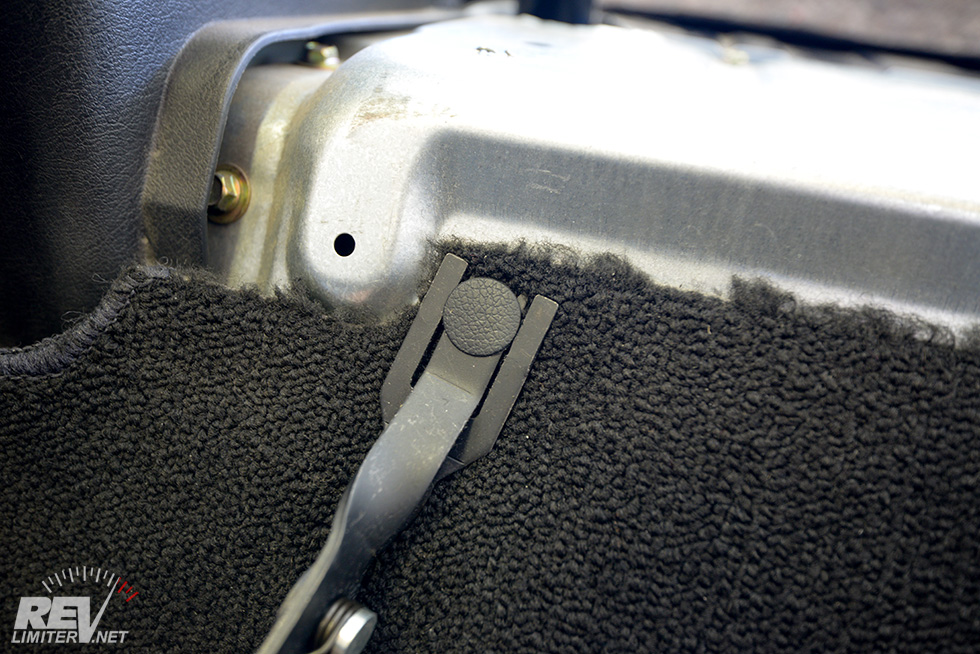
… in action.
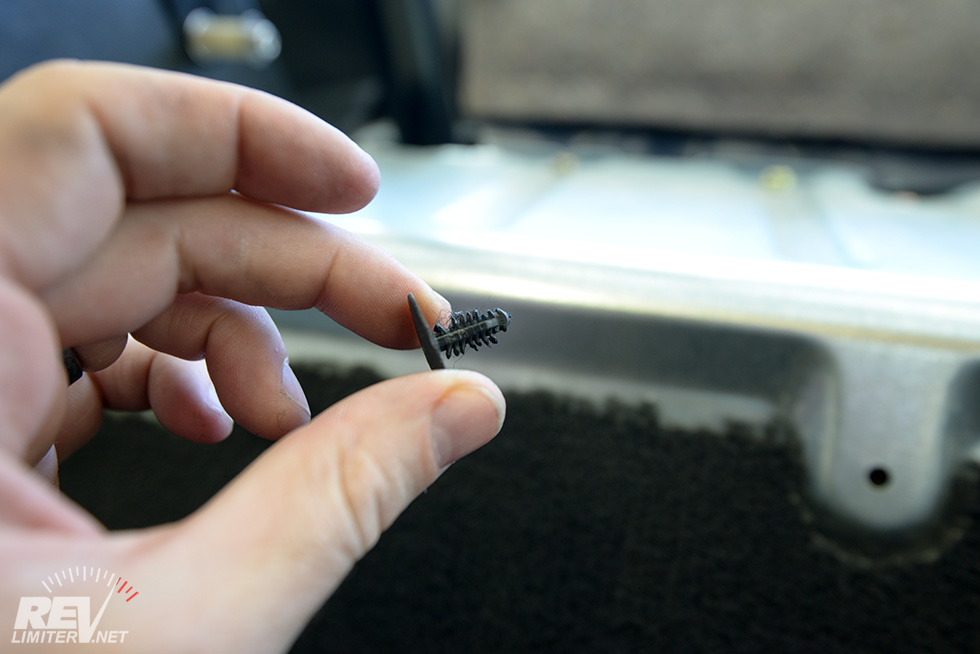
Clip removed with zero damage.
This little tool is well worth the couple bucks. I got it from Harbor Freight. It’s designed to remove carpet pins without destroying them. You can see it in action above. They call it Panel Clip Pliers.
I’ve used various tools for this over the years – a bent fork, a screwdriver with a slot in it, a pair of screwdrivers twisted together, my fingers, swearing, and teeth. Nothing else is as easy or damage-free as this little carpet pliers.
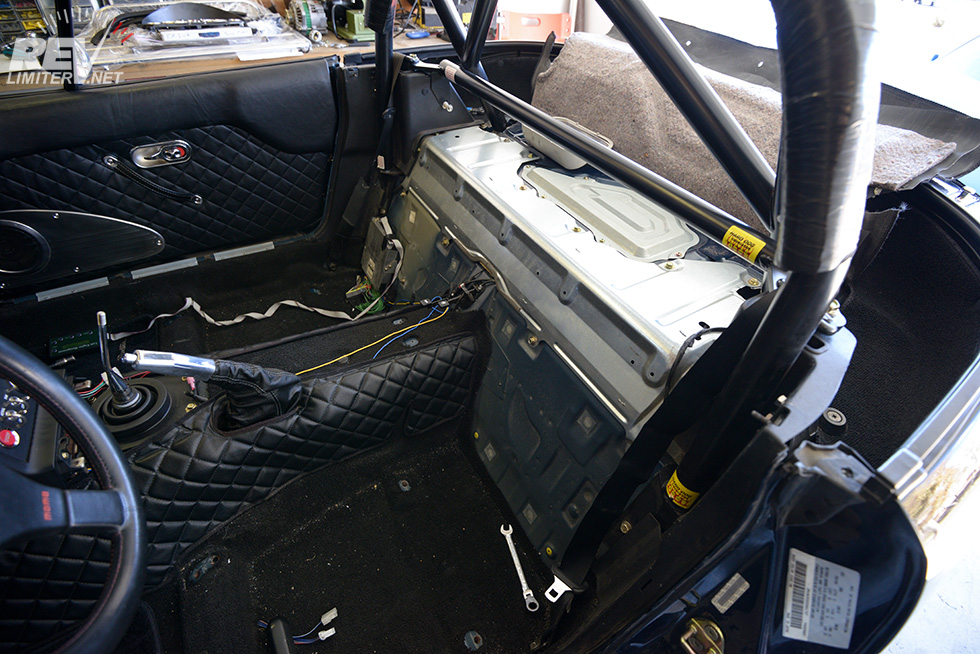
Bolts are exposed.

An just like that, there’s no more rollbar.
It’s hardly worth writing a few sentences about. Rollbars are quite easy to remove once the interior is cleared away. It’s around 6 bolts per side… perhaps 7.
Blackbird Fabworx Install
I love this little tool. Deeply.
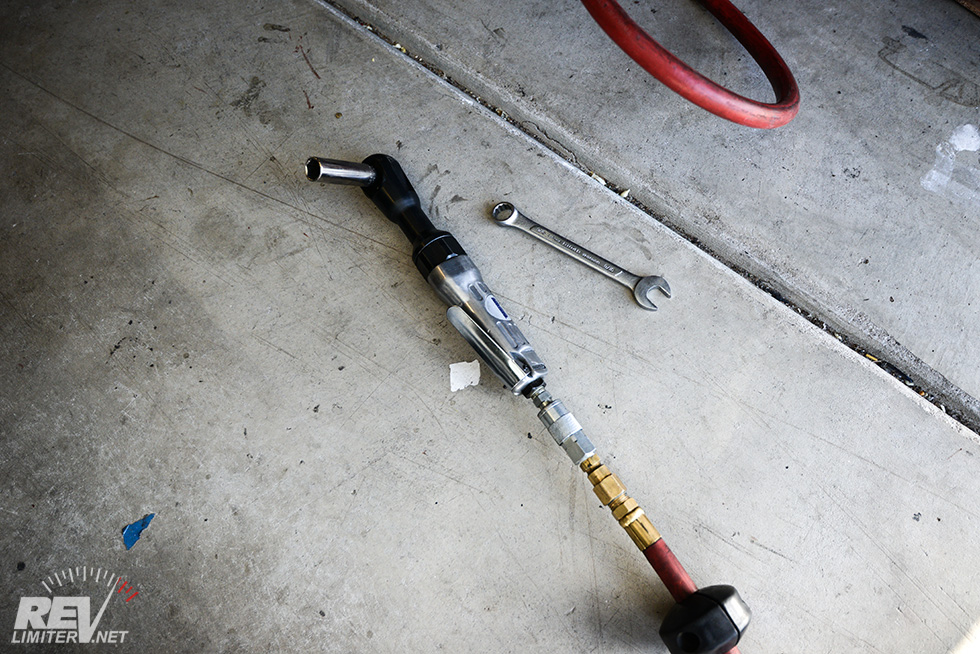
This is the best tool in the world. If any of you out there are reading and don’t have a small compressor, air ratchet, and impact… acquire one. Beg, borrow, or steal. They make life so much easier. You don’t need a huge compressor, though a bigger one is always nice. Having the ratchet do all the work for you is the difference between being exhausted and filthy at the end of the day or just being filthy.
Air tools. Every car guy/gal needs them.
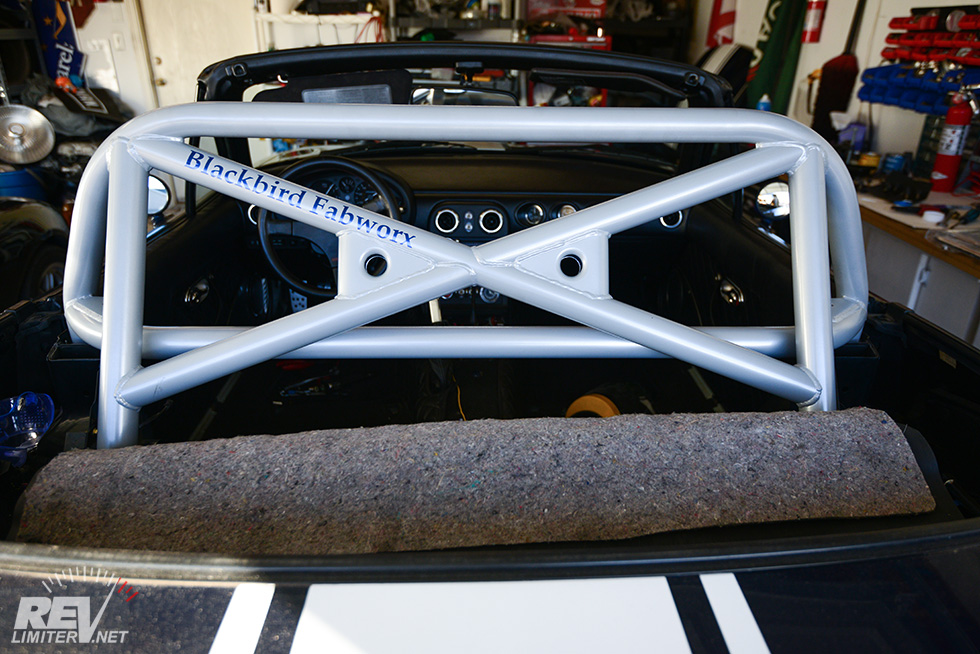
The GT3 is set in the car for the first time.
Of course, nothing lines up just right.
Setting the new bar inside Sharka was super exciting. I got it in place and ran inside to show my daughter. She, being 3, was deep into her playtime and didn’t want to be disturbed. But she came out and humored her old dad. Then she climbed into Bucky and drove him to the moon and back.
She likes driving to the moon. She’s 3.
After plopping the bar inside the car and getting it into position, I had to pull it right back out. None of the holes lined up. I didn’t expect them to at all. Just… I hoped they would. All of the holes were close, but all needed to be opened up a bit.
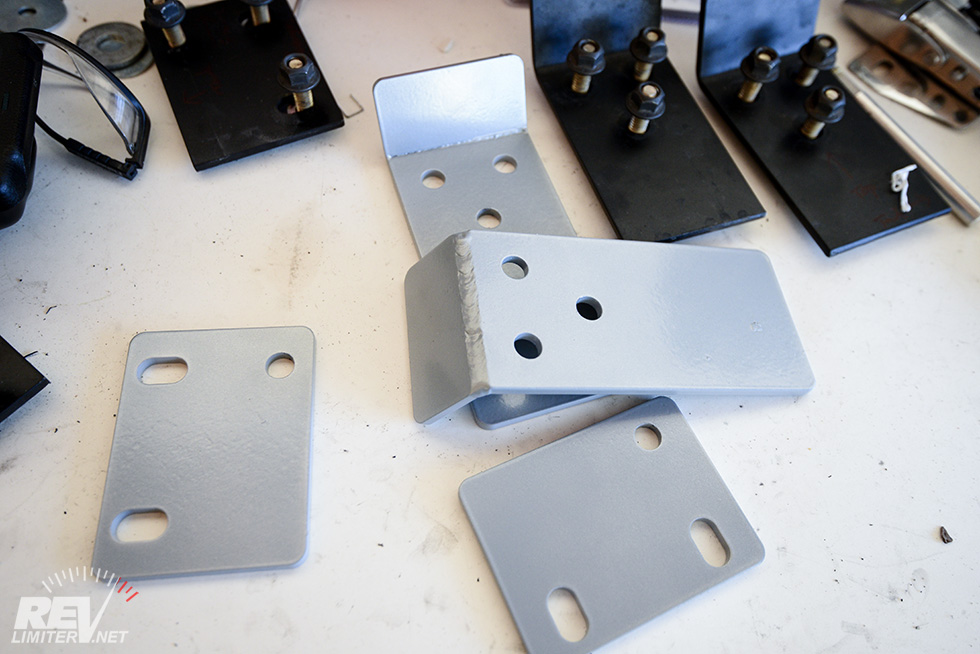
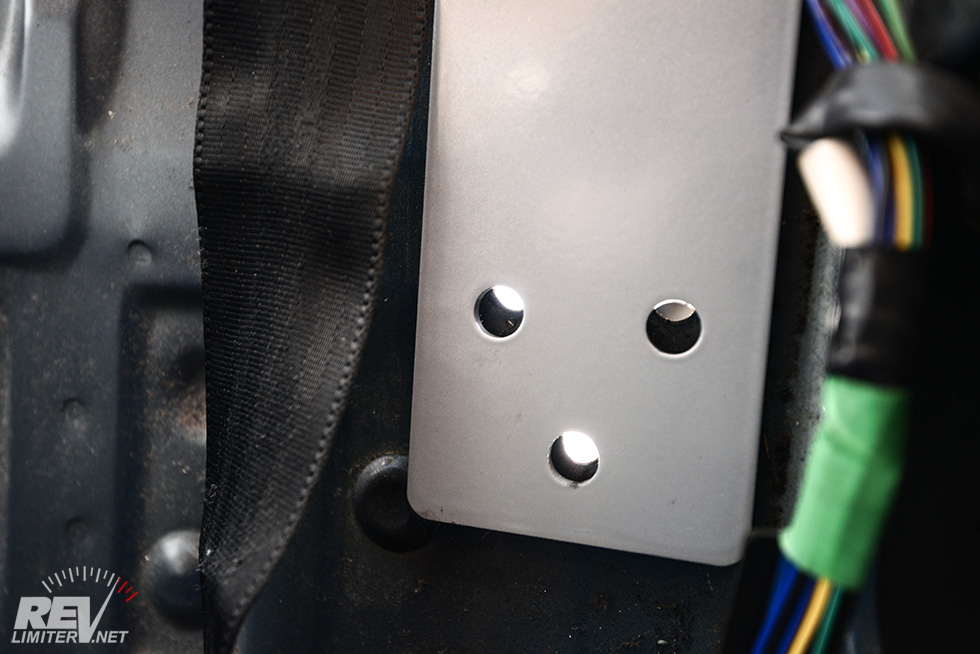
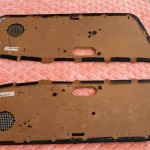
Lovely backing plates.
Just look at these. They’re not only powdercoated, but they also have rounded corners. No sharp edges. That’s huge. That means less things to cut my hands on, and THAT is awesome.

Main hoop backing plates.
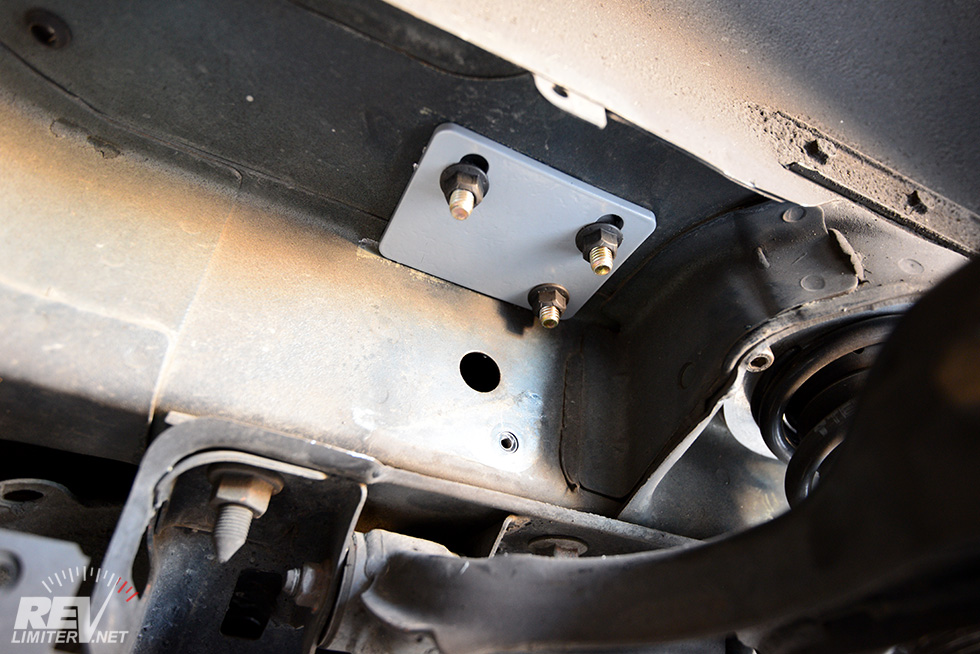
Rear leg backing plates.
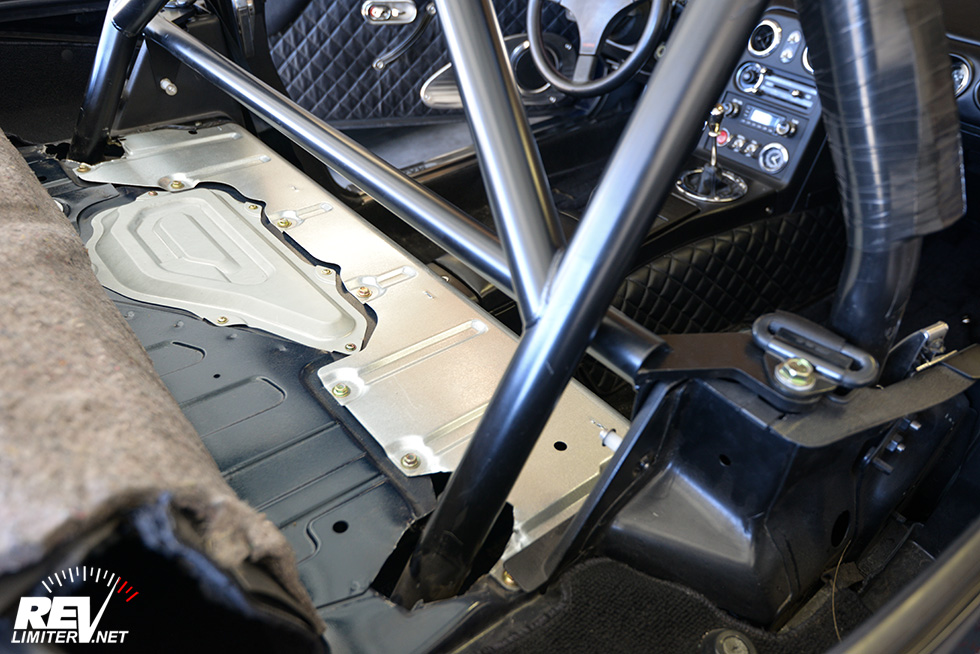
A little bit of work opening up the holes, and the Blackbird rollbar was able to be bolted into place. Everything fit perfect. Everything was square and no part of the rollbar hovered above the bodywork or anything.
The same couldn’t be said of my HD rollbar. That one had the rear driver’s side leg hovering about 5mm above the frame. I used some sheet metal to bridge the gap. I always thought Sharka’s 95 body wasn’t quite perfect, but that doesn’t seem to be the case. Moti’s rollbar lined up perfectly.

Full width.
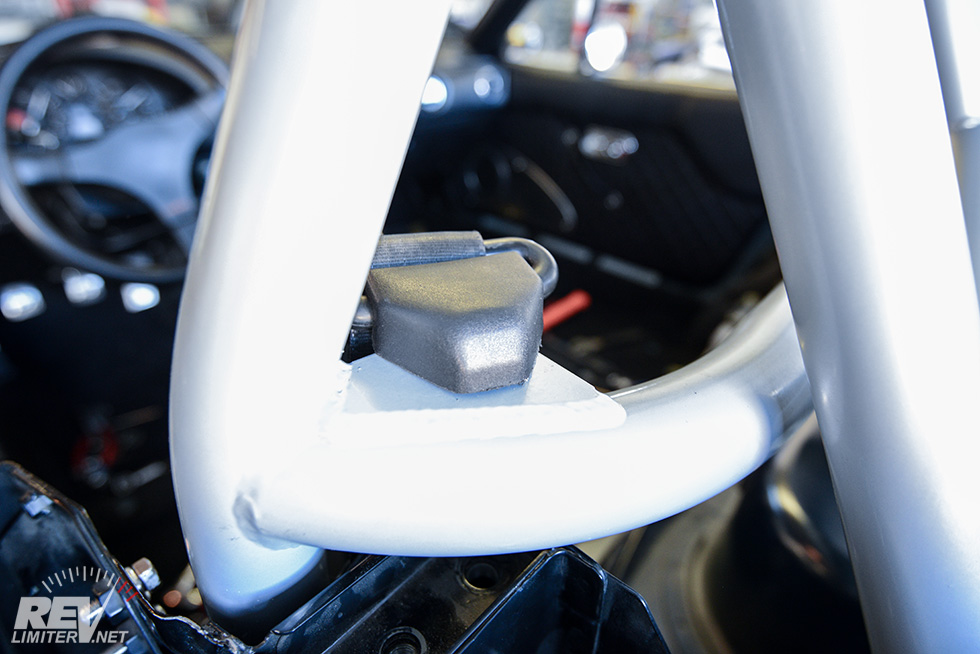
The belt guide swivels and the plastic cover fits.
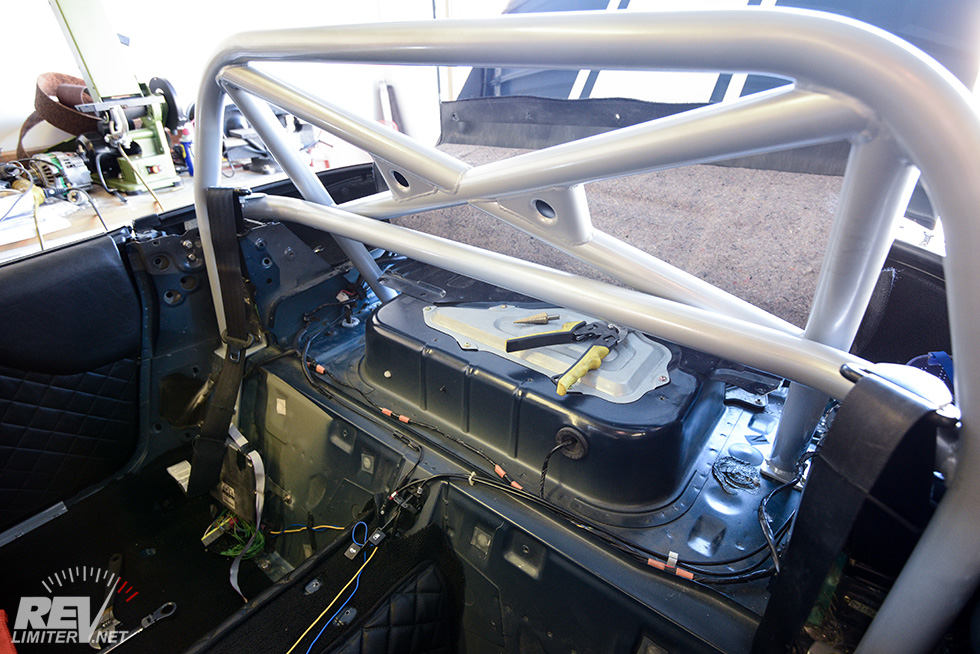
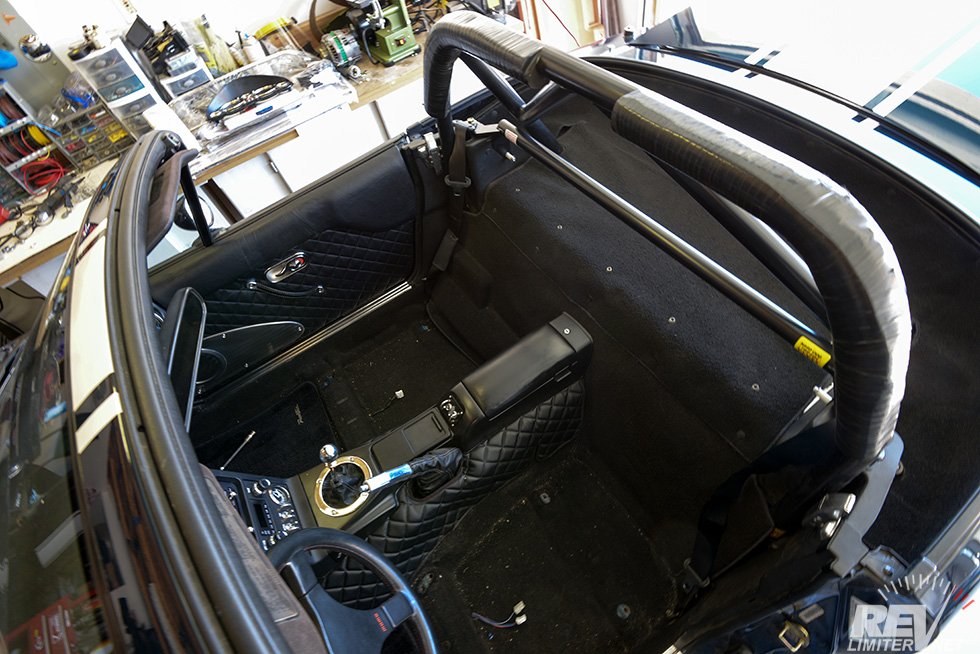
INSTALLED!
As I mentioned above, the fit and finish is just perfect. Both sides of the main hoop ended up in the same place on each side. The relocated seat belt guide worked great and doesn’t keep the guide from rotating. And the belt retractor even works well!
I’m honestly blown away by this rollbar. It fits perfectly. That cannot always be said of, well, any automotive product.
Well done Moti!
Finished Photos

Side profile.
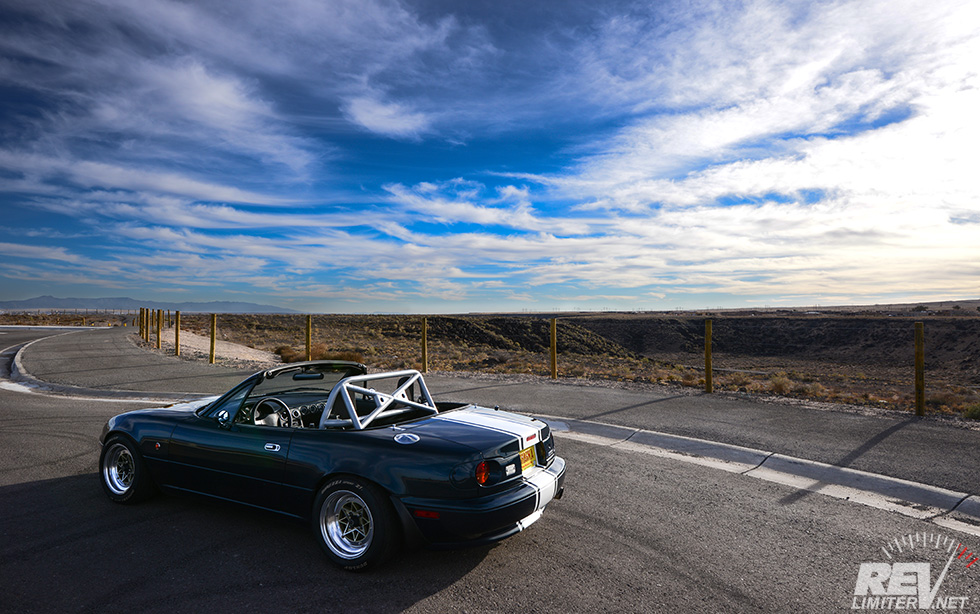
Sky cam.

Ground cam.
I… I love it. I really like the design of the GT3 rollbar. The X brace and gussets. Lovely.
The silver finish? I’m warming up to it. I’ve had Miatas with black rollbars for 15 years. The silver looked a bit odd to me at first. But I’ve had it installed for almost two months now and really like it.
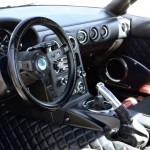
Inside.
From the driver’s left.

From the passenger’s right.
Mirror cam
So silver. Such tubes. Wow.
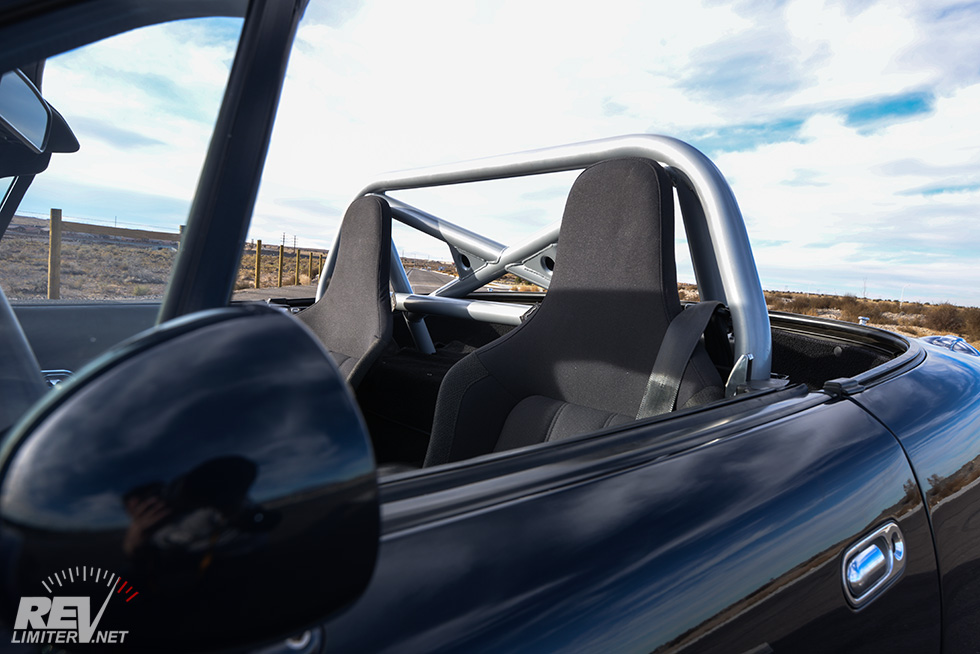
The rollbar works with the seats quite well. No contact is made anywhere and both seats slide fully. It feels a lot more substantial back there.
It actually weights 11 lbs less than the HDHCDD that it replaced. I did the bathroom scale test. 11 lbs less on the nose. That’s pretty sweet.
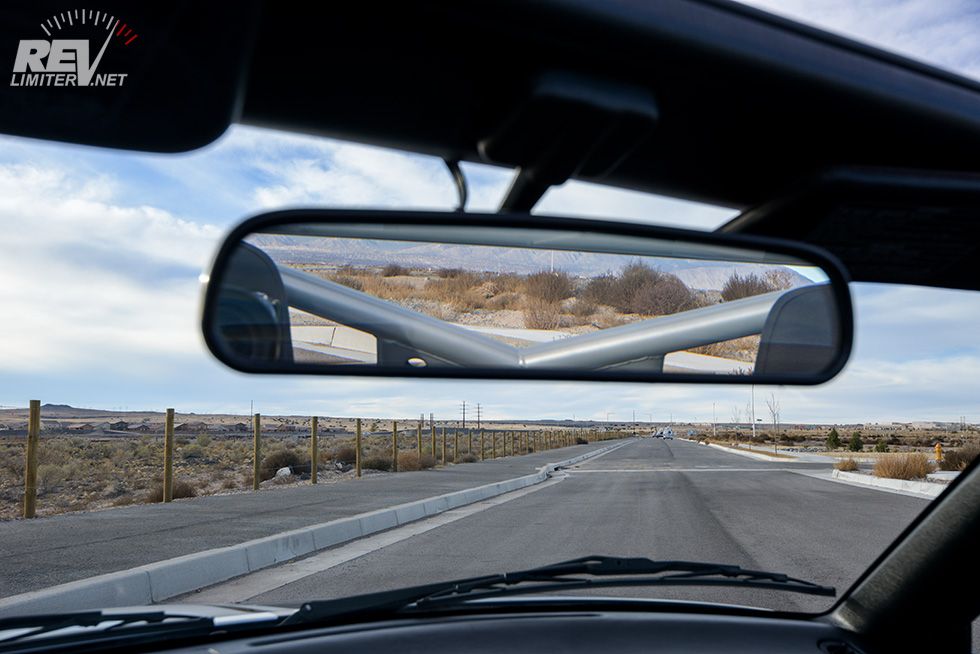
Also, the whole car feels more solid. There’s a marked decrease in NVH. The rearview doesn’t shake anymore. I was amazed to notice that. Driving home from work, I was able to spot a cop waaaaaaaaaay back on the road behind me. I’ve always had to use my side mirrors to make out objects and other cars while driving. Now my rearview is usable again.
I asked Moti about this to see if I was just imagining things. He was not surprised that vibration would be less.
Rear view
Here’s the mirror view. The edges are obscured a bit, but the view is actually better than with the Double-D rollbar braces.
And sharp eyes might have noticed that the main hoop lacks padding… Rest assured, it wasn’t that way for long. I went out for this one photo drive without the padding. I installed it when I got home.
Harddog’s SFI padding fits perfectly.

Will not kill me.
I ordered Harddog’s pre-formed SFI rollbar padding and crossed my fingers it would fit. They said that it would fit most 1.75″ rollbars. And it did! The padding fit like it was made for this bar.
The next order of business is to make a nice main hoop cover. I want to do something out of leather. I’m not sure if I’ll try to do any quilting on it, but it seems like it’s about time to sew some leather again.
The Scorecard
Build Quality: Perfect. It fits perfectly. I’m amazed at how well it fits. A+
Kit Completeness: I lacked nothing. Every bolt, every backing plate, and great instructions – I had all of these. A+
Installation: Pretty simple. There weren’t any tricky parts. It’s at least as easy as most rollbars to install, but it’s a lot more involved than a style bar. I’d give it an A for easiness when compared to other rollbars and a C+ for installation ease compared to an average afternoon project.
Function: This is the whole reason I got the bar. I wanted a rollbar with an integrated harness bar. I wanted to not die on the track. I wanted a functional seatbelt retractor. And, while I can’t crash-test this bar without harming my car somewhat, I’m very happy with the function of it so far. It gets an A.
Style: Completely subjective, as always. I chose this model because of the style. And, in person, I think the GT3 looks every bit as good as the photos online. It’s gorgeous, solid, and purposeful. A+
Overall: Well worth an A grade.
Thanks again Moti!!!
And once again – check out the Blackbird Fabworx facebook page to get one for your own Miata.


Looks good Adam. Emailed Moti myself, in hopes that he’s done a cage for the Mk3 Supra. We were planning on fabbing one up, since most things of that nature with my car are custom (not a huge aftermarket, somewhat regrettably), it would certainly save some time, and it seems like his quality is top notch.
Wouldn’t mind one for my 99 Miata, though that will have to wait until the Supra is done here in a few months. Thanks for sharing the review, always good to see an aftermarket piece go in with a minimum of blood, sweat, and cursing. =)
I hope the Supra gets some awesome Blackbird action. I know he’s done a lot of cages. I’ve been googling his work on various racing forums for a month. Each one is prettier than the previous.
[…] shows how to fabricate and install a roll bar in a 1981 Camaro pure stock race […]
I love these reviews and this one has me sold on this model. Great stuff, keep it up!
Glad to help!!
[…] be a well respected vendor / long time member in the Miata community (Adam from Revlimiter.net) – Blackbird Fabworx GT3 Rollbar Install — revlimiter.net He even reviewed the harness bar I mentioned earlier Moti Blackbird Fabworx – Quality […]
I have to say, I’ve been less than impressed at times with my HD Hardtop in my 1990. It’s a little low, which is problematic for me at 6’3″ and *mumblemumbleoverweight*, getting under the bar at the track is tricky. And the double-diagonal crossbars are horrible for rear visibility, which is already rough in a Miata. Sadly their website is broken right now, but this is a very interesting idea. Did you happen to measure any height/width differences between the HardDog?
Width is exactly the same as HD. The height is slightly lower, which is good. The HD touched my hardtop. The Blackbird has about 3mm of clearance. Just enough.
Hello,
I am considering this roll bar. Its amazing in design! Can i ask you a few questions?
1. Can you still mount the spare tire in the car?
2. What tools did you use to cut the carpet? And what tools did you use to cut/trim the metal body?
3. Can you still use the stock hardtop side brackets or do you have to modify them?
thanks in advance! I keep lurking your page and keep reading this post.
Happy to help Marlon!
1: I can’t answer. The TEIN suspension I’ve had has prevented me from using the spare tire for the last 11 years. I just got a set of XIDA, but haven’t tried to mount a spare. HOWEVER, I don’t believe the rollbar interferes with that area.
2: My carpet was already cut from the Harddog rollbar. The legs went in the same place. I think I just used scissors though.
2b: I used tin snips to cut the softer metal and a cut off wheel to cut the thicker metal.
3: I’ve seen a few photos showing that this bar works with the stock side brackets. I’ve never had them. I have the Beatrush brackets and they’re actually bonded to my hardtop… not possible for me to switch back.
Why nb rollbar on na? Same with the xida top hats?
Dang… let me think on the rollbar…
I believe the NB model had the nice curved harness bar and relocated seat belt anchors. Yeah, I think that’s why I liked the NB bar. The NA had a standard harness bar on the rear legs and used the standard seat belt point.
And NB top hats are required for XIDA if you’re not using their fancy needle bearing top hats. Those were not available when I ordered.
More questions for you Adam.
1) since relocating the seat belt anchors, in your opinion, how well did that work compared to not having the roll bar? Do you still have to manually feed the seat belt back into the retractor when parked?
It works quite well! However, Sharka’s belt retractors have always worked well. I’ve never had to feed them back manually.
Sorry to be thorough but what you’re saying Is that they work exactly like stock with his relocate
Thanks!
No, what I’m saying (but not very well) is that every Miata is different. Some won’t retract the belts no matter what you do. Others will have no problem with the belts no matter how badly the rollbar messes with the belt path.
Sharka’s old HDHC rollbar was dead in the way of the belt. But it didn’t matter. The belts always retracted just fine.
Bucky’s belts don’t retract worth anything even though they have the Bossfrog belt extenders and nothing in the way.
Every car is different.
Did you ever come up with a cover for your padding? Just installed my blackbird and am ordering the hard dog padding as well
Never did. I might ask Hard Dog about sewing one up special…
Excellent write up! Used this as a reference as I installed mine on a 1997 model. Question…..I had an issue with the passenger side main hoop leg hitting one of the ECU mounting stud. It’s preventing the cage to sit completely flush. Did you just cut that stud off and just mounted the ECU on the remaining 2 studs?
Any assistance would be greatly appreciated!!
Thank you.