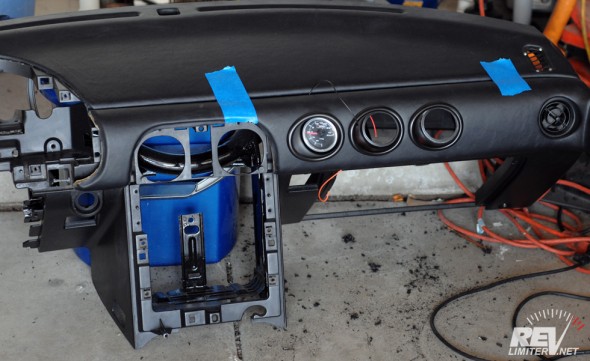
So.. where were we? Last time, I was showing off how the gauge cups fit into the crash pad. After that, I held the pad up to my spiffy leather dash and noticed how homely the vinyl looked compared to the leather.
I had no choice but to also cover the crash pad in leather.
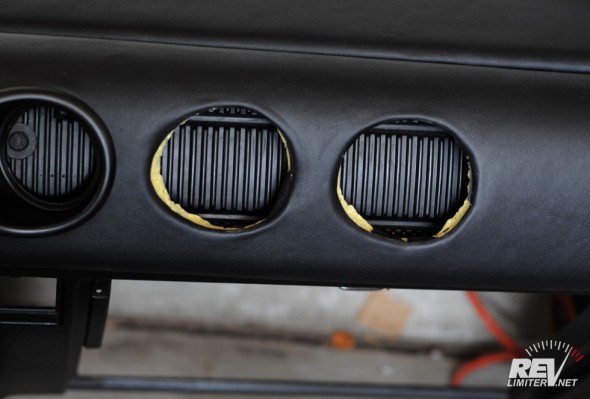
I managed to not take any pix of the crash pad after it came back from the leather shop. That’s right – leather shop. I tried to cover it myself and failed. I was not up to getting the leather around the edges, so I paid a shop to do it. Worth it, I think. They did a very nice stitch on the edge and got the leather inside the vent area perfectly. It matches the dash wonderfully.
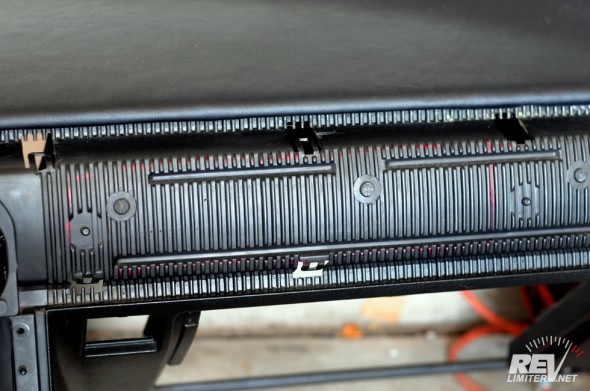
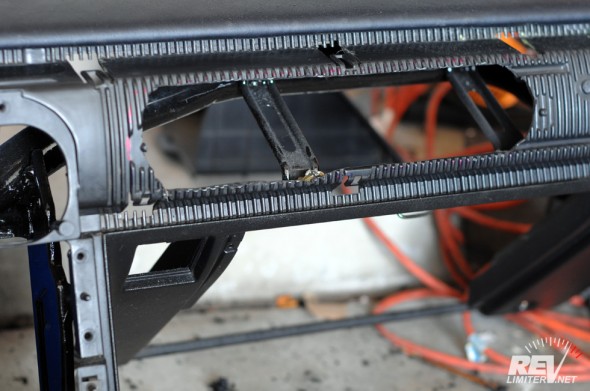
But the dash needed a big hole cut in it.
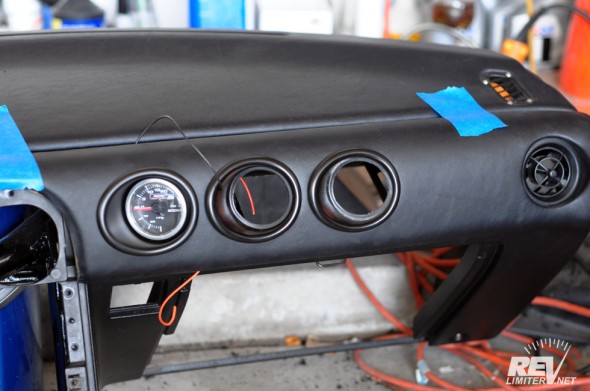
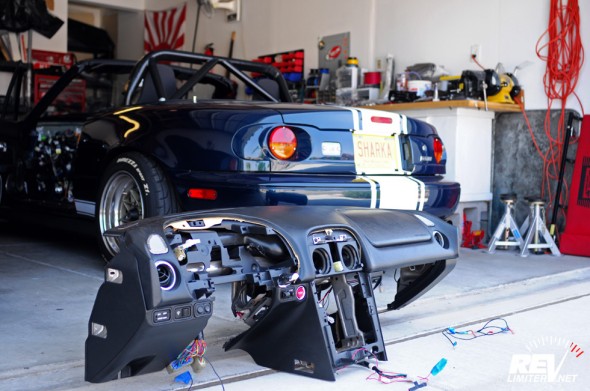
Not much to it. I put the crash pad up to the dash and marked lines through the holes where to cut. Then I connected those lines and dremeled. It was very easy. The dash plastic never saw my composite cut-off wheel coming. It barely put up a fight. Then I cleaned up the edges with a sanding drum. The whole cutting took maybe 5 minutes.
Finally, there’s nothing keeping that dash from being installed! It seems like I’ve had this project on the back burner forever. Heck, my daughter wasn’t even born when I acquired this dash. It’s time to put the thing in already!
The Install
That’s it. Last photo of Sharka’s NA8 interior. Never again will that airbag hole be an eyesore.
Removing a Miata dashboard is seriously easy. VERY easy. I’ve now done three removals. The tricky part is the center bolt way near the glass, but if you’ve got a 1/4″ drive socket wrench and a standard 10mm socket (not a deep one), it becomes easy. That happens to be the right tool for the job and anything else makes it a pain. Even a Gearwrench isn’t quite right for removing that one bolt.
There are electrical connections on both sides of the dash. The driver’s side has the lion’s share, but there are two or three on the passenger side as well. Those can trip folks up. Also, there’s the hood release to release. I always manage to forget that one till I’m struggling with it.
But really, from start to removal is about 30 minutes of work. Very very easy to pull one of these. Only nine bolts hold it in.
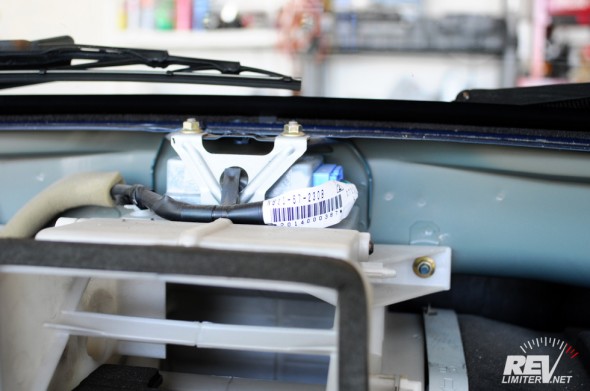
This is the airbag brain. It sits right behind the firewall and under that center bolt. I chose to leave it in Sharka. I know some folks would have issue with that. It’s not hurting anyone. It’s not very heavy. It stays.
I also was curious if the early dash would fit over it or if I would have to remove it. That question alone was the main reason I left the airbag brain installed. I wanted to see if it would fit. (spoiler: it fit fine with the brain in place.)
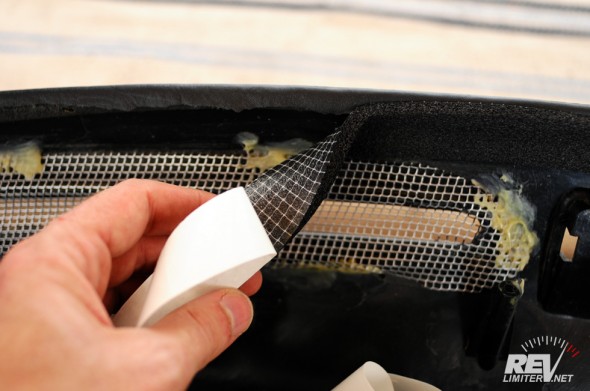
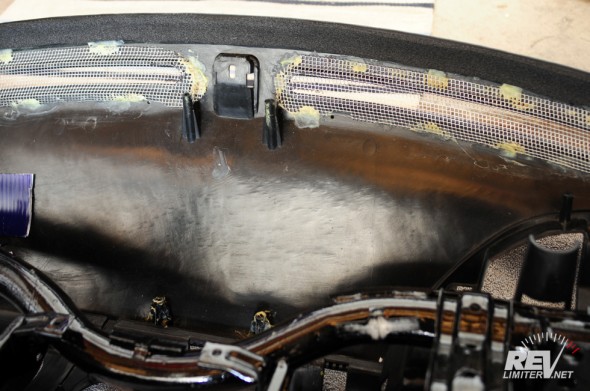
I read this tip a few months ago and swore I’d not install the dash without following it. William of Track Dog Racing clued me in on this while doing Scrat’s restoration. The dash has a strip of foam padding at the front to keep it from rattling. Over the years, it degrades. When you have the dash out, it’s nice to refresh that padding.
I scoured the aisles at the local Home Depot and came home with a half dozen kinds of padding. This one is called Rubber Cushion Weatherseal. It’s somewhere in between the hardness of light foam and medium density foam. And it has an extremely sticky backing with this matrix of goo. And it doesn’t squeak. It’s a winner.
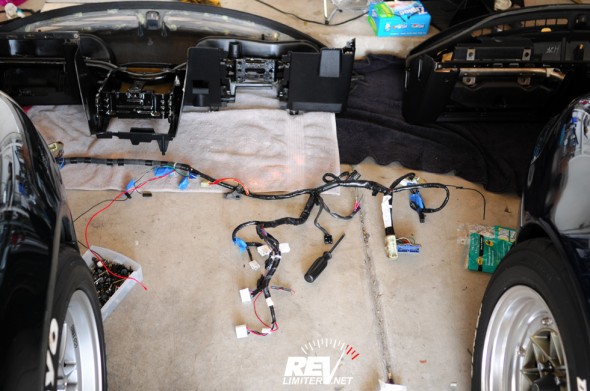
There was a bit more to do here than just swap wiring. For instance, the NA6 and NA8 dashboards have different holes. NA8 puts the power mirror control over on the right by the ignition. NA6 has no accessory hole on the right. So… I had to extend that wiring (7 wires I think) by about a half meter. And the NA6 dash has two lights, while the NA8 only has one.
I had moved my lighter / power socket to live inside the glove box with my NA8 dash. With the NA6, I wanted it to be in the stock position again. That meant changing the wires yet again. All total, I spent about two hours on the wiring. I could have removed four dashboards in that time.
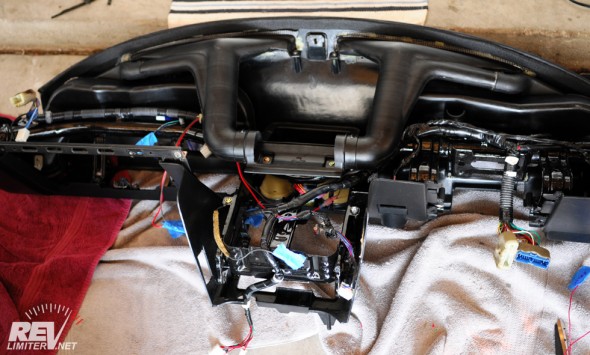
This was the first time in over a year that the 1600 dash had everything installed. All the ductwork, all the wires… it felt good. It felt ready.
Just one more tiny detail.
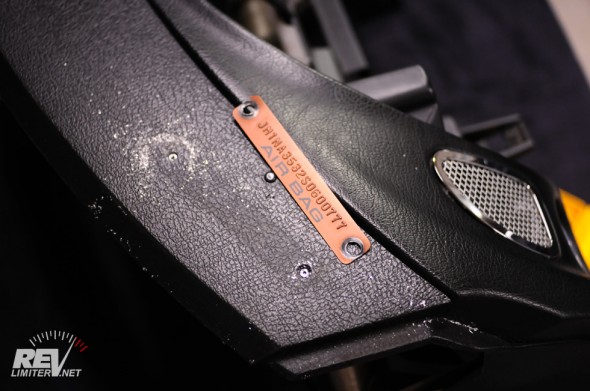
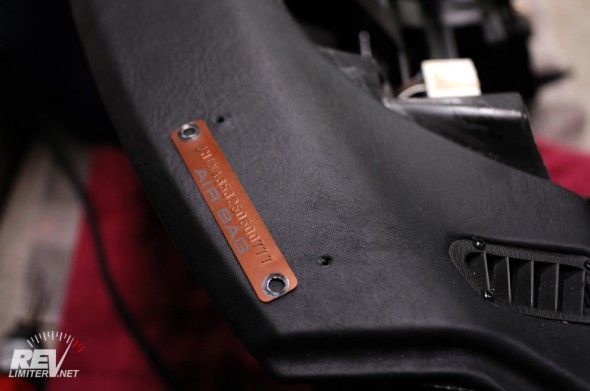
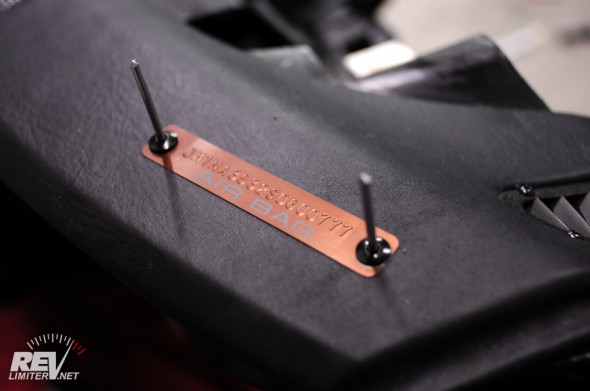
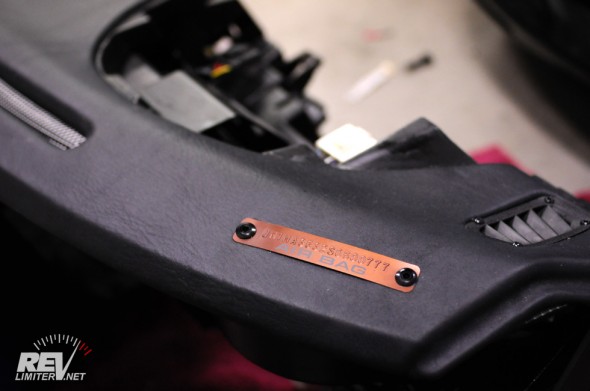
There really is nothing to it. You just drill out the old pop rivets with a nice big drill bit and then install it in the new dash with slightly bigger rivets. I sourced these black pop rivets from ebay. I think 50 of them were $5. I don’t quite remember since I bought them over a year ago, back when I acquired the dash.
Also, no, I’m not worried about posting Sharka’s VIN on the internet. Because this isn’t it.
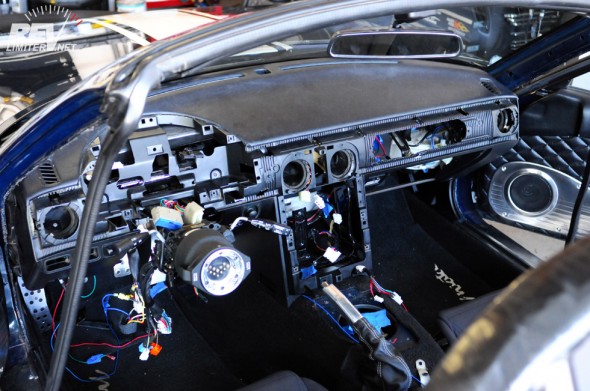
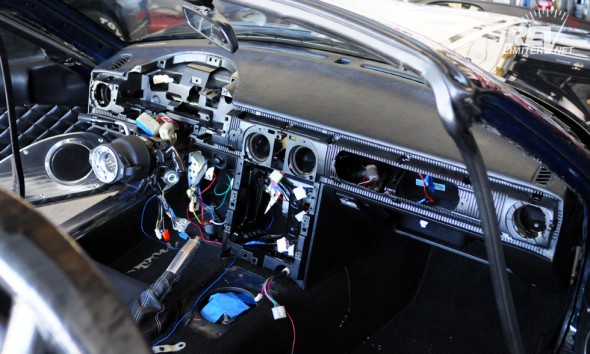
Check out the difference between these two pix and the dash removal ones above. Notice? I removed all the windshield plastic trim. That made a heck of a difference. I spent a good 10 minutes struggling with the NA6 dash, trying to get it to slide into place. Then I realized that it was stuck on that plastic trim. After ripping it out, the dash flew into place.
I also removed the shifter and the little bracket in front of the shifter. That helped a lot too. It was rather hard removing the dash with the shifter installed.
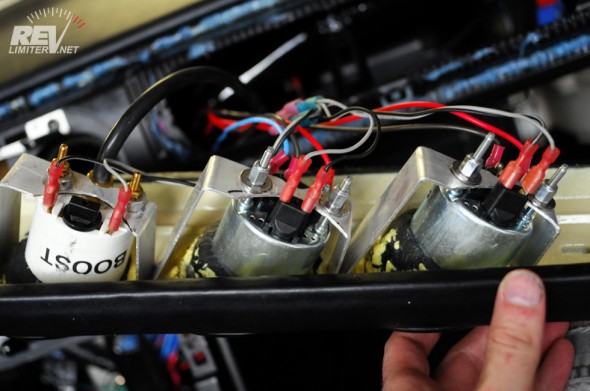
Since the back of the crash pad gauges wasn’t going to be easy to reach, I worked pretty carefully on the wiring. I built a very nice harness that plugs in with a single socket behind the radio. The manifold pressure signal also plugs in back there via a small hose connector.
I hope I don’t have to remove this crash pad for a long time…
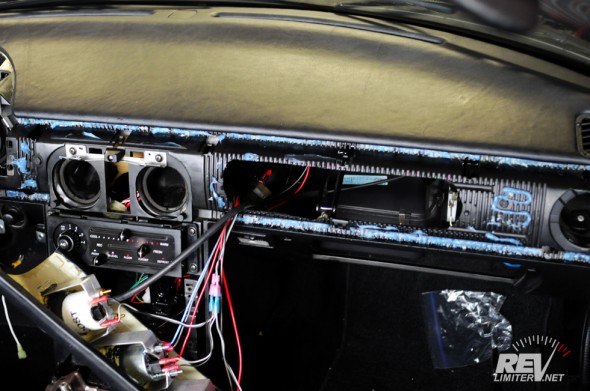
The factory uses black silicone. I used blue RTV. It should work every bit as well, though it might not be as easy to remove.
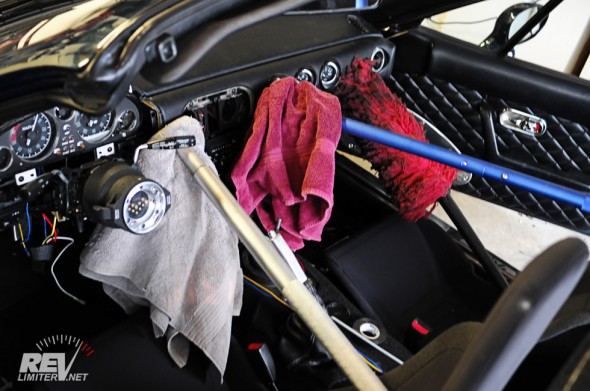
A word about that bottom pic… I just used whatever I could grab to hold the dash in place. I was caught with my pants down. All of my 2x4s were hanging out in my shed, so I used jack handles and a California Duster to keep the pad in place. Silly, but it worked. It is very very stuck on the dash.
And that’s pretty much the install. Everything else is just dressing.
The Goodies
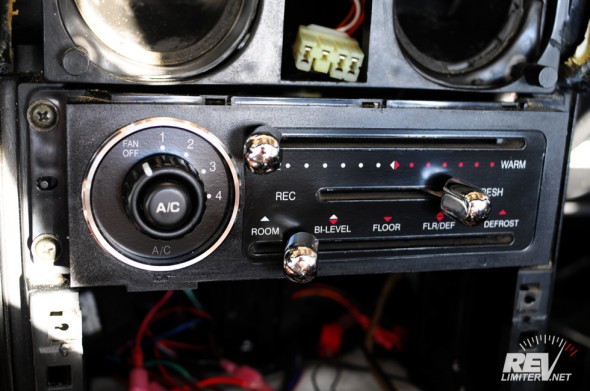
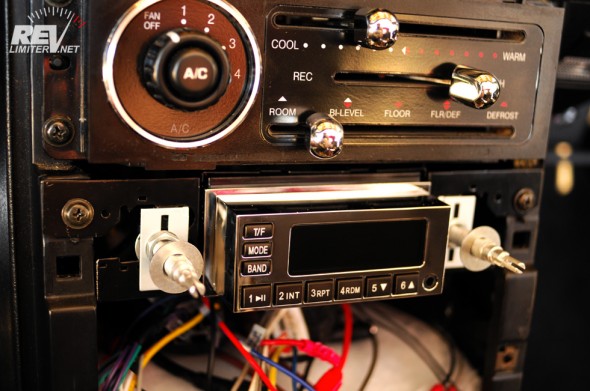
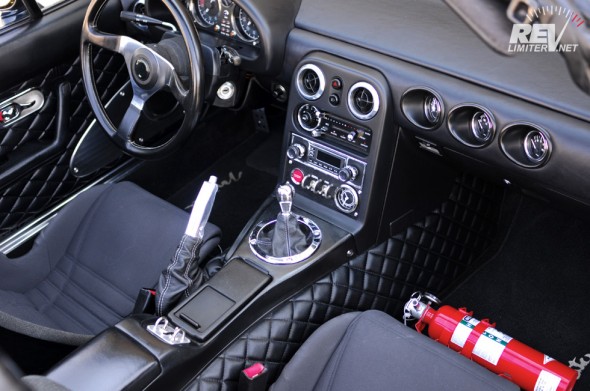
I made myself a new HVAC panel. It’s very similar to the one in my store, but with just a few changes. ROOM and FLOOR replace FACE and FOOT. And the A/C indicator is greyed out quite a lot. And finally, FAN OFF replaces both the 0 mark and “FAN” moniker.
I also left off the AWD metal panel overlay and went for black. It needed a little shine though, so I added this small ring and the chrome slider knobs.
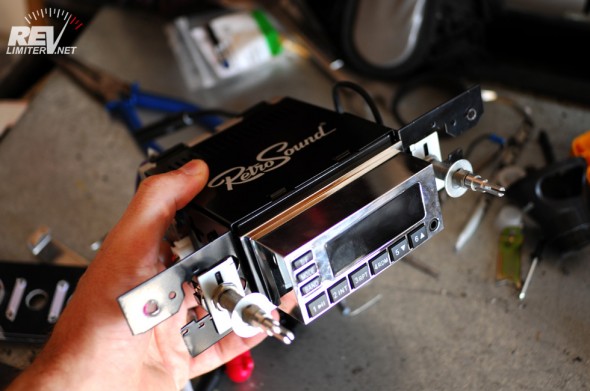
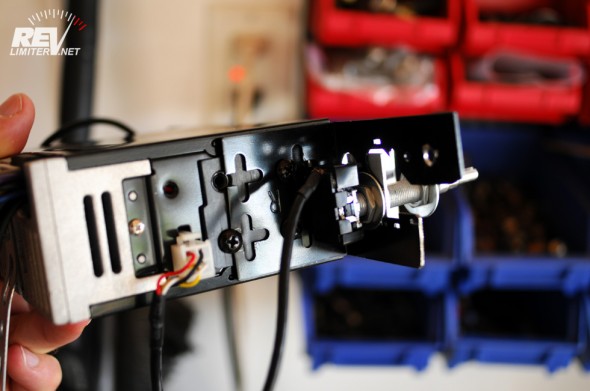
This is a Retrosound Model One radio. I’ve wanted one of these for years. The vintage look, the metal knobs, the lack of CD slot… I love every little thing about it. But I never really had a reason to upgrade. My old JVC head unit worked and worked. It still works in fact. I just couldn’t put it into this vintage dash. So, I used the opportunity as a reason to replace a perfectly fine working radio with another.
It mounts in the factory dash just like OEM. Everything bolts in and screws on. No DIN sleeve. None of that modern funk that 99% of head units have. Just two knobs. It also has a remote-mounted input for USB, SD card, and line-in jack.
.
.
.
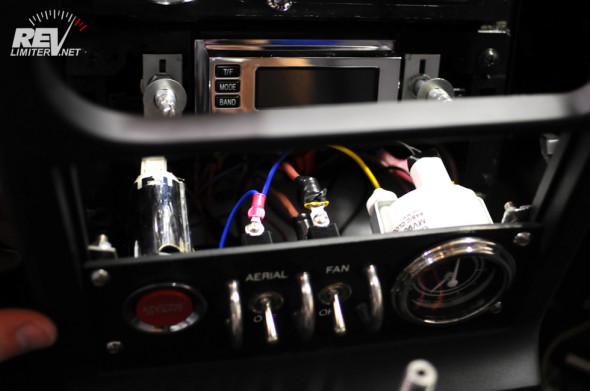
And that leaves us with one more slot to fill. I used to keep gauges in that bottom slot… what to do?
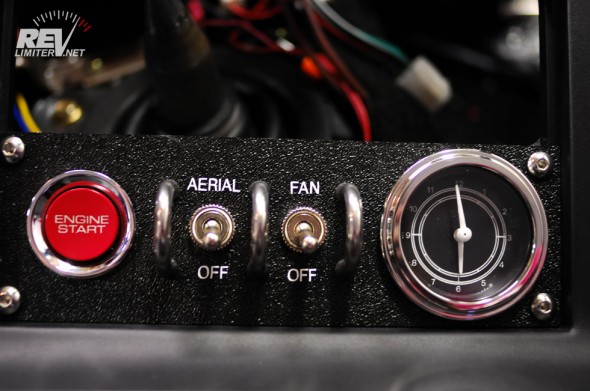
Since mounting the start button at the bottom of Bucky’s center console, I’ve thought about doing the same thing for Sharka. It’s a really nice location for a start button. And a few switches. And a clock!
I shopped all over for this clock. Probably 2 weeks of research went into this clock. Did you know that 52mm clocks are stupidly expensive? My boost gauge was like $35. Those two VDO Series 1 gauges (oil and volt) were barely $40 shipped for the pair. This clock? I think it was $85. And that is a BARGAIN! Most 52mm clocks are in the $125 range. Some are in the $250 range. I found a couple hideous ones for $50 but nothing less than that.
Anyways. Clock. I has it. And it matches my boost gauge.
As for the switches, I like not having my antenna raised while driving along and listening to a non-radio source. And that’s most of the time for me. I’ve yet to find a head unit smart enough to lower the aerial when it wasn’t using the radio. This Retrosound is no different. Switch to USB input? It keeps the antenna up. Soooo… switch.
The fan switch is something I’ve had for as long as I’ve been autocrossing. It’s quite nice to pop the hood and let the fan cool things in between solo2 runs. Mine activates the smaller of the two fans. The main fan is still controlled solely by the ECU.
I changed my starter button wiring slightly. It now switches ground instead of power. And the ground it switches is the e-brake ground that has continuity only when the handle is up. So, the handbrake has to be up for the car to start. That was my idea to keep me from accidentally hitting the start button when driving and shifting. If I hit it with the wiring in this new configuration, nothing happens. Quite pleased about that…
annd…. that’s it.
Wanna see the finished photos? Hop over to part 2 and check it out. Sorry for breaking it up into two posts. There was just way too many pix for one.

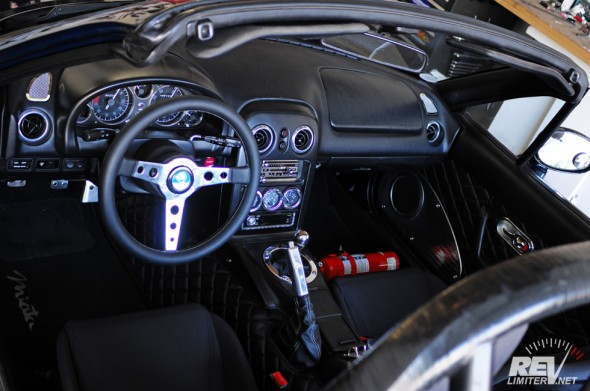
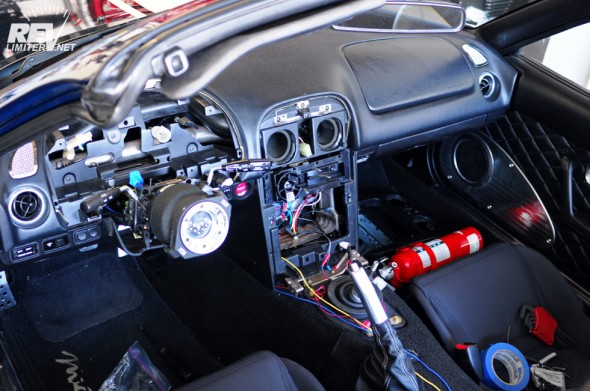
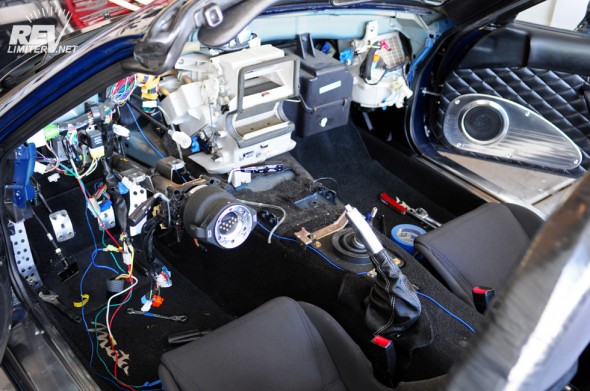


Oh, dear god… trying to find more words and failing… That is amazing!
If only I could have had this all together for your last trip out…
There will always be trips to ABQ! Looking forward to seeing this in person!
Basically I’d like to come live in your garage so you can teach me how to do this to Scarlett!
hahaha! Any time! Unfortunately, quarters are a bit cramped with the two current occupants.
I just came across this site this morning and I absolutely love your interior. The quilted surfaces and toggle switches are perfect. I just obtained a 95 merlot and might use some your ideas.
Feel free! I share my ideas in hopes of helping others.
That interior is the stuff dreams are made of. Beautiful absolutely beautiful
Hello,
Great write up.
What gauge pods did you use in the crash pad?
If you look near the top, there’s a menu of all posts related to this project. You want this one. http://revlimiter.net/blog/2012/05/na6-dash-project-still-continued/
Thanks for another informative post. I’ve never done any riveting. What size rivets and gun do I need to transfer my VIN onto a new dash?
I have been looking for a retro radio set up for my miata and yours seems perfect! i was looking at retrosoundusa.com and was wondering which modle did you order and what car was it for? thx!
It was one of the Euro ones. A Porsche model? Those are actually DIN-sized, though they’re not listed as such on the site. Give Retrosound a call. Great guys to deal with. I had a problem with my order and they fixed it up really quickly.