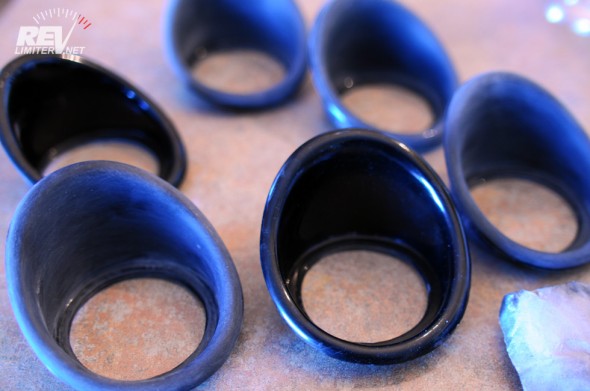
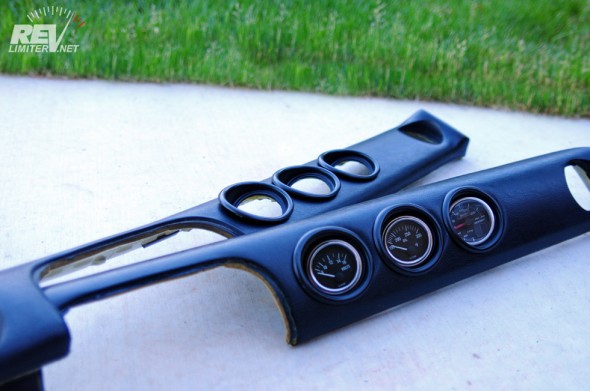
A few words on these cups – awesome, well made, and beautiful. They almost didn’t need refinishing. The finish that Russell of Project M put on them was breathtaking. I’ve never seen a fiberglass part that I questioned painting or not. But, ultimately, the gloss black finish wasn’t exactly what I wanted. Most of the interior plastics are a sort of satin. So, I sanded and painted.
And I managed to not get any pix of the painting. Sorry. You can imagine a piece of cardboard holding the six gauge cups with some black overspray surrounding things.
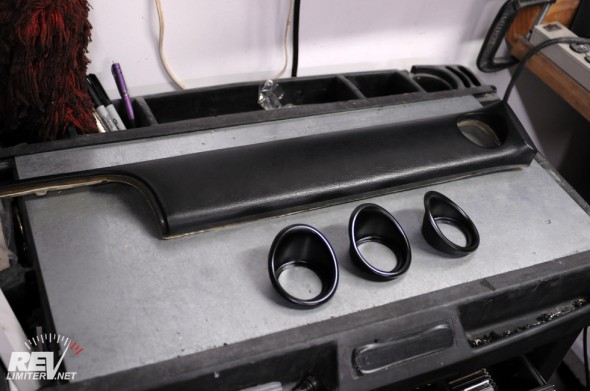
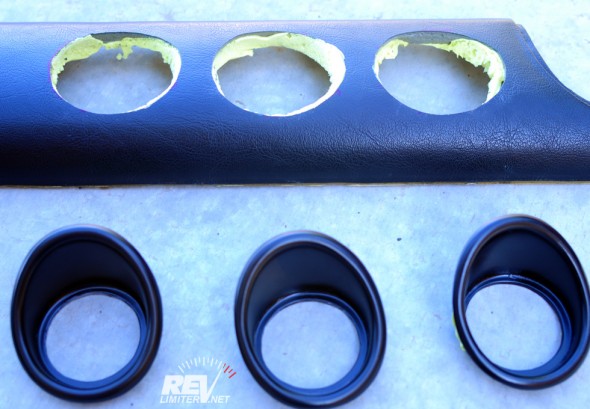
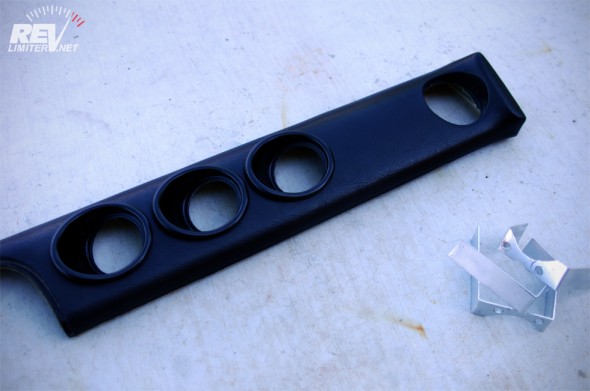
Here are the cups painted. I’m quite proud of the finish. It’s very thick and OEM-like.
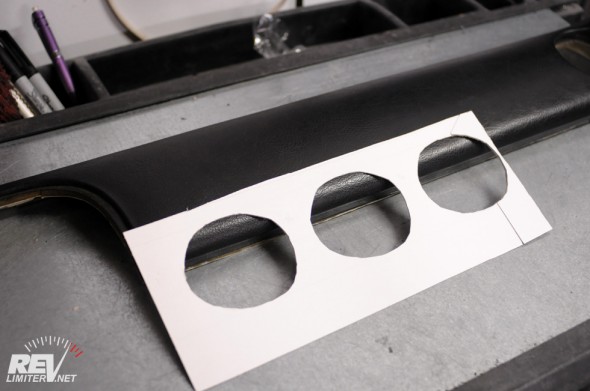
This little template may not look like much, but it’s the result of a silly amount of time spent researching, planning, and measuring. I made several dozen templates. Yes, as in more than 24. I ran out of manila folders and started using the white cardboard mailers I ship gauges in.
It was a matter of getting the spacing just right. I wanted the cups close, but not touching. I wanted them spaced out just a little, but not too much. I wanted them all angled in exactly the same direction. And I wanted them spaced far enough out from the center tombstone so that one edge of the closest gauge wouldn’t be blocked. That’s a lot of fussing over such small details, but that’s how I am.
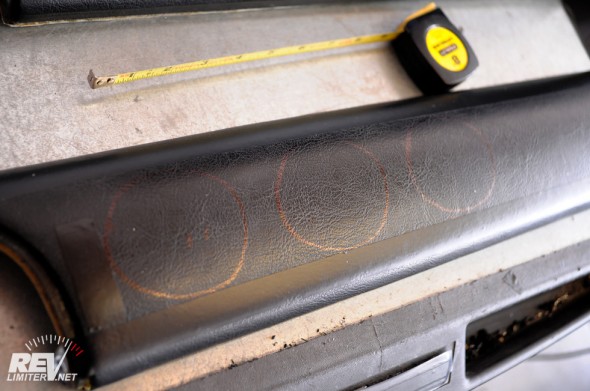
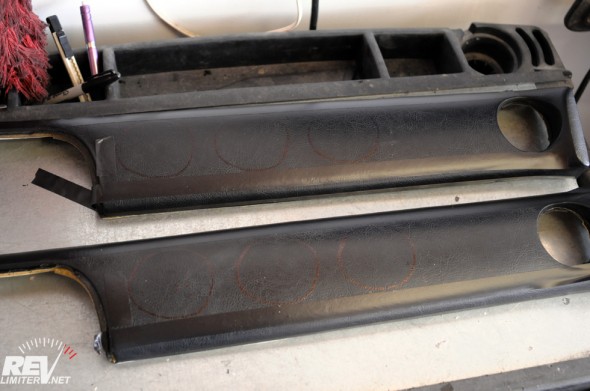
Tracing the ovals onto the crash pad shouldn’t have been very difficult, but I managed to make it an hour-long exercise. But in the end, I got the holes lined up straight as an arrow. I must have laid down those black tape guide lines 10 times…
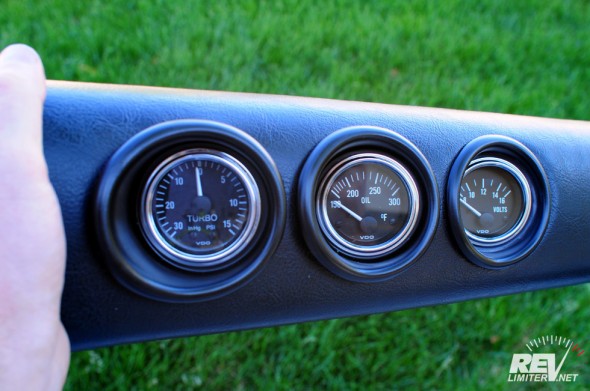
Perhaps you noticed the double vision in the lower photo? I’ve got six gauge cups. That’s too many for one Miata. But it’s the perfect amount for two. The second pad is for my buddy Stoly and will be used in his car, Scrat.
Before you ask, no, I don’t plan to go into the crash pad hacking business. Making these two was a ton of work. I don’t think I’d like to do it ever again.
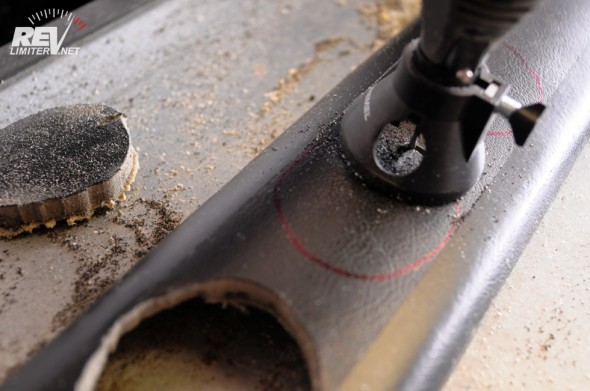
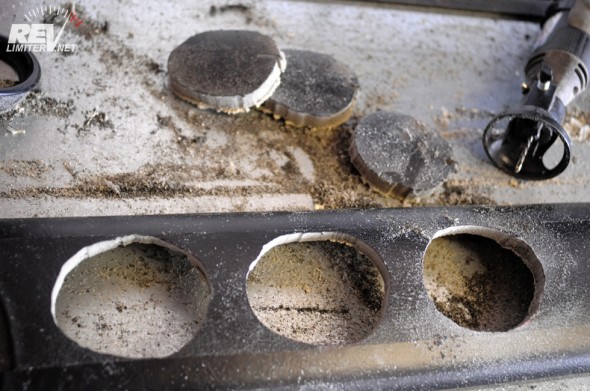
A Dremel and the cutting guide attachment are THE thing for this project. I used one of those cutting bits meant for doing sideways cuts. I think it may have been the Drywall Cutting Bit (#560), but any of them would work. And the proper name for the little frame around the bit is indeed the Dremel Cutting Guide.
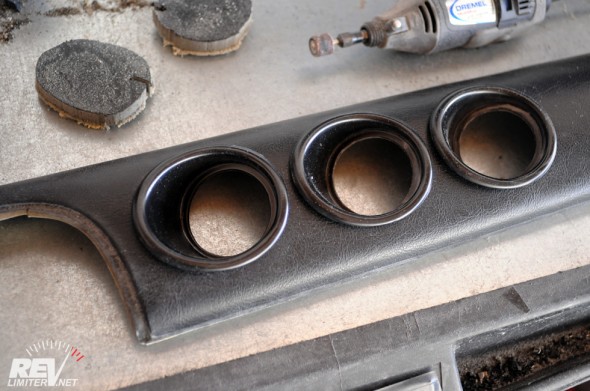
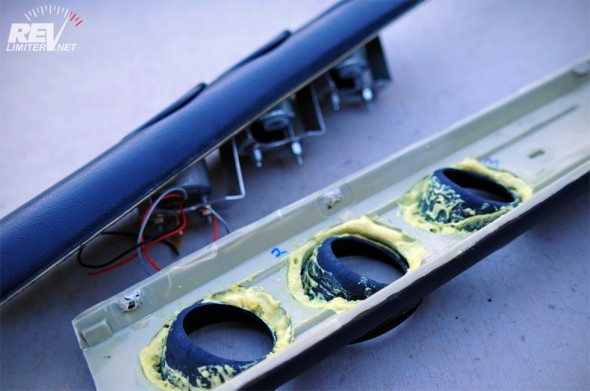
After cutting out the holes, a lot of time was spent with a sanding drum getting them angled in the right manner. Thanks to cutting the holes out at a 90 degree angle to the pad, I had to add some expanding foam to make a perfect fit. The edge of the holes closest to the driver needed to be angled inward at about a 30 degree angle.
And then some time passed.
I cut the crash pads up in February. I then spent two months trying to figure out how to secure the gauges and cups to the pad in a reasonably secure manner. The KG Works cups use this funky round frame with prongs sticking out all over. The U-clips that come with all 52mm gauges interface with that and make everything tight. I tried to replicate it. I failed. So I just let the pads sit for a bit while I pondered.
Then it hit me.
Why not make U-clips like the gauges come with? No need to reinvent the wheel. No need for heroics. Just a simple U-clip with legs of different length!
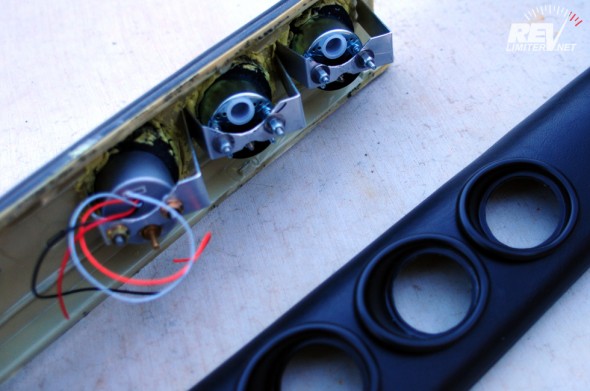
I used 1/16″ x 1″ x 3′ aluminum bar stock. Quite soft stuff, but sufficient for this job. All they have to do is apply a little pressure on the back of the pad and snug the gauge cups down into the foam. Simple. Easy. The result of about 20 hours of off-and-on fabrication. (I even destroyed a sheet metal nibbler!)
Notice the numbers? Each gauge cup is ever so slightly a different shape. They need to have holes cut to fit each one. The cups are numbered on the back side too.
Simple. Easy. I wish I had thought of U-clips at the beginning and saved myself weeks of head scratching. But… well… I figured it out in the end.
Each clip supports his neighbor. The clip at the leading end has a jagged edge cut to help it dig into the crash pad.
That’s pretty much it. Stoly’s crash pad is getting mailed back to him with some holes cut into it and Sharka’s is sitting in wait of being installed. God willing, it won’t take several more months before I get that vintage dash out of my office and into Sharka!
And just in case you missed the link near the top, you can get yourself a set of dash cups from Project M. They make great pieces. I, for one, am a very happy customer.
Update!
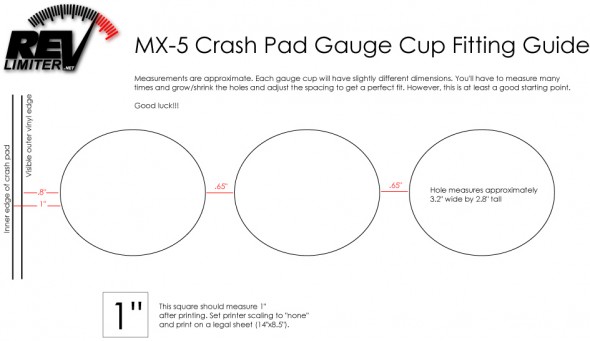
As promised… err…. somewhere… here is a cup fitting guide! This is exactly how the gauges in Sharka’s crash pad fit. And everything is CAD-perfect. I wish my sad cardboard template had been this nice. You can download a PDF of this guide here. Don’t try to print the above jpg. You’ll only be frustrated. Go for the PDF and print with page scaling set to None.
Also…………..
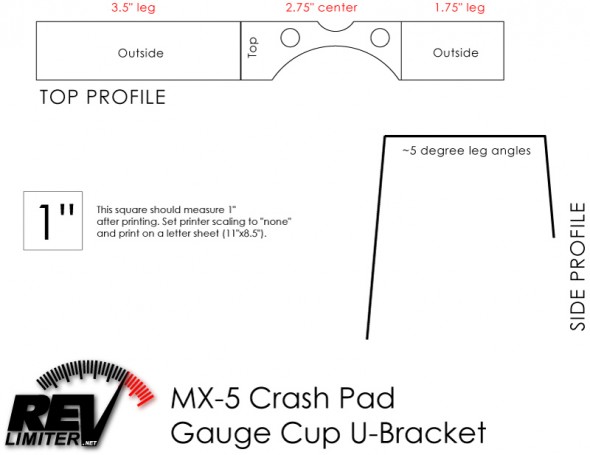
A quicky sketch of my U-clips. There’s really not much to them. A bent metal bracket with holes in the right spot. But I thought this little guide would help. As above, grab a PDF of the file here. Use the little square to verify that your print is the correct size.
Enjoy!
Update!!!
I now sell these gauge cups in my store. Take a look. Mine are made out of cast urethane and include a complete mounting solution. I’m pretty proud of this new product.





I look at this post and wonder… what if neither one of us chose not to take the chance on meeting the person behind the persona. Thought about that a lot lately. I’m quite blessed to have been able to meet so many people that just happen to have a ‘screen name’ in my journey. I can’t imagine not having you, and your family, as friends.
Thank you for all the hard work and many hours that most will never know you took to make these. These look amazing and Scrat will do its best to show off your friendship and craftsmanship.
I’ve also thought about that. The thread on MR about the dude who got put in a coma for complementing another guy’s wheels made me think about it.
Anyways, can’t wait to hang out next week!
Measuring, well made parts and fastidious attention to detail; exactly what my OCD needed to after a long day. Great work as usual 🙂
OT: Could you possibly elaborate/link to the thread about the guy being put into a coma? That sounds crazy!
http://jalopnik.com/5907665/this-man-is-in-a-coma-because-he-complimented-another-mans-wheels
Here’s the story. It’s… horrible. However, the victim has come out of it and is responding to people around him now.
Thanks for the link man 🙂
What a horrible story, some people are just scary 🙁
Awesome Adam.
I have considered adding those gauges cups as well but wondered about how to get the perfect fitment. It was a matter of time before you answered that question, thanks for that!
Wondering if you can publish a scan of the “perfect pattern” on here ? 🙂
I really like Stoly’s comment, and I fully agree with it to say the least. I’ve owned Honda’s, they have great communities as well, but doesn’t get as closed to the Miata community. I’ve met so many nice people (now friends) in France and in California, I’ll never forget that.
Amazing how this little roadster can impact our lives!
Sadly, the pattern pictured is gone. I actually looked for it in my garage last night to scan before you posted your comment. I think I remember using it to clean up excess expanding foam…
That said, I should be able to make a new pattern from one of the finished crash pads. I’ll attempt that this weekend and hopefully update the post with it later.
Nice job Adam!! that looks great!!
hi mate, been making these a while now ,and i came up with an easier and quicker solution.
with kgw cups and russels cups,and the cups sit “into” the crashpad more so no raised edges from mouldings,and looks a lot more pro finish.
i can supply pics and details if needed.
rgds ron
Not sure what you mean… mine DO sit “into” the pad. The U-clips compress the cup into the pad. They put enough force onto the pad to have destroyed two of my plastic 52mm gauges. I had to buy a set of metal VDO Series 1 gauges as replacements…
As for easy and quick, the U-clip has to be one of the easiest parts to make there is. I can do one in about 20 minutes start to finish. Of course, that’s after a long time dreaming them up.
Hi Adam,
Looking at these puts me to shame, I’ve made a few sets of these but haven’t actually fitted mine yet! I’m concentrating on getting the TBs running first, but the gauges won’t be too many weeks away. Great solution you’ve found for mounting them, why didn’t I think of that? Maybe its better I stick to the fibreglassing!!
Russell.
Well, I hope my post gets you some business. I’m loving my dash cups, even though the dash is currently installed in my office rather than in my Roadster.
I remember doing this with some plasic rings aluminium backplate and some epoxy. Spent hours on it.
Amazing how nice they looked in my first car but pretty basic compared to what you did.
This is something so trick and yet almost OEM subtle. Love it.
We need lots of photos when they are installed.
Hi mate nice job
Please can you tell me where I can get the chrome VDO gauges from in the uk ?
Thanks G
Sorry. Not living in the UK, I have no idea. Have you looked on the UK ebay site? Perhaps amazon has some over there? Hope that helps.
HiMate Do you think i can get away with 50mm gauges in these pods?
Probably! You could probably build up the sides of the gauge with some black tape to prevent rattles. And the bezel will most likely allow for a smaller gauge.
Still, they’re not my pods. You might ask Russell, the one who made them. He’s on the Nutz forum.
Veryy energetic post.