

Sharka's Elise seats
A few months ago, a guy by the name of Nick email me about my Elise seat brackets. He wanted to make a design to sell based on the scans I posted here. I was against it at first. All of the posts I make here are only for enthusiast use, not for corporations to line their pockets. I answered back in an angry manner. “NO SEATS FOR YOU!!!!” etc.
But I was totally wrong. Nick is just another Miata enthusiast like myself with some spare time wanting to help out the Roadster community. The bracket design he came up with is quite different from mine anyway. He just wanted to get my blessing on a design that was similar to mine in a few spots.
So we talked off and on over email for a couple weeks. I probably contributed a good 1% to his final design – not very much. But Nick kept emailing me updates. And he now has a garage full of tools and the ability to punch out another Elise seat bracket kit once in a while.

Chance91 Elise seat brackets - photo by Nick
This design bolts onto the stock Miata sliders. Mine requires welding. My brackets actually put the seat bottom in direct contact with the rails. I think the Chance91 brackets put the thickness of the seat mount metal between the rails and the seat, so it’s not quite as low as mine. Still, we’re talking about 1/8 of an inch difference.

Look at all that hand work. Photo by Nick.

A complete bracket set - photo by Nick.

Primed to protect against rust - photo by Nick.
As someone who does a fair bit of DIY stuff, I’m very impressed by these bracket photos. Attention to every curve. Every inch. And what’s more? Nick has decided to publish his design to my blog!

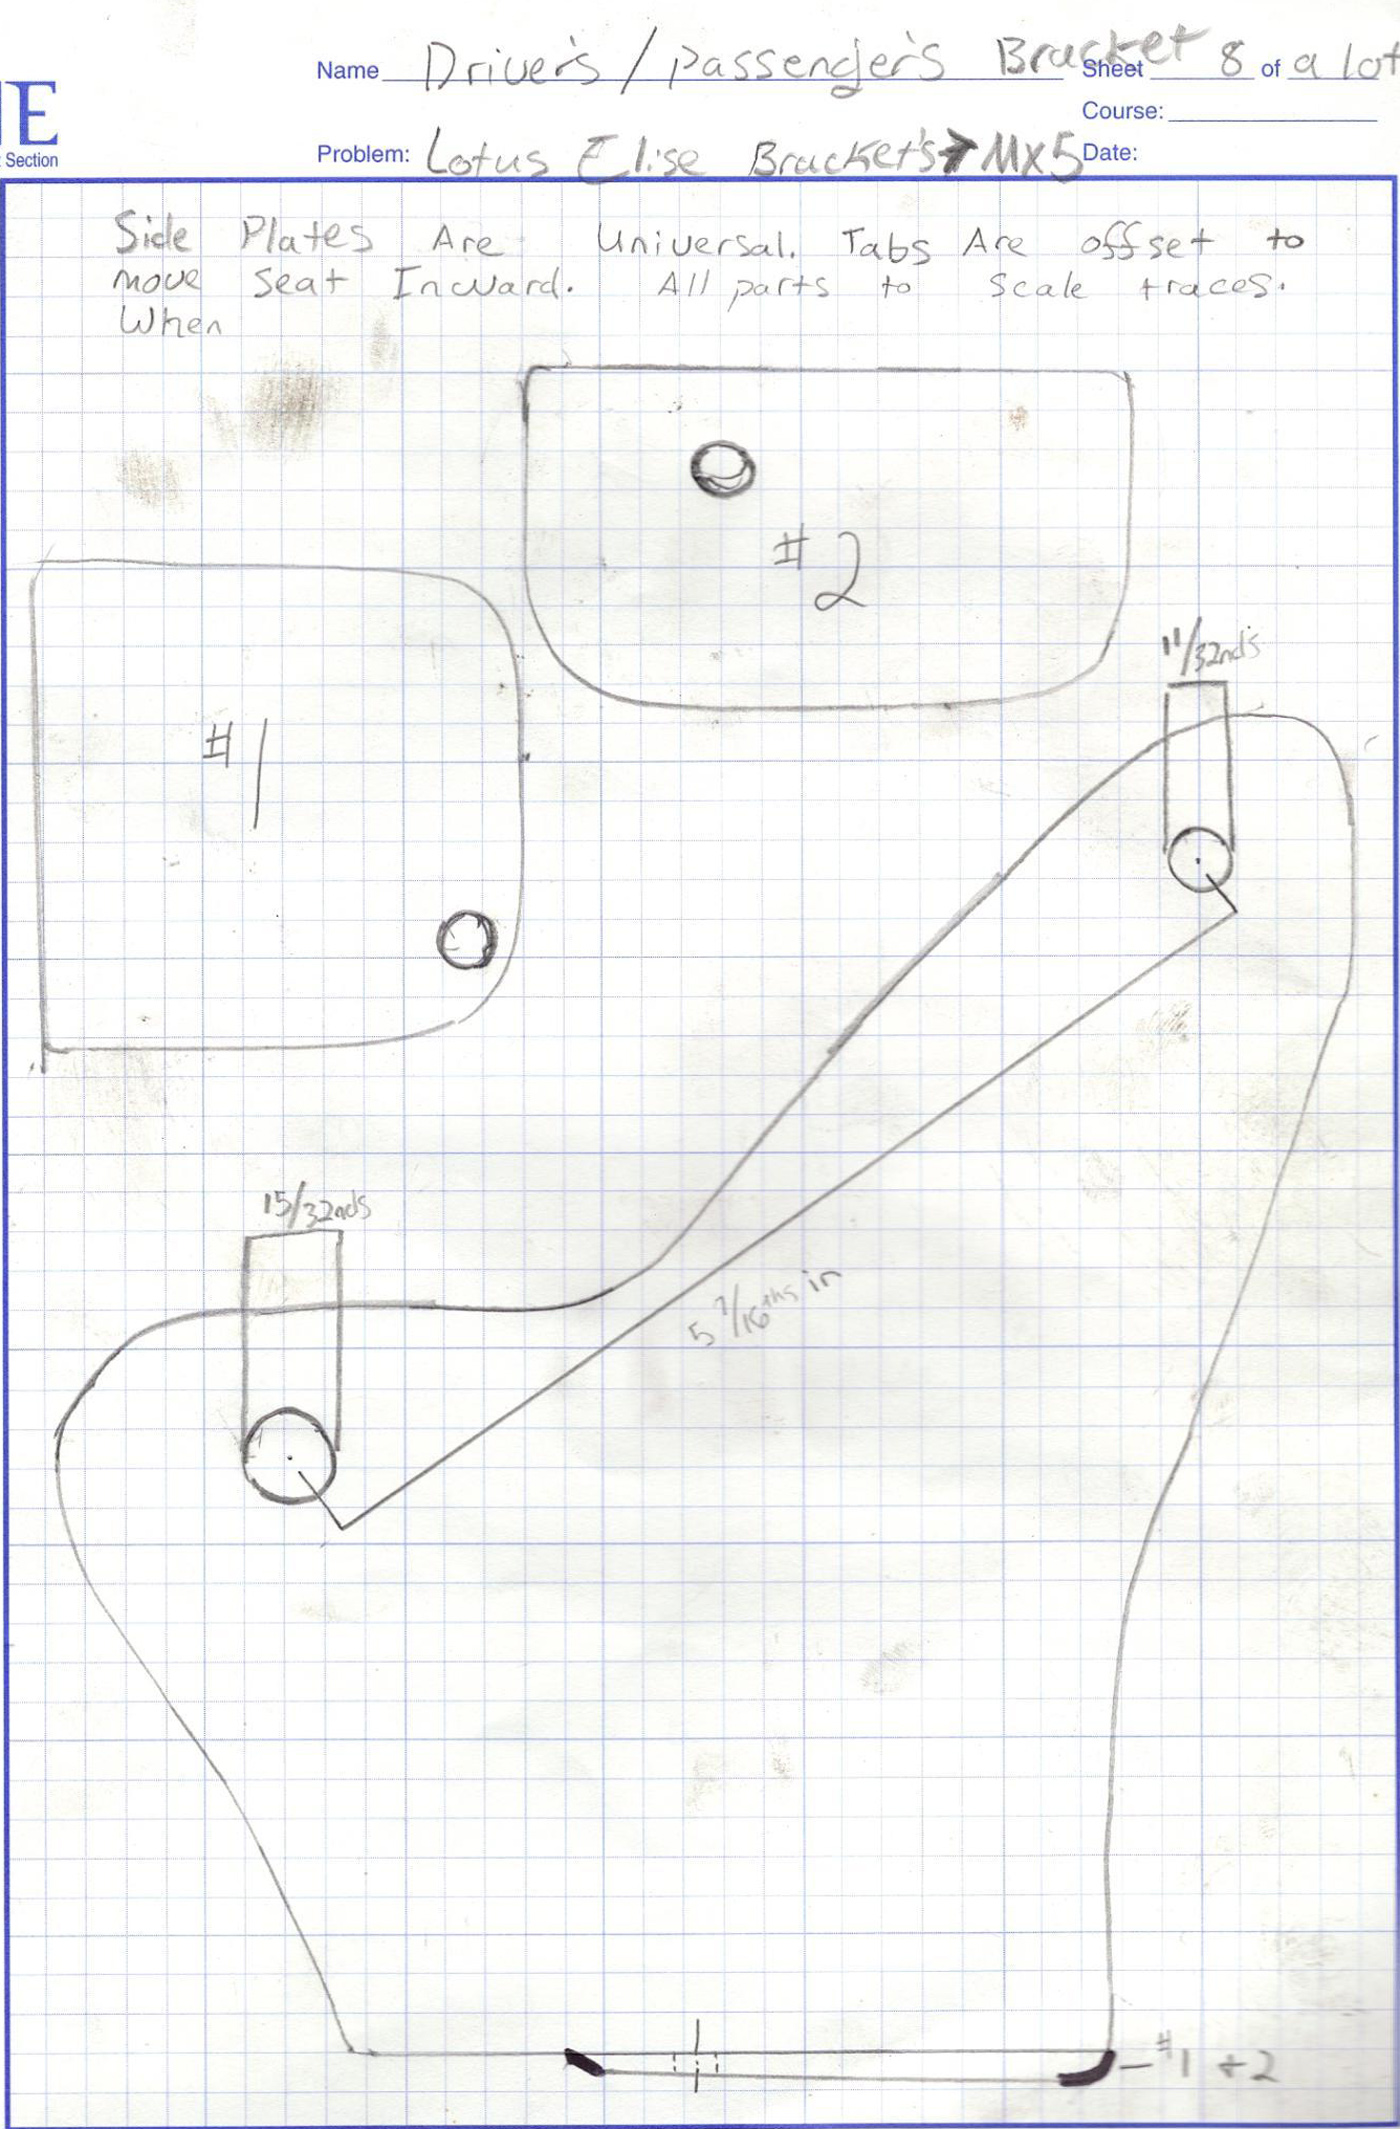
Chance91 seat bracket design - copyright Chance91
As with mine, it is for enthusiast use only. A direct quote from Nick: “Just make sure people know I will castrate them and hang their balls under my rear bumper if they try to make a dozen of them. 1 per intrepid fool who wants to DIY.”
The bracket scan should print correctly. The blue square is 7″ across. The 5.43″ dimension on the bracket should measure correctly. Grab the full size here. Do not attempt to print the smaller scan posted above.
If you want a set of seat brackets of your own, hit Nick’s thread on the Mazda-speed forum. You will have to register to post. You can also send him a private message via his profile.
DO NOT CONTACT ME ABOUT THESE BRACKETS!!!! All that I know is in this post. For pricing details, contact Nick. For quantities and wait time, contact Nick. For ANYTHING, contact Nick.
Thanks for allowing revlimiter.net to host this bracket scan, Nick! I wish you lots of success and many happy customers.


Now if only you could find Elise seats cheaper…
Most guys on CR.net are just having a hard time finding them. Let alone finding them cheap.
Haha, maybe my words were a *wee* bit harsh, but much like yourself, I did work hard on these and prefer my work to be my own. I’ll see about getting complete instructions later when I’m done with this so people can basically just measure and cut the steel. Don’t expect too many people to bother though.
I got my Probax set for $500, but I went to get em in person. I was just really lucky, and that day was awesome for mods. Trans+Rollbar+seats. Happy. Just keep an eye out.
Nah. Not harsh in my opinion. Just honest. 🙂
Thanks for this tip! You may remember i asked you about the mounting details before on your previous threads about mounting these seats in the car. im trying to contact nick to see if i can buy a set of these mounts as im not much of a handy man myself! Do you have his email address? I am not a member of the mazda speed forums although i am trying to register myself now!
As I said above, Nick’s preferred method of contact is via the Mazda-speed forums. You’ll have the best luck going through those channels.
You can always find me at chance9121 at hotmail dot com, but I probably check the MS.com forum more than any other forum and my email, so its your best bet. Bought more steel today.. busy cutting and chopping..
Also, Jag just put a review with informative pics at the tail end of my MS.com thread. check it out.
I took the liberty of editing your email slightly to keep your spam at a minimum. 🙂
Nick, you’ve got a email ! :p
I cross my fingers for your answer !
Good idea, thanks. Not used to that stuff.
Also, the first reviews are smashing, I’m pretty psyched. Going through and testing them out I’m pretty blown away at all flawless the installations typically are. I do have to hit 1 in ever so many with a file for a bit, but just to take a lip off or remove some fractions of a MM. I’m really pretty psyched with how well my patterns worked out over a larger run. This version is by far better than I had imagined it would bet.
Also, adam, most of mine sit on the rail too 🙂 its how I build the fronts, using a template to simulate the stock rails on the seat. works very well.
Any way to get measurements on the front bar & brackets?
The riser brackets can be anything you want in order to achieve a nice lean to the seat. I’d recommend between 1″ and 1.5″ tall.
The width of the front bar is the measurement between the rails themselves. Just put the rails on a Miata floorpan and measure.