Gas fumes are a problem. Ask nearly any first gen Miata owner and they will have a gas fume story. Some are less smelly than others. Some rarely stink. Some always stink. But it’s just a fact of life. If you have an early Miata, you’ve smelled gas in your trunk. Hell, sometimes it happens to NBs too.
Fortunately, there’s a few things you can do about it. Unfortunately, there’s a lot of possible causes. This post will address a couple and their possible solutions.
1: Spare tire
This is what the forums always talk about. The spare tire can out-gas and cause a fuel-like smell. The fix is to either remove it or wrap it in a plastic trash bag and seal it up.
In 12 years of ownership, I’ve never had a spare in Sharka. Bucky has always carried a spare, since 2001, and his trunk has no fuel smell. The tire is not my problem. But it’s always discussed in forums, so I had to include it first.
2: The big tank fill hose in the trunk.
This is the other low hanging fruit. Behind the metal cover on the left hand side of the trunk (port side, US driver’s side, etc) is a huge hose. It is sealed to the tank on one side and the metal filler pipe on the other by hose clamps. Make sure these clamps are tight.
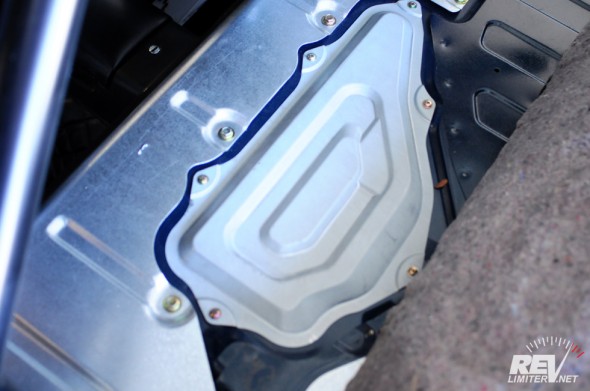
I tried this fix about 3 months ago. I unbolted the panel and inspected stuff. My hoses were all healthy and the clamps were tight. I didn’t think to take a photo for this blog post. It’s just a hose with some clamps anyway. No photo necessary.
3: Exhaust heating up the tank.
This is the main point of my blog post. Heat. Heat and the management of it in relation to the gas tank.
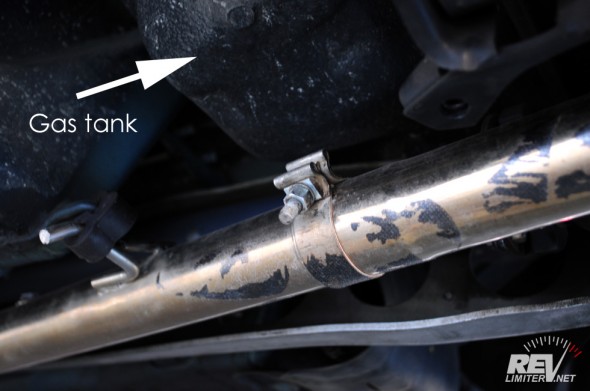
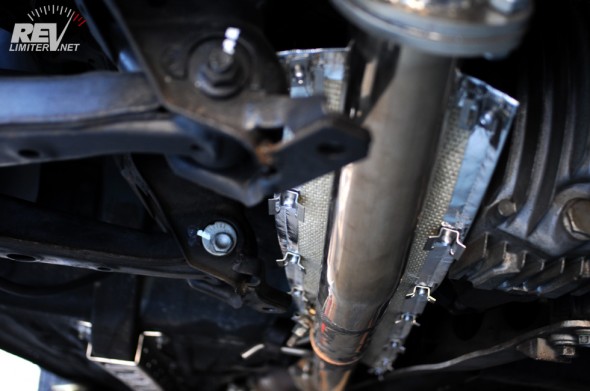
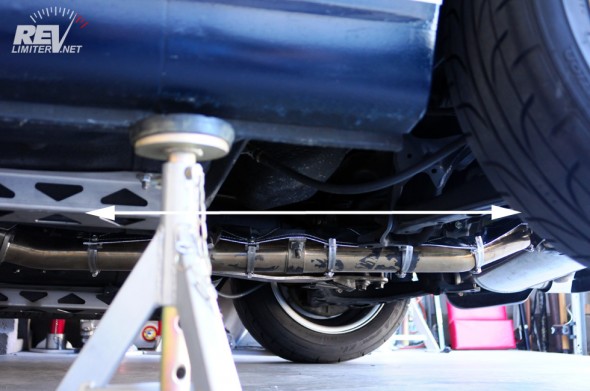
Check out that exhaust. It runs right under the fuel tank. There’s actually some space between them… maybe 2″ or so. It doesn’t TOUCH the tank, but it gets quite close. And there’s no shielding anywhere. I think the factory exhaust includes some shielding on the pipe. Aftermarket ones? Nope. No chance.
When Geoff (stoly) and Steve (r2limited) were here in NM visiting me, I started to form a theory. While driving around in the mountains, we were all plagued with fuel smells and a lot of pressure in our tanks. A lot. All three cars. All three were NAs, but all three were rather different. However they all had aftermarket exhausts…
Heat + gas tank = tank pressure? Hmmm. A theory. It formed.
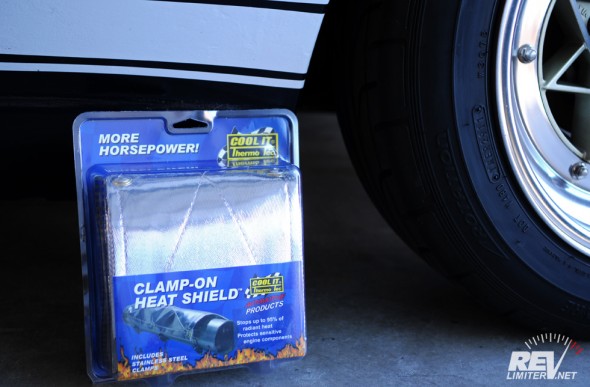
So, I researched my theory. It turned out many V8 conversion guys were having crazy problems with fuel tank pressure and fumes. The fumes were forcing most to refuel after only a half tank or even 100 miles of driving. A fuller tank has more fuel mass and heats up more slowly. And two exhaust pipes and V8 heat levels will indeed warm things up. A few of them recommended this particular heat shield. I hit Jegs and picked one up.
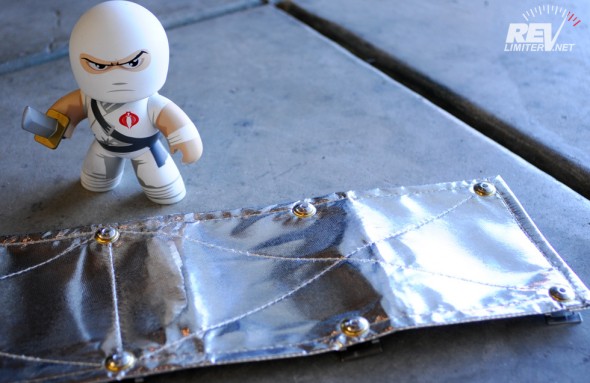
Thermotec sells several of these. They do a 1′, a 2′, and a 3′. I bought the 3′ after measuring the midpipe. It seemed like it would probably be mostly covered by a 3′ and I thought I could always cut it down if I needed.
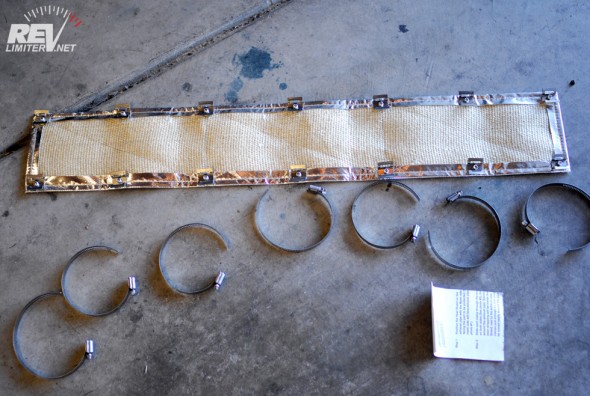
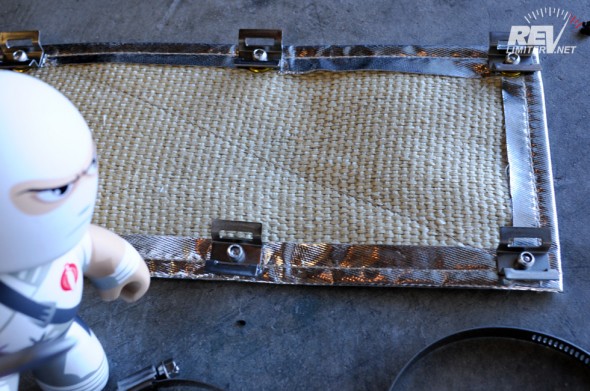
I didn’t expect this shield to be quite this nice. Fiberglass cloth with nice metal brackets. And on the other side is a reflective barrier that’s sort of quilted onto the fiberglass. Really really nice. I guess I expected just some stick on stuff that resisted heat. In fact, I’d already tried some stuff like that.
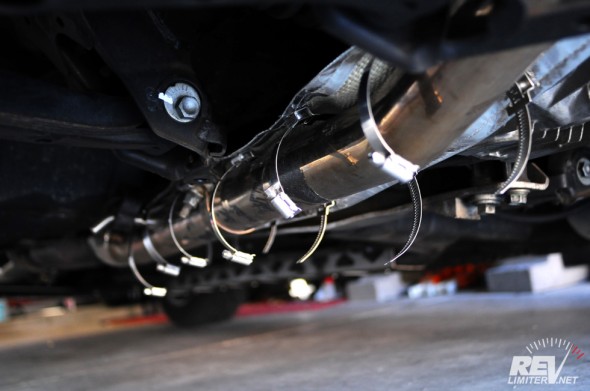
Also, this shield will fit damn near any pipe you can throw at it. Sharka has 2.5″ pipe. I think a 4″ pipe would be no problem. They ship huge hose clamps with this shield.
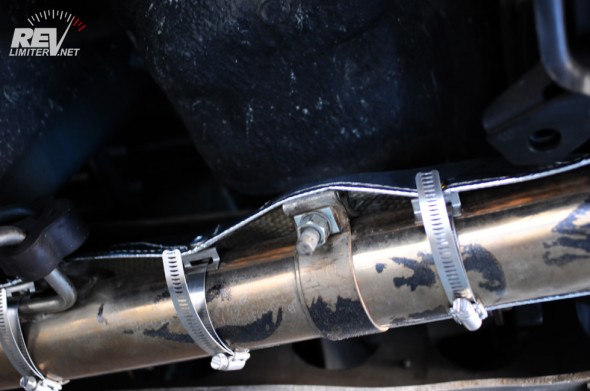
Really not much to it. The hose clamps are, as previously mentioned, huge. I used a power driver to fasten the hose clamps down. I started out with a screwdriver and my forearm was burning after just one clamp.
The heat shield runs the length of the midpipe. Almost from the cat all the way back to the muffler. It provides shielding not only for the exhaust, but also for the differential. And that’s GOTTA help. It’s just gotta.
I’ve only driven a handful of miles since installing this piece. I’ll update this post when I have some concrete data on the effectiveness of this mod.
4: The valves on top of the fuel tank.
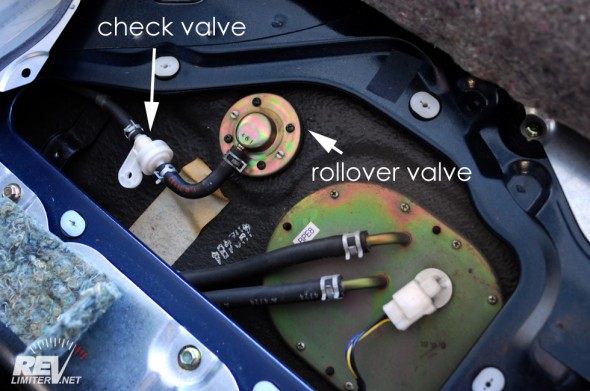
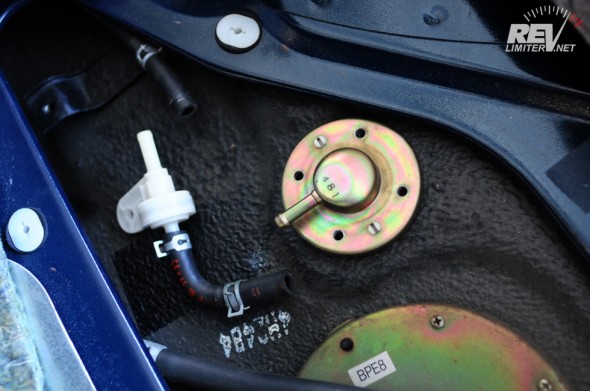
This is another possible problem area. The gas tank has these little valves in the top. One is designed to keep fuel from splashing out in the event of a roll. The other is a sort of one-way check valve designed to let pressure from the tank out to the EVAP system to eventually burn though the motor. That’s the idea anyway. After 15+ years, how many of these valves on the NA Miatas are still functional?
Sharka’s is actually functional. At least it was a few years ago. I’ve already had this apart to clean once. I didn’t blog about it back then, but it worked great. This time, I brought my camera.
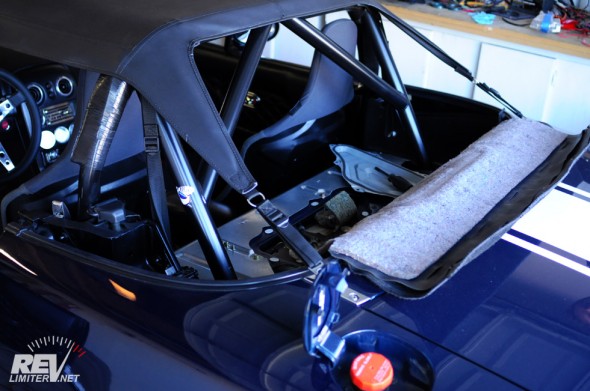
If you have a soft top, this isn’t the easiest job in the world. You have to put the top up to get enough room to roll back the carpet. You also have to sort of crouch behind the seats. It sucks. Having no top or a bikini top makes life really nice.
If you ever wondered, this is how you change the fuel pump as well. It’s the larger item beside the valves in the top photo.
There’s really nothing to it. The anti-roll valve is held in place by four small screws. The check valve just has hose clamps holding it in place.
By the way, manual transmission Miatas have one check valve. Automatic cars have two. And I think CA-spec cars have a network of three valves? Very strange. I once saw a photo of one. Looked like a maze designed to keep fuel vapor from ever leaving the tank.
The little valve works exactly like a PCV valve. It should rattle when you shake it. You should also be able to blow through it in one direction but not the other. When I removed Sharka’s it didn’t rattle. I could also blow through it both directions.
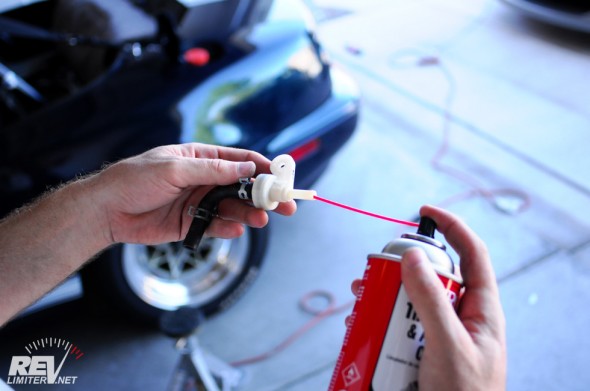
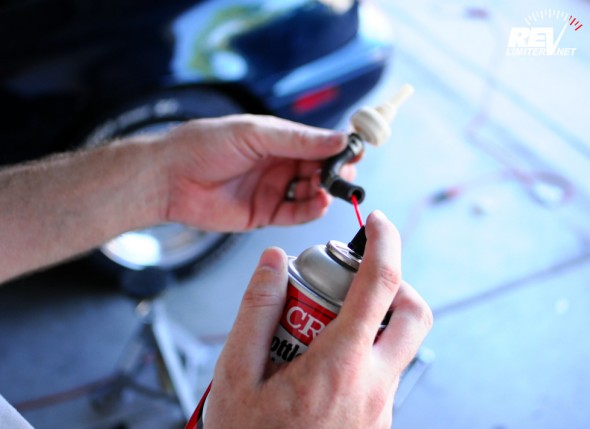
A little carb cleaner fixes it right up. I just sprayed a small bit in each side and then shook it up a little bit and drained the cleaner onto the rocks in my front yard. Then I filled up each side of the valve and let it sit propped up in the corner of my garage for maybe 10 minutes. Nothing to it.
After letting it sit, the valve once again rattled when I shook it. It also let me blow though in only one direction. Success!
The anti-rollover valve should also rattle when you shake it. Mine seemed fine. Still, I gave it a tiny cleaning with the carb cleaner while I was waiting for the check valve to un-stick.
5: ????
I’m sure there are other ways to deal with gas fumes and excess pressure in the fuel tank, but I’m not remembering any off the top of my head. Anyone out there reading along know of any? If you do, please share. I’ll either update this post with them or make a whole new one.
One more thing….
The plastic carpet pins that hold the carpet in place on top of the rear package tray are the devil. They suck. They will magically evaporate while you’re trying to remove them, regardless of your skill or what awesome specialty tool you’re using.
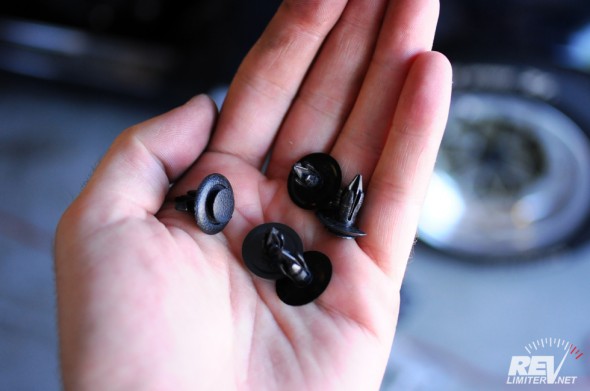
The things I’m holding in my hands are small plastic fasteners designed for keeping the plastic interior panels attached to their metal bodywork frames. They are AWESOME replacements for the evil, crumbly, awful carpet pins. I’ve had these holding my rear package tray carpet in place for at least 5 years. They work perfectly. And I can remove and install them as many times as I want and they just keep on working.
If you ever have to roll back your carpet for any reason, I highly suggest swapping out your broken carpet pins for these bad boys.



Holla! Could you link which carpet pins you purchased? I recently did my softop (nice writeup by the way) and destroyed a few of them.
I’m sure any hardware store (HD, Lowes, Ace, etc.) would carry them. I need to replace mine as well.
Every time I hit a hardware store looking for car parts, I end up disappointed. ACE does indeed carry a lot of stuff, but it’s kinda hit or miss for car fasteners.
The local O’reilly’s has a good selection of these little pins. And there’s always McMaster-Carr online.
Sorry, but I can’t. The ones pictured in my hand are from my dead 97. I saved all the plastic fasteners and as many bolts as I could. It’s kind of awesome having a whole car worth of spare hardware.
That said, just about any auto parts store should have these. They have the regular carpet pins too. The kind that breaks after one removal.
I just looked up the part number in one of my Mazda parts catalogues. It seems to be G032-68-865 for that little plastic pin.
Excellent! Thanks
Mitsubishi uses those fasteners as well, 1994-2001 ish. You can probably find 7 of them easy by hitting a breaker yard and popping a few hoods. They seemed to use them to fasten the top of the bumper skin to the radiator support obracket.
You and your site have me as a new NA Miata owner REALLY EXCITED….You sir are AWESOME. Internet high five! Also, I really want to try the exhaust wrap. What’s the product name, so that I may look it up. Thank you!
Thanks! Glad you like the site.
Exhaust shield: look at the top of the post. There’s a photo of the box. Can’t do any better than that. Looks like it says Thermo-tec Cool It Clamp On Heat Shield.
I found it last night on Jegs but its at home. Thanks! Did you notice any improvement?
The trunk stays the same temperature as the interior now. With the top down! It’s a dramatic improvement.
[…] Inside gas fumes? http://revlimiter.net/blog/2012/07/h…-fumes-i-hope/ There ya go. There's a few things you can try in here. Probably cleaning the valve on top of the […]
Just wondering how your gas fume situation has been, now that it’s been over a year.
Do you still have gas fume smell or has it been eliminated?
The fume smell comes and goes, but it’s much better than the previous year. I think it really does stem from the valve on the top of the tank, at least in my case. A yearly cleaning is probably what I need.
I am having excesskve tank pressure and was unable to find the heat shield so I wrapped the entire mid pipe with header tape. I have not had time to test my set up yet.
How has it affected the tank pressure issue?
Now this is one I can answer. (unlike the above where I don’t have a good answer)
Problem solved. There’s no more tank pressure issue. I’m SO pleased about this.