It was a big weekend of car work. A long weekend. Loonnnnnnng….. Half of Saturday and all of Sunday. And it was good. And I didn’t lose any fingers or toes.

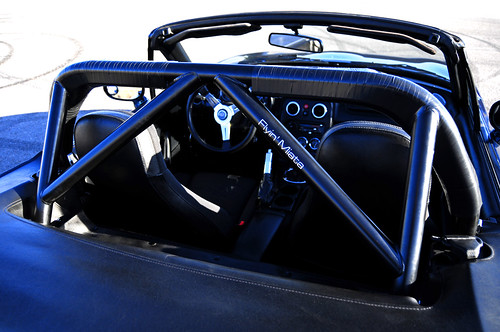
I started with the rollbar. This marks the 3rd rollbar I’ve installed in a Miata. I always wondered if it was possible to install a rollbar by yourself – one man – and how long it would take. The answer? about 4 hours. It would have taken me more time if I’d needed to cut the interior trim panels to fit the bar, but I had the panels from my 97. They fit Sharka’s new HDHCDDM2 bar just fine. So, 12 holes, 14 bolts, and I was pretty much done. Air tools and a crazy-powerful drill made it almost no work at all. Trimming the carpet was the most difficult thing. I cut slowly and it was all over in a few minutes.
Then it was onto the frame rails.
A little on Flyin Miata’s frame rail reinforcement kit: I’ve been eying this part for a little less than a year. I was gonna install it on my 97 as a reward to myself when I passed emissions. Well…. Sharka-the-97 never DID pass emissions! That car had a crappy early OBDII system that refused to send a “ready” code, and in fact never did set the ready code. The car was destroyed and I’ll never know what the problem was. Anyways, the 95 passed the sniffer test the first try and I bought the frame rails that day. I didn’t want to spend the time installing them until I got finished stripping the 97. I’ve been waiting for this day for a while.

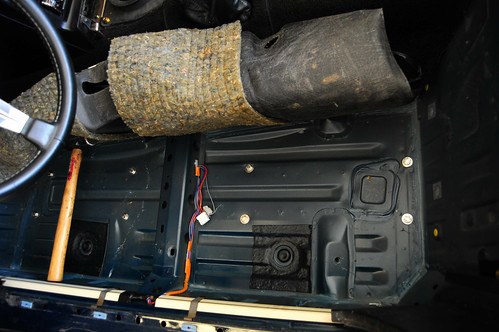
So yeah… it’s kinda hard to take a good picture of frame rails from underneath the car when it’s just on jackstands. So I have this one of the 8 bolt holes in the driver’s side floor. Like my high-tech carpet-holding device? I was proud of it. I’m also way impressed with the frame stiffeners. They’re EXTREMELY effective. The car just feels solid. Bumps are absorbed easier by the suspension and seem to be over sooner. No residual shake. Even the doors sound more solid when they close. The frame rails and rollbar really stiffened up my 14 year old car.

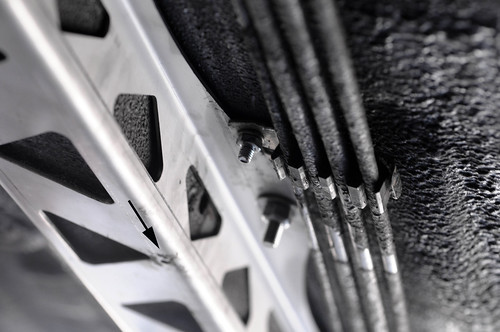
I was unhappy with how the instructions said to route the brake/fuel hard lines. So I did this. I drilled an extra hole in the body, flattened out the bracket, and bent the lines ever so slightly. The black arrow is pointing at the “factory” mounting point.
The factory way is to run them diagonally to the frame rail. Which is hard to explain. Imagine an upside-down right angle triangle. The floor is the top. The frame rail is the side. And they wanted me to run the hard lines as the hypotenuse. The lines didn’t hang down below the rail, but they seemed unprotected and unsupported. Asking for trouble. So I did this.

Be careful of this pair of holes. The drill comes up very near the ECU. I took mine out before drilling.

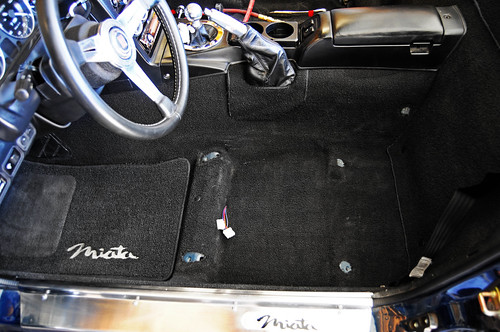
Speaking of 14 year old things, here’s my carpet. It’s original and just shockingly clean and perfect. With the hardtop installed, I couldn’t really get a great shot of it that showed off the perfection. Since I had the seats out for the rail install, I took the opportunity. DAMN is it nice carpet. Yes, I’m bragging. The carpet in the 97 was just SO darn crappy. The cut-pile carpet in the later cars is just no match for the loop carpet in the 90-95 Miatas. I’ve LUSTED for new carpet for that poor 97 for years, but there aren’t really any good aftermarket loop pile replacement kits, just the fuzzy cut pile crap. So I put that project off until the car went away.
Anyways, sorry for the rambling. It was a great weekend of car work. I topped off the brace and rollbar installs with some rollbar padding (important!) and an exhaust install.
Maybe stripes this next weekend…


Hello, I just wanted you to know I have added you to my Google bookmarks because of your astounding website layout (LOL). But truthfully, I think your website is one of the cleanest set up I�ve stumbled upon. It really makes your website easier to browse through.
Very nice project. Thanks for the great tips!