A short while ago, my buddy Steve designed these awesome vintage rocker stripes for his gorgeous white NA. Ever since seeing pix of his car with those stripes, I’ve wondered about more vinyl for Sharka. Side stripes to match the top stripe.
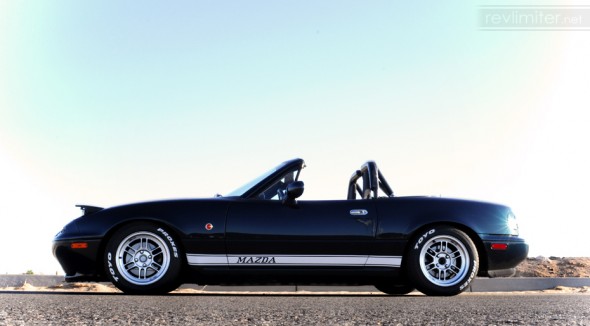
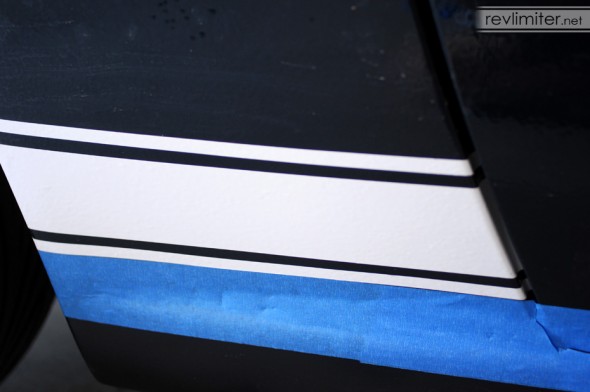
And, as you can see from the lead photo, I don’t have to wonder any longer.
I wasn’t the only one wondering about side stripes for his car. Quite a few folks on ClubRoadster were into it as well. So, Steve decided to get into the Miata aftermarket business and sell his vintage rocker stripes. There’s a half dozen styles available over on his new store, r2-limited.com. I highly suggest going and checking it out. Come back here and read about installing the vinyl afterwards.
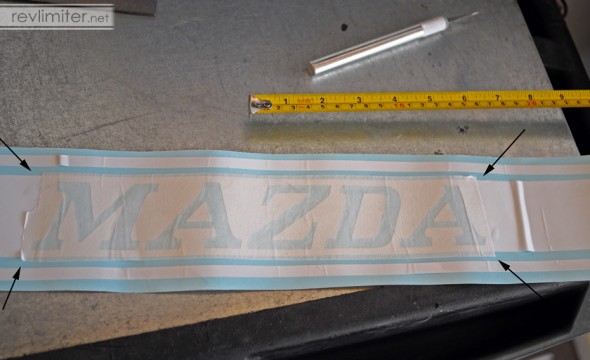
Sharka’s side stripes are a custom design to match my RX-2 rear Mazda badge. It’s a logo design that Mazda seems to have never used on letterhead, just on the RX-2 and 3 badges on the sides of the car. Since the logo didn’t exist anywhere, I spent a few hours sketching it out in Illustrator so that could be cut out of vinyl. Then Steve spent a few more hours in Illustrator getting my jagged letters all even and nice, as you see them here.
Anyways, I’m REALLY pleased with the side stripes. But I mentioned something about the install, earlier, yeah?
Vinyl Install
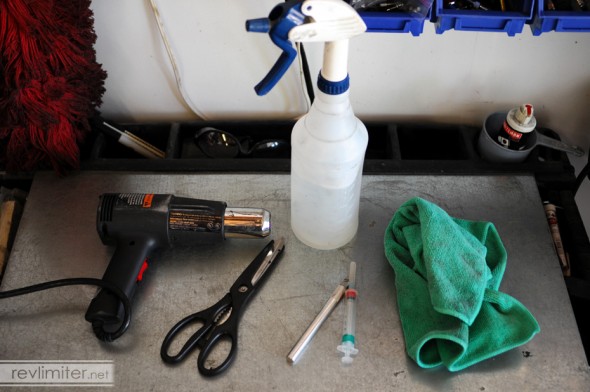
This is what I use to do stripes on a car. Er… my tape measure seems to have not made it into the shot.
- A tape measure. This is the most important tool.
- Scissors to cut the vinyl on the bench.
- Squirt bottle with water and 2 drops of soap.
- Microfiber towel for smoothing the vinyl once it’s on the car. Used on low only.
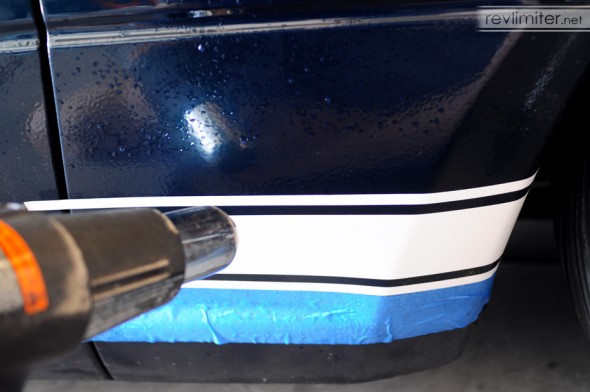
- Heat gun to tack down and re-shrink the vinyl.
- X-acto knife to trim the edges of the vinyl once installed on the car.
- A small hypodermic needle. Just the needle part. It is AWESOME for popping bubbles in the vinyl.
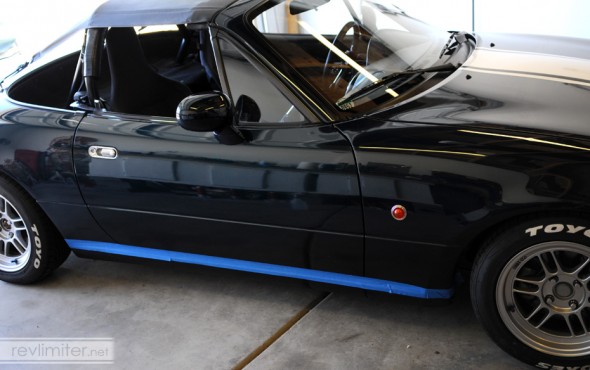
- Some method of marking the car. I use blue tape in this install. I also like yellow post-it notes.
With a top stripe like Sharka wears on his hood, you need to mark both edges. With a side stripe like this, doing just the bottom is fine. I put mine 2 cm above the lower edge of the door.
Measure each panel and then add an inch or so to each edge. I measured the front fender to be about 12.5″ wide, the back fender to be about 10.5″ wide, and the door to be about 42″ wide. So, I cut a 14″ long stripe for the front, a 12″ long stripe for the back, and a 44″ long stripe for the door. I also put the Mazda logo about 3.5″ away from the leading door edge.
Whenever I do stripes on a car, I always like to do the easiest panel first. That seemed like the small rear fender to me. There’s not much curve to it and it’s the smallest panel.
Next up was the front fender. Doing the back and the front like this makes the door that much easier. I can line up the door stripe on both edges and then just have to space out the rest.
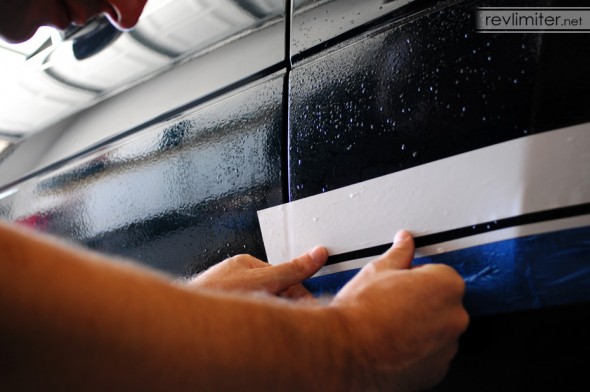
You see that I’m not using any contact paper to do this? I hate contact paper. HATE. IT. It rarely helps. It always grips the vinyl too strongly. You almost always have to reposition the vinyl after removing contact paper, and sometimes you tear it when removing the contact paper. I just hate the stuff. So I don’t use it. I lay the vinyl by hand and then space out each stripe with a tape measure.
My method of putting a vinyl stripe on a panel:
-
0. Clean clean clean. I get the panel really damn clean before even starting.
- Soak the panel down with the water/soap solution.
- Soak the back side of the vinyl as I pull it off the backing paper.
- Place the vinyl on the panel. Anywhere.
- Slowly work the vinyl into position.
- Give it a quick hit of the heat gun to stick it down a bit.
- Go back to #1 and spray the panel again and do the next stripe in the series.
- Once I get the next stripe into position, I get out the tape measure and get the spacing between the stripes absolutely perfect. This can take 30 seconds or 30 minutes.
I’ve never done this professionally. I’m sure I’m not doing it the easiest or best way. But it works for me. I’ve done 6 Miatas worth of stripes over my life and really enjoy laying the vinyl. It’s honestly not very difficult. Taking pictures during the process is easily as much work as doing the stripes themselves.
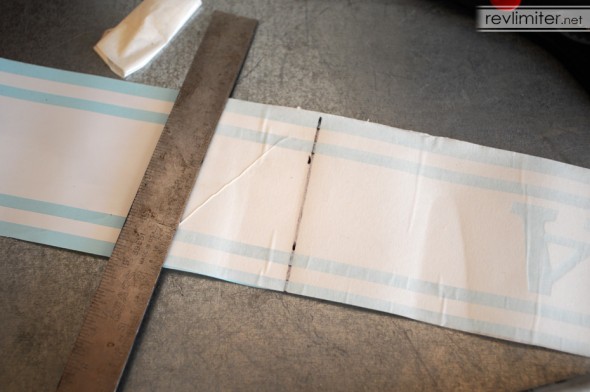
This is the one time I use contact paper – when I have to. But you see how far I cut it down. I made sure there was only the very minimum of contact paper necessary to place the MAZDA text correctly.
Again, anyone using this as a guide for their own stripe project is more than welcome to use as much contact paper as they want. I just hate the stuff.
And that’s it. After an hour or two, the vinyl should be stuck to the paint well enough to pull off the contact paper. It’s easiest to peel it off at as steep an angle as you can – as close to 180 degrees as possible. That will keep your vinyl stuck to your car as well as possible, however be prepared for some to pull up and require shrinking back down with your heat gun to get it back into shape.
Finished Pix
I’m VERY happy with Sharka’s new vintage rocker stripes. They came out just perfectly. And the whole install only took me about 3 hours on a warm afternoon. That was 3 hours well spent.
What are you waiting for? Go over to r2-limited.com and get some vintage side stripes of your own!

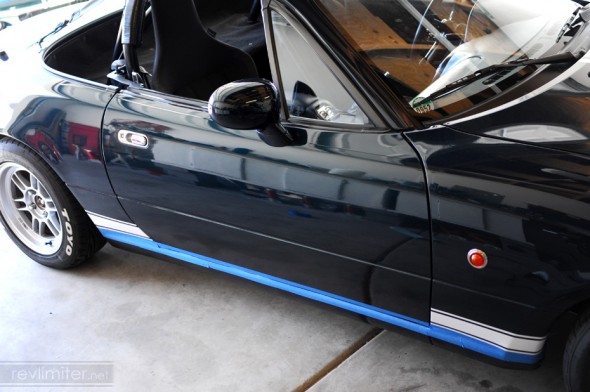
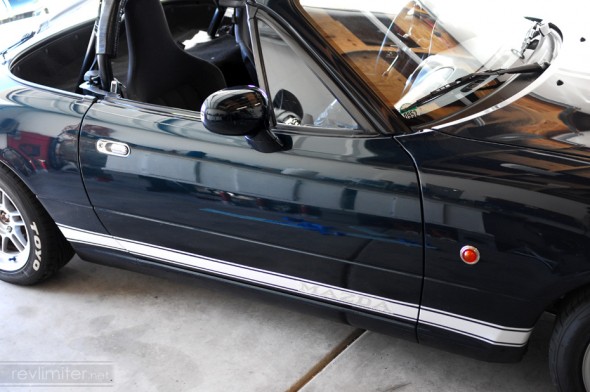




OMG. Love.
Love that my first production set was for Sharka. Love that the first set installed was on Sharka. Love the way Sharka looks with them!
Thanks for the great how-to, Adam. Of course, we expected no less!
I was honored to receive the first set. Incredibly honored.
And I love doing these how-tos!
Thanks for the write-up. I screwed up the first set of fender stripes I put on my NC, and I’ve been looking for a better approach. I may also use this to put stripes on my NA, once I get the mechanical mods mostly taken care of.
Also, how do you get the vinyl off the backing paper without de-sticking or otherwise ruining it?
Um…. I just peeled it? I had no problems.
As for de-sticking vinyl, that’s something you don’t need to worry about. You soak it with water. When it dries, the sticky comes back.
The secret to vinyl is keeping it wet. You can’t get the vinyl or body panel too wet. Then you just slide the vinyl around till it’s perfect. You have all the time in the world. If it gets dry, just spray the panel some more.
Thanks for the advise. I’ll try to put it to work soon.
I put the fender stripes/hash marks/Grand Sport stripes on the NC2 today: Red Candy Flash on Liquid Silver Metallic. Your approach was much easier than what I had used before. I managed to work out most of the bubbles with my fingers. The small ones that are left should work their way out over the next few days of sitting in the sun. If not, I’ll go back and pinprick them. I figure the stripes are good for about 15 EHP (eyeball horsepower). That should give me the edge in Street Touring R locally.
I hope to use this technique to put Le Mans stripes on my Laguna Blue NA eventually. I’m leaning toward white at the moment.
Thanks again.
Hi Adam,
Looking good!!
Can you post a photo of how it looks when the doors are open?
http://revlimiter.net/blog/wp-content/uploads/2011/10/stripe04-590×392.jpg
Thanks alot & best =)
I think I have the same question as Tristan. Where do you cut the stripes at the panel gaps after installation? In other words, do they wrap around the front fender or door edge? Do they spill over from the rear fender into the door sill? I’m considering these for my NA, and I’d appreciate any guidance you can offer.
I can’t believe I didn’t find your blog sooner. I’m a huge Miata fan and I’m loving every bit of what you have here. It’ll take a few days to go through it all! I currently drive a NC but I’m interested in buying a NA soon.
By the way… I found your blog via one of your ads on Clubroadster. I’m the guy who runs RallyWays.com – So the kudos come from a guy who knows web.
One other thing, please set up an email subscriptions service, be it Feedburner or a more sophisticated method like Aweber or Mailchimp. I was looking around to subscribe and could only find RSS. RSS is ok, but I always forget to check my feeds. I bet there are more guys like me that forget.
I’ll be going through the whole site… 🙂
Cheers, Danny Cruz
Thanks for the kind words Danny! This blog is sort of an ongoing labor of love. 🙂
Email subscription eh? My RSS feed is indeed through Feedburner (just click the Sharka cartoon on the right of every page), but I don’t think that offers email options. I’ll have to dig around. I’m an RSS junkie. Not a day goes past that I don’t read my feeds. I guess I just assumed others were the same. But an email subscription thing might be pretty sweet. I’d not actually thought of that before…
thanks!