
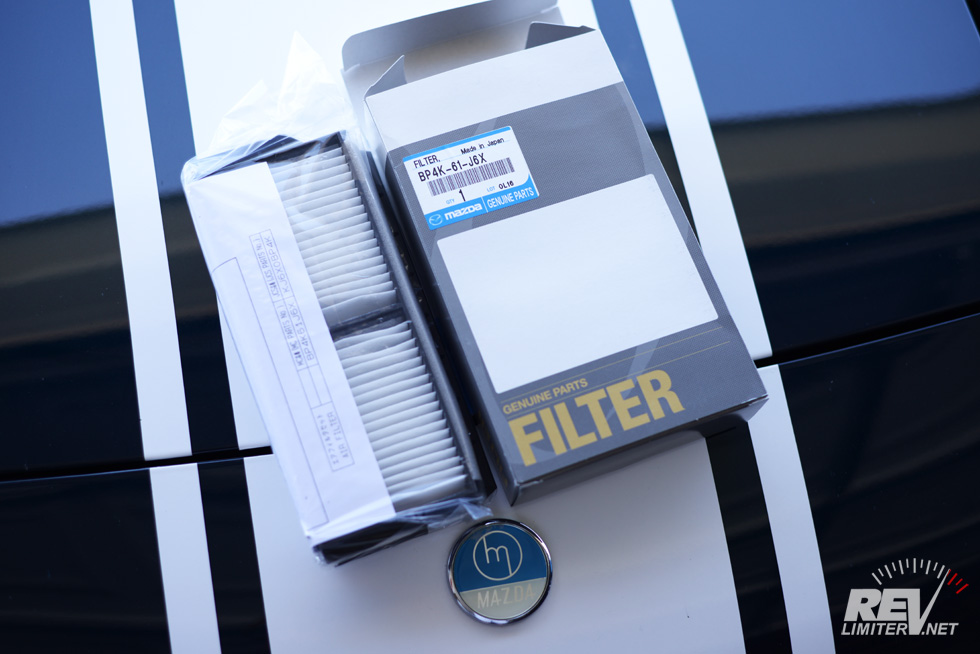
One OEM cabin filter, ready to be hidden somewhere under a dashboard.
This is some long-overdue maintenance for our poor Mazda 3. These things are supposed to be changed every 20k. I believe the car was up to 46,000 miles at the time of the change. Oops. Still, better late than never?
So… this project is really not very fun. It’s annoying and will possibly make you question why you own a Mazda 3. But, it has to be done. The question is, do you do it yourself or pay a stealership to do it? For something as involved as this, I’d not risk Jiffy Lube or other such monkeys. But if you’ve got a free afternoon, you can save a couple hours of labor at your local Mazda service shop.
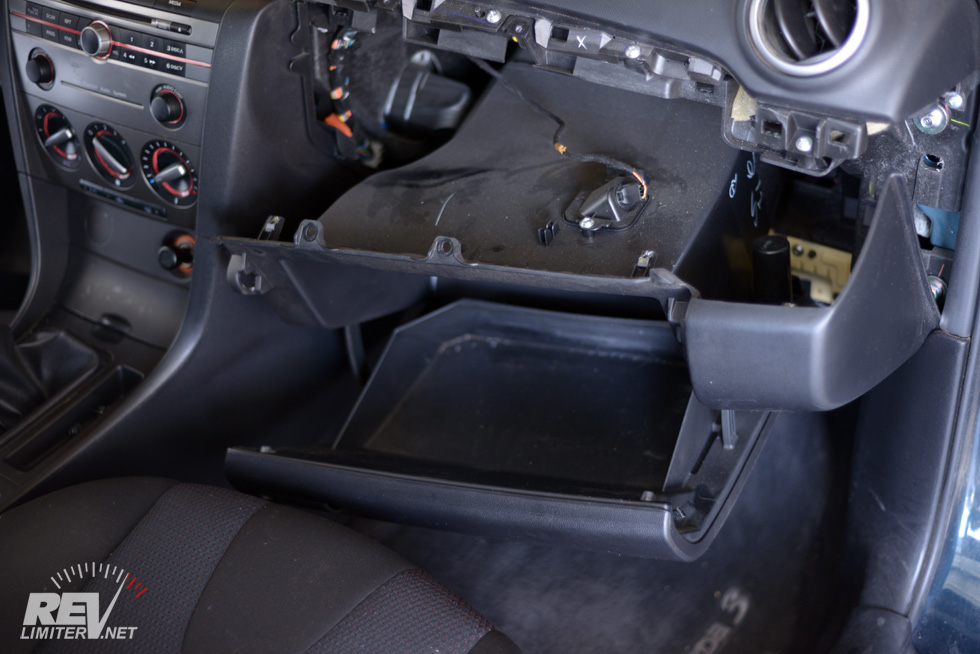
Step 1: Remove the glove box.
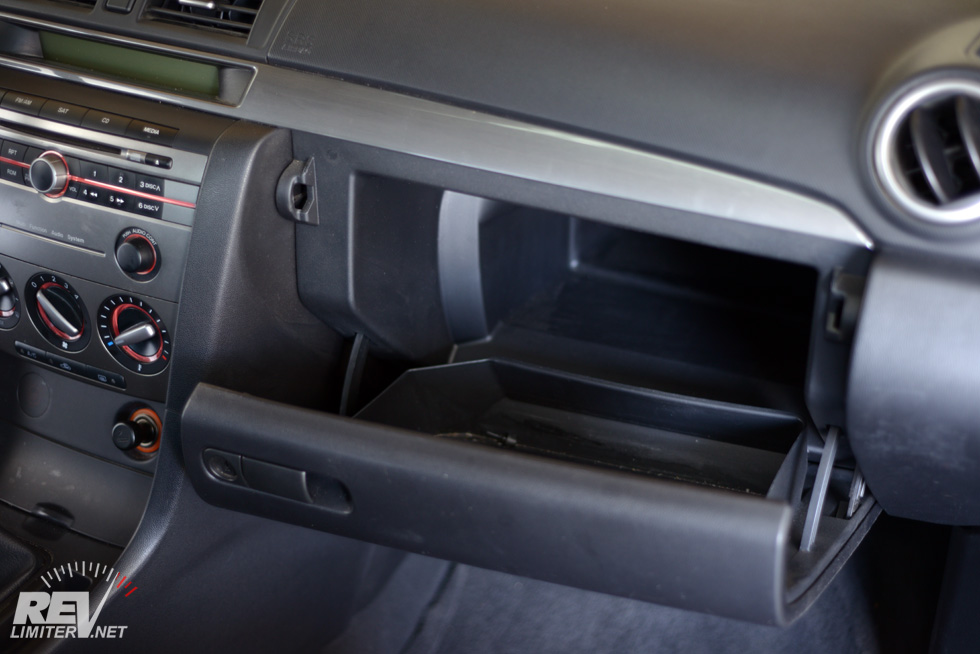
See the glove box? Remove it.
First, open it up. Then empty out all the crap. Then spend 5 minutes marvelling over the size of the thing. Seriously, you could fit multiple laptops in the 3’s glove box. It’s insane. It’s not a glove box. You could fit a whole coat in there.
Maybe two.
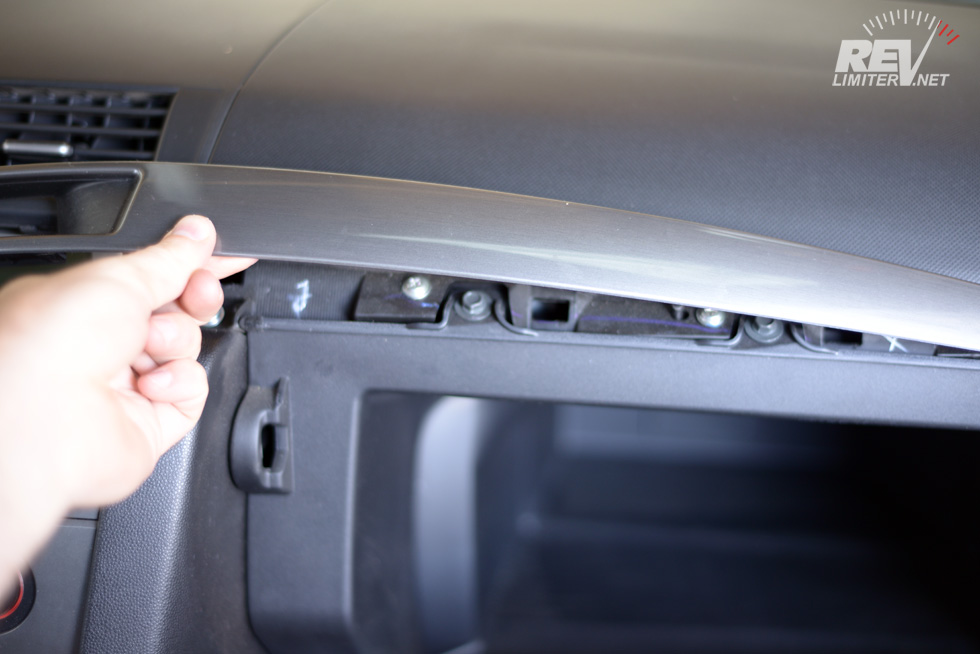
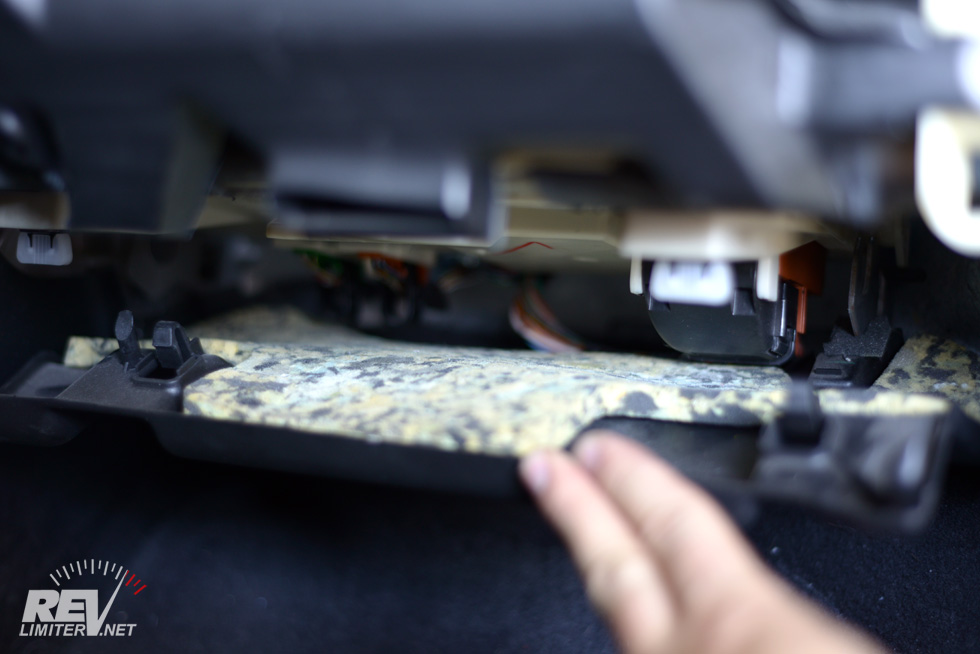
Pull the trim panel free.
The trim panel is attached on the far right side. Start pulling from the middle. The clips will give way and the panel will pop off. Then slide the L shaped clip out of its hole in the far right. Set this aside carefully because it scratches easily.
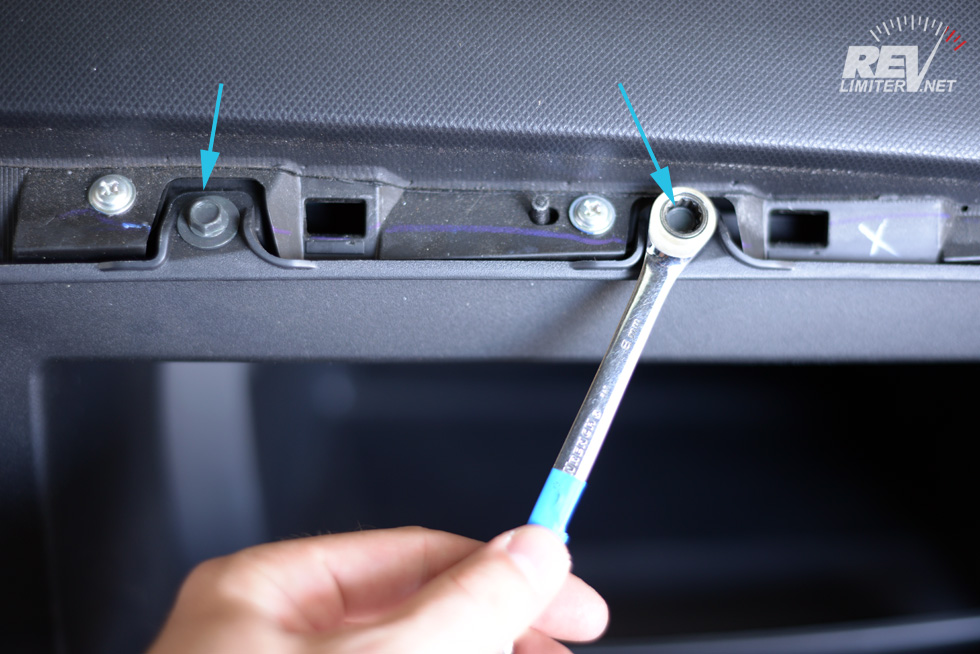
Remove these two bolts.
Some cars apparently have screws here. Not mine. They were bolts with 10mm heads. Strange. But only two hold the box in place.
YANK. Ta-da! The glove box is out.
A firm yank and the box comes out. Nothing to it. Just be brave.
Once the box is out, release the light so that it can be set aside. You need to be in the area the glove box is occupying in the above shot.
2: Remove the fuse box.
Pull the kick panel down. Just yank.
Seriously. Yank. If you pull from the front edge, the kick panel comes free very easily. Not much force needs to be applied.

Remove this side panel. One plastic rivet holds it in place.
Another easy one. I’m surprised just one thing holds this panel in place. Seems like there should be more.
And now… the fuse box. This is so ridiculous.

Unscrew these two thumb screws.
Rotate the fuse box down.

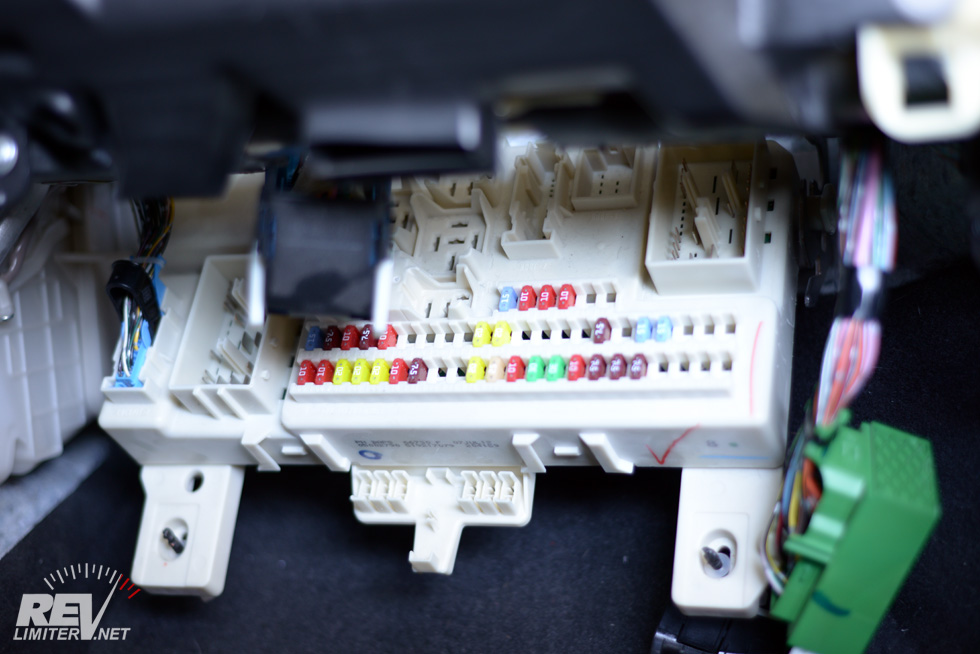
Start removing the zero-force connectors.
At this point I was just shaking my head. How can it be DESIGNED to require fuse block removal every 20,000 miles?!? That seems insane. More than once I asked out loud “Why do I even buy new cars??” Yes, I called my 2008 a “new” car.
Anyways. The fuse box removes pretty easily. The one tricky thing is figuring out how to operate the zero-force connectors. They’re similar to what are used on computer processors. You rotate the plastic arm and the connector just pops free. Sorry, but I couldn’t figure out a good way to photograph this. And there’s a ton of them.
Connectors disconnected.
There were a few spots in my 3’s fuse box that had no connector plugged in. I assume other trim levels have more or less stuff attached and active in the fuse box. The above picture was for me. It was shot so that I could see how the connectors were oriented and which went next to which. I advise anyone doing this to take similar pix. It’s helpful.
Set the fuse box carefully to the side by your other interior pieces. You may continue to be amazed that the damn thing is made to be removed. I was. Hell, I still am amazed while I sit here and write this.
3: Clear a path to the filter.
Remove the fuse box bracket.
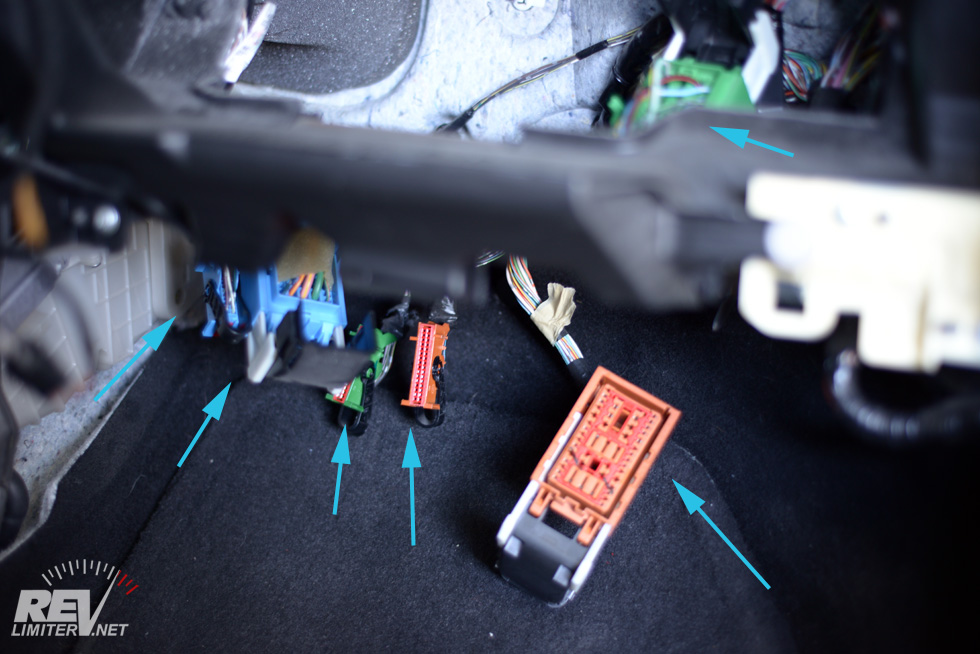
That nice bracket needs to be moved as far away from where it lives as possible. It is held in by two bolts. Also, several of the wiring harnesses for the fuse box are connected. And for dessert, it has a carpet pin in the bottom. I left the carpet pin and just let the bracket dangle from it, but removed all of the wiring harness plastic pins. Needle nose pliers make that easy.
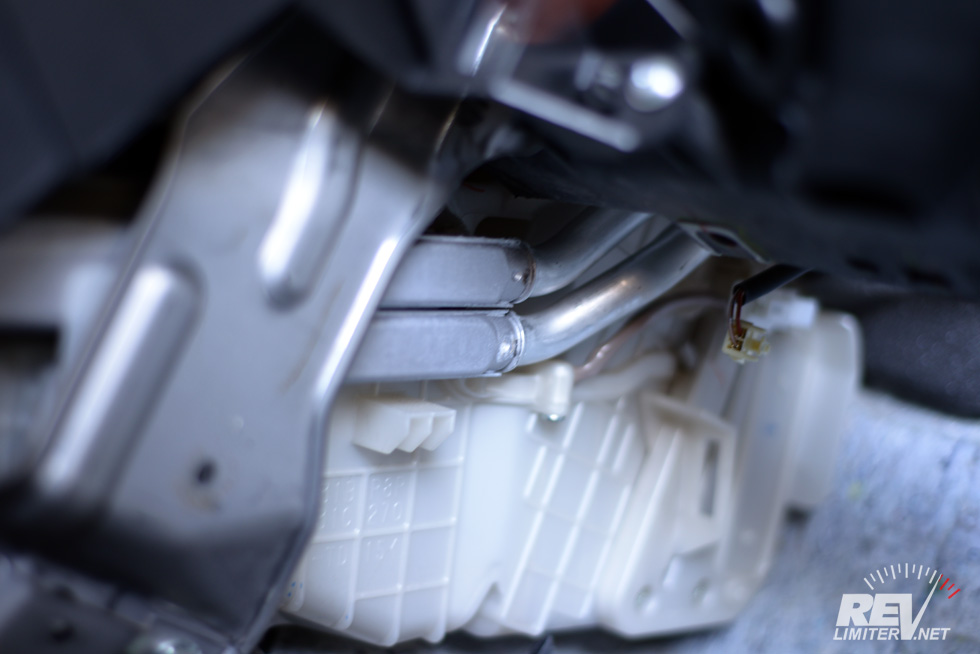
BEWARE THE SILVER TUBES!
If you’ve recently driven your car anywhere, these silver tubes will be approximately 5 degrees hotter than the surface of the sun. They go to the heater core which is mounted in an amazingly accessible location. I had indeed just driven the car before trying to change out the cabin filters. The tubes were full of hot coolant. I lost some forearm skin.
You have been warned.
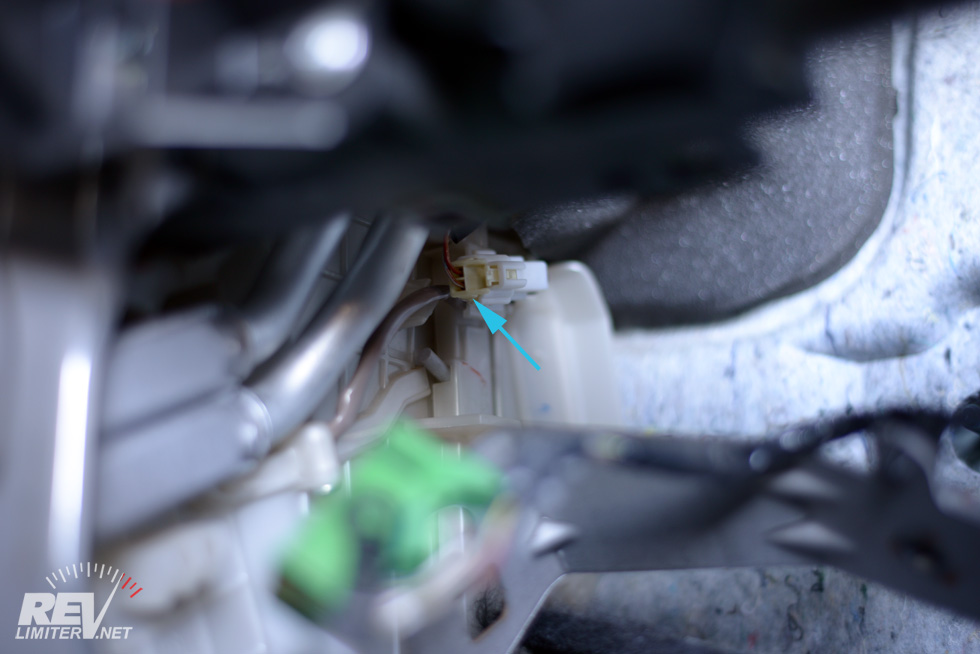
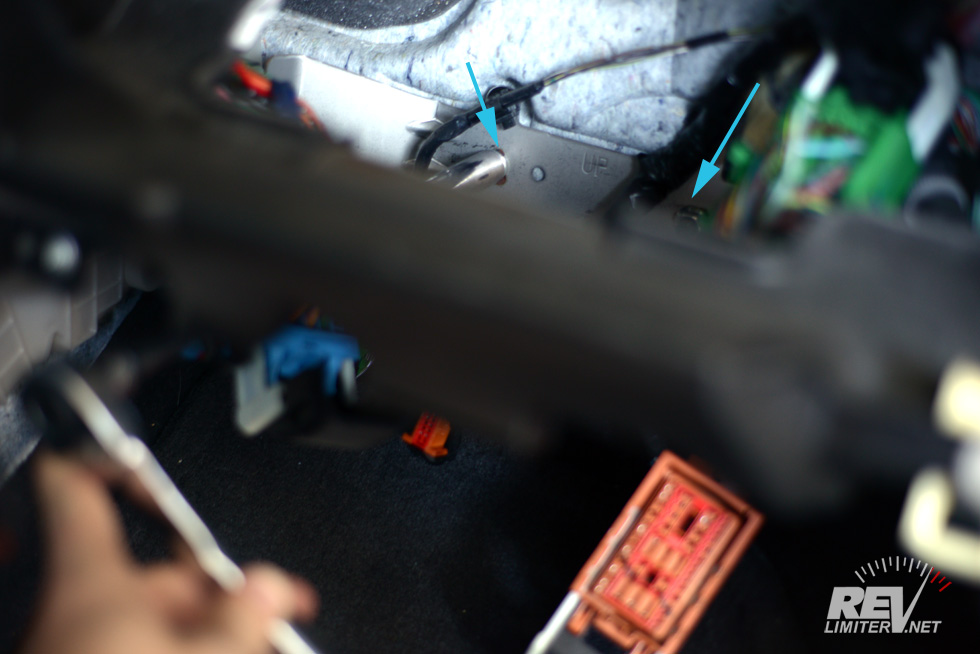
Disconnect this little guy.
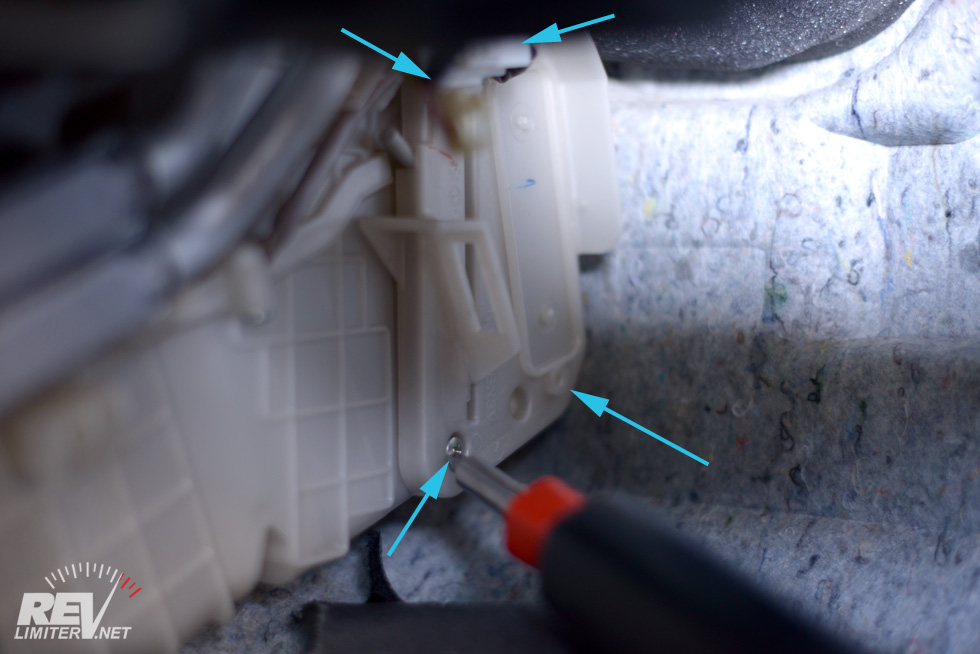
Remove these four screws. Two are hiding up top.
You’re almost there. The cabin filter is within reach. Just a few more items to go.
Using a magnetic screwdriver to help remove those two hidden screws is a good idea. Mine saved me from dropping the far-forward top screw behind the carpet. I was just using that one by luck. It just happened to be at the front of the drawer when I went gathering tools.
4: Swap out the filter!
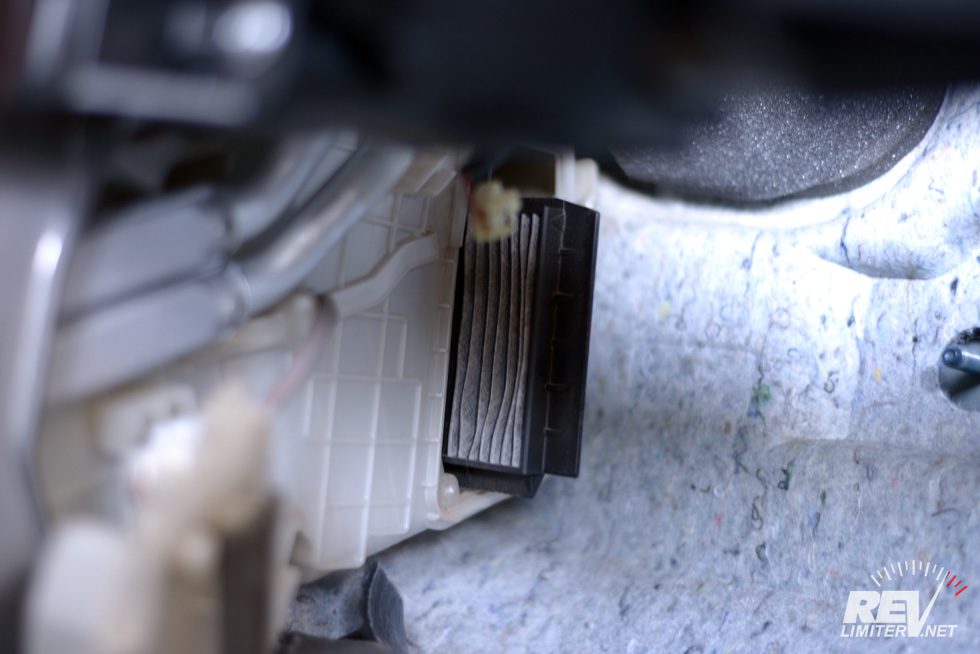
FINALLY!
It’s a FILTER. Say it with me, Mazda. FILTER! It shouldn’t be this hard to change a filter out of anything. A fuse box should not require removal for this regular maintenance activity. MAINTENANCE should not require 19 photos to describe.
As an added bonus, the filter is in two pieces. They live on top of each other. Try not to get angry and burn down your garage.

Yuck. The very definition of the word.
I gave these filters a double tap on the garage floor. Just a tap-tap. All of this came out. There’s a shit ton more in there. I… am a bad Mazda 3 owner. I feel I must apologize to my poor car at this point.

One new filter ready to go.
Here’s the new filters. This is the correct orientation. The filter with the small panel on the side goes on the bottom toward the passenger feet. The filter with the panel divided in half goes on top. There’s arrows that show which way air should flow through them.
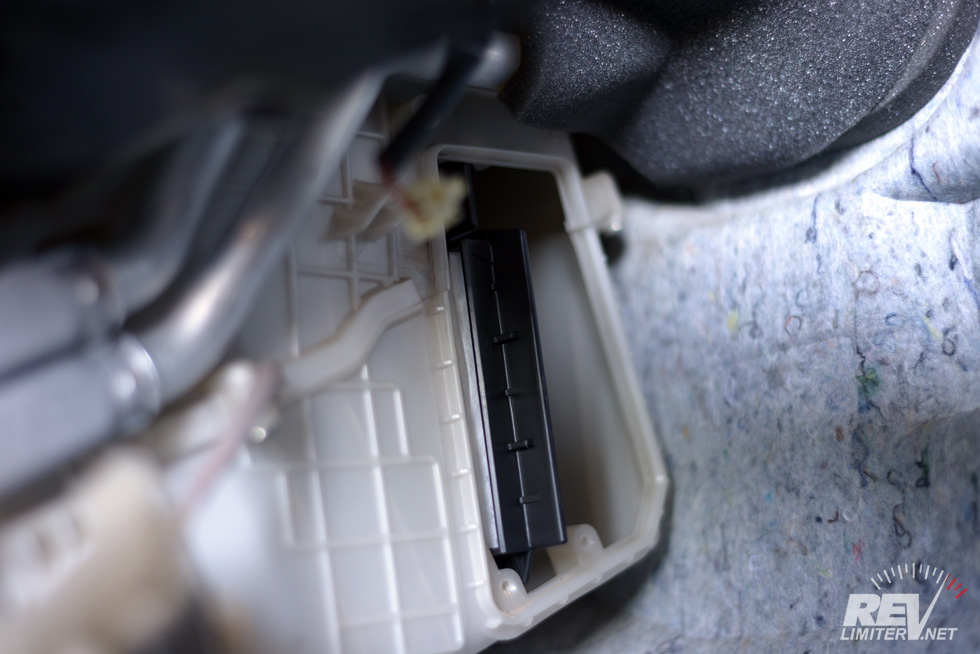
Slide the filters in. Try not to weep for joy when you’re finished.
The last task they make you perform is to somehow have one panel levitate in the box while you slide the other panel below it. There’s nothing to hold the top panel on top. You have to hold it with one hand while sliding the bottom filter in with the other.
Annnnd… it’s really not that bad. I did it in one try. I was shocked. I expected this to be a stupid human trick on the level of double yoyos or juggling chainsaws. It was… quite easy. Yet I’m not sure how I did it.
5: Put everything back where you found it.
Let me just say that I’ve done some strange things with cars before. I enjoy them. I like a good challenge. I like taking them apart. But I didn’t expect this level of engineering stupidity to change A FILTER. It’s not something that should require this much work. I am still questioning why I’m bothering with this modern car.
There might be a lot of old cars in my future.
Good luck with your cabin filter change!


That is ridiculous! I have a CX9, and it’s super easy to change the cabin filter, as there’s an access panel from the glove box. I feel for you Mazda3 owners. Hopefully, they newer ones are better?
I can’t imagine the newer ones being much worse. Planning to move large wiring harnesses every 20k miles cannot be good for the longterm health of the vehicle…
Possibly a LHD issue. I’ll have a look at my RHD, it’s due for a change, I’m suspecting it’ll probably be a lot easier as I expect they wouldn’t have mirrored the whole cabin filter assembly.
I hope to hear back from you! If the RHDs were better designed, I’d at least feel better about Mazda in general. heh.
You’ll hate this. The filter cover is almost entirely exposed in the RHD car, all you need do is remove the 4 screws and the cover comes off, exposing the filter.
Done!
Indeed this does not please me. hahaha
You would hate changing the new Outbacks headlight bulbs.
You have to remove the wheel well cover and blindly reach in from the wheel well to get at it, it makes it much easier to reach if you take the wheel off. Some people apparently take off the bumper to do it.
They really want to send you to the dealer for everything.
To change out the foglights in my NB, it’s pretty much the same. Take out a few plastic bolts and peel back the wheel well liner. The bulbs can be reached with the car jacked up.
Honest to god, that’s not so bad. It’s 5 minutes extra work beyond opening the hood. But removing a fuse box to service a filter? That’s something to smack an engineer around for.
And here I was assuming you remove a kick panel and viola! A filter access point. You might as well have changed out the heater core while you were at it.
I’ve not done it, but it seems like the heater core would be easier to change out, or at least the same amount of work. Aside from regular stuff like draining the radiator.
But in the plus column, the 3’s A/C is way better now.
Wow. Just….wow. Mazda…I am disappoint.
Cool! So that’s how you do it. I thought it would be difficult to do that’s why I always have it serviced and pay a lot. But I am going to try doing it by myself the next time I maintain my car. Thank you for sharing.
Not to drive you too up the wall… I ended up buying a 2001 Silverado … one of four years GM put cabin air filters in their trucks. One hex screw, and a plastic flappy door that pops off. Filters out, new ones in. 10 minutes tops. My AC no longer smells.
grumble grumble…
Ok, I’m now officially not looking forward to changing the cabin filter in my girlfriend’s Mazdaspeed 3 after seeing it’s complexity. It’s all the fault of the designers using CAD – they’re able to pack components into tighter spaces knowing that they’ll fit without a problem. That’s why you need to disassemble half of an engine compartment to change the spark plugs in some modern vehicles.
My wife’s ’06 3 has 73k miles on it, and still passes plenty of air. Until it doesn’t I’m not torturing myself looking through the top half of trifocals trying to get at the filters.
Period.
Thanks for the guide, but I don’t need to touch the glove box compartment to change out the filters. I was forgetful that I didn’t remember the positions of the bottom two red and green fuse connectors goes after pulling them out.
Wish I could say that…