
revlimiter NB HVAC Panel - installed!
Your Shopping List
- An NB HVAC (Heater/a.c./fan/air/other names) insert set - To my best knowledge, the only set out is from the revlimiter Store.
- Clear silicone - Included with your HVAC set.
- Gloves, toothpicks, paper towels - To apply the silicone and clean up small spots.
- A soft, microfiber towel - To wipe fingerprints and dust off.
- Tools to remove your center console - Screwdrivers, pry tools, specialty stereo removal tools, etc.
Frequently Asked Questions
- So... I can touch the surface, right? These aren't delicate?
That is correct. While the finish can be scratched, fingers and chemicals won't hurt it. - Any tricks to the install?
The one slider on the center of the NB HVAC is a pain. It pops out from the front like the other knobs, but it requires a lot of force and work.
The other trick is to only remove the NB HVAC plastic front face and leave the rest of the housing installed. But if you want to change out the lights, you have to remove the whole thing. It can be quite annoying to get the three long cables out of the dash. - Where can I get the HVAC panel in these pix???
I sell them here on this site! Check out the revlimiter.net Store.
Removal
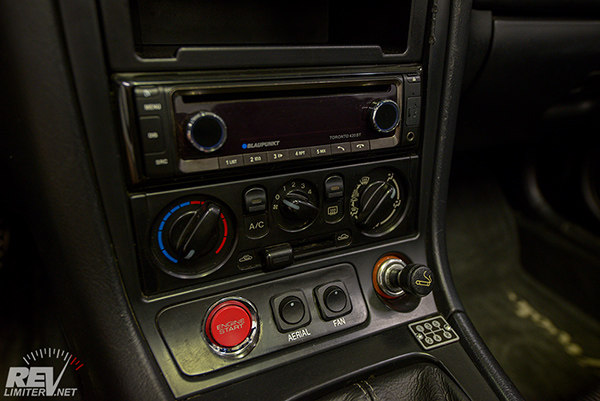
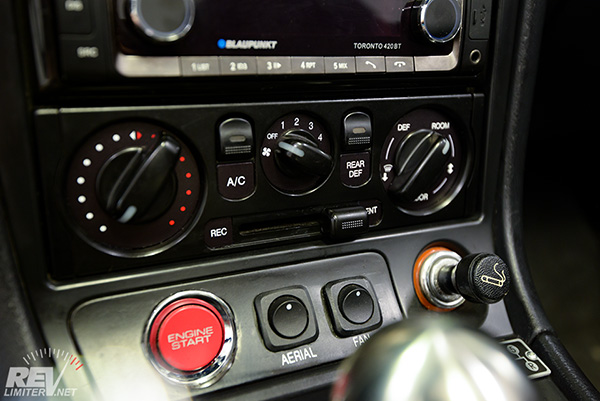
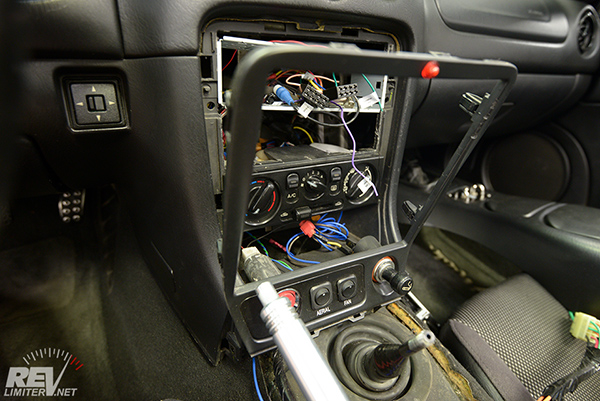
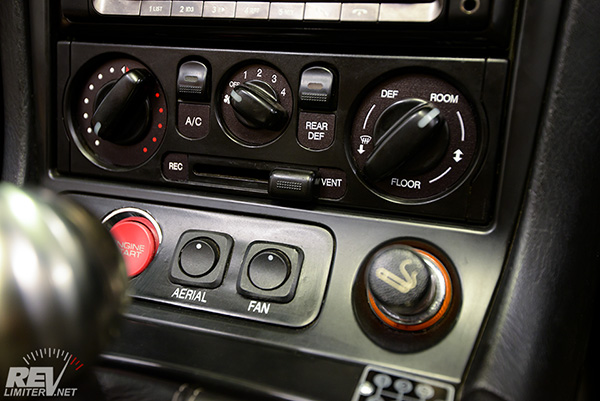
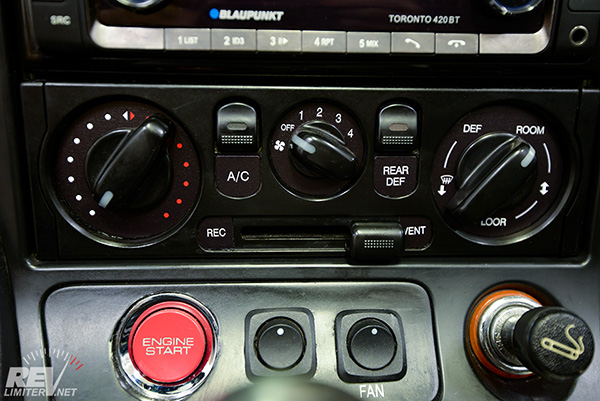
This is how the NB HVAC looks originally. The inserts are very small and easy to confuse. I thought this "before" shot would be useful. Please note all the various aftermarket stuff I have installed on my own NB around the HVAC. Radio, switches, etc. It will all be in the way of this install.
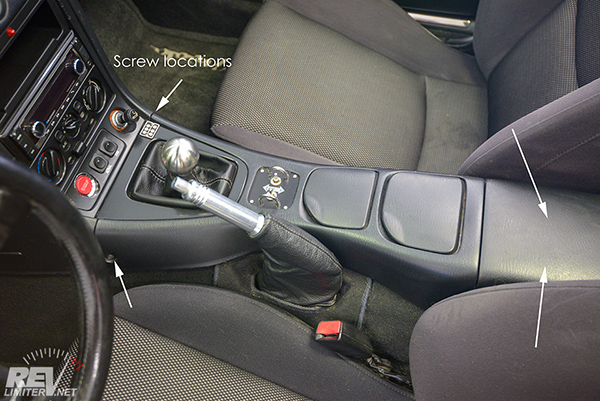
The center console must come out. There seem to be many versions of this panel with different screw locations. Mine has four screws - two on the front and two inside the console cover. Remove the shift knob, unscrew, and set the console to the side. You don't need to unplug the window switch.
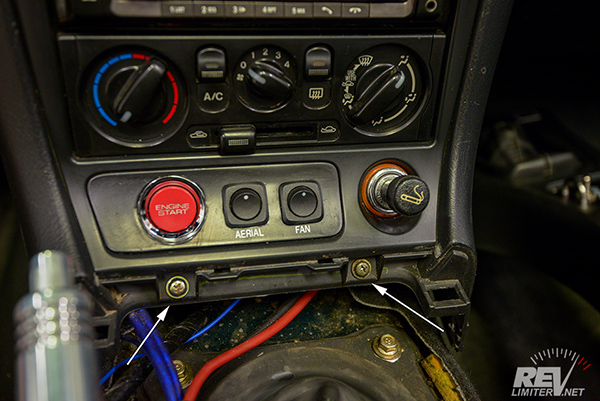
Remove the two screws holding the tombstone cover in place. After doing this, you can just pull that panel forward to remove it. It has small clips all around the outside edges.
An aftermarket radio may be holding the panel back from being removed. Your stereo will be in the way anyway and should be removed. Clear EVERYTHING out from around the HVAC housing. The more access you have to it, the nicer life will be.
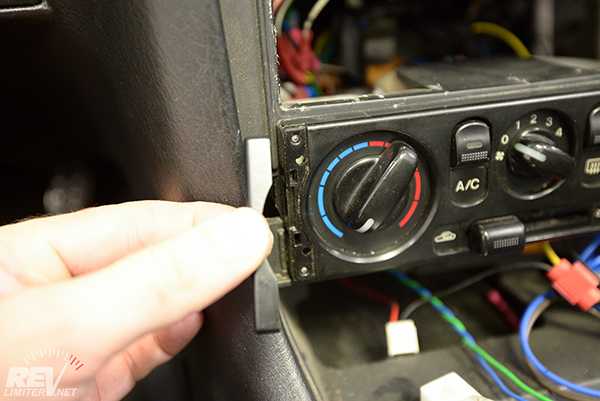
These two small outer covers DO NOT NEED TO BE REMOVED. They're delicate and don't mind staying in place. I removed them for this install without realizing this fact.
I repeat, do not remove these outer covers.
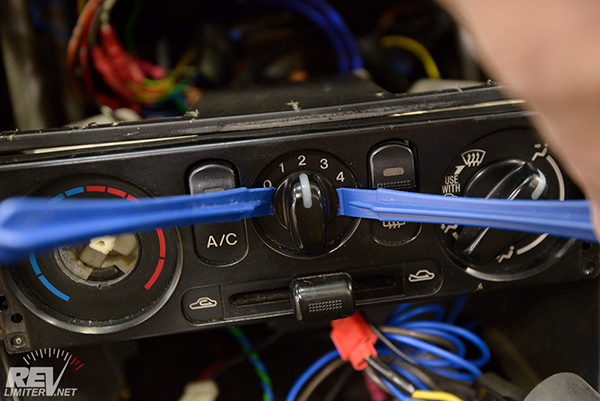
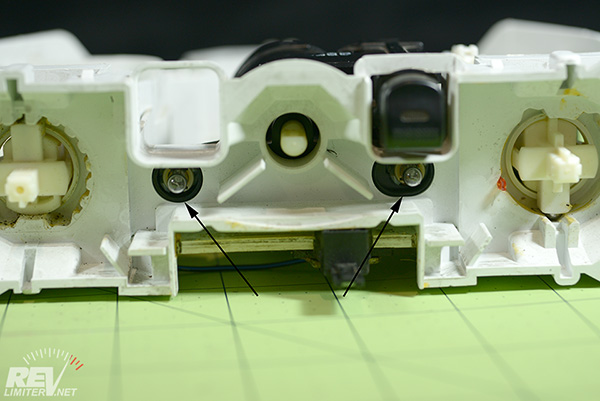
To remove the front plastic face, you must slide the whole HVAC housing forward. You do this by wiggling your finger to the inside front edge and pressing the metal housing tab down. There's one on each side.
This is the metal tab that needs to be pressed down. I'm sure there are specialty tools to pop these free (that need the plastic front edge covers removed) but your fingers do just fine. You just need access to the top of the HVAC panel.
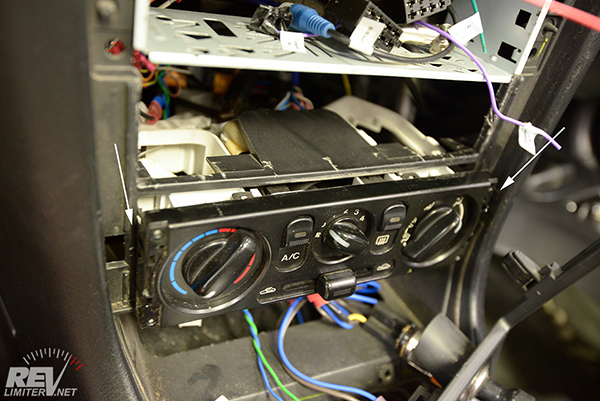
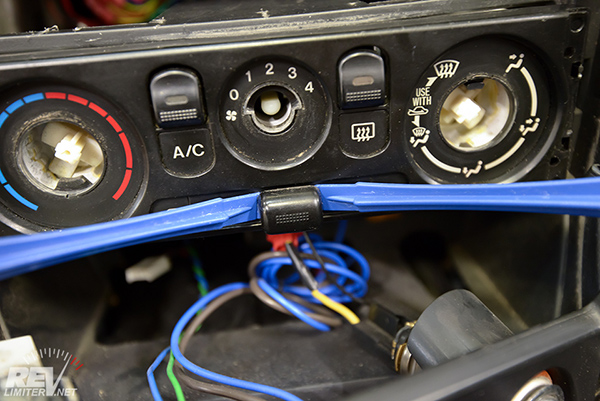
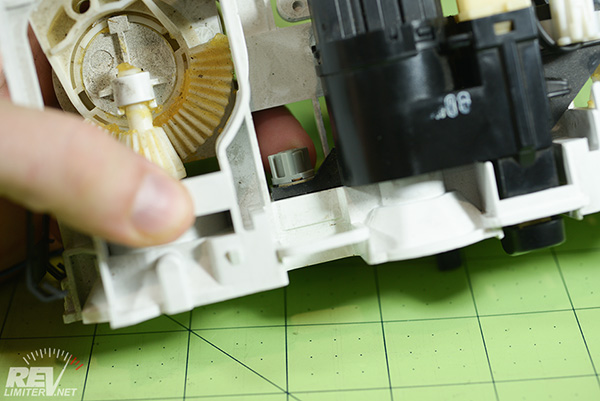
Once the panel is able to slide forward slightly, you'll have access to the two tabs top and bottom to remove the face.
All of the knobs and sliders come off with pry tools. Just slide under the edges and pop forward. Do this for all 3 knobs.
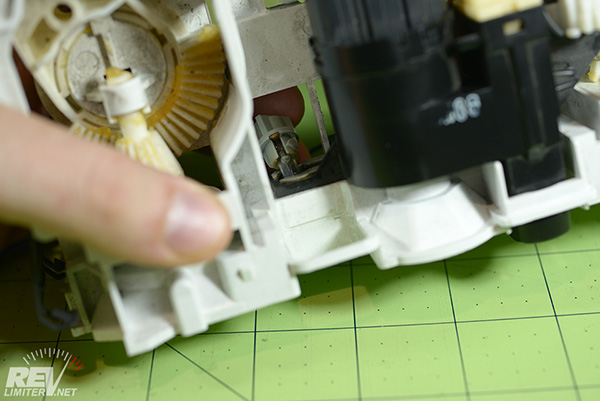
This is the hard part. This little slider knob DOES actually pry off from the front as well. It might not be possible to do it with the plastic tools though. You might need to make a metal one or use a fork or something. But it will pop out.
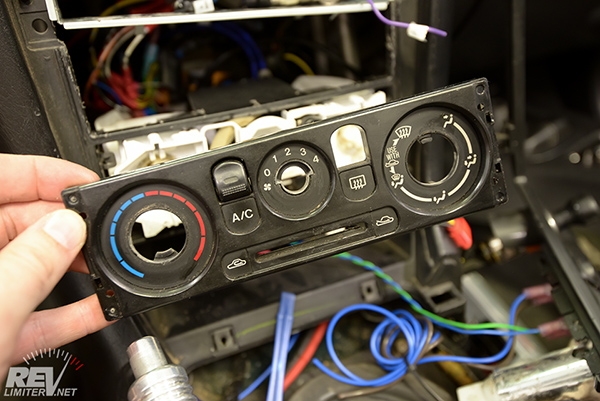
The HVAC face is held on by four total clips - two on the top edge and two on the bottom. You can access them with the whole HVAC housing slid forward slightly. Be careful to not snap these delicate plastic bits out.
HVAC Bulb Change
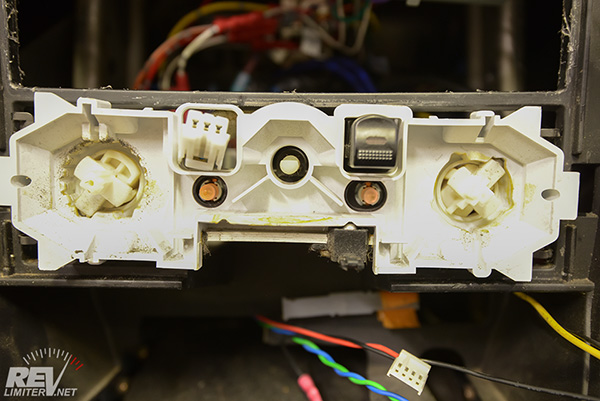
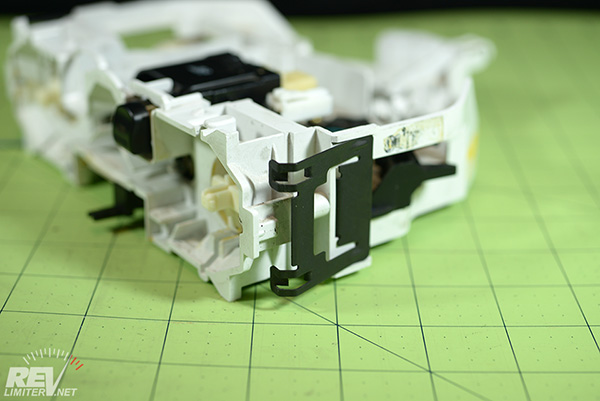
With the face removed, you have access to the HVAC bulbs. There's one on either side under the AC and Defrost buttons.
The proper way to remove the bulbs is by removing the entire HVAC housing. In order to do this, you need to follow the three cables back into the dash and disconnect them from the various things they control. This is not too easy.
The other way to change bulbs is to remove them from the front with a pliers or something and try to insert a replacement bulb. This IS possible but can take forever. It's extremely difficult to get a bulb back into the front of this juuust right when it's held in place by the dashboard.
The bulbs are the standard twist-in type. You untwist them half a turn and then can yank the bulb out of the holder.
If you're installing LEDs remember that they can be installed backwards. LEDs have a polarity. So you might immediately plug the whole housing back in (electrically) and make sure both lights work. If a bulb is backwards, just flip it around 180 degrees to get the polarity correct.
HVAC Face Installation
Move to a clean work area. This goes much easier with enough space and no grime around. Set your new HVAC inserts to the side.
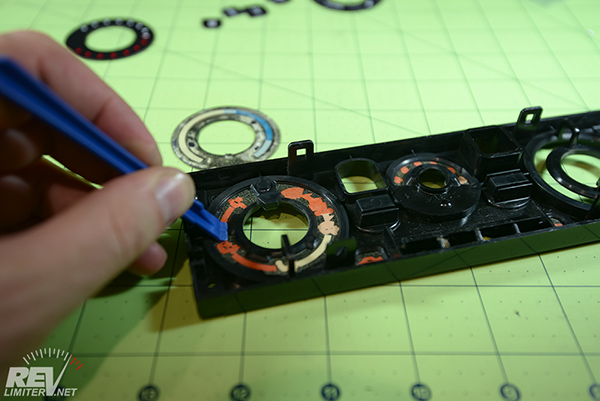
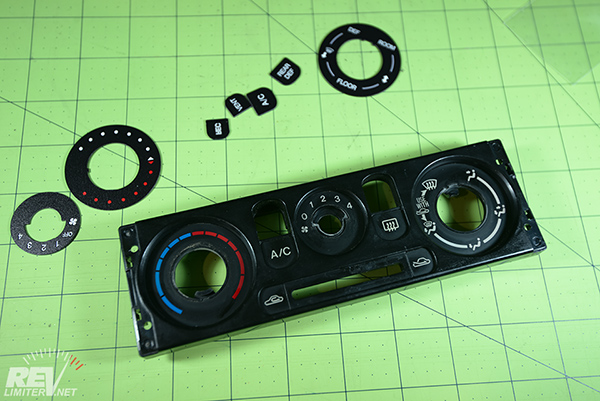
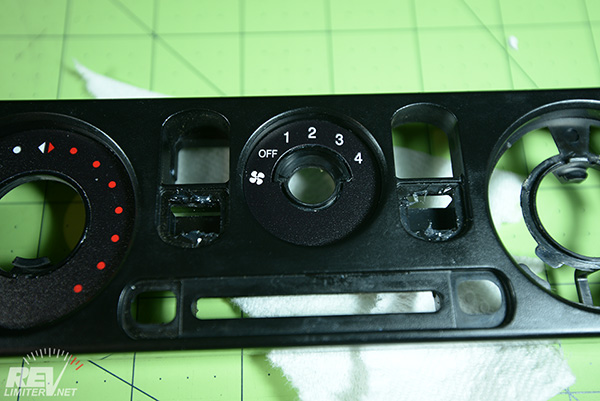
The old inserts are glued in with spray adhesive. You can just press them out using your pry tools. Be careful to not break the black plastic holding the old inserts.
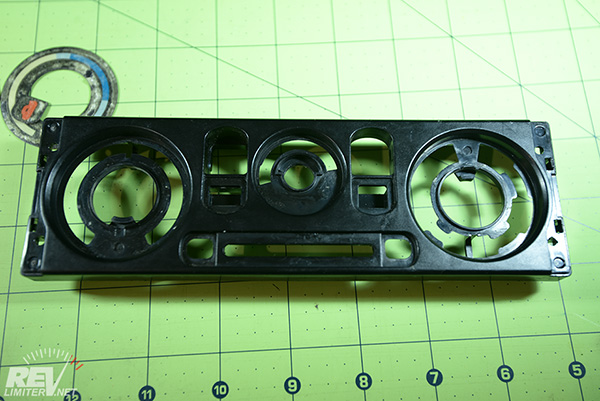
Clean any old OEM glue off the black panel. This shouldn't be hard as it likes to stick to the inserts instead of the plastic.
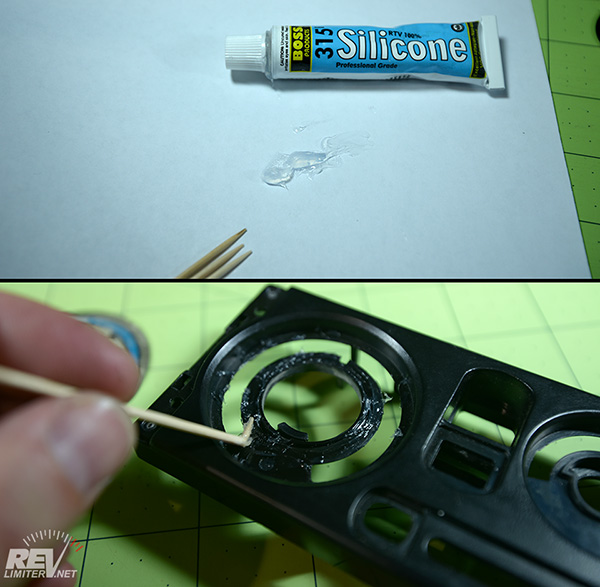
Clear silicone is the glue of choice for these tiny pieces. It goes on easily with a toothpick and can be cleaned up easily as well. Do NOT get it on the panel face! That'll be hard to clean off.
Apply a tiny amount of the silicone to the inner flat recesses. Note how I broke the tip of the toothpick over to one side to create a better silicone application device.
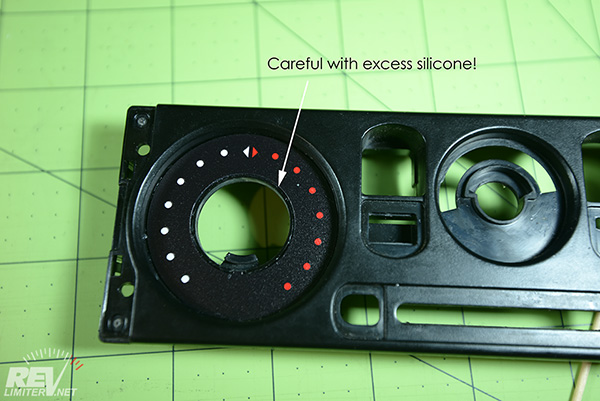
If you get a bit of excess silicone on the panel, wipe it AWAY from your new revlimiter insert. Keep some extra paper towels in the background to remove this. And keep your fingers clean too. It might sound like a lot of effort keeping things clean, but it's worth it.
Move across the panel adding inserts as you go. Add as little silicone as possible and only add it to the inner recessed areas.
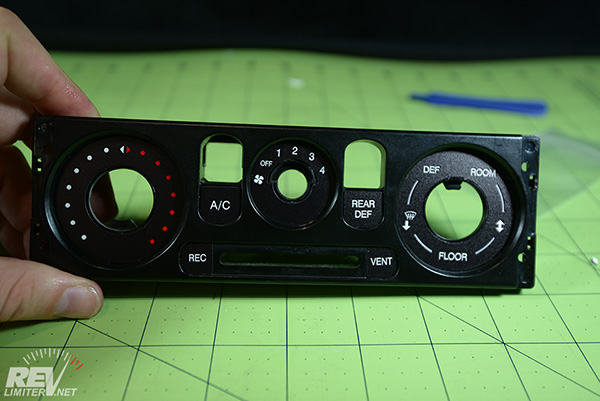
And, in case you forgot... A/C is on the left, Defrost is on the right.
Final Fitting in the Car
If you want to change the bulbs - DO IT BEFORE YOU REINSTALL THIS PANEL!!! I actually had to remove this myself after forgetting while taking all of these photos.
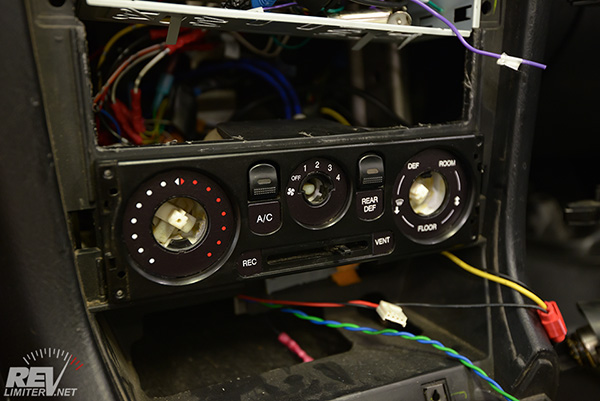
Click the panel back into place and plug the A/C button back in. Then slide the whole housing back into place.
Button everything back up. You're done! Congrats!!!
Additional Images
After all that work, I had to celebrate with some finished photos.
Nice to have this refreshed after years of weathering.
Site Navigation


Latest Blog Posts
25 Years
Posted on Mon, 14 Jul 2025 02:09:39 +0000
 A few photos to commemorate owning Sharka for 25 years. They're worth a peek.
Read more...
Where’s all the blog posts?!?!
Posted on Fri, 27 Jun 2025 19:59:51 +0000
 Why are you seeing 2013 blog posts in the "new posts" list? It's been a hard month for the revlimiter site.
Read more...
Mabel
Posted on Sat, 29 Jun 2024 03:42:43 +0000
 Who’s the dog that keeps showing up on the revlimiter Instagram? It’s Mabel, my ACD/Pomeranian service dog.
Read more...
CarbonMiata Vent Window Install/Review
Posted on Sun, 29 Jan 2023 14:57:01 +0000
 After waiting 23 years, there’s finally a pretty vent window kit on the market for the NA/NB Miata. Unfortunately, it doesn’t actually work well.
Read more...
GV Tail Light Upgrade
Posted on Mon, 27 Sep 2021 20:14:38 +0000
 TLDR; LEDs are brighter, who knew?
Read more...

Products sold on this site are for Off-road and Competition use only. This website intended solely to provide general guidance on matters of interest for the personal use of the Reader of this Page, who accepts full responsibility for its use. All products as well as information provided "as is," with no guarantee of completeness, accuracy, or timeliness, and without warranty of any kind, express or implied, including, but not limited to, the warranties of performance, merchantability, and fitness for a particular purpose.