Your shopping list:
- 1 carbon fiber NACA duct from McKinney (I used the large 4" duct).
- 1 spare headlight lid (optional).
- Bondo.
- Hardware to fasten your duct to the lid (don't trust the Bondo to do it for you).
- 1 Dremel with composite cutting wheels & various sanding drums.
- A roll of blue painter's tape.
- Mazda touch up paint at a minimum.
- 1 can of Tower Spraypaint in your car's color if you happen to destroy your lid's paint like I did my 1st time.
Step 1: Measure everything! (No photo)
Raise your headlights and shimmy the duct in between the lid and your lights. This is extremely easy with the Moss Low-pro's. With the stock headlights, it's a little more difficult. I slid the duct around a bit and marked each side at the limit of motion. Hard to describe. Just measure a lot.
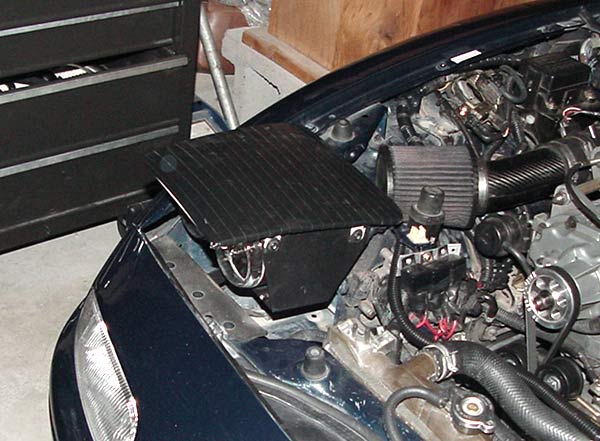
Step 2: Mount your spare headlight lid.
Mine was white and crumpled from rolling - yes, rolling - on a Spec Miata. I applied a little black tape and called it good. The spare lid comes in handy while you're waiting for yours to dry after painting. Tower Paint is very soft and really benefits from being left in the summer sun for a few days after being applied.
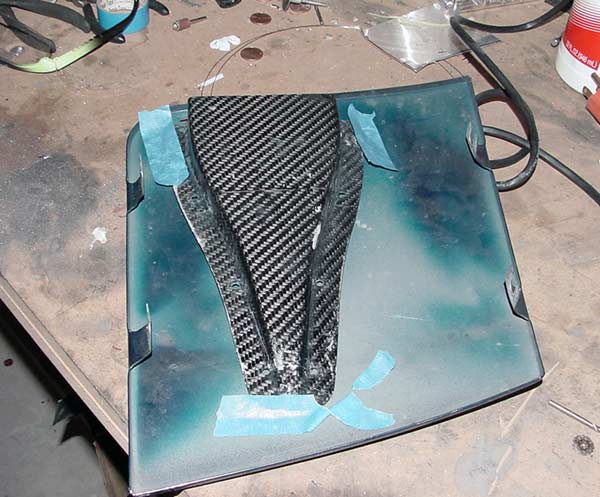
Step 3: Mount the duct to the lid and measure like crazy.
I put the duct between the marks I made in step 2 and taped down the two top edges. I then got out the tape measure and got the duct straight in relation to the headlight lid. And then I put it back on the car to verify that everything still fit.
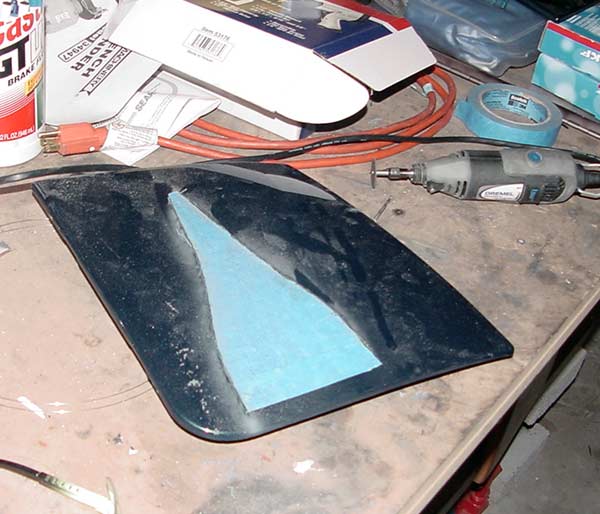
Step 4: Mark up your headlight lid prior to cutting.
I made a pattern out of blue painters tape applied to the base of my duct. About 1000 little pieces of tape is all it takes. I'm sure there's other ways to do this, but this made sense to me. The difficult thing was putting it in exactly the same spot as the duct which is taped to the bottom of the lid. I'd suggest removing the duct before you start cutting.
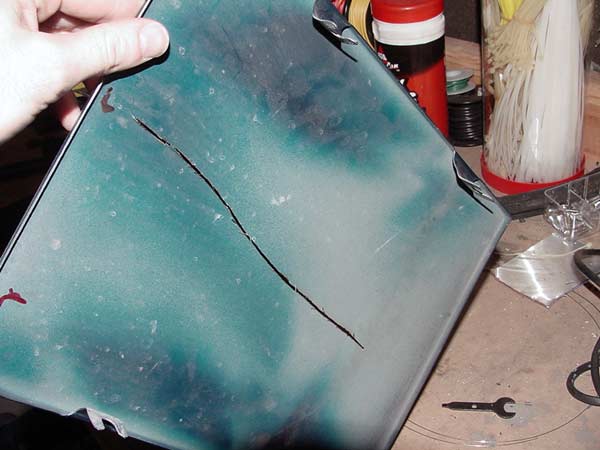
Step 5: cut.
I cut from the top side. This just shows you how it's come along. The first time I did this, I used a Dremel milling bit, similar to a drillbit. This melted the paint near the cut. The composite cutting wheel was a much better choice. You've just got to be a little more careful with it. I'd suggest extreme care at this step. I took about 30 minutes to make the 3 seperate cuts required to make the right shape.
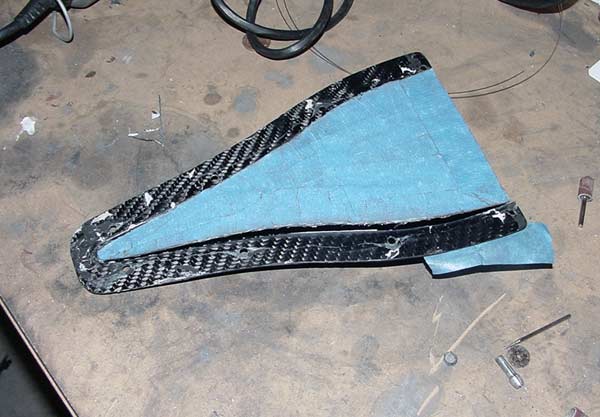
Sorta what the taped pattern looked like...
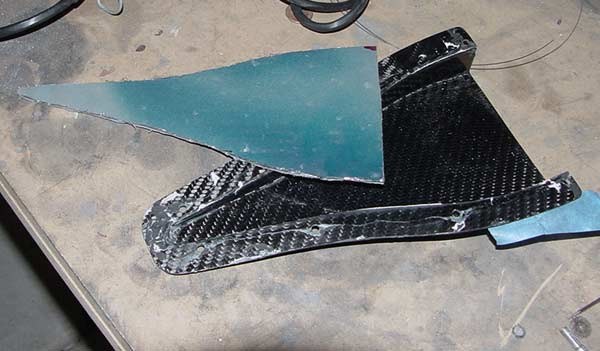
only it's not the pattern, it's the cut shape!
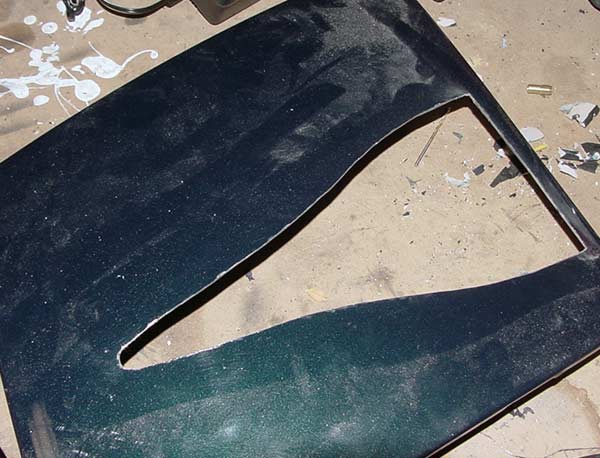
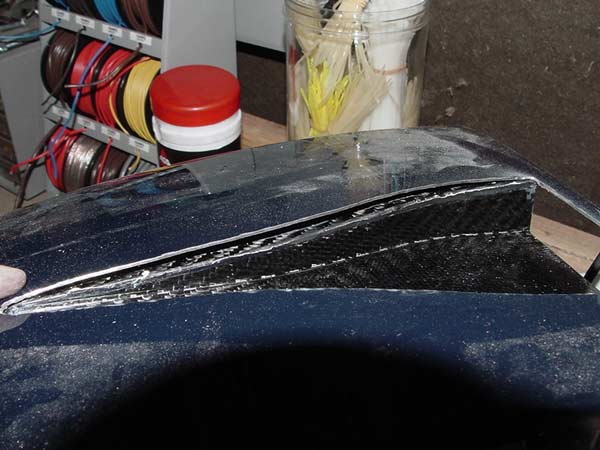
One duct-shaped hole.
I was very careful to not gouge the paint and stay exactly on the edge of the pattern. After cutting, I used a couple sanding drums to get the edge nice and smooth. This is your chance to adjust any edges that need an extra mm of material removed. Unfortunately, it's a bit harder to add a mm of material.
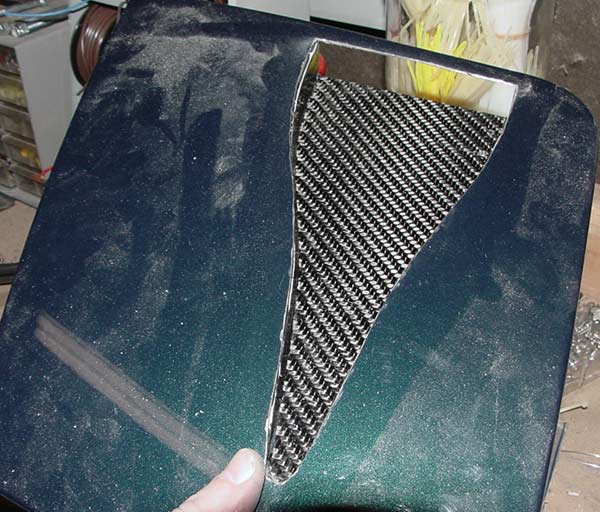
Test fitting the duct. Looks good!
Our next job: fill that void.
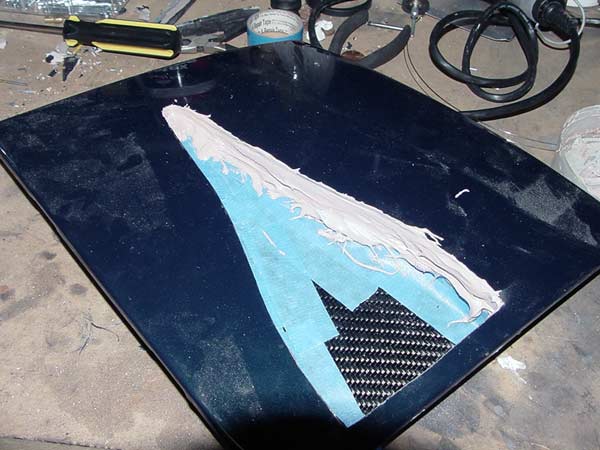
Step 6: Apply Bondo.
Time to get out the blue tape again. This time, apply it to the wall of your duct exactly on the seam. Allow a little on the base of the duct as you see above to catch any splattered Bondo. Then you just fill up the empty space with putty. If this is your first time using Bondo, I'd suggest trying to fill a hole on a spare chunk of metal first.
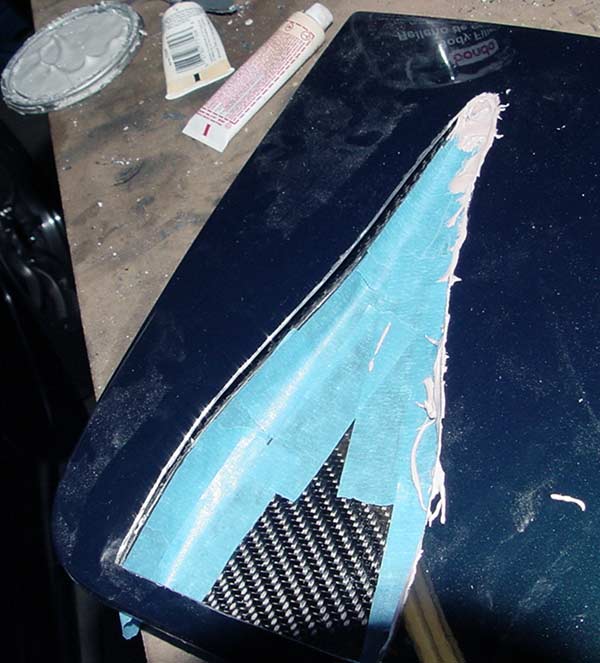
Try not to slop it everywhere. Fortunately, it cleans right off the paint with rubbing compound.
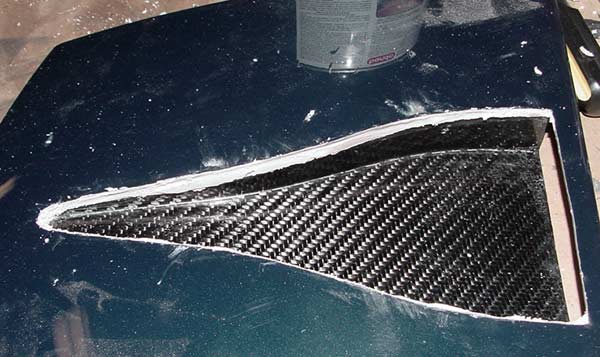
Peel off the tape before the Bondo hardens.
The Bondo will begin to harden in about 10-15 minutes depending on how much hardener you mixed in. It starts to get chunky and then it starts to warm up. Peel off the tape when this happens and you'll have a perfectly shaped plug for your gap. Then you just sand it flat. The putty is very easy to sand for the next hour or so.
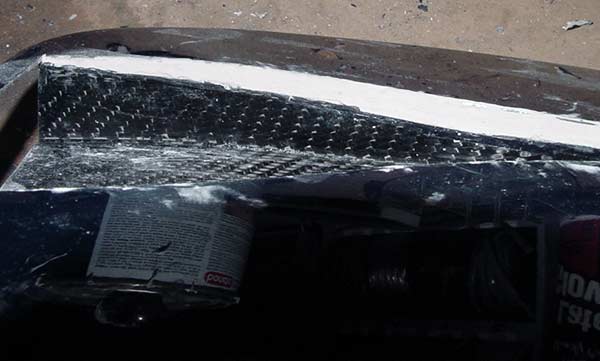
Smooth sanding! Just don't nick the carbon fiber.
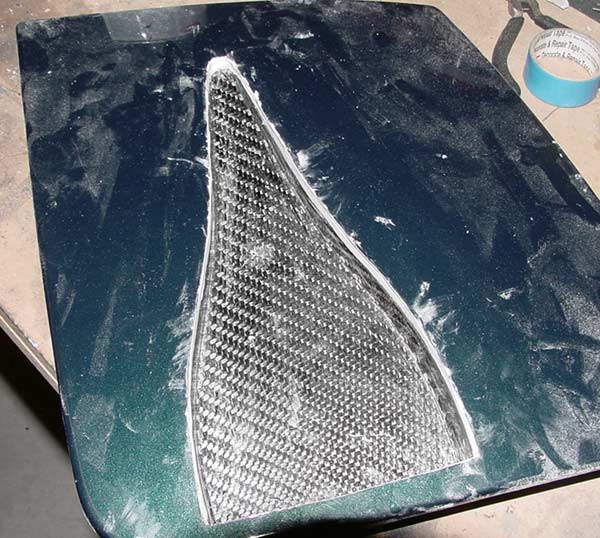
All sanded and ready for paint and some fasteners.
I let the Bondo harden for 24 hours before painting. I'm not sure if this is necessary, but I was tired of working that evening. I found that flat black paint is perfect for the bondo. You can brush it on after spraying some in a can or remove and mask the duct and spray it on. Body-colored paint looked strange. The flat black matches the carbon fiber closely. Finally, get out the tape measure again and mark some spots for drilling and hardware installation. Some epoxy would also work between the bondo and the lid. Bondo tends to stick to the duct quite nicely, but it doesn't bond to the metal quite as well. A little epoxy would be nice insurance against the duct flying off and possibly getting ejected from the bottom of your engine bay.
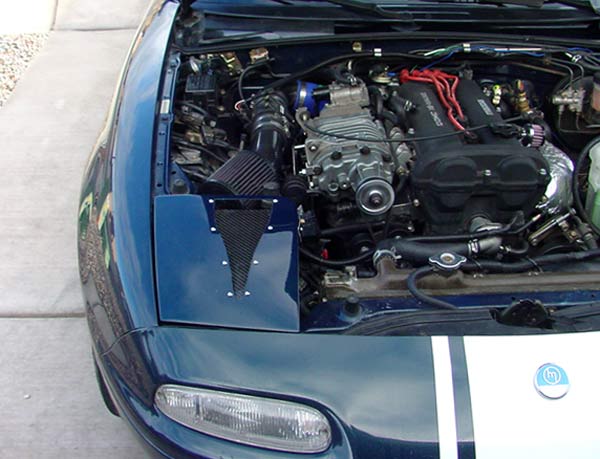
The installed duct - a thing of beauty.
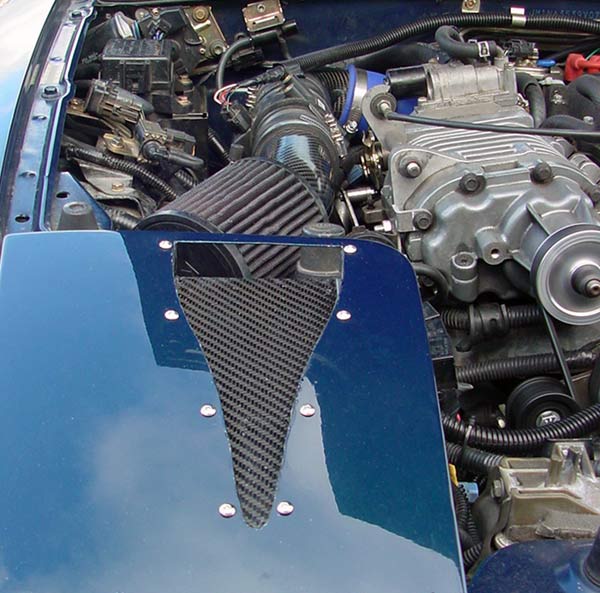
Notice the capscrews holding the duct on and the little bit of touch-up paint around the edge.
The weather was just too cold when I cut the duct to paint. I was happy my paint didn't get badly destroyed and only needed a little touching. But when the weather warms up, I'll be stripping the lid bare and spraying it blue.
Site Navigation
Latest Blog Posts
25 Years
Posted on Mon, 14 Jul 2025 02:09:39 +0000
 A few photos to commemorate owning Sharka for 25 years. They're worth a peek.
Read more...
Where’s all the blog posts?!?!
Posted on Fri, 27 Jun 2025 19:59:51 +0000
 Why are you seeing 2013 blog posts in the "new posts" list? It's been a hard month for the revlimiter site.
Read more...
Mabel
Posted on Sat, 29 Jun 2024 03:42:43 +0000
 Who’s the dog that keeps showing up on the revlimiter Instagram? It’s Mabel, my ACD/Pomeranian service dog.
Read more...
CarbonMiata Vent Window Install/Review
Posted on Sun, 29 Jan 2023 14:57:01 +0000
 After waiting 23 years, there’s finally a pretty vent window kit on the market for the NA/NB Miata. Unfortunately, it doesn’t actually work well.
Read more...
GV Tail Light Upgrade
Posted on Mon, 27 Sep 2021 20:14:38 +0000
 TLDR; LEDs are brighter, who knew?
Read more...
