
revlimiter Gauges (Version Dragstrip) - almost ready to go.
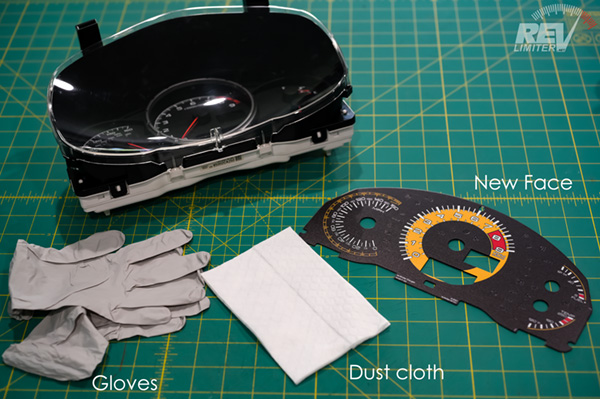
Your Shopping List
- A set of genuine revlimiter Gauges. - You can buy them right here on this site! Check out the revlimiter.net Store. Other gauges may be of lesser quality or not compatible with the steps below. Don't settle for anything but the best!
- Powder-free gloves - These come with your gauges. Because you'll never be able to wipe off finger prints from most gauges, including your old stock ones.
- Dry dust cloth - This comes with your gauges. It's normal for gauges to become a bit dusty while you work on them. This cloth gets them looking good before sealing up your cluster.
- Paper towels - always helpful.
- Pry tool - A small flat blade screwdriver works. This just helps pop the gauge glass free.
- Screwdrivers - to remove the gauge cluster.
Frequently Asked Questions
- I got a smudge on my gauge. Can I wipe it off with rubbing alcohol?
With Gen3 revlimiter Gauges - sorta. Don't use rubbing alcohol, but a damp rag/microfiber/paper towel is fine. Gen3 gauges are waterproof and easy to clean up. You can also remove dust from them with blue painters tape. - Where can I get the gauges in these pix???
I sell them here on this site! Check out the revlimiter.net Store. - NA and NB Miata gauges have funky non-stock zero positions. Why can't my 86 have that?
The BRZ cluster has a jillion warning and indicator lights in the center of the gauge faces. The guts of the gauge include thick plastic to pipe light to the gauge sheet. Also, the gauges aren't exactly round. Because of this, there's no way to rotate the BRZ gauge to a non-stock zero position and still have it light up. - I want to change my BRZ lighting color. Can these gauges do it?
Yes and No. The BRZ uses amber LEDs soldered to the circuit board to create the amber/red lighting. The FR-S uses white LEDs. The white LEDs allow you to change the lighting color, so yes, an FR-S can have any color night mode they want. The BRZ cannot. - How do I know the tach / speed/ etc is accurate after doing this?
The four BRZ gauges are all small stepper motors that self zero. When you apply power to the board, the gauge cluster recalibrates itself and makes note of where zero is. Because of this, it's very very easy to install a new gauge face and have no loss of gauge accuracy. . - Will this make my odometer read wrong?
No. The odometer is not affected by this job. Removing and reinstalling will not change it. But your trip odometer will be reset. Some folks use that to track their mileage (including me) and this fact is nice to know before you put the cluster back in only to see 0 on the trip meter. - Some other shop sent me to this page. Is it cool if I use the info here?
Well, sure! The thing I enjoy most is helping out my fellow Miata enthusiast. However, I'd greatly appreciate it if you would drop me a note and tell me about these other manufacturers who are ripping off my hard work.
Gauge Cluster Removal
I do not own an FR-S/BRZ/86. Clusters shown here came from junkyard cars. Please refer to google or the forums for help in removing the gauge cluster from your car.
Gauge Face Installation
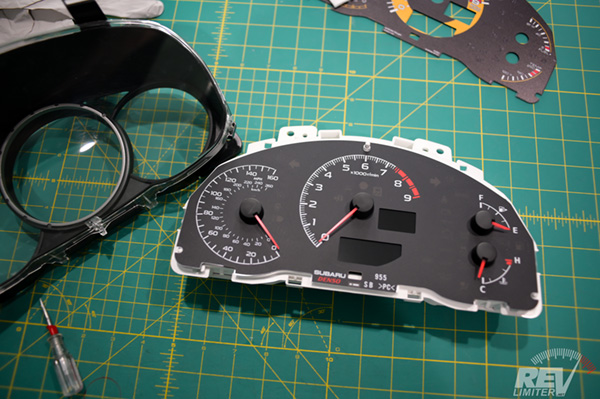
Take the cluster out of the car and to a comfortable, dust-free work area. Note that my gauge sheet is sitting out in the open. This might not be the best choice. Please keep yours in the protective bag/package until you're ready. Your Gen3 gauges can have grease wiped off of them, but it takes a really long time. It's far easier to protect the gauges and to wear gloves any time you're touching them.
Send curious pets and children out of the room. This is a rather delicate process and small parts can be damaged. It's best to have quiet, clean solitude while swapping out a gauge face.
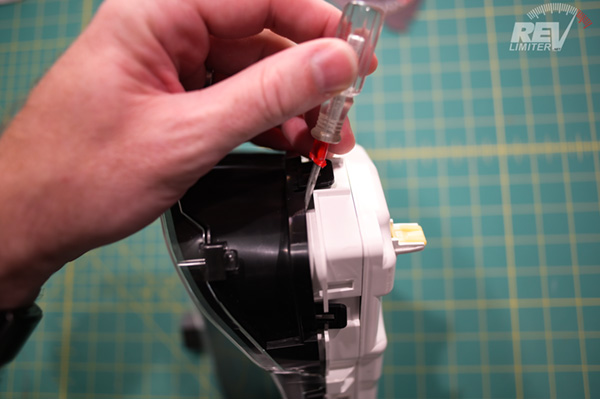
The plexi and black fascia just pry free from the white cluster housing, but they sorta like to snap back together on their own. A small screwdriver can prevent them from clicking back together.
Starting at one side, release the two black clips and start slowly and carefully prying the fascia away from the housing. Note that while the clear plexi can be removed separately, there's no need to do this.
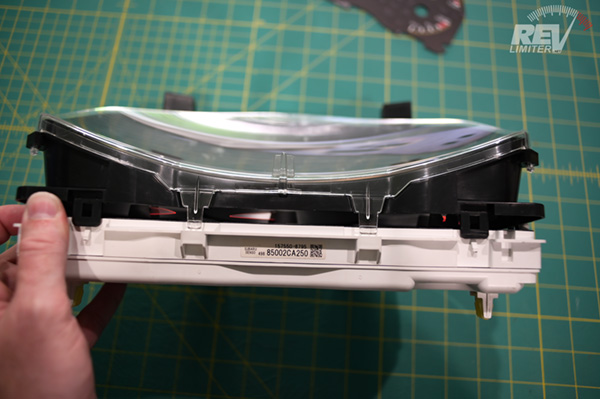
Continue prying apart on the bottom side of the cluster. You'll hit a point where everything just falls apart from each other. There's a few more clips on the bottom than on the top, so it's easier to get the cluster to separate by leaving the top for last.
Set the plexi and fascia away from the work area so it doesn't get damaged or scratched.
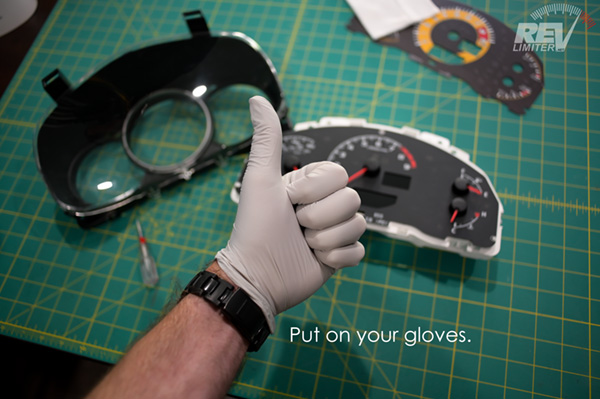
Now is the time to put on your gloves. You'll wear them for the rest of the install.
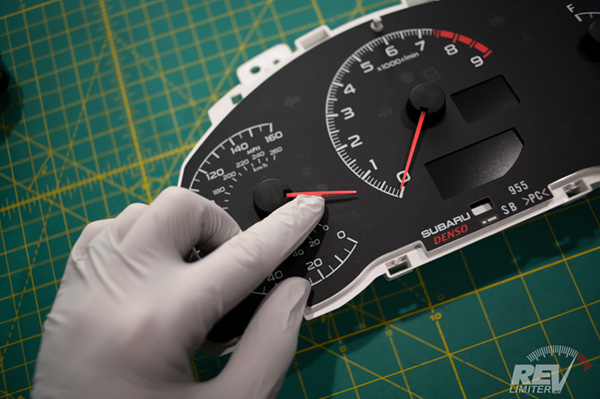
THIS is the hardest part of the whole install. Give yourself plenty of time to get these needles off. Patience is required. The more gently you can remove these needles, the higher the chances you'll have of not needing to repair your stepper motors later. However, unlike many other cars I've never seen a BRZ/FR-S need a stepper motor repair.
To separate the needle from the stepper motor, the best way is to very gently force it toward and past the low-end stop. As shown in the photo above, push the needle past zero in the wrong direction. You'll feel it start to give way and then spin freely. Gently spin it around many times and then gently apply some upwards pressure to help it pop free. 10+ full rotations is not too many. The more you spin the needle, the easier it'll be for it to pop free.
Did I say "gentle" enough? Force may cause the metal shaft to come out with the needle itself. If this happens, you'll need to repair the stepper motor or solder in a new one. Don't be afraid to spin the needles backwards as many times as you'd like. 20-30 revolutions isn't out of the question. The more you spin it, the easier it will be to remove each needle.
Videos are sometimes helpful, so here's one dealing with removing the BRZ needles by spinning them off.
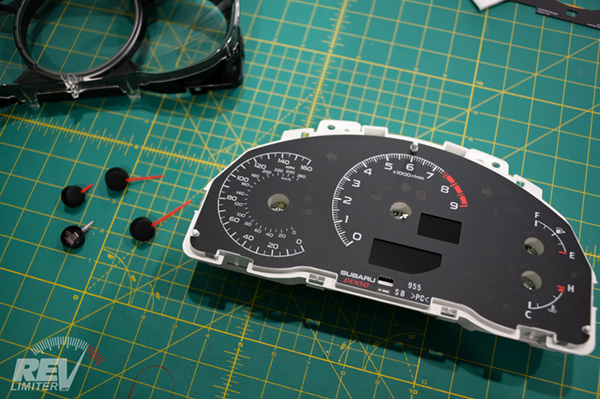
Set your needles to the side so they don't get damaged, knocked on the floor, stepped on, eaten by the dog, etc.
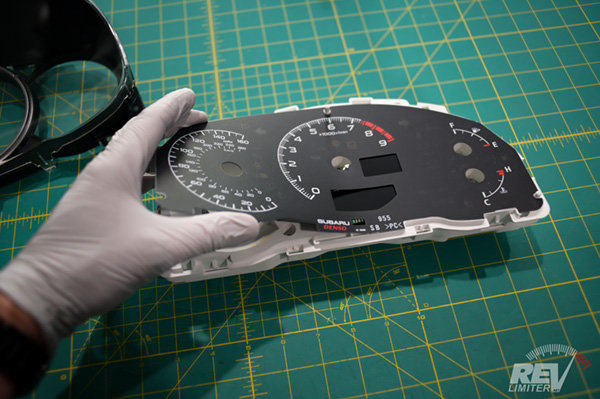
The gauge sheet removes by pulling up. There's a small hold-down pin in the tach center that you'll need to work around. Set the stock face aside. If you think you might want to install it in the future, place it in the package your revlimiter Gauges came in.
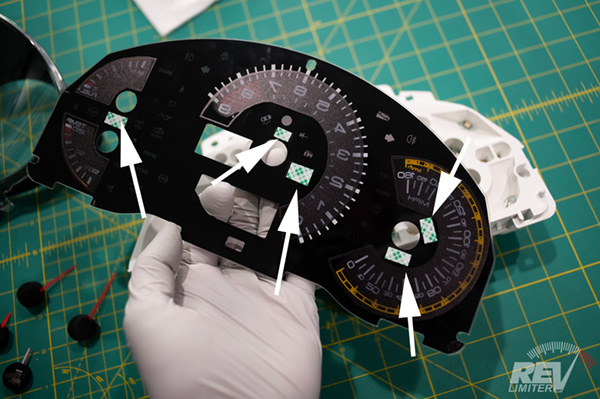
Your revlimiter Gauges are a bit thicker than the OEM face, so that center tach hold-down pin can't be used. Instead, we have double sided tape. Remove the backing from each piece of tape. There should be five pieces, but this may change over years of development. Make note of where those tape pieces are.
Carefully line up the gauge sheet onto the cluster. It will exactly fit the raised plastic outer edge just as the OEM one did. Press down on the tape locations to lock it in place.
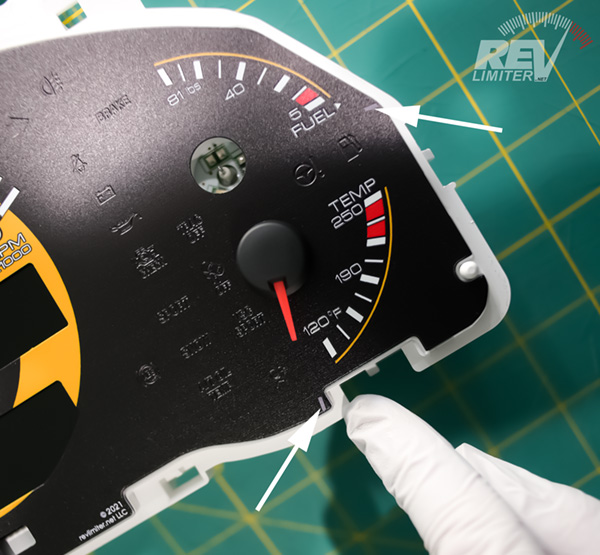
You're in the home stretch. Now you need to calibrate each needle. There's a small grey tick mark for each of the small gauges. That's your zero calibration point.
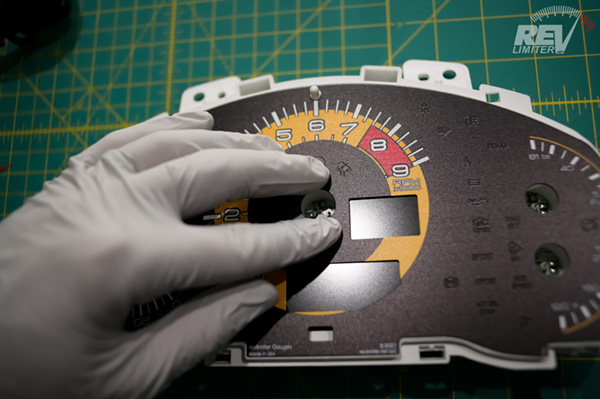
Re-install one of the needles VERY GENTLY in the middle of the gauge range so that the needle is just barely on the shaft. Then (again, gently) rotate it toward that zero point. You will feel when the motor stops moving and hits the inner zero point. That's good. Keep rotating the needle itself until it is pointing at that zero calibration mark. If you go a bit past the zero calibration, that's fine. Just spin the needle all the way around in the backwards direction and try again.
When you're happy with the calibration, press the needle onto the base more firmly.
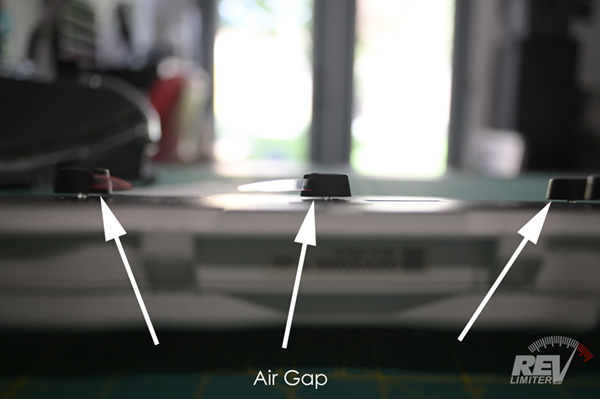
When you're re-installing the needles, make sure you leave some space between the gauge face and the needle base. If the needle base touches the face, that gauge will not move at all. You need space between needle and face.
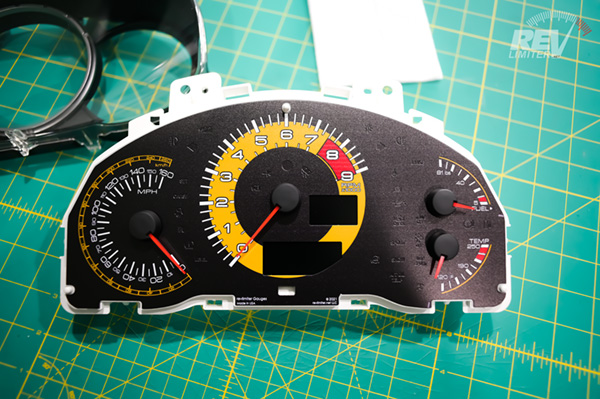
Now calibrate and install the last two needles. The tach and speedometer zero at their own zero point. There's no little zero calibration mark off the scale.
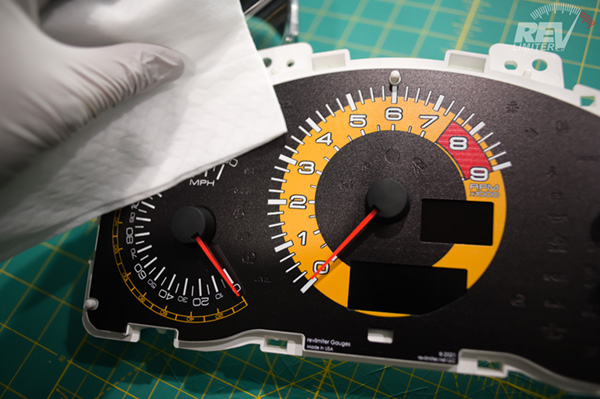
Remove any dust from the gauge face before popping the cluster cover back on. You may be looking at these gauges for many years. Now is the time to get them as clean as possible.
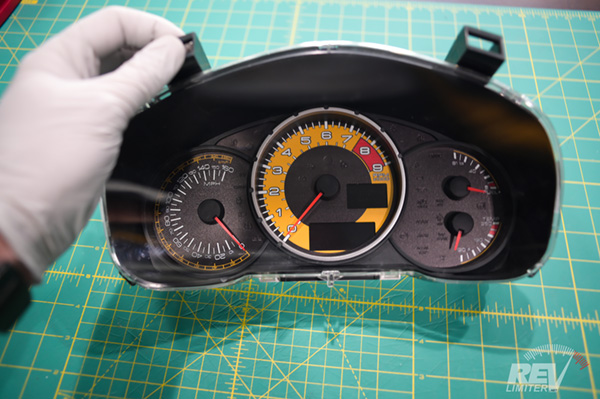
And that's it!!! Reinstall the cluster cover and you're done. Now is a great time to clean the glass if you needed. Take it out to the car and plug it in.
Site Navigation


Latest Blog Posts
Where’s all the blog posts?!?!
Posted on Fri, 27 Jun 2025 19:59:51 +0000
 Why are you seeing 2013 blog posts in the "new posts" list? It's been a hard month for the revlimiter site.
Read more...
Mabel
Posted on Sat, 29 Jun 2024 03:42:43 +0000
 Who’s the dog that keeps showing up on the revlimiter Instagram? It’s Mabel, my ACD/Pomeranian service dog.
Read more...
CarbonMiata Vent Window Install/Review
Posted on Sun, 29 Jan 2023 14:57:01 +0000
 After waiting 23 years, there’s finally a pretty vent window kit on the market for the NA/NB Miata. Unfortunately, it doesn’t actually work well.
Read more...
NA Miata Ignition Switch Replacement / Refurbish
Posted on Fri, 12 Mar 2021 19:25:57 +0000
 Is your NA Miata not starting anymore? A bad ignition switch may be the problem.
Read more...
XIDA ND Suspension Install
Posted on Mon, 20 May 2019 20:01:01 +0000
 Mona dumps the soft GT suspension in favor of a set of XIDAs from Supermiata.
Read more...

Products sold on this site are for Off-road and Competition use only. This website intended solely to provide general guidance on matters of interest for the personal use of the Reader of this Page, who accepts full responsibility for its use. All products as well as information provided "as is," with no guarantee of completeness, accuracy, or timeliness, and without warranty of any kind, express or implied, including, but not limited to, the warranties of performance, merchantability, and fitness for a particular purpose.