There I was, driving along, minding my own business, with a trunk full of groceries. Nothing special about the day or the road I was driving on. I’ve driven it a hundred times. I look down at my gauges, and see that I’m doing zero miles per hour.
Zero?
The wind was whipping past and I was passing someone in the lane beside me, and yet I was apparently doing 0 according to the speedometer. And then it suddenly sprung back to life. It worked for another mile and then was dead again.
Hmmf.
I assumed the problem was me and my penchant for changing gauges every few months. In Sharka, I’ve gone through a tach and a fuel gauge in the past four years. They just… broke. But the speedometer on Bucky was a different story. See, I did a bit of research before I tore my gauge cluster out. The internet message boards reported that there’s a speed sending unit that needs a bit of love from a soldering iron to make work again. Heat and vibration makes them come free after a 10 years or so.
Solder a couple wires? I can do that.
By the way, the sensor is rather spendy. $200ish from the cheap places online? Yikes. That’s a little high. I thought I’d try my luck with the melted metal first.
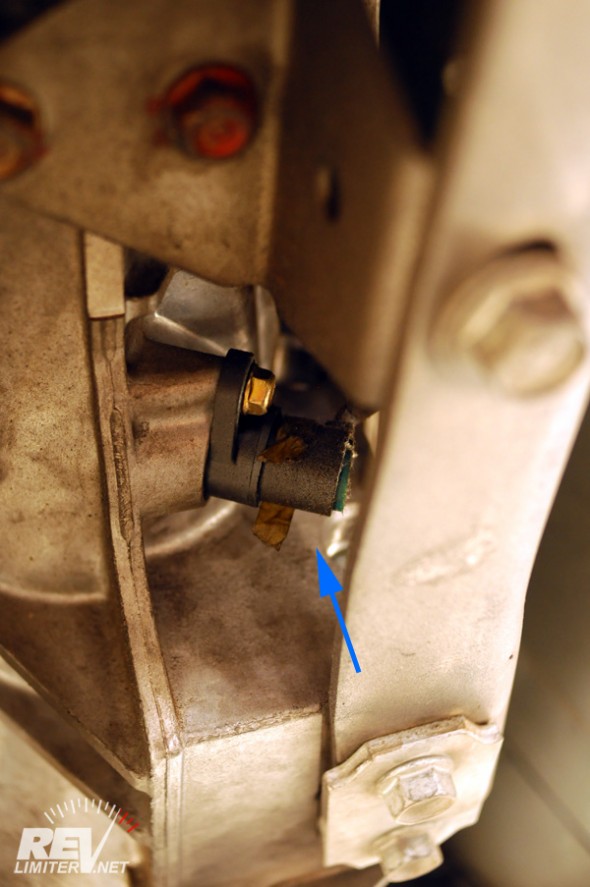
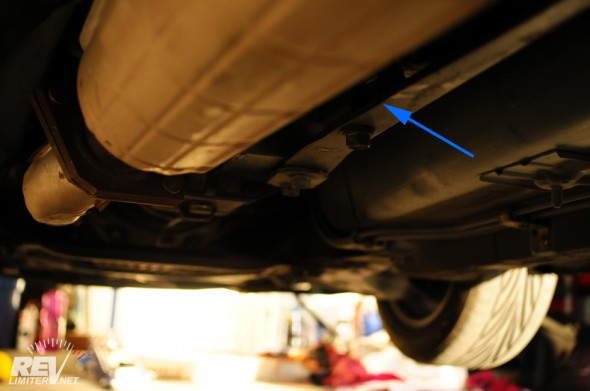
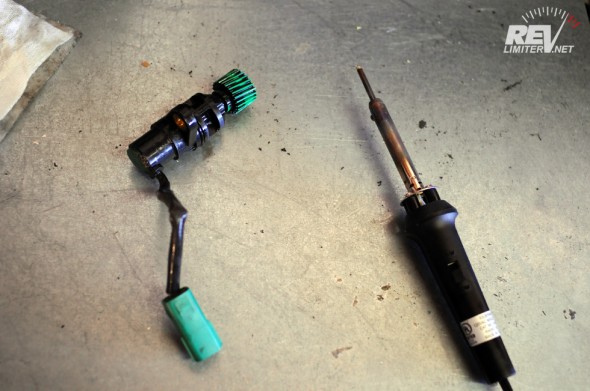
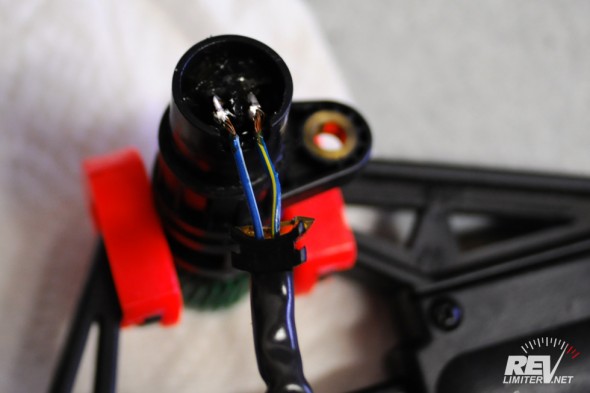
This is the object of today’s project. It’s a little generator in the passenger side (starboard/right side) of the transmission tail area. The second pic shows the location as best as I could. It’s near the middle of the catalytic converter.
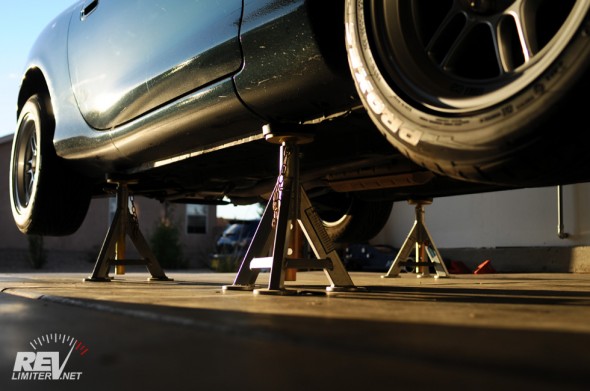
YOU WANT TO ONLY JACK UP THE REAR OF THE CAR. I put all four corners in the air. A small amount of transmission fluid will come out of the hole after you remove the sender. You want the tail to be a bit higher than the nose. Just jacking up the back end will do that. Or you could have your jack stands staggered a bit.
If you jack up all four corners evenly, you will want to have a catch pan nearby. Not much oil leaks out maybe 1/8 of a liter. But it’s enough to ruin your shirt.
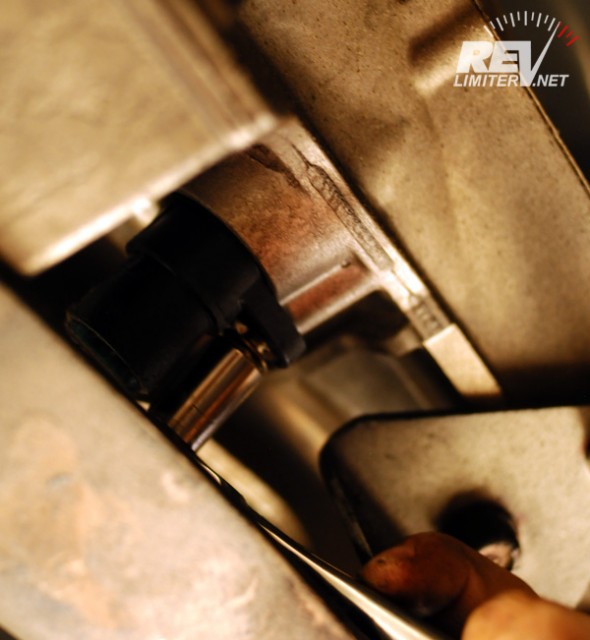
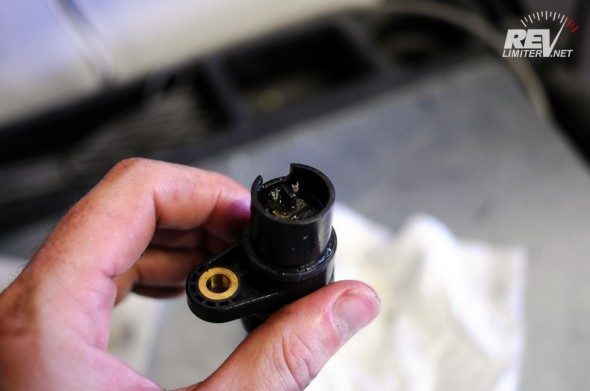
There’s not much room to work with, but there is enough. You could use a box end wrench or a thin socket combo. I’m using a thin 1/4″ drive ratchet and standard length socket. They were the perfect fit. One bolt holds the generator in the trans case. There’s not much to it.
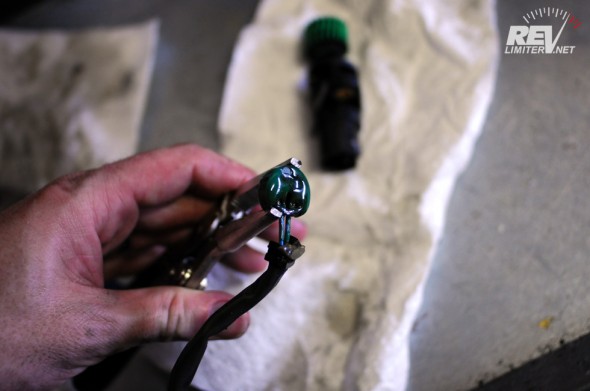
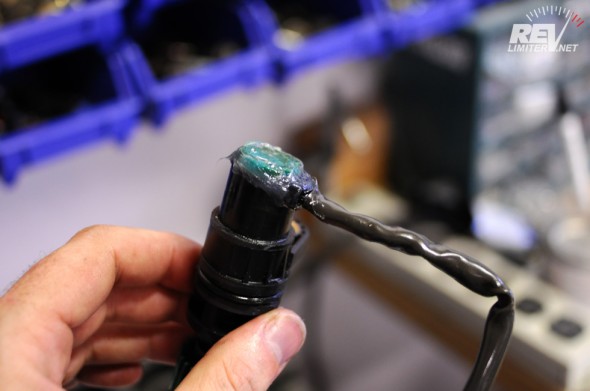
The act of removing the little green cover will most likely remove the wires for you as well. They did for me. The green stuff is like a slightly gummy plastic. I was able to dig channels out of it for the wires with a very light application of an Xacto knife.
My reading online indicated that the wires weren’t soldered well at the factory. Too much silver in the solder or something and not enough heat? Very likely I “fixed” them the same bad way the robot did at the factory. I used some high-silver-content solder and only a 30W gun. But, to spoil the ending, it worked. Maybe it’ll stay working for another 10 years?
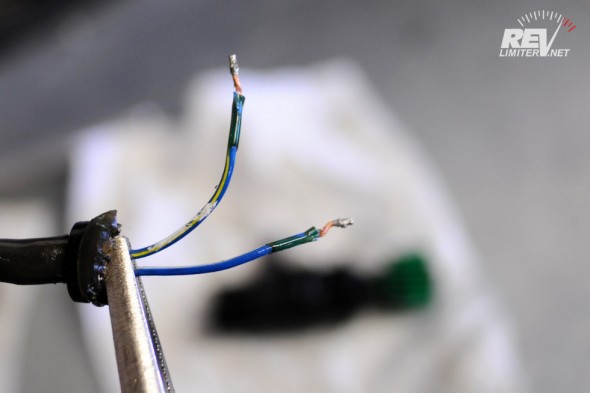
I’m not sure it makes a difference which terminal connects to which wire, but I marked them anyway. I’d hate to do all of this work and get something backwards.
To solder, I held the wires with a needle nose vice grip and the generator body with a panel clamp. Nothing special, just something to give me an extra pair of hands. I’m sure folks that regularly play with circuit boards will be laughing.
A little solder and a little silicone. That’s all you need to finish this off. I couldn’t get the green plastic to seal again without the silicone, but with it, the connection should be quite decent.
And that’s it! Plug the sensor back in and cross your fingers as you pull into the street from your driveway. I had no problems. Since doing this fix, I’ve added about 500 miles to my odometer. No bad speedometer behavior has been noticed since.



I little off subject, but what jack stand “hats” are you using?
There must be some sort of slot in the “hat”.
Keep up the great work. I have a slew of your products on my upgrade list.
Chris
Those are just the pads that came with my ESCO stands. They’re huge, the size of a standard jack pad.
https://revlimiter.net/blog/2010/07/mega-jack-stand-review-1/
No slot. They’re soft rubber. Sharka has sat on them for months at a time with no damage. They are the most incredible stand I’ve ever handled. They are the very definition of stable.
Thank god you fixed this! Now we can finally trade Flipper for Bucky! 🙂
Now that Flipper has those really sweet wheels… hmm…
[…] The little generator in your transmission is going bad. NBs have those instead of cables. https://revlimiter.net/blog/2012/09/d…eedometer-fix/ You can either remove and resolder yours or you can remove the bad one and install a new one. […]
revlimiter,
Great instructions and the pics really help. Headed out to do this now.
Got it done. Took about 2 hours from start to finish, and most of that time was spent allowing the silicone to dry. Very good instructions. Appreciate it very much. Saved myself and smooth $175
AWESOME! Glad I could help out. And I hope your repair holds for a while. I think even if I have to redo this every few years, it’s worth it over buying a new unit that would also break.
Nice write up. You can get second hand senders from about $20. Handy if you are not into soldering.
I changed mine because you need to if you change the diff ratios.
Cheers from downunder.
Hmmm… not a bad idea! I’d not thought about a junkyard sender. I’d be hesitant to put that in without making sure the wires were solidly connected though.
Revlimiter, thank you for adding your pictures to my thread on this subject in the DIY section of ClubRoadster. That thread got another reply today from someone who followed the instructions and got his speedo working again. I don’t know if you have a better camera than my craptastic Sony or you are simply a better photographer (both equally likely), but your pictures certainly clarify things a lot. BTW my Sony camera has been put out to pasture and replaced by a Canon. When I do another DIY thread, it may look as good as yours (I hope). Keep up the good work!
Thank YOU for the thread!!! It saved me a few hundred bucks. 🙂 And glad you didn’t mind me adding some pix to it.
I think the pix in this post were from a Nikon D300. Not the best camera ever, but a decent one. I put nearly 70,000 shots through it before I moved onto another. Yes. 70k. heh.
Thanks very much for this write-up. This is probably the best part of driving a miata, the community and helpful do-it-yourself info online.
My speedometer was dropping to zero intermittently just like yours and I followed the instructions to a $5 fix! Took me about an hour of actual work. I recommend potting the wires with something more structural personally. I actually used super glue myself so while I can never do this again, I don’t expect to need to. It did need a day to cure though.
That green plug was a real pain to get out! I had to drill out mine.
Thanks again,
Chris
Glad to help Chris! And thanks for the idea of potting this in something else. I bet a 2 part epoxy like a plastic welder would work too.
Hey I am having trouble removing the sensor after taking the bolt out, I have a 2000 I dont know if it has alot of crud keeping it in or what. Did yours just pull out???
Mine was pretty easy to pull out. I think maybe it fell out? And then it dripped a lot of transmission fluid on my arms…
To Alonzo and others who have trouble removing the sensor, I did this yesterday and had a hard time pulling it out too. The sensor would rotate easily but just wouldn’t pop out.
I just took a thin flathead screwdriver and gently pried it out by sticking it between the protruding tab where the bolt goes through and the transmission body and gently twisting.
The “gear ring” on mine was red instead of green so maybe it is a slightly different unit with a larger o ring? Reinstallon was a lot easier, it just popped back in.
Anyways, the project went smooth thanks to this guide and the one on CR.net. Thanks Adam!
Quick question my Speedo just went out 2 days after I bought my 2000 miata did your check engine light come on after your Speedo stopped working? And did it go away afterwards?
I believe you will get a CEL if the sensor is out for some amount of time. I only drove with mine like that for 3 or 4 miles. Not sure how long it would take for the CEL to come on about it.
Great pics and article. I had the same problem a few months ago, it did cause CEL on mine. One difference that i did was instead of using silicone, i used a glue gone. I have put around 3k miles on it since i fixed it and all is good.
[…] Re: BBro's Classic Red 2002 Wise choice! Also get a rear main seal for the engine and a transmission input seal as well. Also check your speedometer sensor on the transmission as they are known to have a issue with the filler they used around the connections of the sensor. Revlimiter aka Adam always has fantastic how to's: https://revlimiter.net/blog/2012/09/d…eedometer-fix/ […]
GREAT POST!! I used this exact diy early last fall when my NB speedo was jumping around and starting to show the symptoms.
It was a tight fit but I had enough room just by driving up on ramps and crawling under.
Since the fix, the speedo has been dead reliable.
Thanks again! (ps I’ll get a set of gauges one day, have some other maintenance first to take care of. Love the warbirds)
[…] do believe i have a rear main leaking on this car (not worth it to fix). Dead NB Speedometer Fix ? revlimiter.net This does seem like the issue. I'll take a look tomorrow. Thanks for the insight! […]
Hi, cool website you have got going here
THANKS! Clear, easy to follow instructions. Did it to my NB this afternoon. Seems to work. Will be certain after this weekend’s Miata Club road trip.
Awesome! finally got around to fixing this on my MSM. My soldering isn’t nearly as good as yours since i melted a little bit of the plastic near the wires, but it does the job. Sealed it up with some RTV black i had lying around, buttoned up the car and took it for a drive. No more intermittent speedo dropping out. Thanks for sharing this!
Great info but I have a 1991 the odometer is working fine but the speedo will stick at 40mph or 50mph It’s not the cable. Is the speedo repairable or do I need a replacement and if so how do I change the milage on the replacement to match mine? I replaced the gauge faces with yours about a year ago.
I helped Reinhard over email with this. The fix was removing the speedometer needle and putting it on more gently. It was coming in contact with the face.