
A nude fender
If you ever begin to scratch the surface of importing a car from Japan, the topic of rust is usually very prominent. And Cappuccinos weren’t necessarily blessed by the factory with extreme rust protection or undercoating. Most come with some rust problems.
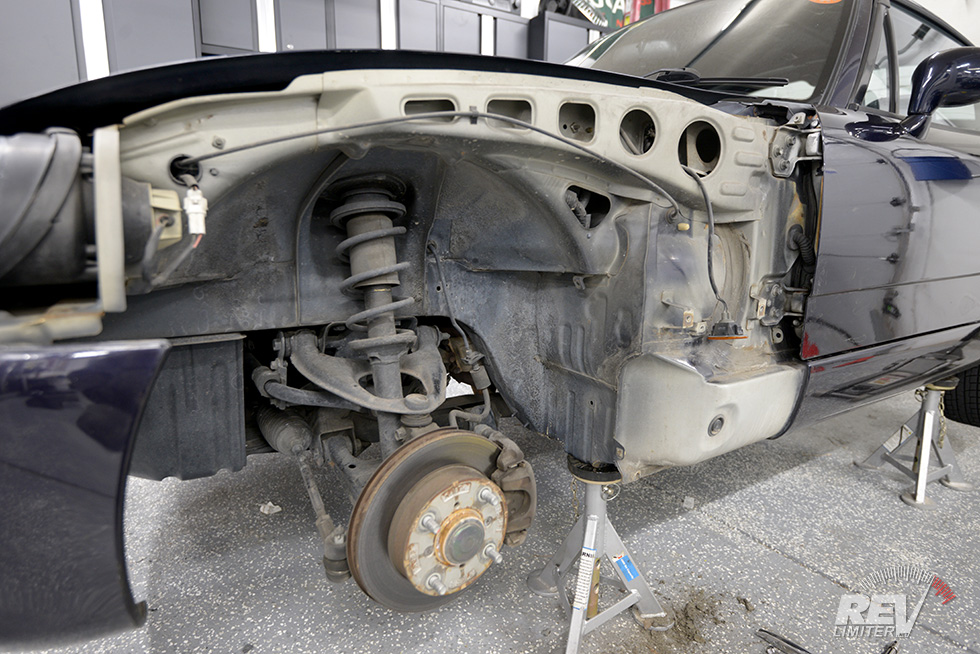
Cap seems to be nearly rust free. But “SEEMS” bothered me. I wanted to strip off some bodywork and verify this lack of rust with my own eyes and screwdrivers.
Off came the fenders!

Amazingly clean.
Not to spoil the suspense right away, but Cap IS very clean. There’s some surface rust in odd places and a lot of rusty screws and bolts, but nothing bad. No body panels or frame with cancer eating through. I’m very lucky.
But that won’t stop me from protecting the tiny car from the possibility of ever rusting.

JDM dirt.
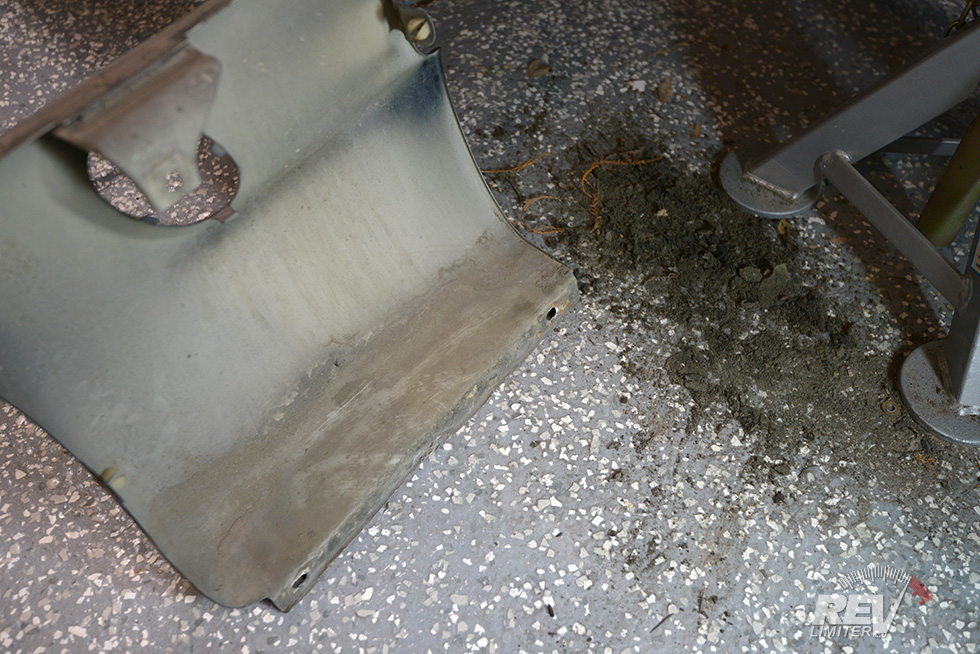
Fine JDM soil.
Opening up the passenger fender revealed quite a lot of dirt. Or sand? Lots of junk poured out. I was glad I didn’t put this off longer and wondered if the fenders were ever cleaned out before.
And then I cleaned out the driver’s side. That’s the one with the big pile of dark loamy soil. I… have no words. It looks much smaller in the photo. It was a small flower pot worth of soil in the bottom of that fender and the fender itself was slightly damp.
Ripping off those fenders was definitely needed.
Nose off.
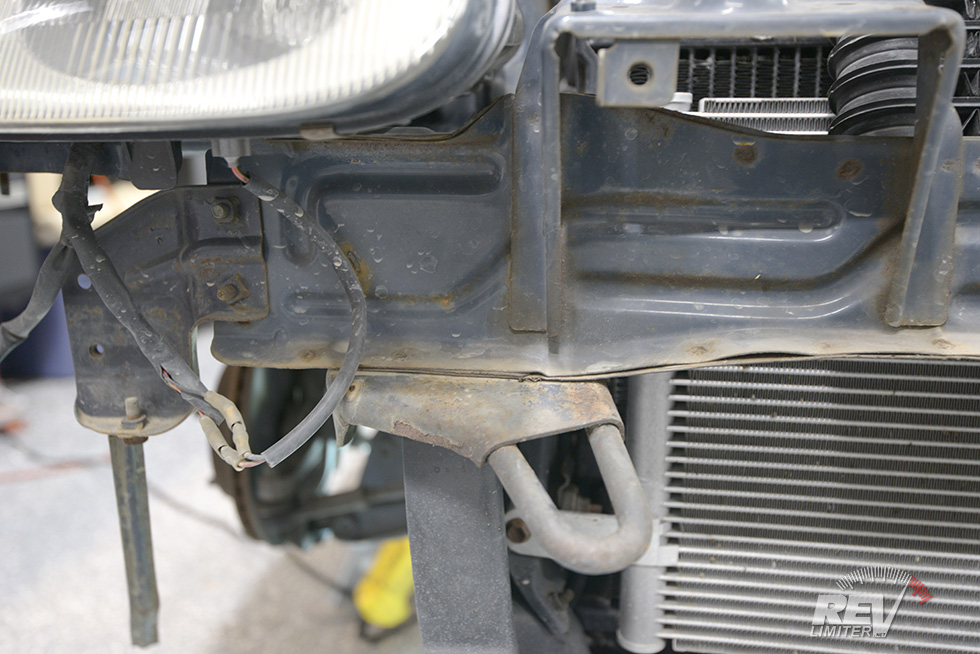
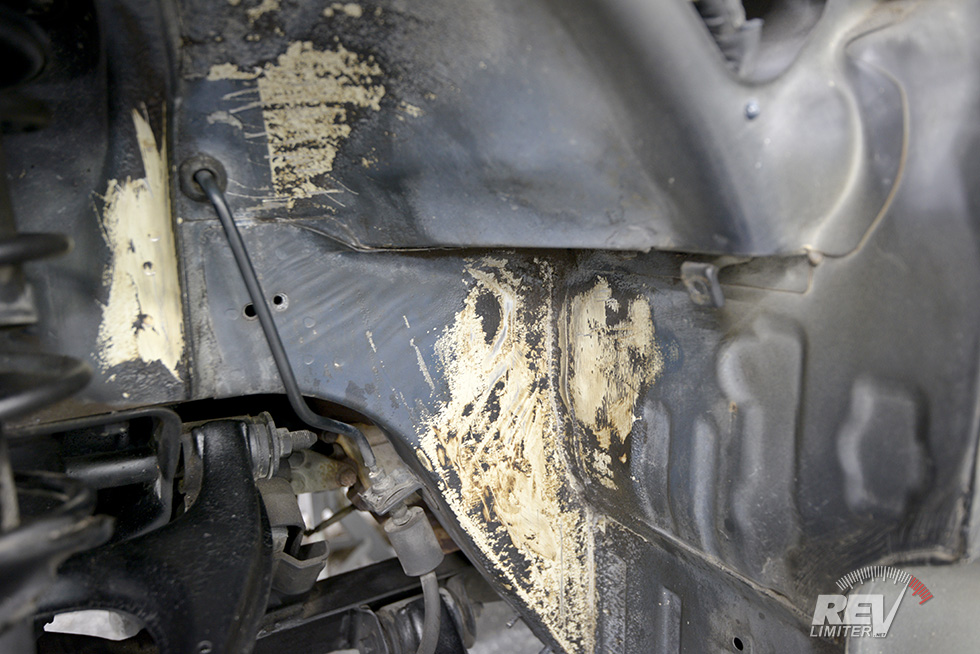
Surface rust spots.
Removing the front bumper cover revealed quite a bit of surface rust. Again, nothing terrible and nothing that would eat the chassis. Just some small spots that needed fixing.
Well, everything will get fixed, not just the small spots.

Asphalt based undercoating?
Undercoating removal.
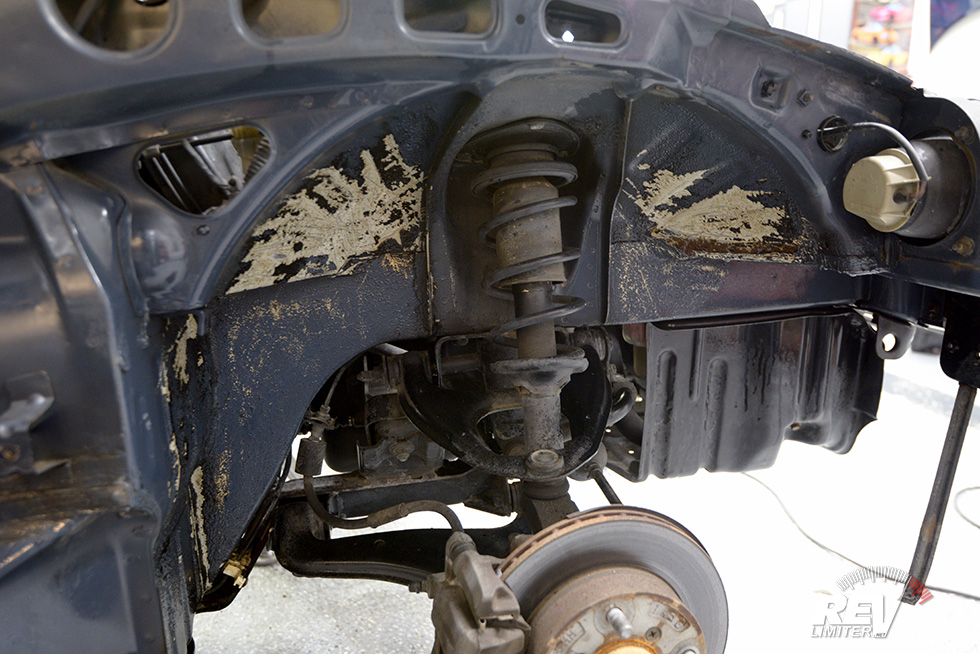
More undercoating removal.
Though I’ve read that Cappuccinos don’t have much undercoating, my own 94 seemed to be an exception. There was a ton of clumpy, crusty stuff inside the wheel wells. Some of it could be scratched off with a fingernail and it had a very stone-like consistency, like asphalt? I’m not sure if that’s a thing, but Cap was covered in it.
Since I plan to undercoat 100% of the visible metal surface, I wanted this old flaky asphalt stuff gone, so out came the chisel.
And on the off chance that anyone reading along has a car with this coating and intends to do this – keep your work area clean! It bonded with the epoxy on my garage floor and was extremely difficult to clean. I now have some permanently dark places in the floor.
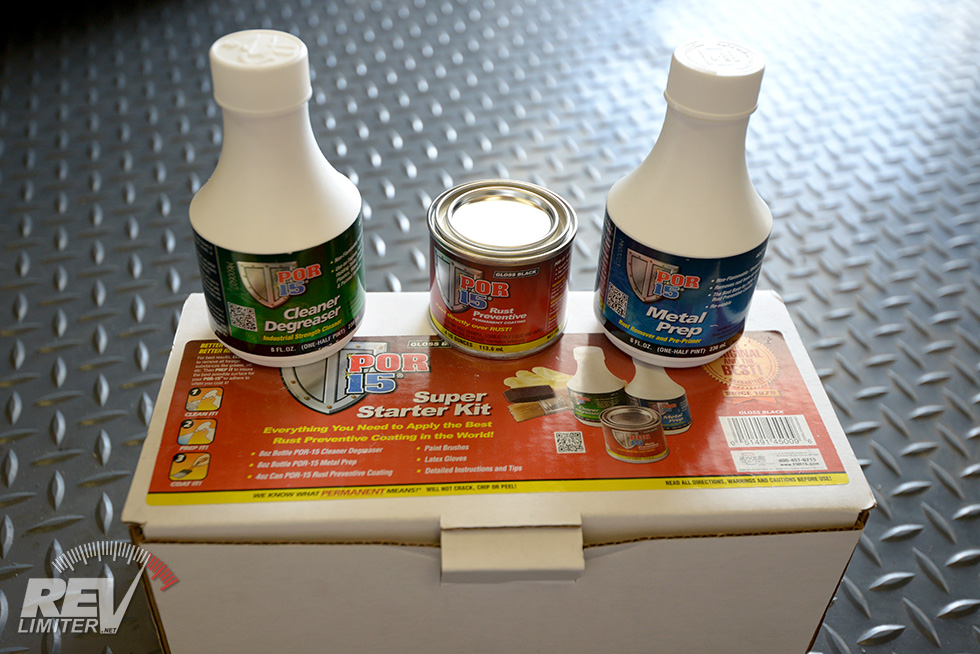
The small Por15 starter kit.
Finally, it’s time for some undercoating! I’m stealing this photo from my own blog back somewhere in 2016. I first used POR15 in the restoration of Sharka’s NA6 dashboard and was extremely impressed by the stuff. I knew it would be just right for Cap.
Cliff notes on POR15 – it’s an epoxy that you paint over rust (hence, P-O-R) to convert it to an inert material and protect from future rust. It’s a three part process involving a de-greasing step, a preparation spray, and finally painting on the candy coating.
POR15 and both of the prep cleaners are very bad for you. I wore a full face mask with respirator ala Breaking Bad, gloves and coveralls. The whole time. For every step. And it was worth it.
Back to the project.

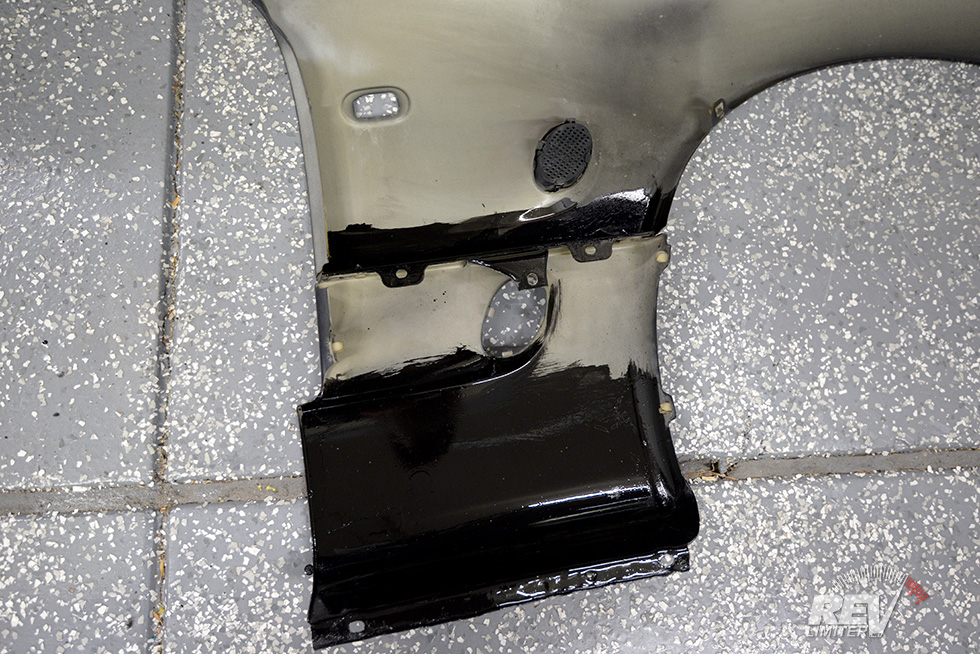
POR15 on driver’s fender.
Front clip covered.
Partial passenger fender treatment.
There’s, unfortunately, not much in the way of in progress photos. I didn’t want to get my nice camera covered in POR15 and basically just blazed through.
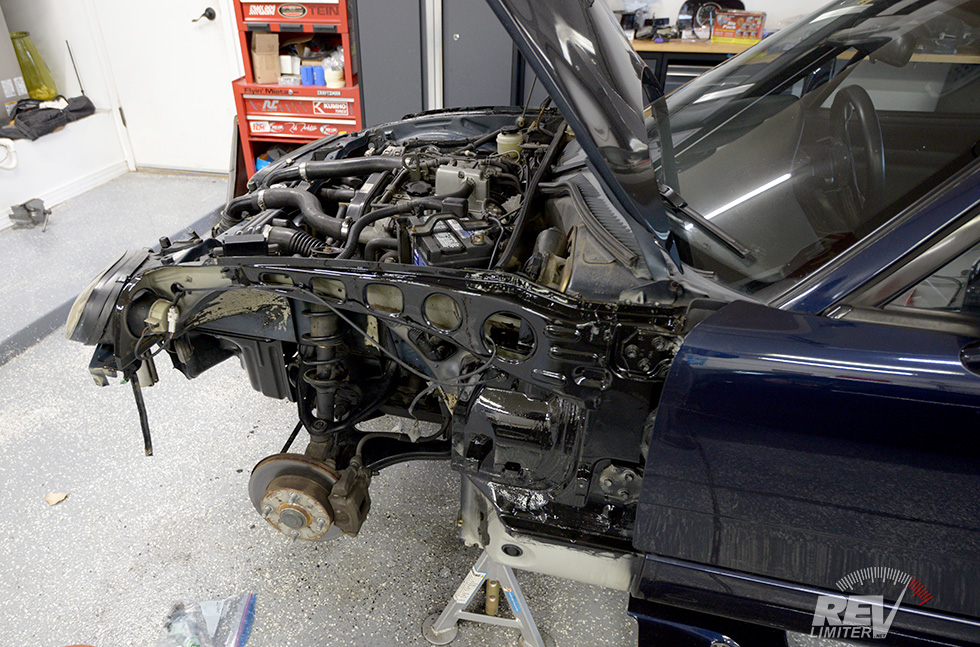
I tried to cover each and every surface hidden under the fenders in POR15. This included both A arms on the suspension as well as any hidden underneath areas. All sides of each possible panel got covered.
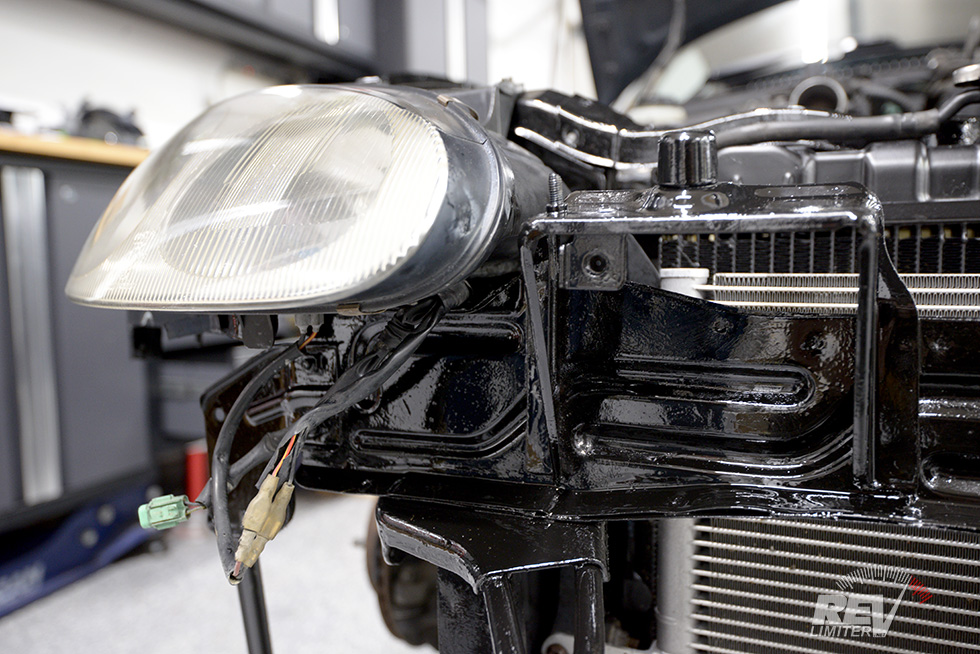
And while doing the area around the headlights I noticed I was missing some real estate. The headlights and intercooler needed to be removed to get everything.
So…
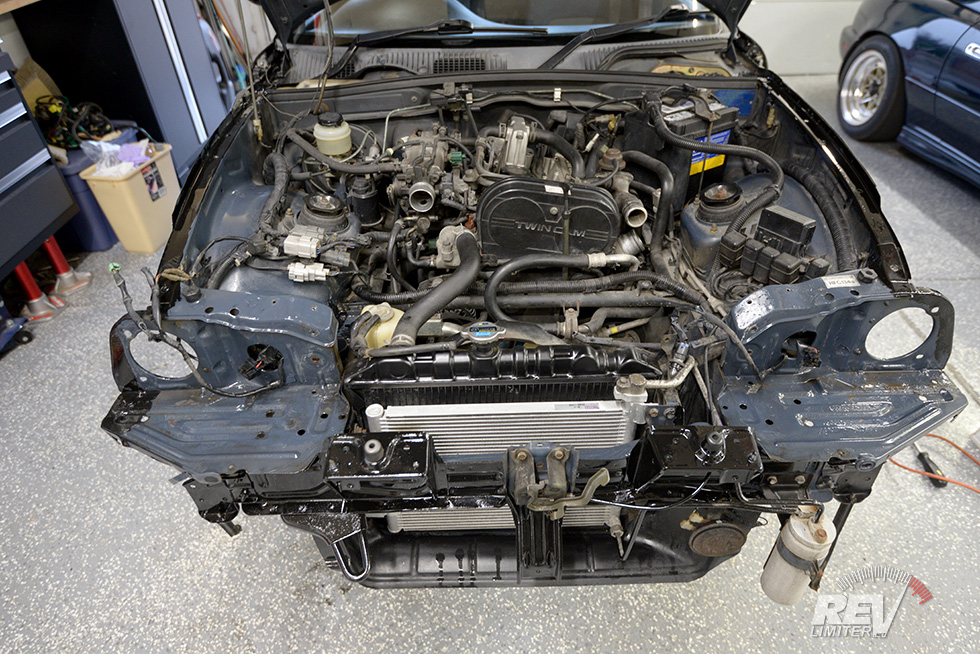
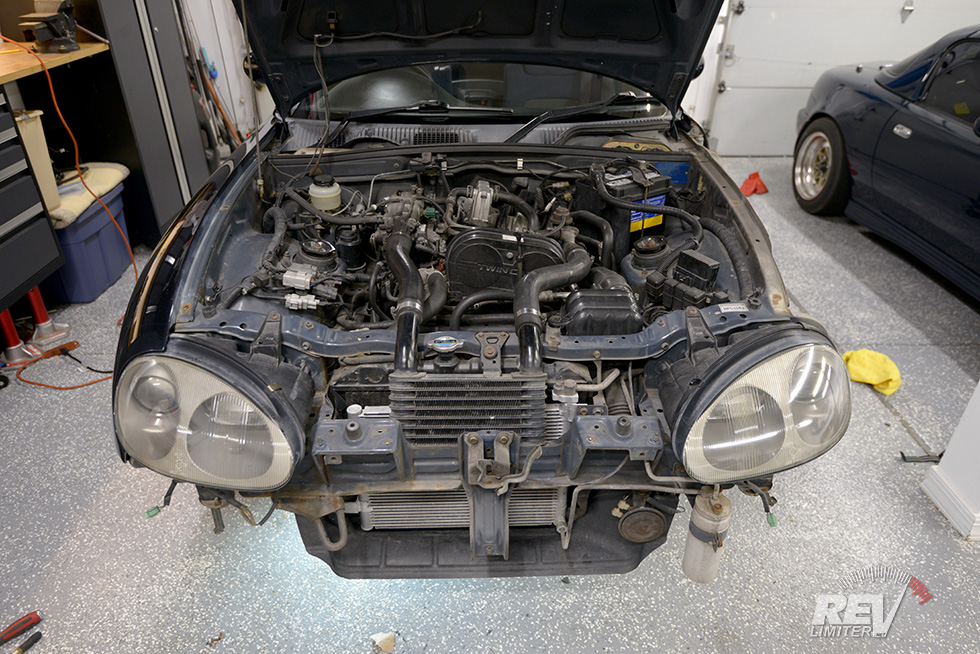
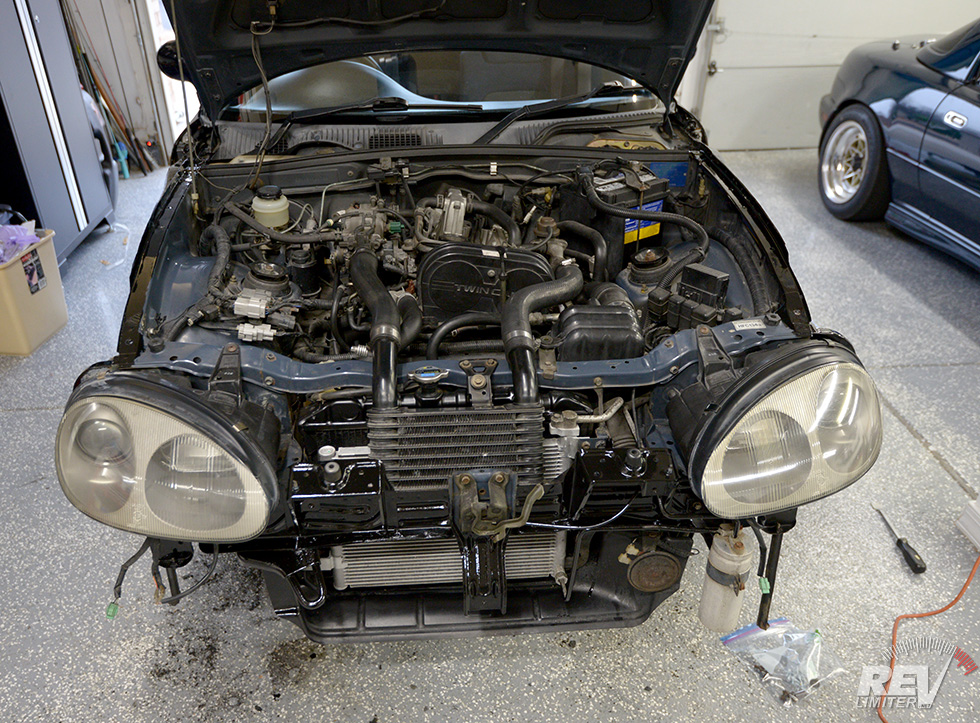
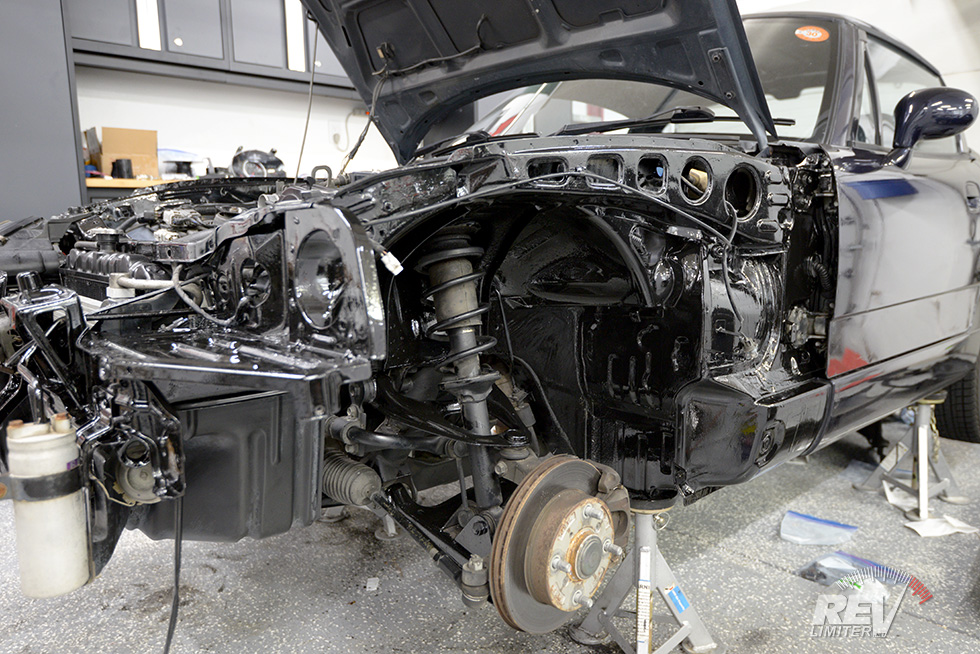
Stripped front end.
Cap seems so stripped out like this. I was bitten by the urge to just start ordering random body panels and headlights from Yahoo Japan, but successfully fought that feeling off. I don’t want my Cappuccino build to just suddenly be completed. I want to learn about the car and enjoy it, changing out a few parts at a time.
So I opened yet another can of POR15 and kept rust converting.

Wink
No more rust. EVER!
Even these trouble areas.
Ready for reassembly.
All total, this process took me about a week. That was finding the odd hour here and there to use another can of POR15 and paint as much as I could. See, the cans are very small and aren’t really able to be opened again once you start.
But the work was very worth it. Cap’s front half is now protected against ever rusting again.
This blog post is part 1 since I’ve not done anything with the metal behind the front wheels. There’s a lot of real estate underneath the car and there will be a lot of laying on my back with tiny paint cans of POR15. That’s for another post.
I did one other thing before putting all of the bodywork back in place.
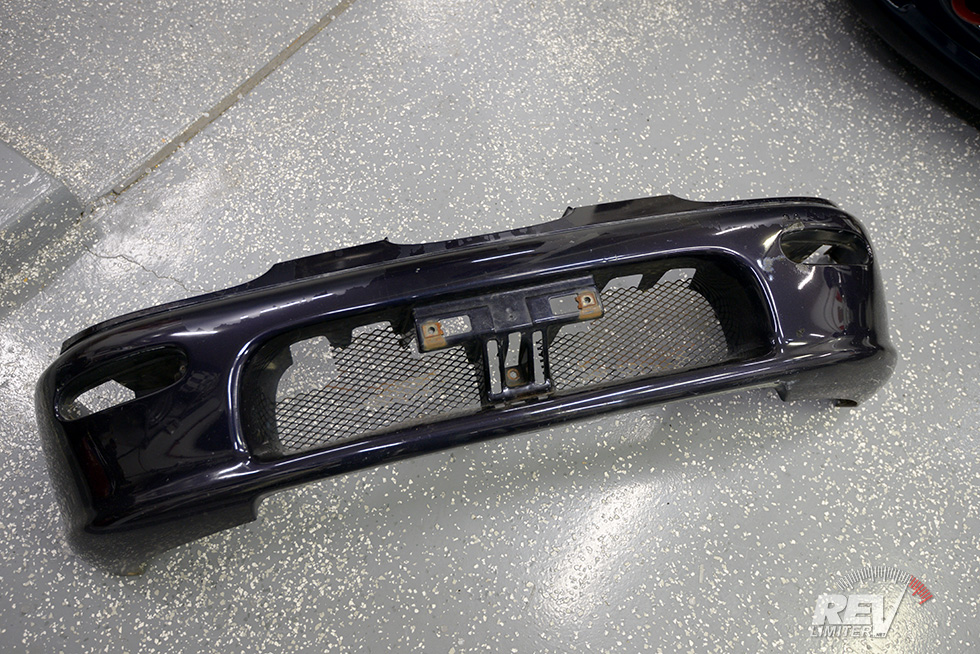
Yucky license plate holder.
… which is a molded part of the bumper.
I hate this license plate holder. HATE. I tried to remove it the very first night I owned Cap and was parked on Route 66. And… I discovered it was a molded part of the bumper.
This horrid thing was designed to look like this from the factory. And what’s worse, the lower bumper support is integrated into it.
Ugh.
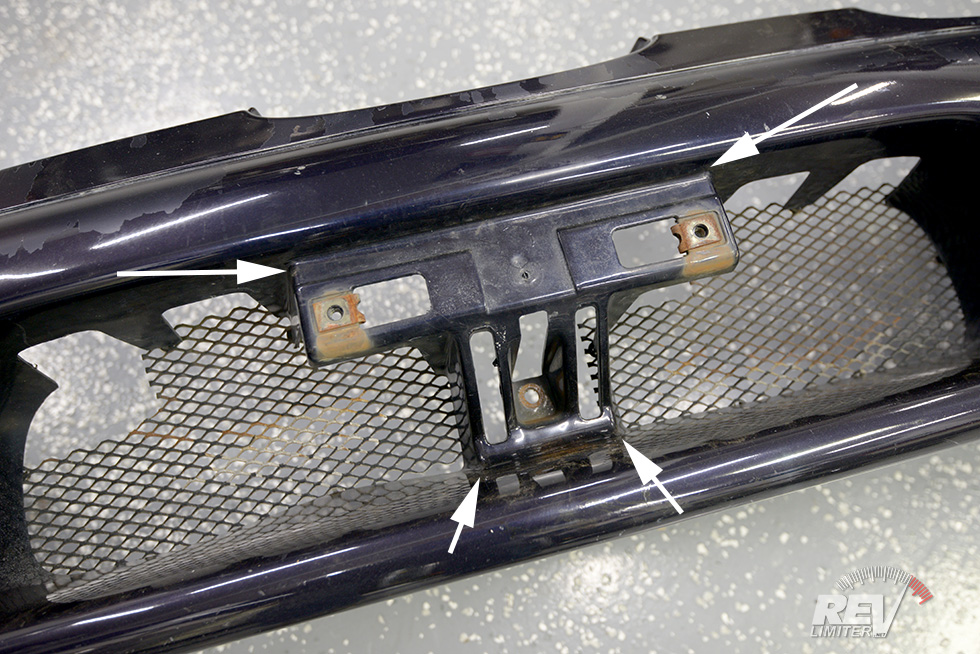
Out came the dremel.
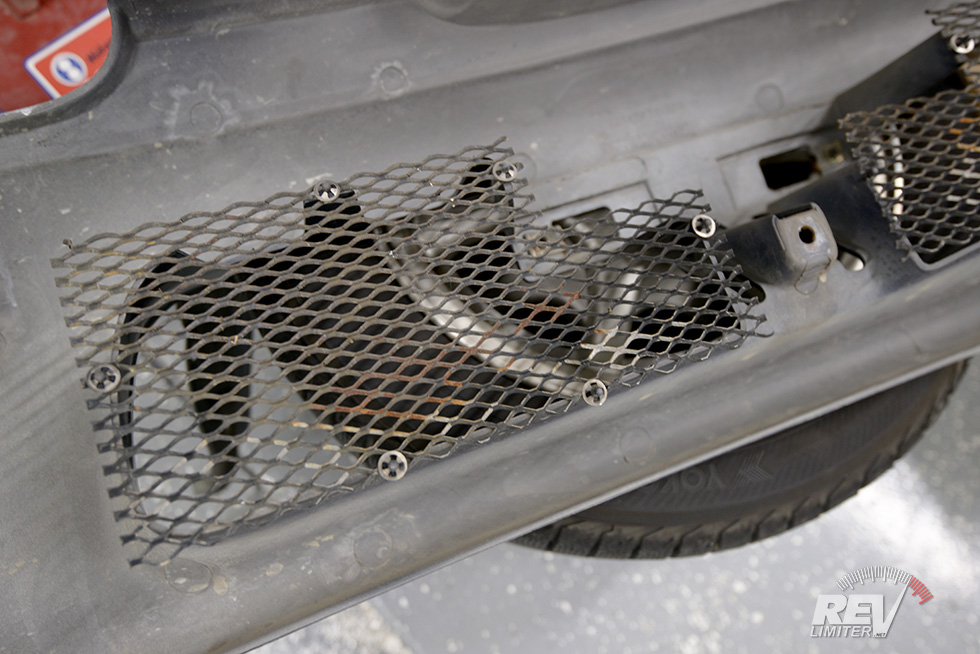
Rusty gutter guard.
The gutter guard in the mouth may be a factory part? Every stock Cappuccino photo I’ve seen has this exact same stuff.
Mine was rusty and flaking. It needed to go. I had some lovely 80% open area aluminum honeycomb mesh that would work much more nicely.
Queue the dremel noises.

Hacked up.
Maybe not the most beautiful modification I’ve ever done, but it’s a hell of a sight better than the original version. I left a small amount of the center bumper mount with the idea of hiding it behind the metal mesh.
This will certainly work until I find just the perfect nose for Cap.
With that it was time to button up.
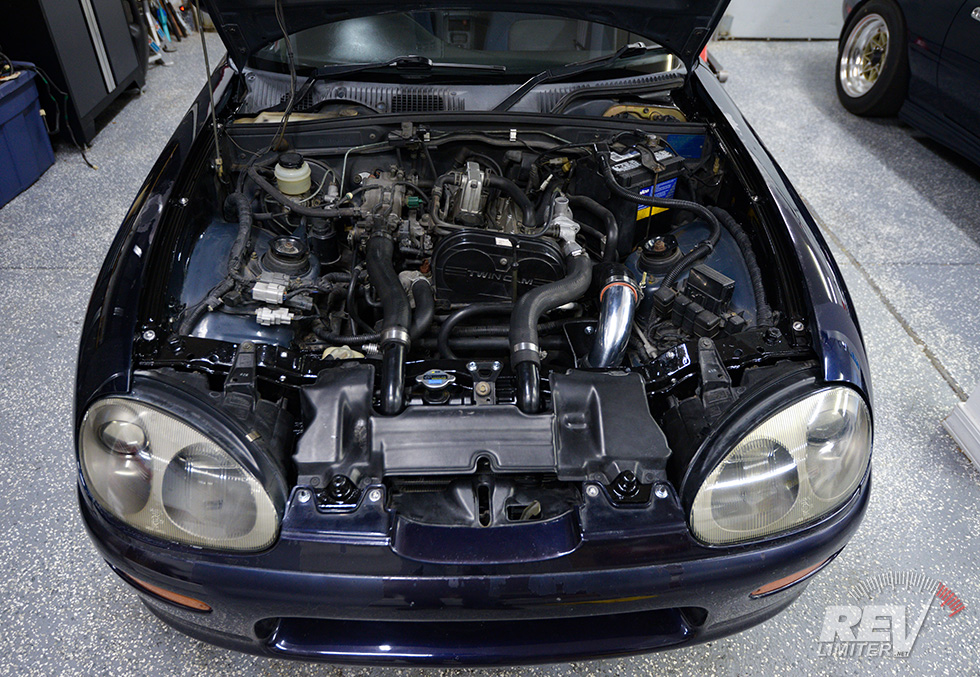
Protected.
Most of the delicious POR15 candy coating is hidden by fenders and wheel well liners, but a bit is visible in the engine bay. I’ve also begun replacing as much rusty hardware as I can with fresh nuts and bolts.
A lot of work for a very small car, but worth it I think.
A side benefit from doing all of this is 100% less rattles. When I got the car, it was… almost embarrassing how much it rattled. A tiny bump in the road produced a symphony of squeaks, rattles, shakes, and clunks. It was horrible.
And that was due to no hardware being present around the driver’s side headlight. The bumper, front edge of the fender, and headlight were missing a half dozen fasteners. I discovered this when removing everything. Fixing it up was very easy and extremely rewarding. Cap now rattles about as much as any other 25 year old car.
Maybe a bit less.
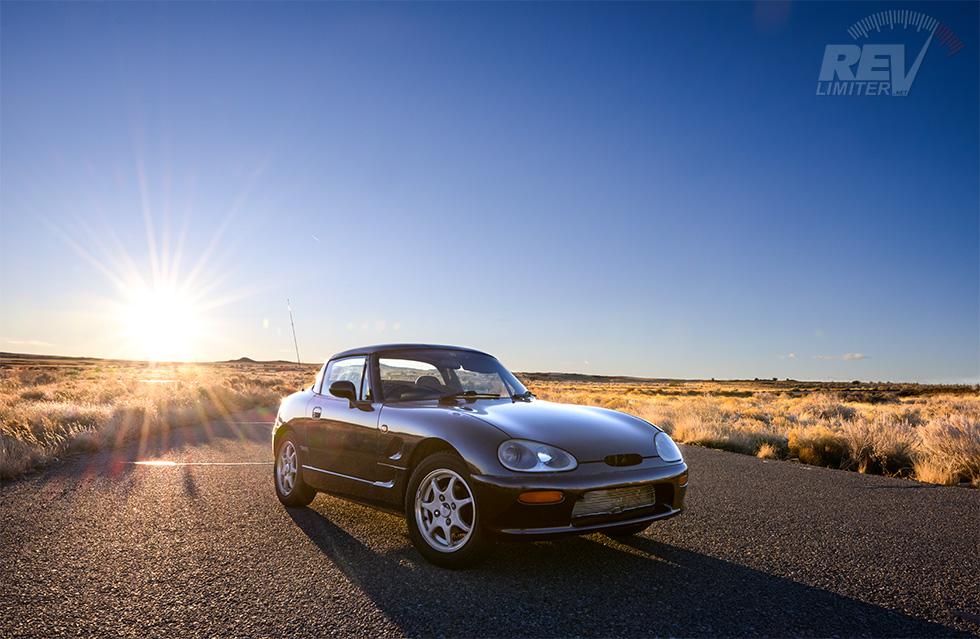
Cappuccino Sunset.
And there’s Cap’s new smile. Such a happy little guy.
Next up, I’ll attempt to add a boost gauge and turn up the power.


Well done. Thanks for sharing.
Gute Dokumentation, vielen Dank dafür.
Beautiful Cappuccino!
FYI, the smaller panels just behind the front wheels that collected all the dirt are made of aluminum, so the rust protection isn’t really needed on those