
Alternate blog title:
This time with 100% more shootout.
I don’t know how I manage to collect multiple versions of the same part like this. It’s a sickness? Or perhaps my subconscious is actually planning out these posts? I never start out trying to do this though.
Anyways, I found myself with four Miata reroute kits on hand and thought I’d do a comparison before installing my chosen one.
And before I get into that, here’s a listing of all of the coolant reroute / fixes I’ve done to Sharka over the years.
- 2011 – coolant reroute no1 with BEGI spacer
- 2011 reroute no1 part 2
- 2012 – The Reroute Strikes Back
- 2015 – FM Crossflow rad install
- 2016 – Coolant De-route – removing the reroute
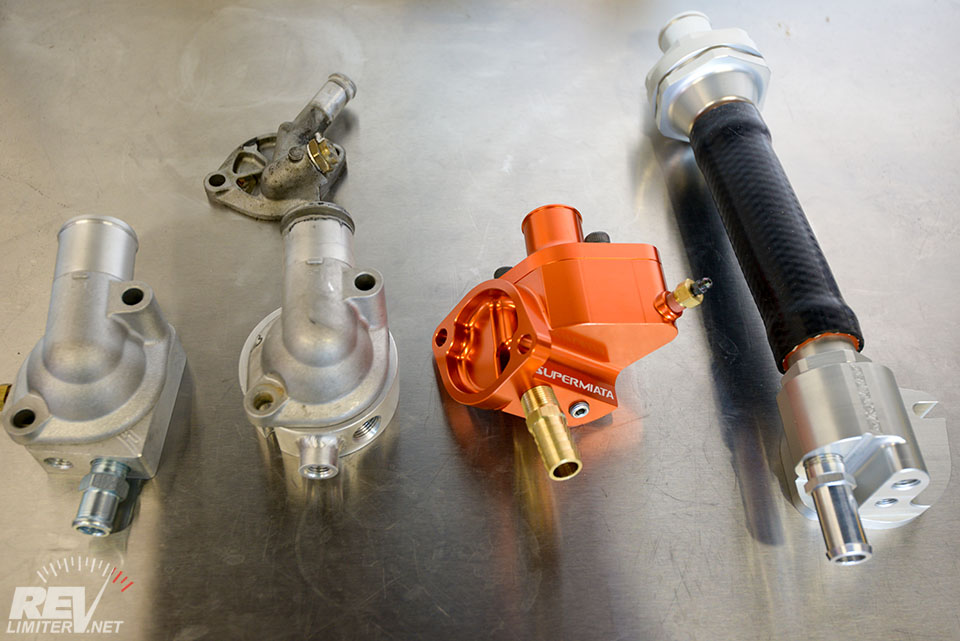
The 4 fighters.
We’ve got…
The BEGI reroute spacer – granddaddy? of the reroutes
The Hawley Performance spacer – another take on the Kia water neck reroute
The M Tuned Reroute – probably the most widely available kit
949/SuperMiata Qmax Reroute – the new kid on the block in orange
These are all tools to do the same thing – reroute the coolant path inside an NA/NB Miata engine and restore even cooling throughout the cylinder head.
Tiny backstory footnote: Mazda designed the B series engine to be used in front wheel drive applications. The coolant came in one side of the engine and then out the other. When they put the engine in the Miata, it got turned around 90 degrees. In the interest of either ease of assembly or ease of maintenance, they decided to put the coolant inlet and outlet both at the front of the engine. This creates poor cooling around cyl 4 and way too much cooling around cyl 1. A reroute kit attempts to remedy this problem.
And for my own experience, Sharka was rerouted for about 5 years with a BEGI kit. I had intermittent problems with water leaks and poor sealing for about 3 of those years. It got so bad at the end that I just ripped it out and went back to the stock routing.
Now it’s time to try again.
Opening Shots
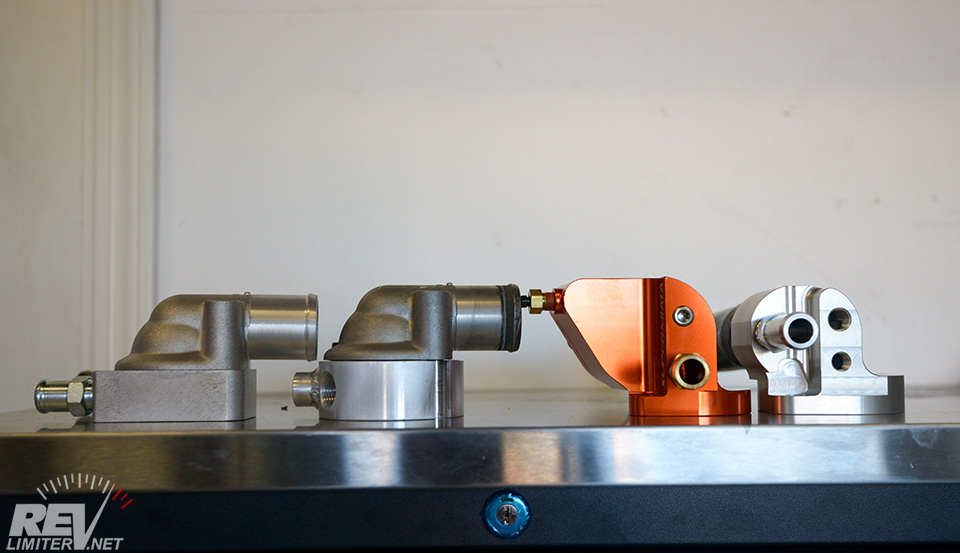
Height comparison
As you can see, each of these reroute kits is approximately the same “height”. So they need about the same amount of space behind the firewall to live in. Two of these kits use a water neck from a Kia motor as part of the reroute and two do not.
Stock heater outlet neck: 37mm clearance needed.
BEGI / Kia neck: 70mm
Hawley / Kia neck: 66mm
M Tuned: 69mm
949: 72mm
But that’s not all of the story here. You also need to get bolts over and through these kits to mount them to the motor. More on that later in the individual sections.

Stock water neck.
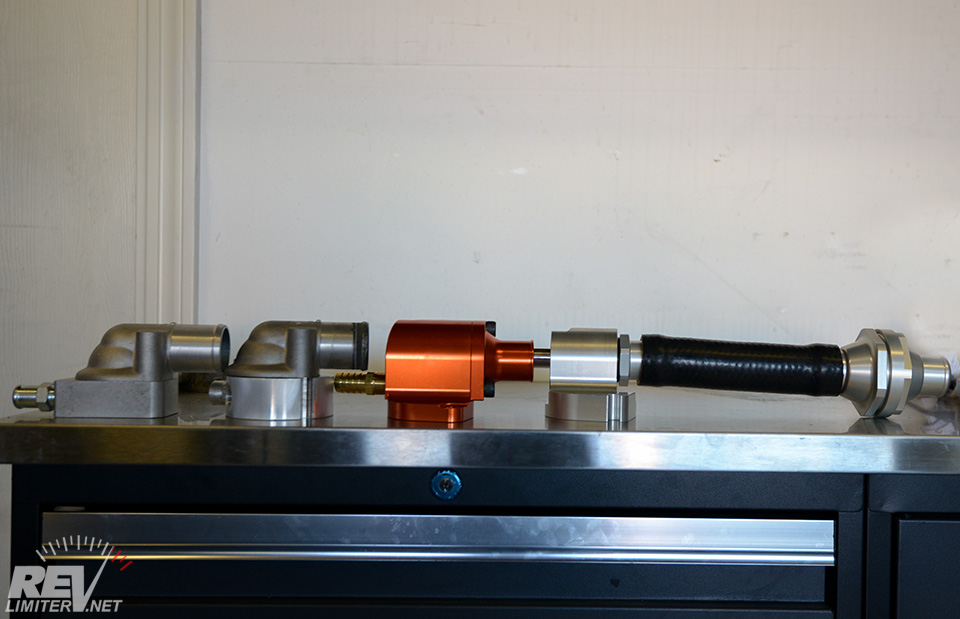
Width comparison
Each reroute kit has to house a thermostat somewhere inside of it. Each kit places the thermostat in a slightly different location.
Hawley and BEGI place the thermostat between the spacer and water neck. This puts it 26mm and 29mm away from the head respectively. This is almost as close as you can get the thermostat to the head. Having it close to the head is a GOOD THING.
The 949/Supermiata kit puts the thermostat right behind that cover on the right. It’s roughly 35mm away from the head.
The stock configuration (I bet you wondered why that pic was up there) places the thermostat about 98mm from the head.
The M-tuned reroute kit puts the thermostat roughly 250mm away from the head. That’s… a long way. Sorry M-tuned fans, but that’s quite a lot of distance in my opinion. The farther away the thermostat sits, the longer the pistons get to cook before that thermostat feels heat and opens.
BEGI Kit
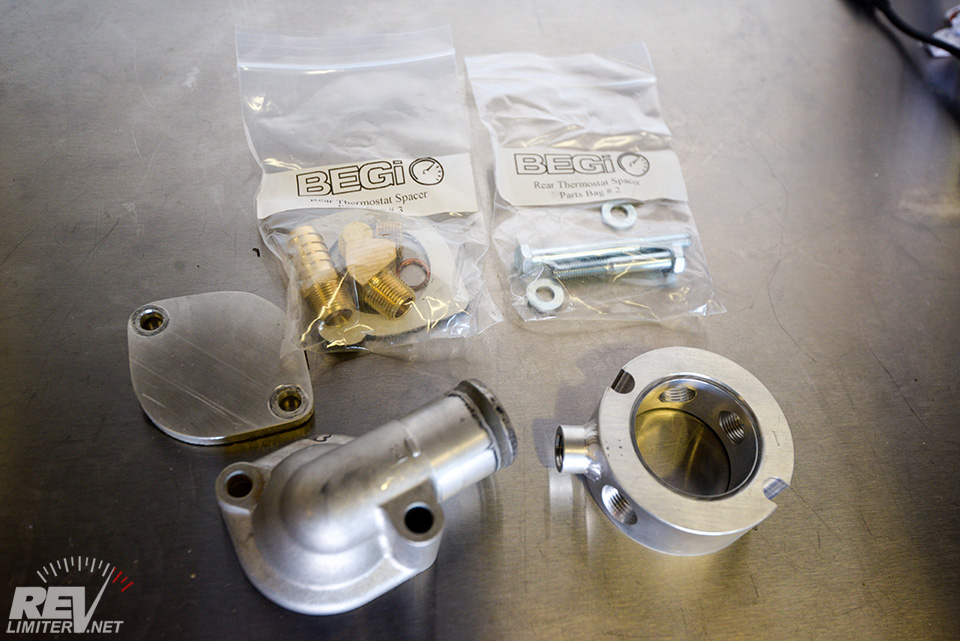
BEGI reroute kit
After removing Sharka’s original reroute kit in 2016, I bought a replacement set from BEGI. My original spacer was worthless and leaking, so I thought I should have a replacement on hand in case the OEM routing proved horrible.
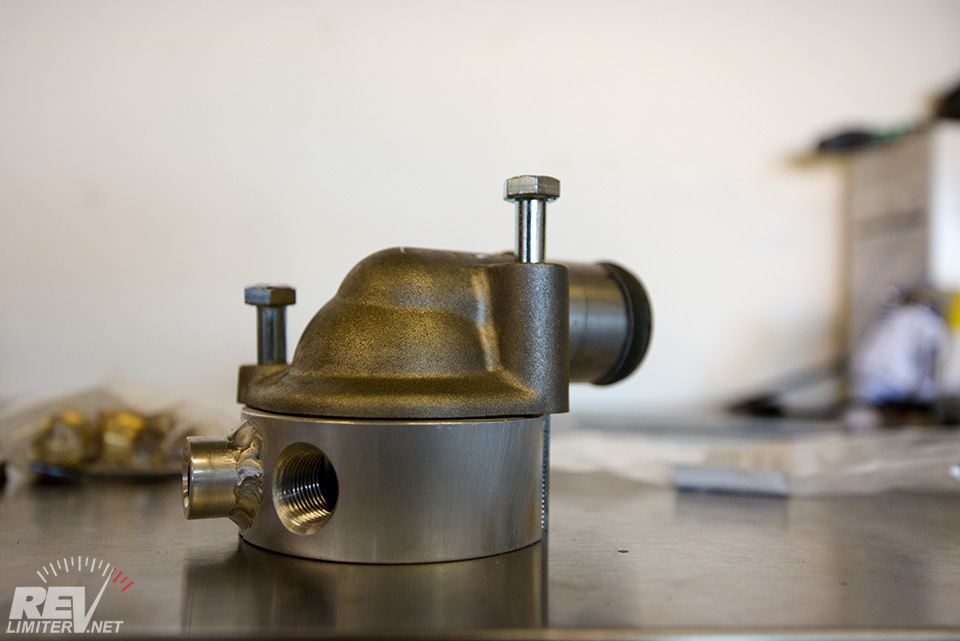
BEGI with bolts
I alluded to this earlier. The true “height” of the BEGI reroute spacer kit is not 70mm, but is actually 85mm. That’s how much clearance you need between the firewall and engine to install this thanks to the HUGE bolt needed to mount that Kia water neck.
If you’re installing this reroute kit with an engine on a stand, this is not a big deal. You have unlimited space. But with the engine in the bay? It’s hard. I’ve done it in reverse. It took me about 45 minutes of working to get that bolt out and the whole spacer removed.
There’s one more thing going on with the BEGI spacer. Look at the very edges between the spacer and the Kia water neck. See how the Kia part overhangs the spacer on those bolt holes? That’s not good. The BEGI spacer does not fully support the Kia water neck and it can warp.
Mine, the one you see in the pic, warped. It cannot be reused without being machined flat again. That was another one of the leak points in Sharka’s first reroute experience.

BEGI flow path
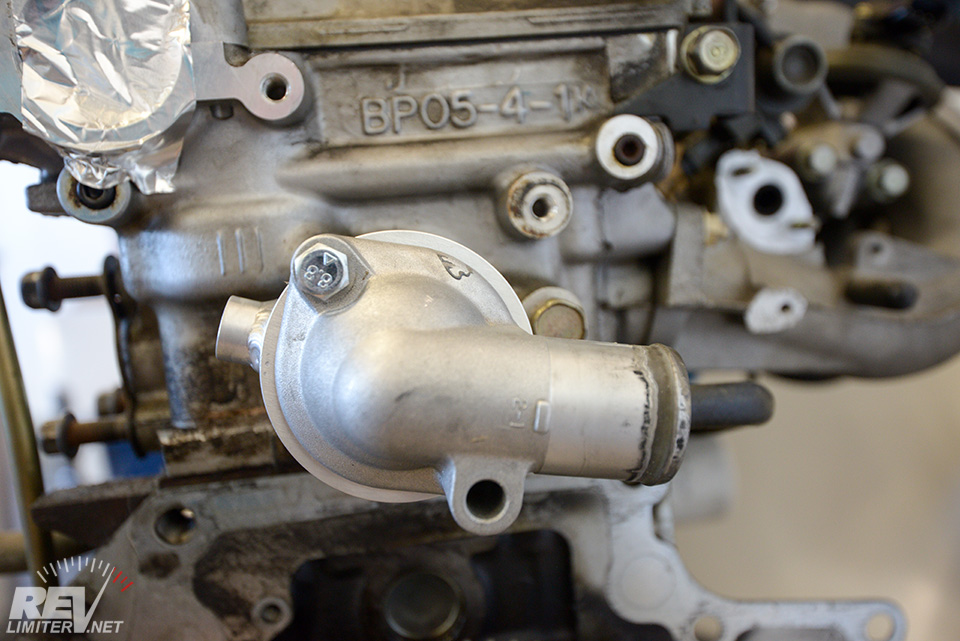
BEGI from behind.
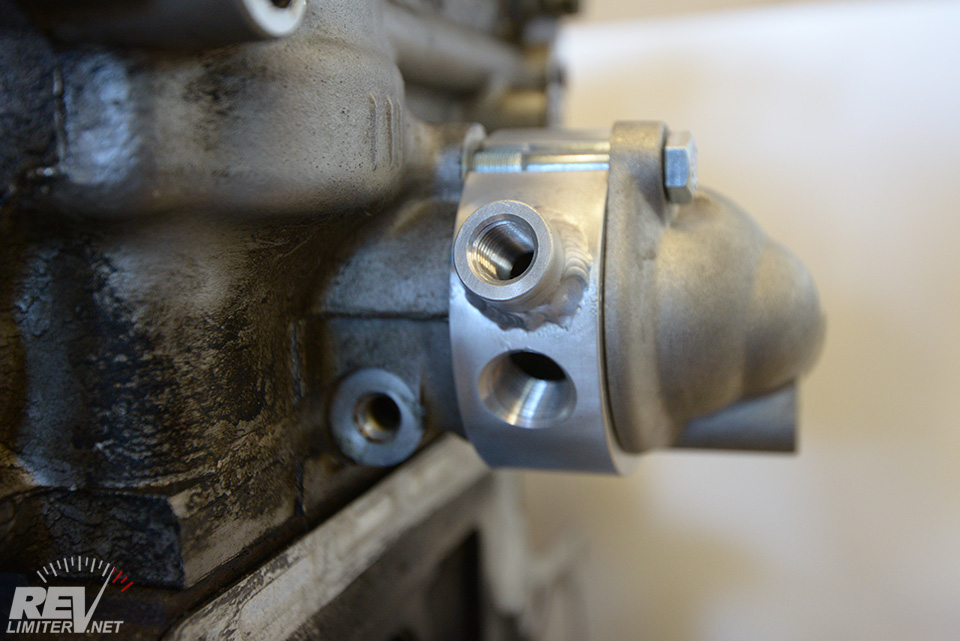
BEGI exhaust side

BEGI intake side
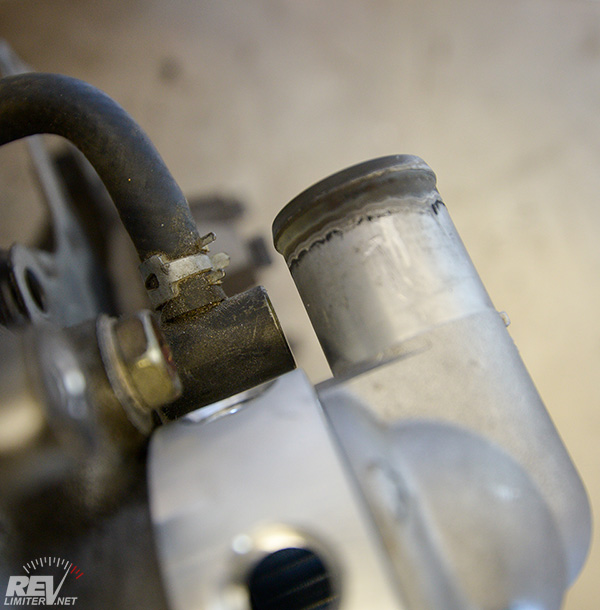
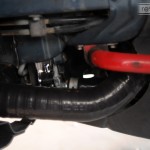
Hose clearance
These photos give a good feel for how the BEGI spacer uses the space behind the motor. It’s got many ports on it, but not all are easy to use due to presence of OEM bolts and coil packs. There’s also VERY little space between that small coolant pipe and the Kia neck to slide a hose on. I’ve done it. It’s not fun, but it can be done.
The internal path is smooth and open thanks to the Kia water outlet. No rough edges to create turbulence.
Hawley Kit
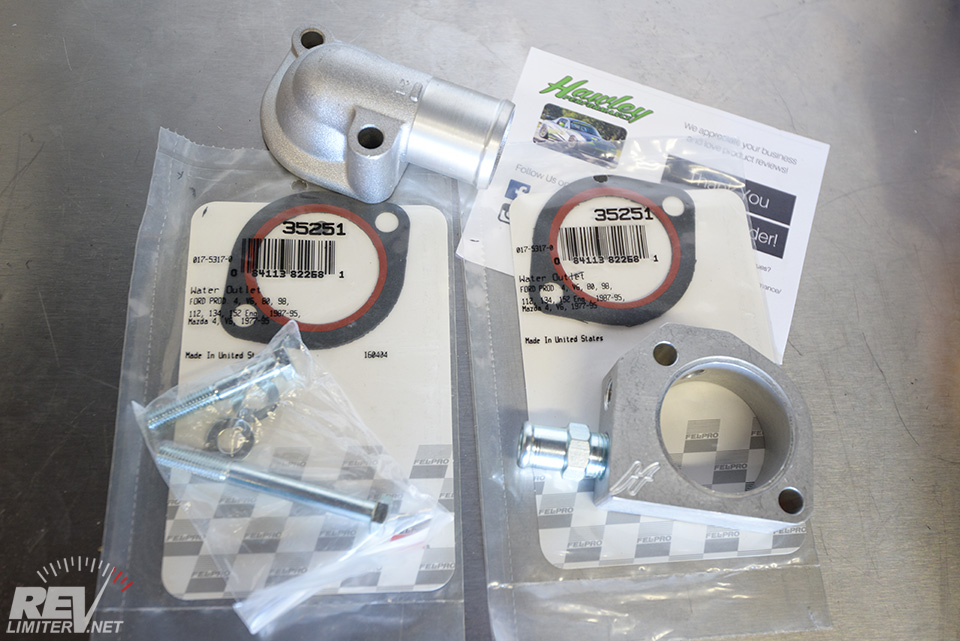
Hawley Performance Reroute kit
This kit is similar to the BEGI one. It is the same idea – using a spacer and Kia water neck to reroute the coolant through the back of the head. This one is made by a small company called Hawley Performance. I found it through the Miataturbo classifieds. I thought it might be a good alternative to the BEGI kit, so one came to live with me.
The kit includes a spacer, bolts, hose barb for the heater line, and two excellent OEM quality gaskets. Seriously, these ones are SO much better than the crappy paper gaskets. Hawley also sells a Kia water neck upon request.
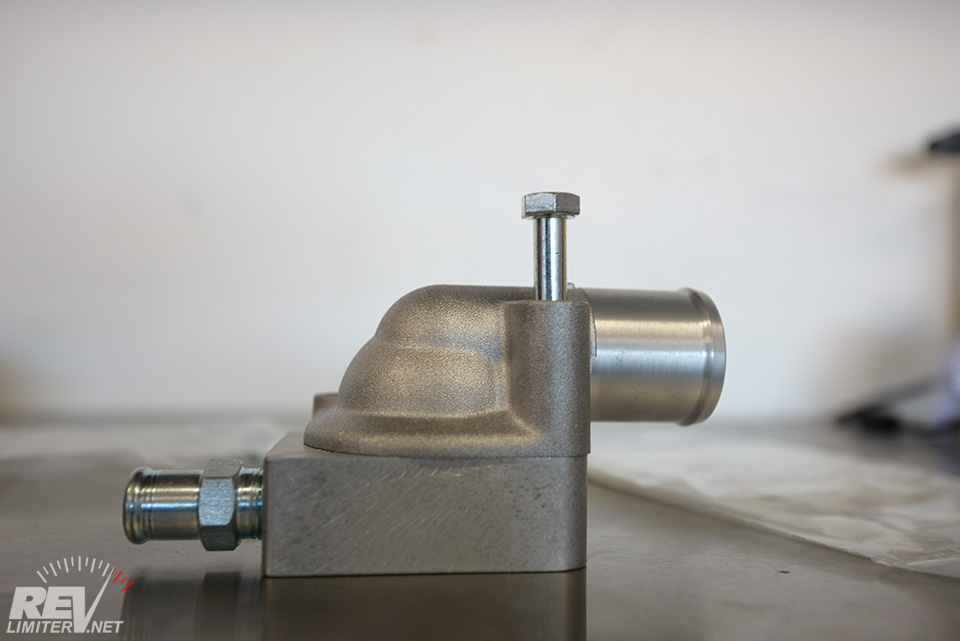
Long bolt problem.
This kit has the exact same hardware as the BEGI one. You have to somehow make space for an 85mm bolt to get between the head and firewall. Not fun, but not impossible.
The spacer is thinner than the BEGI one, so there’s a bit more room once the reroute is bolted into place.
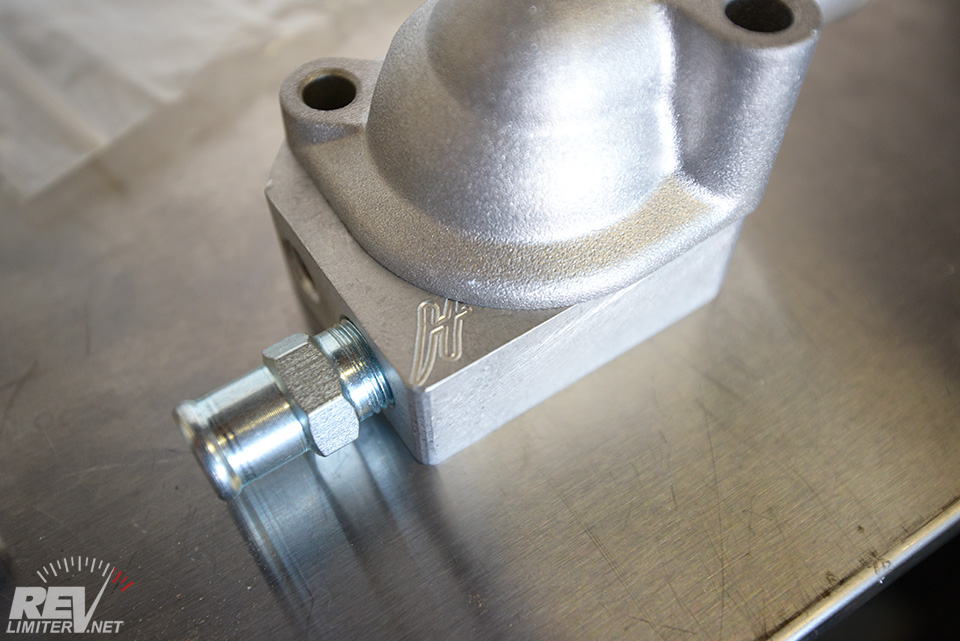
H logo.
Overhang
There’s two odd things on this spacer. First, the H logo. It actually goes UNDER the gasket. Hawley says that it doesn’t cause a leak, but it seems like an odd choice to me. I’d want to fill that logo with some RTV to make sure there’s no leak.
Also, there’s a bit of overhang on the edges of the Kia water neck. This is the exact opposite of the BEGI spacer. On that one, there’s insufficient support for the mounting holes of the Kia part, but full coverage of the water neck base. On the Hawley part, there’s full support on the mounting holes, but not full coverage on the neck base.
I don’t think the 1mm or so of overhang on the neck will be necessarily bad or cause a leak. It’s just a bit of an odd thing.
At least the bolt holes are fully supported and the Kia neck is unlikely to warp.
Hawley spacer mounted.

Overhang.
Hose clearance.
These pix show the mounted characteristics of the Hawley spacer. It has a couple of ports for sensors and nothing else. Nothing you don’t need.
The overhang is odd. There’s tons of space at the bottom of the engine. Not sure why it’s missing a tiny bit of material down there.
The one worrying thing is the lack of clearance for a hose and hose clamp. Sure, these photos do not have gaskets installed but… that’s not much space. But I know there’s folks using this kit, so it must be possible to slide a hose on there once it’s mounted.
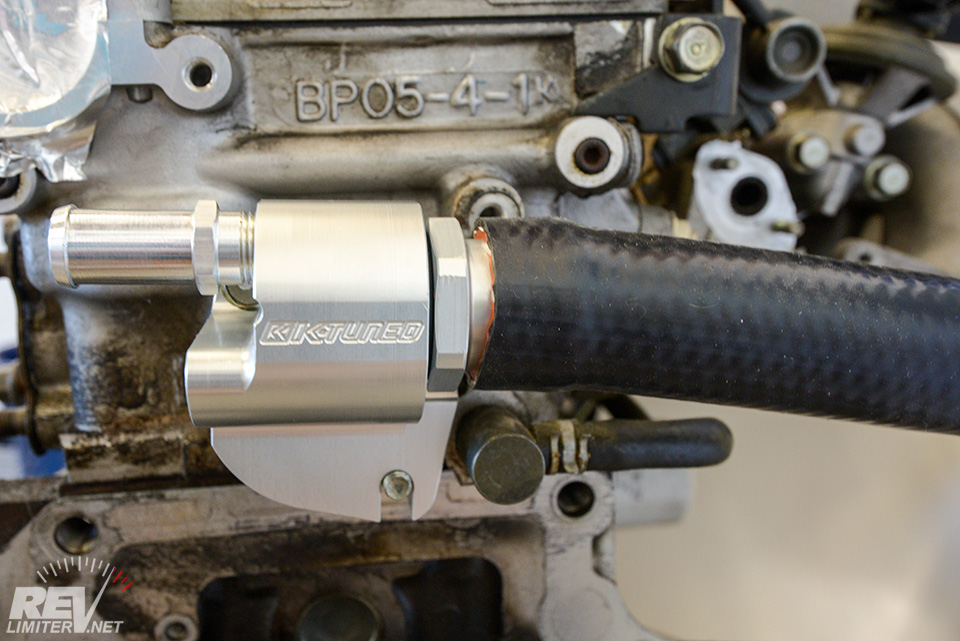
M Tuned Kit

M Tuned reroute kit
This was, I think, the first fully engineered reroute solution to hit the Miata market. It didn’t rely on hoses from large American trucks or Kia water necks. It tried to make thermostat changes a bit less painful by moving it away from the back of the engine. M Tuned gave you everything needed to reroute coolant out the back of the head.
I bought this one just a month ago. 949 Racing was having a sale and I fully intended to install it on Sharka.
More on that in a bit.

M Tuned mounted.
They pre-cut this short hose length for you to put the remote thermostat housing a certain distance from the reroute adapter. You’re not meant to alter this small hose.
A word to anyone installing this kit – USE SILICONE ON THE THERMOSTAT HOUSING!!! The thermostat is held in by a rubber gasket. That gasket will tear apart and cause leaks if you just torque the two halves of the housing together. But if you use some silicone grease (dielectric grease is perfect), you’ll not destroy the gasket, get a good seal, and not have leaks.
On the exhaust side.
From the back.
This kit does not have the 85mm bolt problem that the BEGI and Hawley do. You only need to work the 69mm housing past the back of the motor. That’s not difficult at all.
Lots of clearance on this one too. No problems sliding the hose on. Especially since you do that before putting the thing in the car.

Inner flow path.
This is one place where the M Tuned kit really needs some work. Those jagged surfaces will cause turbulence. Nothing at all is smooth inside this housing. And the opening for water to pass through is extremely tiny. The bottom third of that opening will get taken up by the stock water temp sensor when it’s installed.
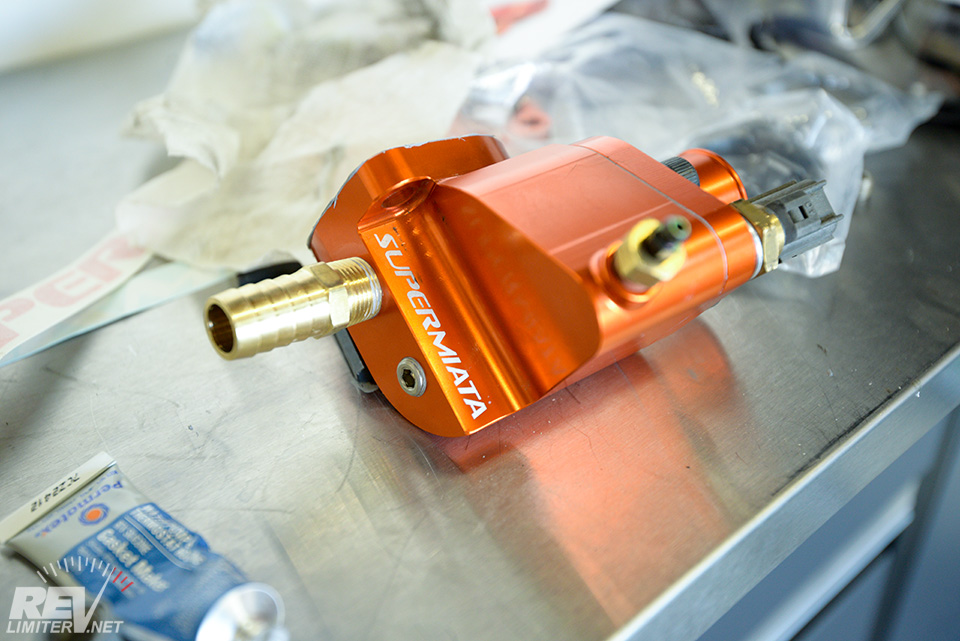
949 Racing Qmax Reroute

The Supermiata Reroute.
I mentioned buying the M Tuned kit from 949 on sale. It turned out it was on clearance. And the reason for the clearance was that 949 made their own kit.
This kit is brand new to the market as of August 2017.
I believe I read this kit was in development for 2 years and in use for a full year before offering to the public. Multiple CAD designs, 3D printed prototypes, CAM prototypes and revisions until they were finally happy with it.
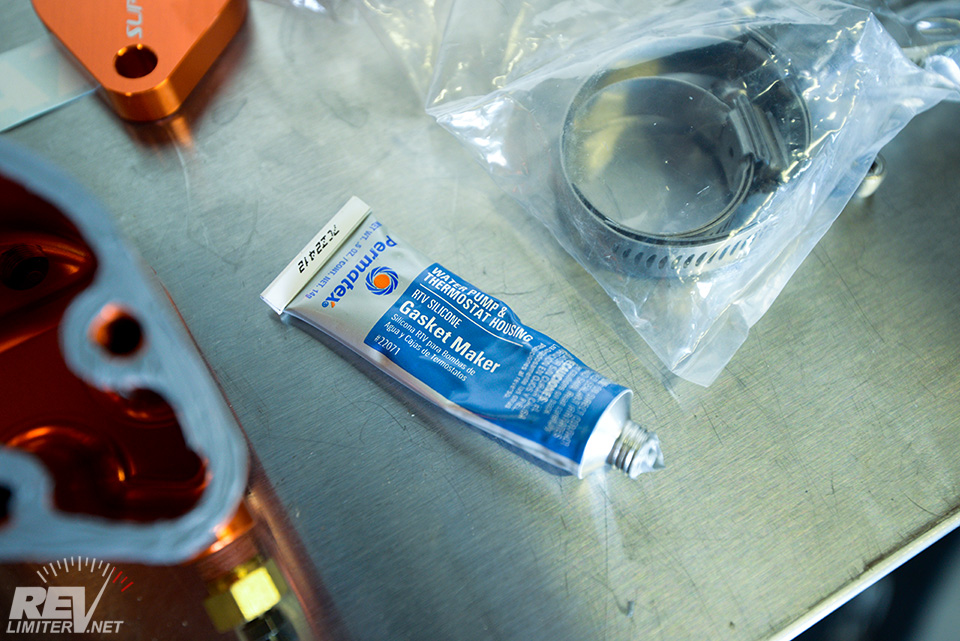
The 949 kit is EXTREMELY complete. It even comes with a small tube of gasket goop. It’s very impressive in person. Even after my first reroute failure, I’m pretty confident in this kit.
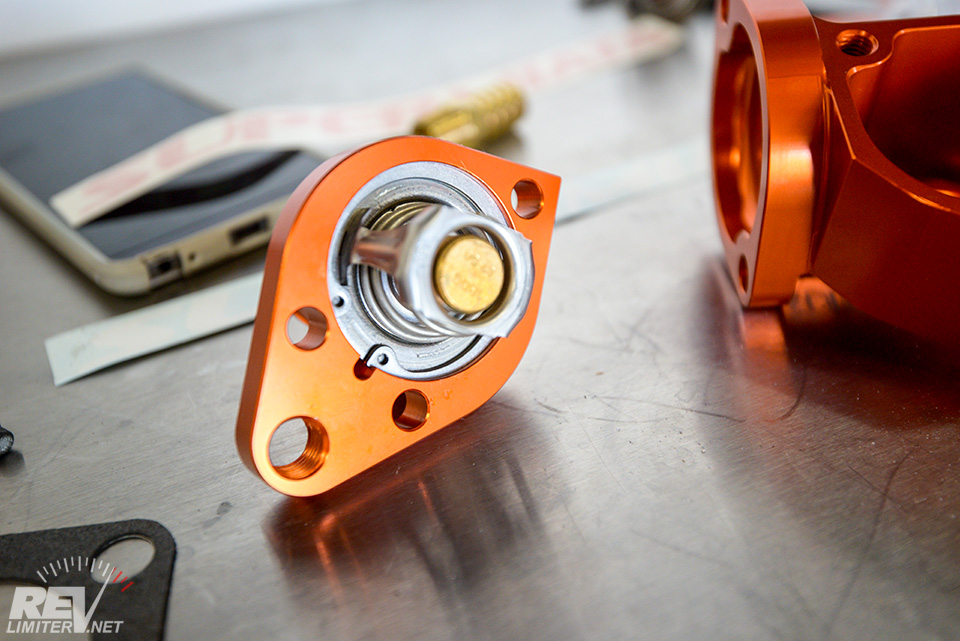
Thermostat
They ship a tiny 44mm thermostat with the kit. The actual thermostat guts and passage are the same size as the standard 52mm Miata thermostat, it’s just got less outer diameter.
I used a Stant 45848 180 degree unit in mine. 949 ships a 195 degree thermostat. They have reasons for it (a Miata engine makes its best power at 195 and above) but I’ve owned Sharka long enough to know that the little guy really does not do well with 195 thermostats. The 5500 foot altitude I live at has something to do with it too (water boils at 197 here).
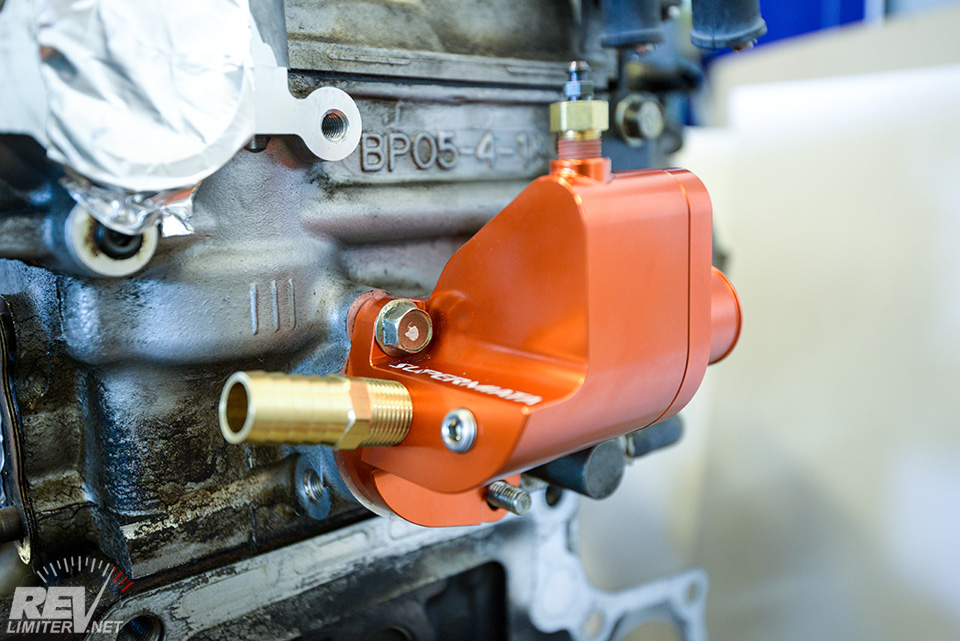
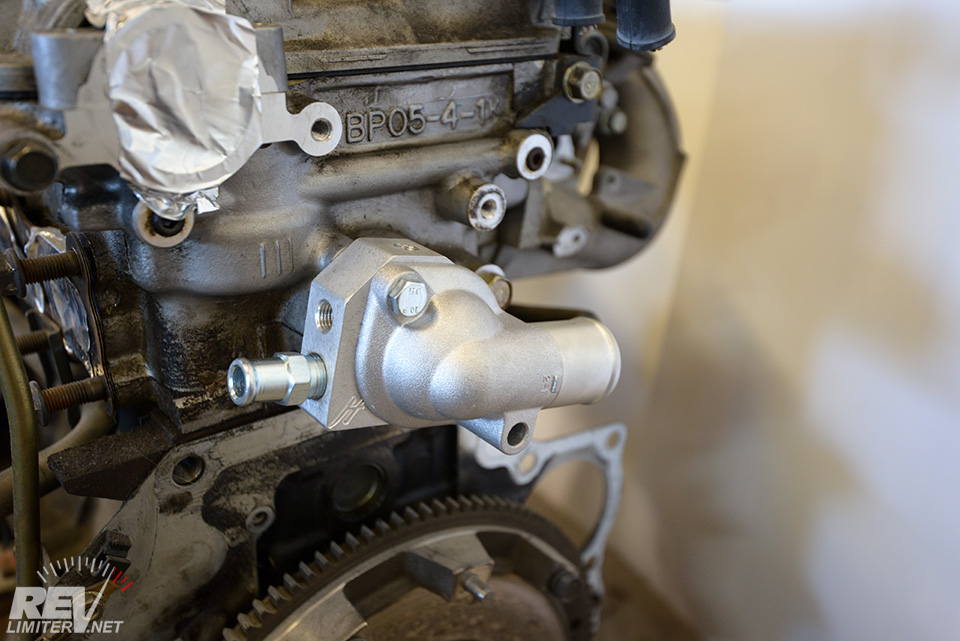
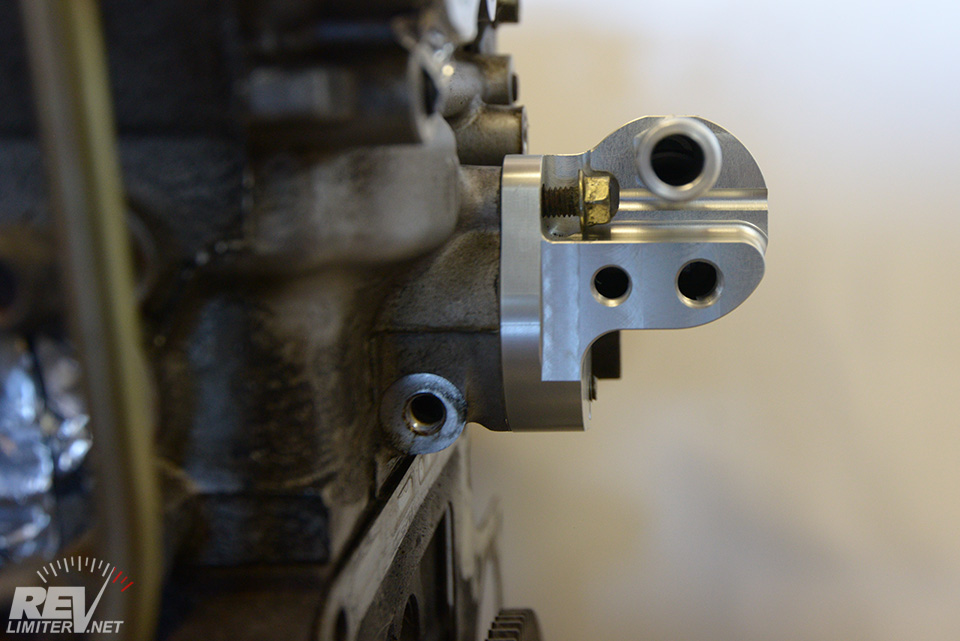
949 from the exhaust
This is by far the easiest reroute housing to bolt into place. Look at the tool space engineered into the housing! It’s also the only one designed to work with the stock rear stud. The others require you to remove that stud.
Sharka’s engine already has the stud removed… Alas, I had to use two bolts.
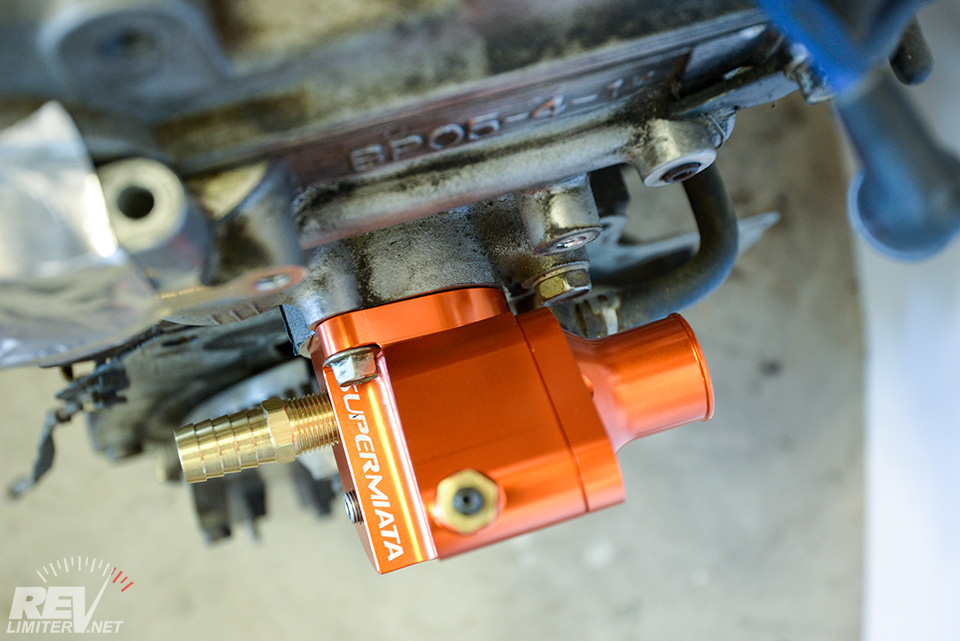
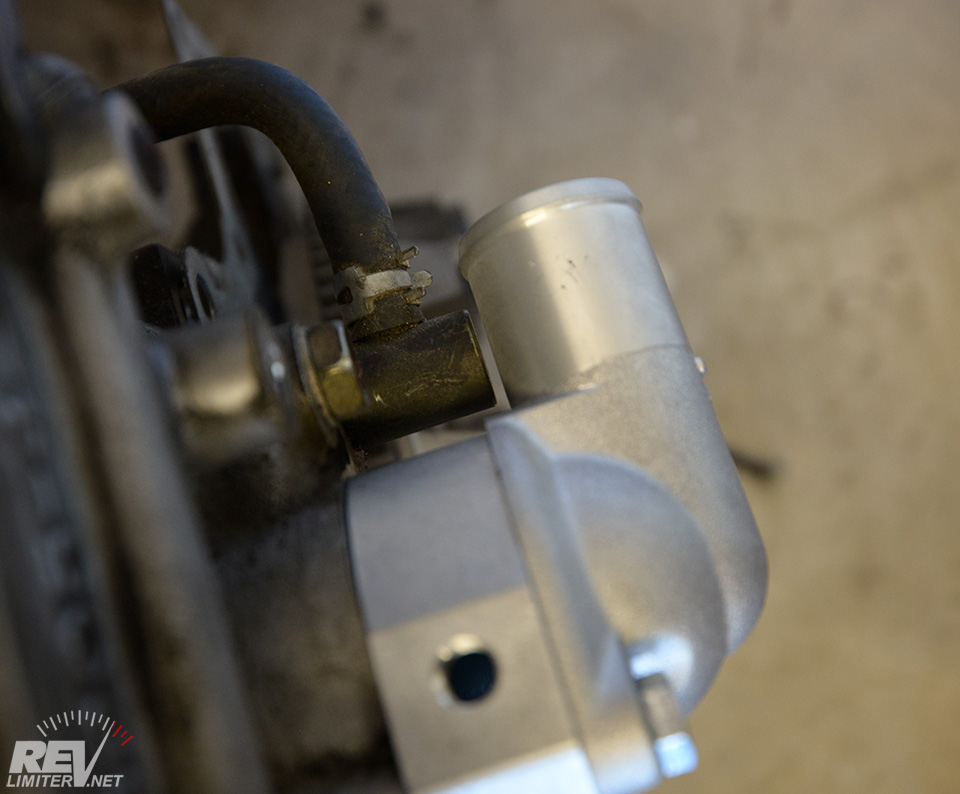
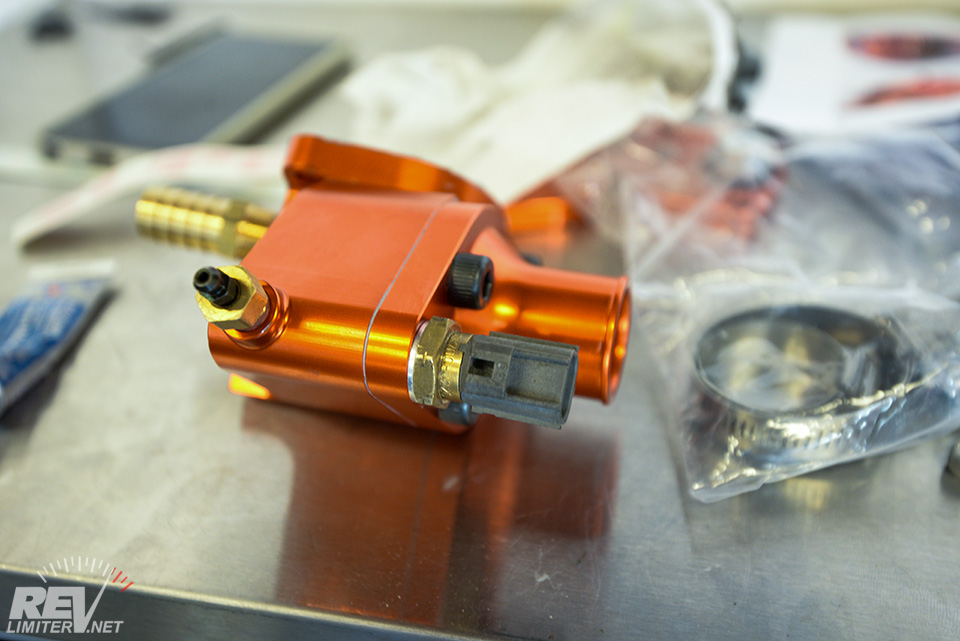
949 top
Tons of clearance for a hose. Also, notice the valve on the top. That’s a bleeder valve. You open it and attach a short run of hose while the engine is off and you’re filling the rad with water. It lets air bleed out the back until the engine is full.
BRILLIANT!
I’ve used it. It’s amazing.
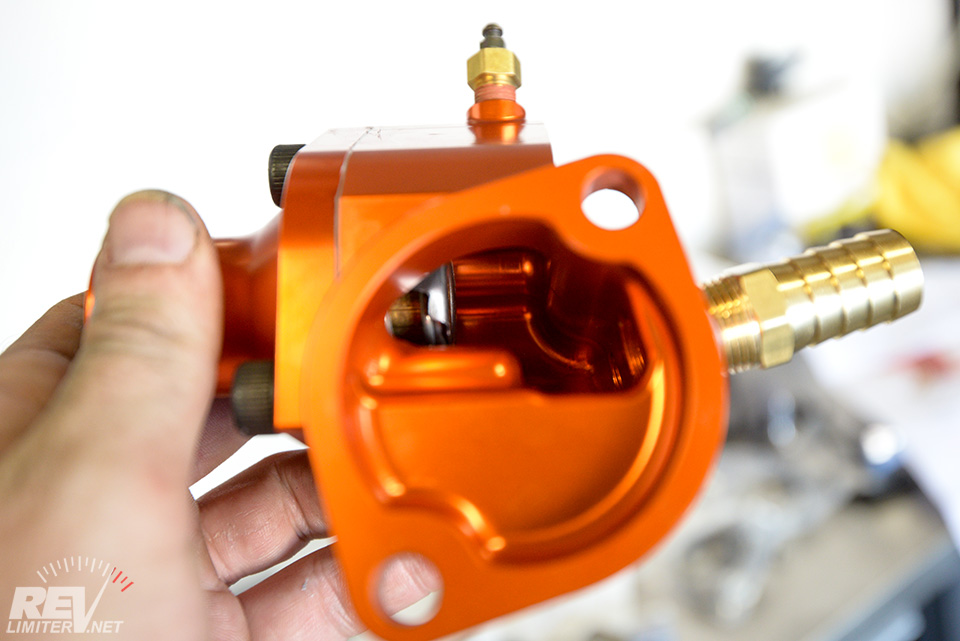
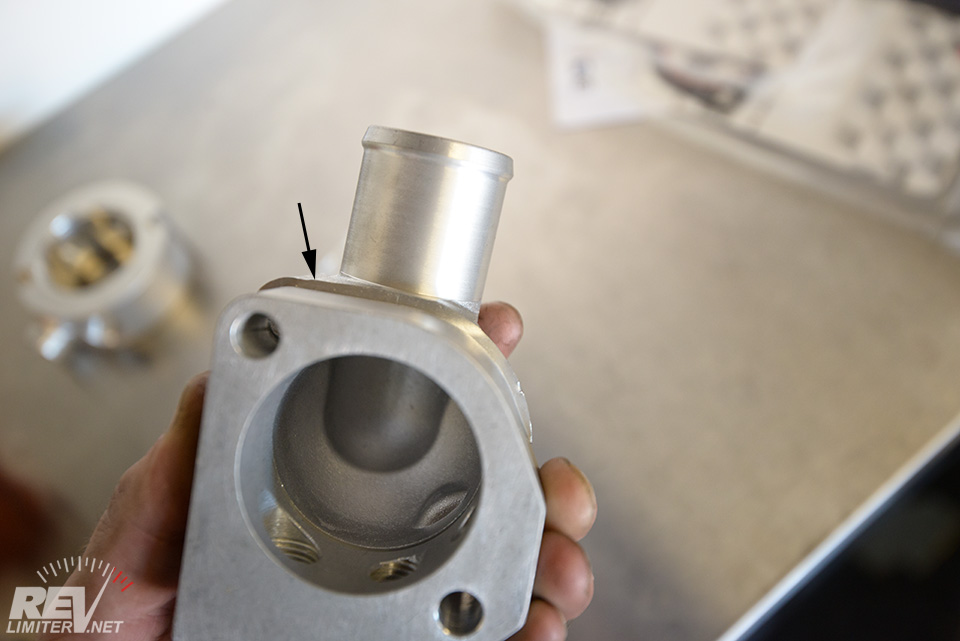
949 flow path
Everything in here is smoothed. It’s extremely impressive to inspect in person. No rough surfaces or sharp edges. And nothing to get in the way of coolant flow. 949 posted that the open area has a greater diameter than a 2 inch circle. That’s fantastic.
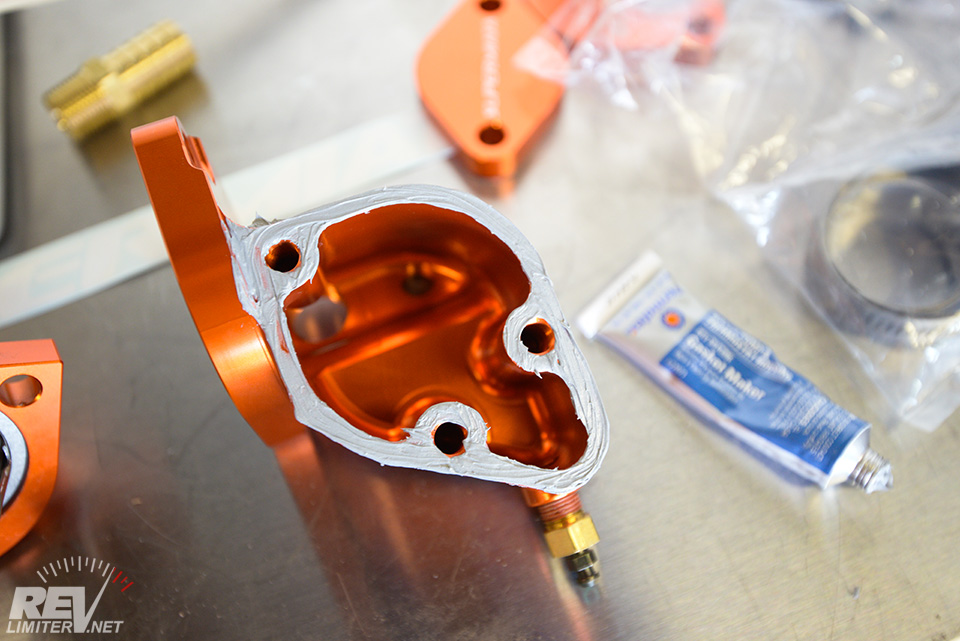
Gasket installed.
For my own reference in the future.
You’re meant to use gasket goop on all mating surfaces on this reroute spacer / adapter. 949 supplies a small tube of Thermostat Housing Gasket Maker. After many years of scraping off cardboard gaskets, I’ve got no problem with this at all.
One note – you’re even supposed to use this gasket maker between the head and the spacer. You don’t use an OEM gasket. I was curious and held one up to the housing (and did not take a pic, sorry) and immediately saw the reason – the stock gasket would restrict water flow. Gasket maker, carefully applied, will not restrict anything.
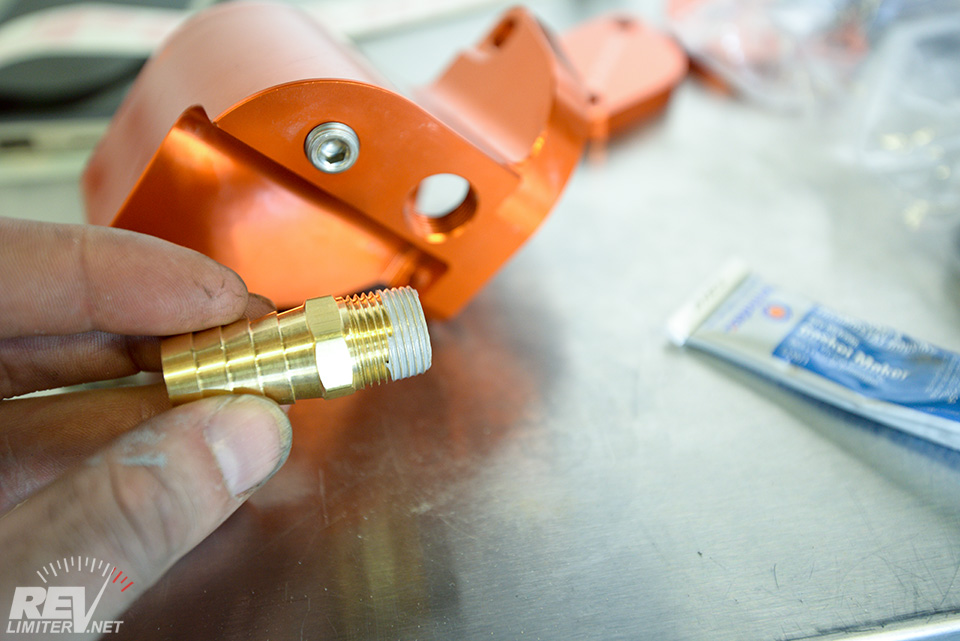
Sealant on the hose barb.
Fully dressed.
Fully dressed.
The stock water temp sensor has a little spot in the housing for it to live. And it points in the right direction so you don’t need to tear apart your wiring harness to allow it to fit.
Fantastic engineering. My hat is off to the 949 guys.
Block off plate.
949 gives you two block off plates. One lets you keep the stock water neck and the other lets you delete the neck and bolt a plate to the head itself. I’ve got FM’s turbo hard line kit for water hose routing, so I need to keep the stock neck in place.
Two nicely anodized plates. Impressive.
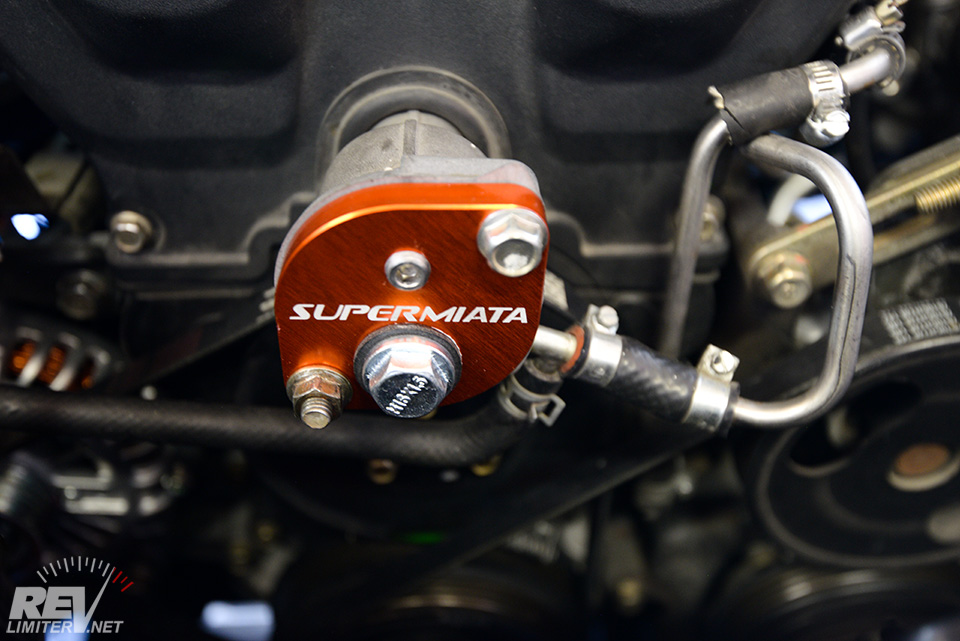
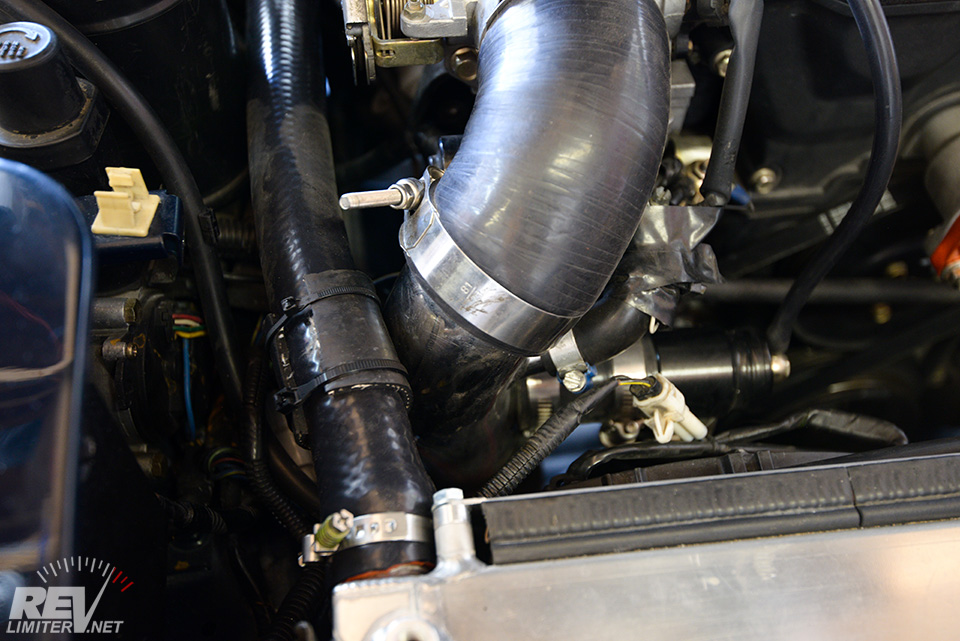
Installed in the back of Sharka’s motor.
It was very easy to get this onto the motor. I expected hours of pain, but it bolted right up.
I *did* unbolt the PPF from the transmission and jack it up a bit to give more firewall clearance. But that’s just obvious. Make ever extra millimeter you possibly can when doing a reroute with the engine installed.
Special thanks to my buddy Corey for the trick hose clamps. They’re a constant tightening worm drive clamp that doesn’t eat hoses and has a spring to keep things tight. They were first seen in Scrat’s engine bay.
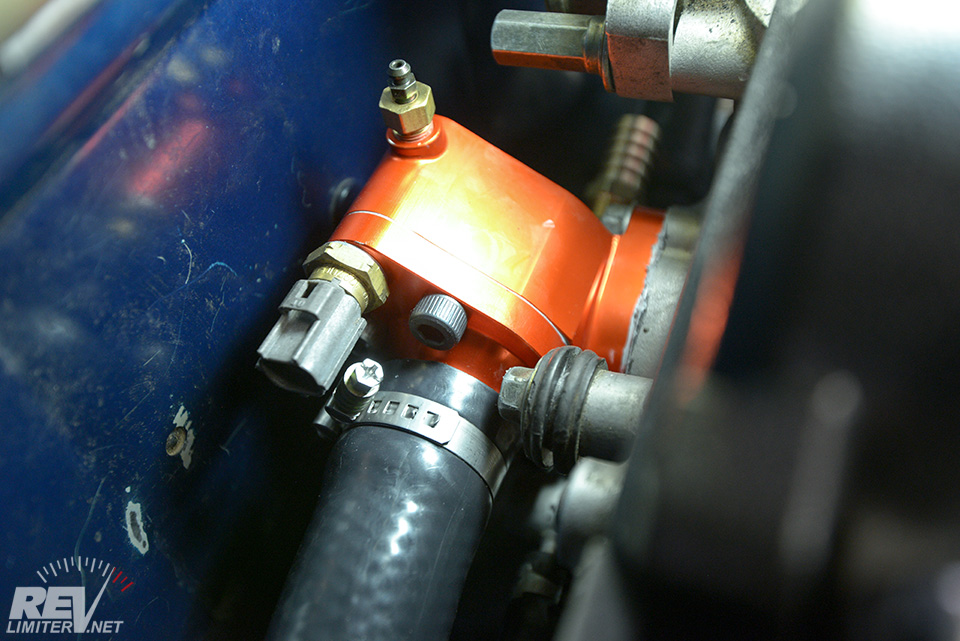
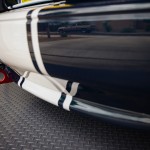
Hose protected
Burped
The long silicone hose 949 uses is the same as the M Tuned one. It’s easy to route and install, but you do need to protect it from rubbing wherever rubs might happen. A bit of old rad hose and some zipties keeps things protected.
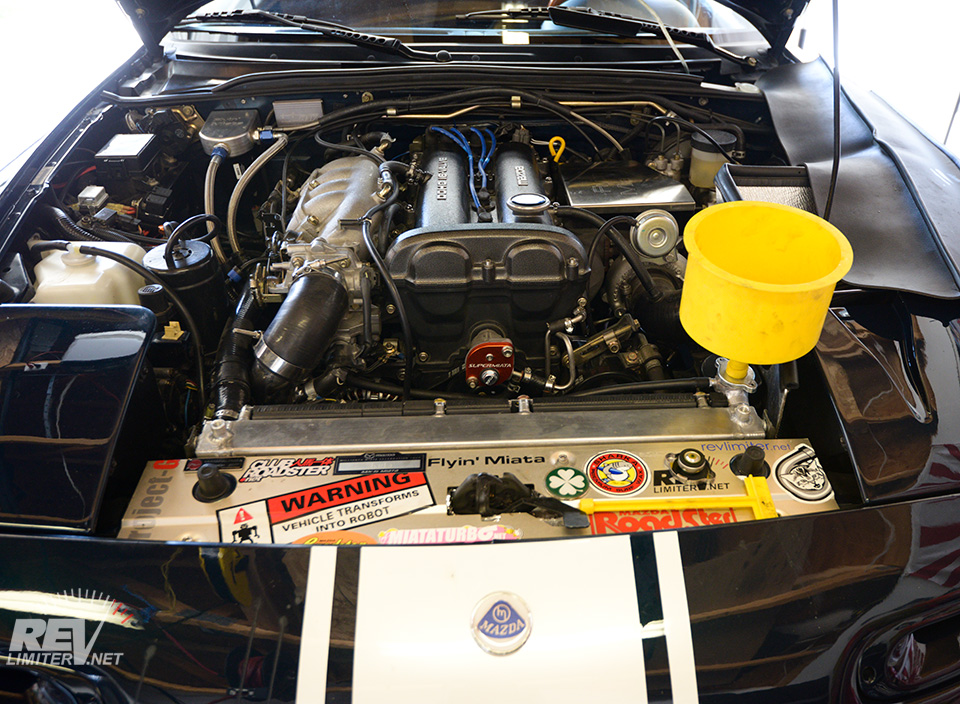
A quick fill and burp with my spill free funnel and Sharka was rerouted again. No leaks so far. That’s after about road miles. I’m hoping things stay sealed.
And that’s it! Sharka is re-routed again. I hope this will be the final one.
And a billion accolades to 949 Racing for some brilliant reroute engineering. Well done guys!


One additional note on the Hawley Performance spacer. I just recently installed one of these on my car. I too was replacing a leaky and problematic BEGI spacer. I did not find any issues with the radiator hose fitting with a hose clamp. I did find an issue with the temp sender and the heater hose clamp interfering. On mine, they were too close. When I tightened down my sender the first time, the release tab was touching the hose. I had to end up overtightening the sender to get the harness release tab in a position so I could get a hose clamp on with no interference. This may not be an issue for everyone based on machining tolerances, but I just figured it might be a good bit of information for your shootout. I can send you a picture of the issue if you’d like to include it.
Hmm. Good to know. Thanks for the comment!!
Thanks for this! You know I have an engine out service coming up. This’ll be a great addition.
My pleasure!! I’m hugely impressed by the 949 kit so far.
Great write up and photos as usual Adam. I have been considering doing a reroute for a while now.
Question for you…Is it smart/easier/make more sense to do the reroute now (pre-turbo) or after turbo is installed or does it make a difference? Does installing the turbo have any affect or change to the 949 reroute system other than having to use the stock filler neck?
Thanks!
Paul B
Thank you for including our spacer in your review! As one of the owners of Hawley Performance, we always like to hear what our customers thoughts are on our products.
It looks like you are using our initial release spacer which we tried to make as thing as we could for ease of installation. The barb on the back of the head unfortunately did make it difficult to install the hose, so we increased the thickness of the spacer by a few mm to clear the barb in question. I’d be happy to send you the v2 spacer for your comparison.
Regarding the other two items you mentioned, the radius of the bottom of the spacer was copied from the water neck we used to use which wasn’t an OEM part. The necks we use now are direct from Kia and have a slightly larger max OD, which likely translates to the overhang that can be seen.
The “H” logo isn’t something we’ve seen an issue with as there is plenty of gasket surface still available, but has been addressed with our machining vendor and is in process for a slight program tweak for ease of mind.
I must mention that it might also be worth noting the price point of each kit. Emilio has produced a very premium product with the new Qmax kit but it comes at an noticeable additional cost. We kept the K.I.S.S. ideology in place with our kit to keep installation simple and price point very reasonable.
Again, thank you for including our parts in your review. Please let me know if I can send you our current release spacer for comparison.
Thanks,
Michael
Hawley Performance
Do you have a link, or even a name for those hose clamps? Always on the look out for really good worm drives!
Awesome review! I’m getting ready to start HPDE with my car and wanted to maximize my 99’s cooling with a better radiator and a reroute, but I’d read lots about prior ones…including yours! This sounds like a perfect mate up for what I need…and since I’m already COP, I don’t have coil packs back there to deal with anyway!
Damnit Adam! I was looking for the original reroute posting, then I came across this, now I must get it for Yorokobi. 🙂
Spotted this after coming to the same conclusion as you and purchasing the Qmax kit for our ’01 endurance race car. Replaced the head gasket with the ’94-99 part #. Surprising how many coolant ports they closed off in an attempt to get water back to the #3 & 4 cylinders. Thanks for showing a finished pic of the thermostat assembly. The heater hose port is the only thing that’s a little weird as is seats firmly after only a few threads. Needed to see someone elses. Hopefully this nicely engineered unit will perform well under the most difficult race conditions and, along with our new oil cooler, will give our built JDM engine lots of longevity.
Super frustrating that I got the M-tuned in January, before Qmax hit the market… 🙁
You mention Sharka doesn’t like the 195– what do you mean? If it boils at 197, are you saying your coolant will boil that soon?
I have been using 192, in an NB with reroute. gave it a big 52mm radiator since last summer. As it’s now warming up here in Vegas, it’s still struggling with AC in traffic– when I need AC the most! Considering a 180* t-stat for the MTuned now, so seeing what kind of experience you have with it.
With my 192 (or was it 195?) it runs in low 180s in 3 seasons of the year. When I had 180 in an NA w/ a big radiator, I had trouble keeping it at operating temp.
Any follow up comments now years later? Leaks?
I haven’t had any leaks on the SuperMiata reroute yet.
Can you do this again but with the other new ones, like the cobalt reroute from moss. I have that one in my car now