I gotta tell you, even after doing it, this topic still gives me a shiver. Putting a hole in your oil pan???? Shiver! Still, it really isn’t very difficult and there are a LOT of write-ups on the subject. I thought I’d throw my own into the bucket. Maybe make this scary subject a little less scary for one or two of you out there.
So, here we go.
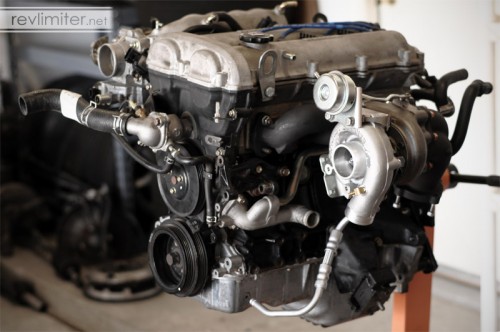
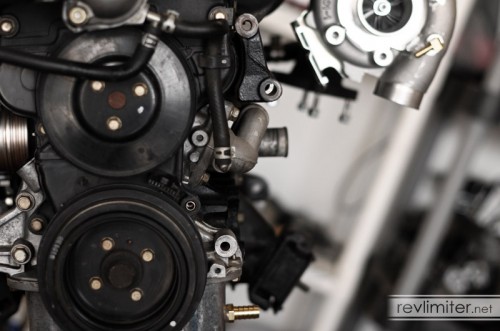
I’m doing this with my 99 engine on my engine stand. Makes it very easy. Well, maybe not VERY easy, but at least I don’t have to wedge myself under the car with a drill and camera.
For those of you going under the car: please be careful. Use 4 sturdy jack stands. Give the car a good shake once you have it up on the stands to ensure that everything is stable. And throw an extra tire under the side in case there’s jack stand failure. Your life is worth the extra couple minutes.
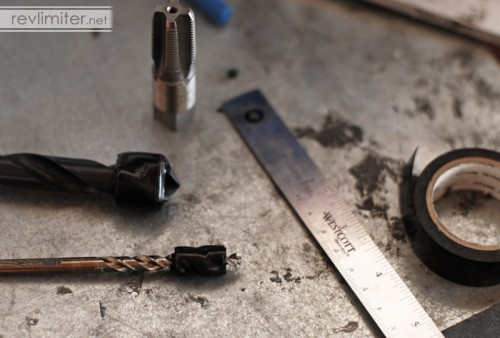
My FM turbo kit came with drill bit, tap, and a nifty little ruler. You’ll also need.
- A drill. One that the big 37/64ths bit can fit into. Mine was a 1/2″ drive. Do you have a half inch drill? I had to borrow one.
- A tap wrench. My 3/8 NPT tap fit perfectly into a 5/8″ 12 point socket. 16mm should also work. The key ingredient is the 12 point. 6 point won’t work.
- Electrical tape to act as a bumper. You don’t want to drill too far into your pan and nick the oil pickup.
- A smaller bit for a pilot hole if so desired. I used a 1/4″ bit. If you don’t do a pilot hole, a center punch to locate your BIG drill bit is suggested.
- GREASE! Grease, grease, and more grease. I had a tub of black moly grease handy.
- Tons of paper towels.
- Q-tips. These are somewhat optional. You put a bit of grease on it, bend it at a 90* angle, and then put it through the finished hole to help get any shavings out.
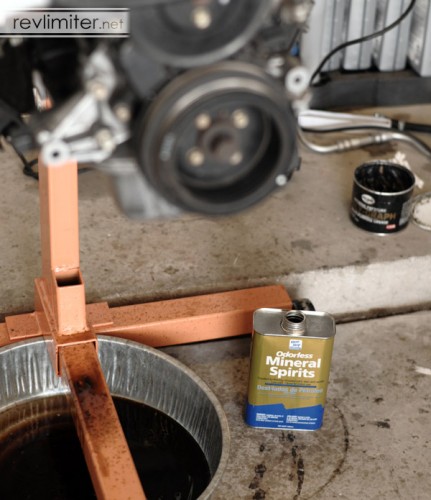
- Mineral spirits to help flush the pan when you’re done.
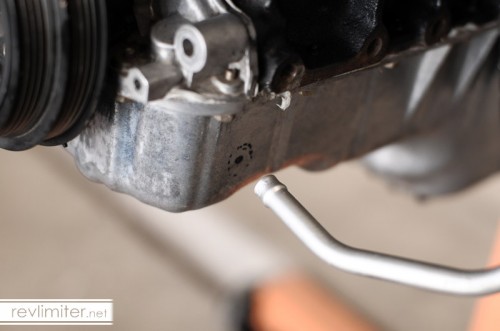
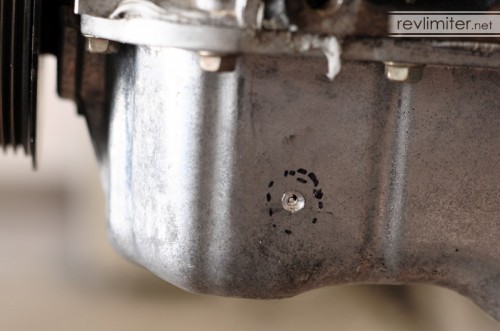
Different turbo kits will have you locate your hole in different places. I’m using the FM hard line kit, so I had to put it where the hard line wanted it. In general, you should put the hole up as high as possible without interfering with your air conditioning compressor. I have about 1/8″ of clearance with my final drain location.
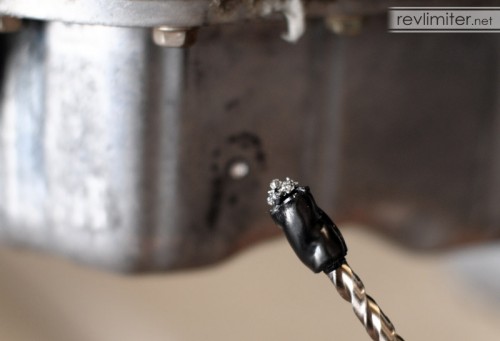
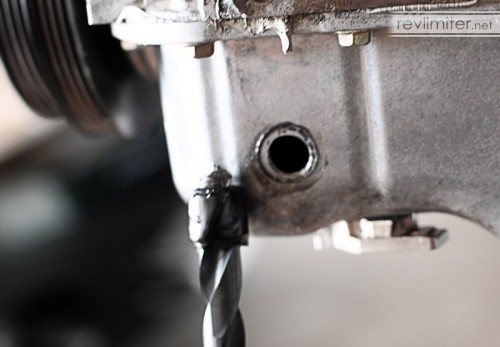
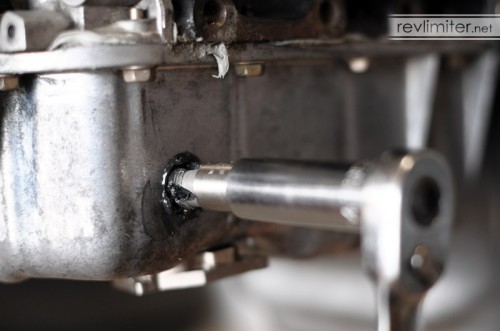
Several things to note here. My drill bit is totally covered in disgusting crap. That’s just grease and about 10 seconds worth of oil pan shavings. You don’t HAVE to grease the drill bit before you’ve actually opened up a hole in the pan, but it helps to figure out how to keep the shavings under control. A little grease in each channel is really all it takes.
The 2nd thing to notice is the bumper. That’s to prevent the oil pickup from getting nicked. The correct spot for the bumper is about 1/4″ away from the tip of your bit. What the heck is the oil pickup? This thread on MiataTurbo will answer that question for you. Nicking it would be a bad thing.
Remember: Drill slow. Take your time. Re-grease your bit often. You have all the time in the world.
I fully intended to drill my pilot hole all the way through, but I was going very slowly and really paying attention to how the drill felt. The moment I broke through, I stopped to check things and re-grease my bit. I realized that I didn’t need to break all the way though. Just a decent pilot hole to locate my BIG drill bit was all I needed. So I stopped here.
While drilling, you can apply some compressed air if you so choose. FM calls for 10 psi or less from a regulated air supply. Too much pressure is no good. But just a bit of air will help blow the bits and shavings back out the oil pan hole.
What you do is unscrew the oil drain valve on the other side of the pan. Then figure out a method of attaching your air supply. A helper would probably be the easiest thing here.
I chose not to do this due to not trusting the regulator on my air compressor. If you have a decent regulator, by all means do the compressed air bit. And you might wanna use some eye protection. That big drill bit shoots out a LOT of shavings.
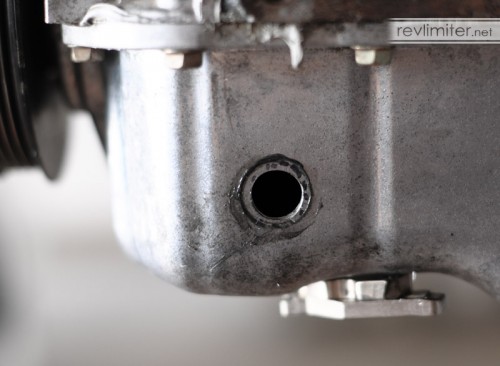
Drill like you mean it. Drill carefully. Take your time. It took me about 15 minutes to drill this. I used a LOT of grease and a lot of paper towels. The big drill bit really makes a lot of metal shavings.
Note the bumper. It is 1/4″ from where the bit widens to the full 37/64ths. That’s about 3/8″ total from the tip of the bit. The oil pan is only 4mm thick, so you don’t need to go though very far.
Clean up the edges of the hole as best you can. Don’t worry about shavings in the pan just yet. You’ll be adding a lot more shavings when you tap that hole.
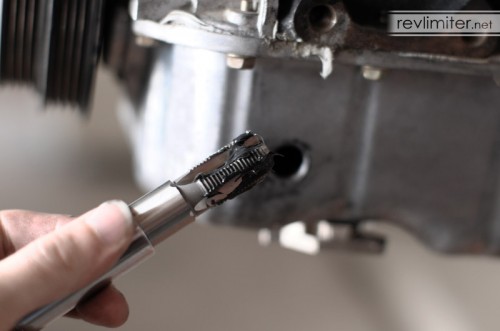
Just like drilling the hole, you’ll want to use lots of grease to trap the oil shavings. Grease each of the 4 channels in the tap. You’ll figure out how much you need.
If you drilled your hole with the engine mounted in a car, you’ll probably have had to drill at an angle. That’s fine and probably unavoidable. But you want to tap that hole straight. This is very possible. Just line up the tap at the angle you want and start turning.
I’m not going to describe how to tap a hole here. If you need that level of help, get a buddy to do the tapping for you.
You’ll want to sink the tap fairly far into the pan. You want to leave only 2-3 threads of the tap visible outside of the pan. This keeps you at a safe distance from the oil pickup and gets the hole tapped correctly.
Remember, cut for a few turns and then remove the tap and clean off the grease and metal shavings. Then re-grease and go back to work.
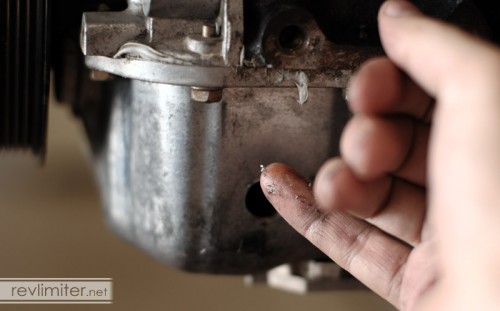
As I said above, some people like to use a q-tip bent at a 90* angle to do this. Put a very thin coat of grease on and go fishing for shavings. I did the same thing with my pinky finger. Just dip your finger in the grease (see how thin a coat I use?) and fish around inside the hole. You’ll be able to feel everything. Just be careful not to cut yourself.
After you’re satisfied that you’ve cleaned the pan enough with your finger/q-tip, grab your mineral spirts. I put a small funnel into the drilled and tapped hole and poured about half a quart through the pan and out the drain hole. You could wait till you get the hose fitting on the pan if you wanted.
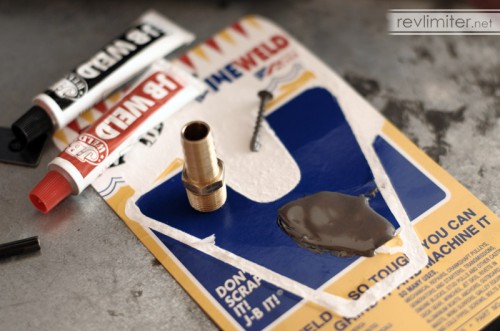
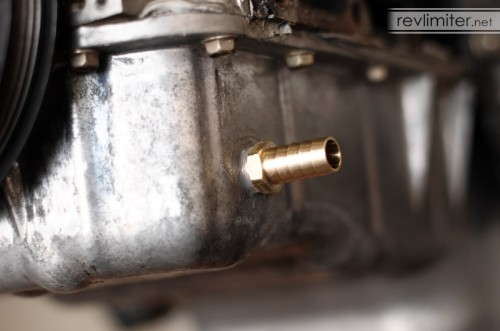
(Before applying the JB Weld, go ahead and thread the fitting into the pan to make sure it fits.)
You can install the fitting a couple of ways. Thread sealant works well (Permatex has some great stuff in a little white tube). I should imagine high temp RTV would work okay. JB Weld works GREAT. And Teflon tape does not work at all. Unless it is of the correct grade, teflon melts in the presence of oil and fuel. I learned this the hard way once. Use sealant that’s rated for petrol resistance.
Personally, I love JB Weld for this type of application.
That’s it. Drinking time! Hope your oil pan drilling experience was as easy as mine was.
Thanks to Bill at Flyin Miata for contributing to this blog post!
-Update!-
Everyone considering drilling their oil pan should go check out this thread on MiataTurbo. Savington has posted some truly excellent photos on the topic as well as some advice.
1: Drill as far forward on the pan as possible. You don’t wanna drill anywhere near the AC compressor bracket.
2: A cut piece of small diameter PVC pipe placed as a sleeve over the drill bit makes an excellent drill stop. You only need about 1/4″ of flute on the bit to get through the pan. A sleeve will be much more secure than the electrical tape method I used above.



Hi Adam,
Great directions, just one note. Could you add that FM calls for pressurizing the engine to blow the chips out? It really does work well and to me is safer than not using the air. Thanks! And good luck with the rest of your installation!
Done! Thanks for the comment and the help, Bill. Post has been updated with the compressed air bit.
What a great resource!
Where does the oil feed line go to?
Oil feed comes from the other side of the block, all the way around, and to the top of the turbo.
[…] with. but yeah, i'd just throw a bunch of blue rtv around that shit. or look at rev's blog here – https://revlimiter.net/blog/2010/07/drilling-for-oil/ – and use whatever he […]
[…] brass adapter fitting in place. RevLimiter's detailed write up on how to do this was a huge help: Drilling For Oil ? revlimiter.net The first bit of drilling Drilled and tapped And the fitting in place! I used black RTV to […]
Hey Adam,
If the engine was already out of the car, why didn’t you just drop the sump? Surely 100% safer?
Because I wanted to blog about it and help people who would have to drill their pans in the car. 🙂
Haha after writing that I realised why, so you can be helpful!
This is going to help me so much thanks Adam!
What size fitting did you use. I can’t remeber what I used for mine but it’s a very loose style fit…..