
MMMM… Clutch juice!
So, there I was. Minding my own business. I was at the store to pick up the proverbial bacon and milk. The weather was nice, so I brought Sharka. I hit the start button, put the clutch in, and start to back out. And BAM!!!
I stalled.
I looked around, totally at a loss. I put the clutch in again, to take it out of gear before trying to start the engine, and I notice that there’s very little pressure. The pedal goes to the floor very easily. So I pumped it in hopes that maybe it wasn’t catastrophic clutch line failure like last time. And yay, clutch pressure! So I babied the car on the short trip home. I used the clutch very little, mostly shifting without it. I got home, dumped the groceries, and went right back out in Bucky to grab some clutch parts from the nearby NAPA.
Clutch Master Cylinder Swap
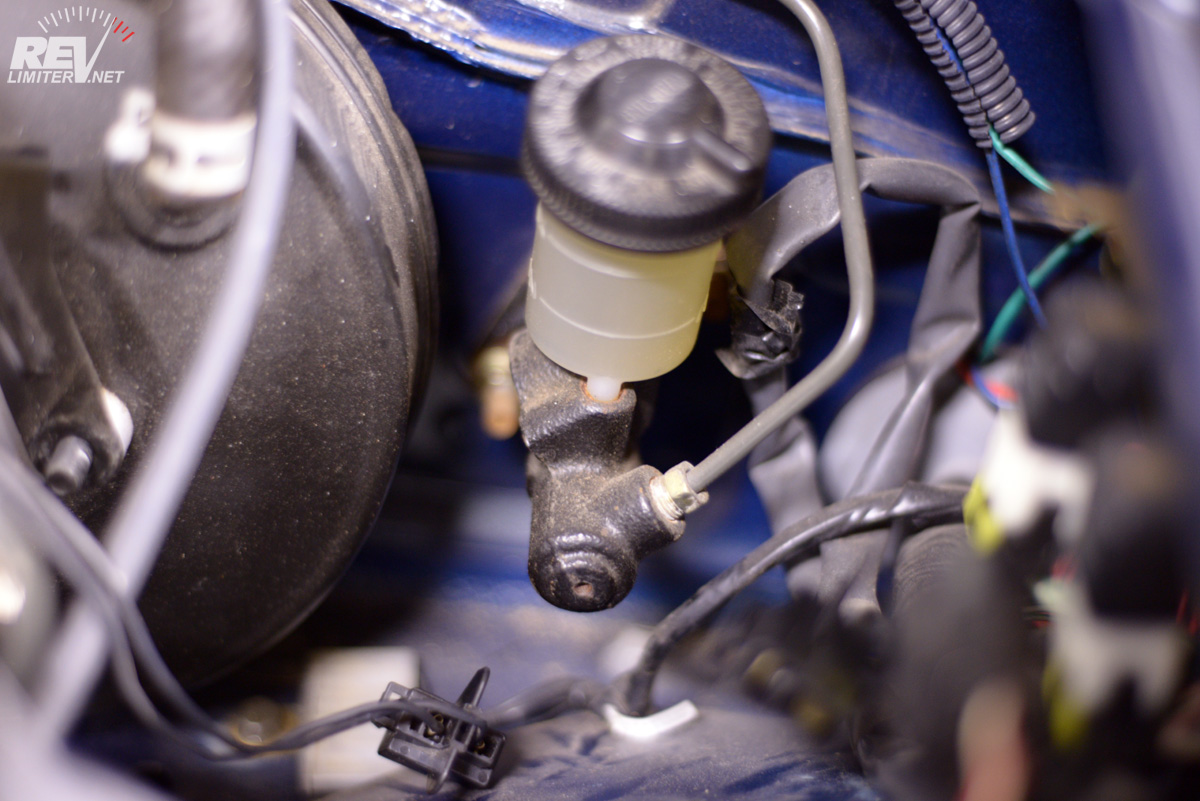
Remove everything around the clutch master.
First item of business is getting enough room to work. Most Miatas won’t have much problem. A few might have to remove some intake components from around the clutch master. Sharka has the Link ECU sensor pack and the cruise control brain surrounding the MC.

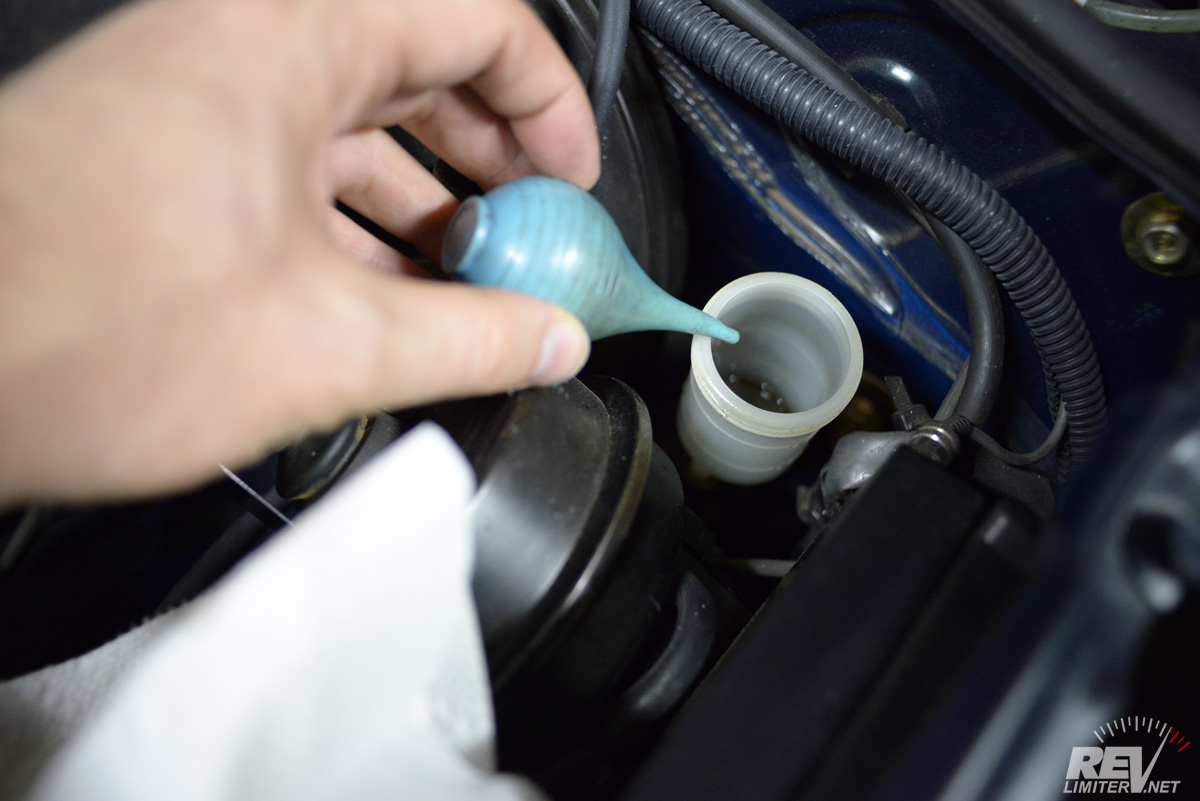
Suck out the fluid.
Step 2: Suck out the fluid. There’s not much in there, but it will all come out when you remove the hard line attached to the front of the master cylinder. Suck it out with something. I have a small ear syringe (pictured above) that I’ve used for years to drain brake and clutch reservoirs. It lives with my bleeder bottle when not in use.
Step 3: Remove that single hard line at the front of the MC. You need a 10mm flare wrench to do this. You might want to have a plastic baggy nearby to put the end of the hard line into. Also, plenty of paper towels below to help protect your paint.
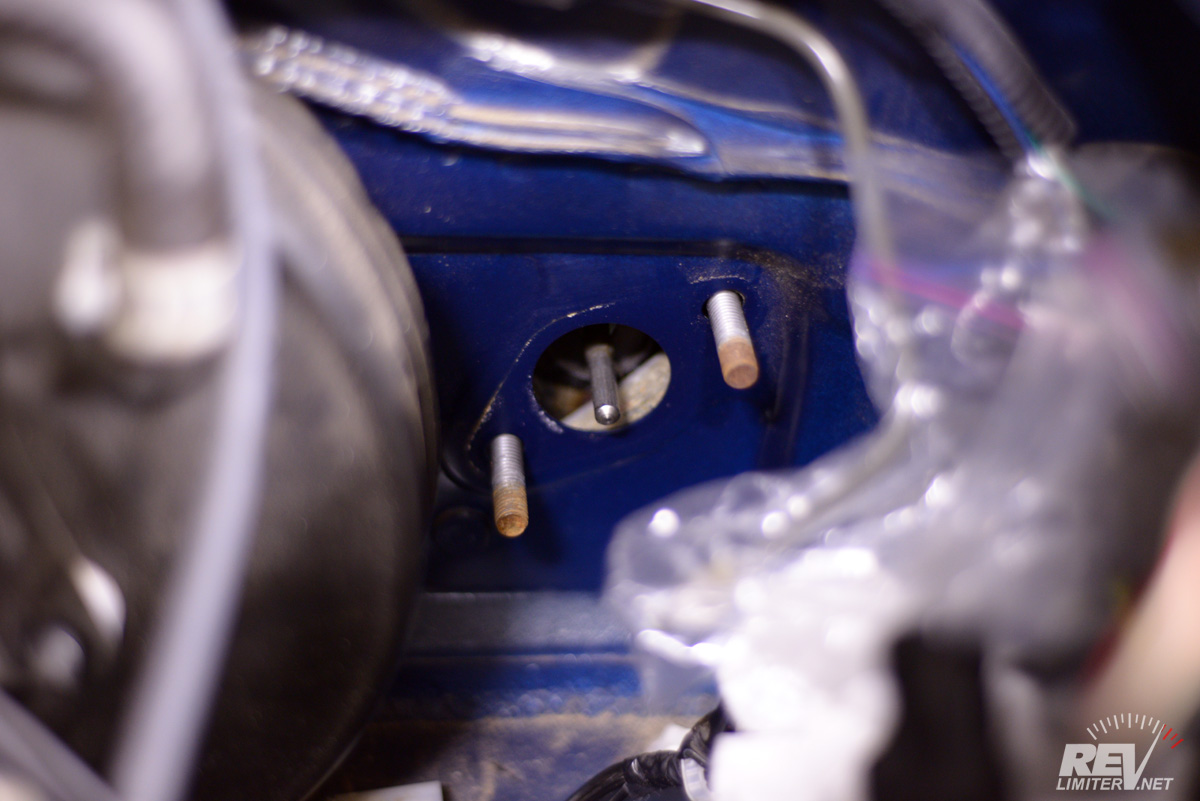
Remove the master cylinder.
Step 4: Remove the MC. It’s held in by only two nuts. Get a 12mm socket and go crazy.

One shiny, new clutch master cylinder.
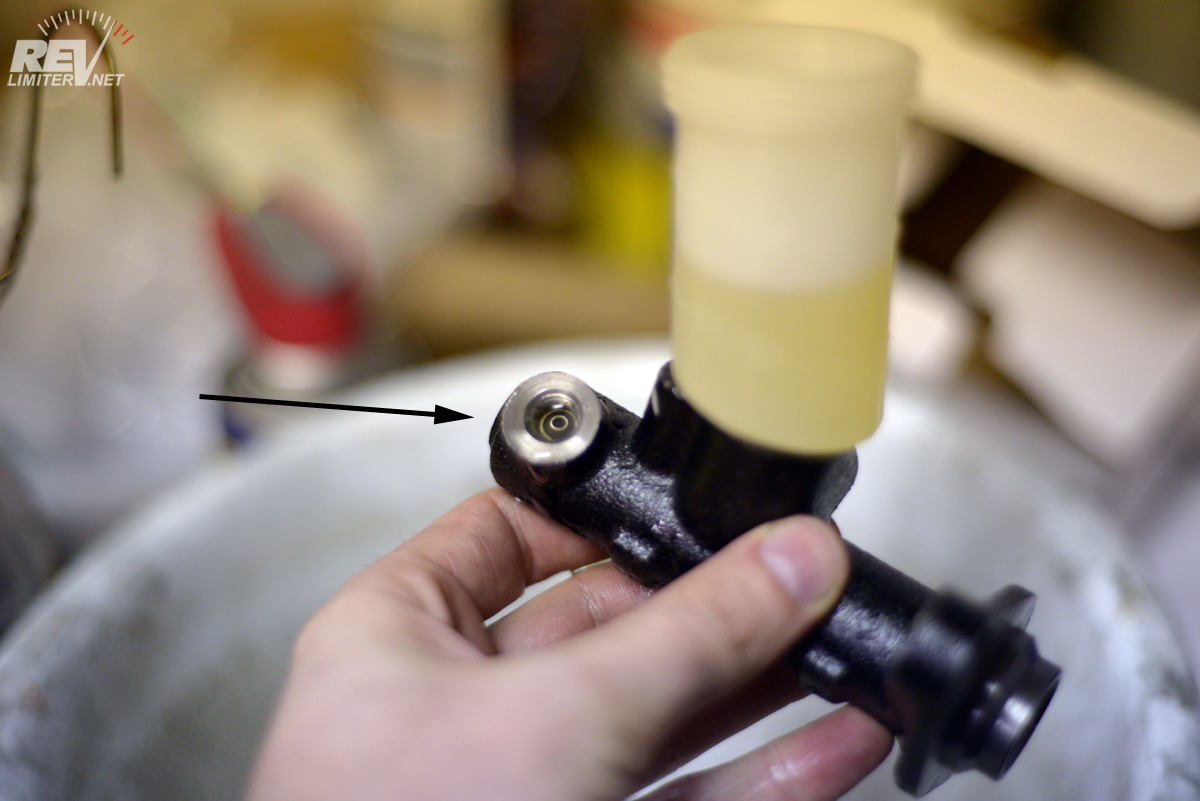
Bench bleed the MC.
Step 5: Bench bleed the master cylinder. Sorry to not have a photo of me actually doing this. It requires two hands and that left me with none to hold the camera (yeah, my tripod was away on an adventure). The way you do this is very simple.
0: Find a nice big bucket for the fluid to spray and drip into. Also eye protection. Do not skip step zero.
1: Fill reservoir with fluid.
2: Remove cap on the outlet.
3: Using a small rod (a 3/8″ ratchet extension of 6-12″ works great), push the piston into the master cylinder. That will force air out. When the piston comes back, it will draw fluid in. Do this until fluid starts to squirt from the outlet.
4: Replace cap on the outlet. Wipe the MC body dry. Walk back to your car and install it while not dripping any brake fluid on your bodywork.
The goal of bench bleeding is just to get everything wet. You want to get fluid to go through everything. This makes it easier to get bubbles out when bleeding the clutch for real.
Reinstall the master cylinder.
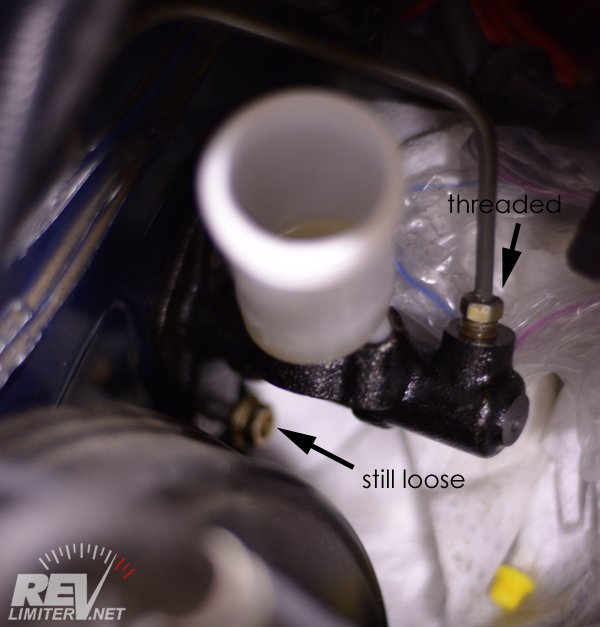
Step 6: Install your new clutch master cylinder. The easy way to do this is to get both of the nuts threaded onto the shafts sticking out of the firewall. Do not tighten them. Then, with a floppy MC, install the clutch hard line. If you get the clutch master torqued down on the firewall and then try to install the hard line, it will be very hard to get the threads to start correctly. But with some play in the MC, there’s no problem.
Step 7: Wipe everything down with clean, dry paper towels. Make sure no brake fluid is anywhere. It’s not horrible stuff. The world won’t end if you get a drop on your paint and wipe it up right away. But you do NOT want to accidentally leave any on your paint overnight or longer. It is worth the effort and time to make sure no stray brake fluid drops got on your paint.
Step 8: If you don’t need to swap out your slave cylinder, you can move onto bleeding the clutch. Yay!
Clutch Slave Cylinder Swap
Remove clutch fluid
Step 1: Remove clutch fluid. Why am I including this again? Because in 13 years, I’ve changed Miata clutch slave cylinders a half dozen times. I’ve replaced a master exactly once. You just got done looking at the pix of that one clutch MC job. They just don’t go bad that often.
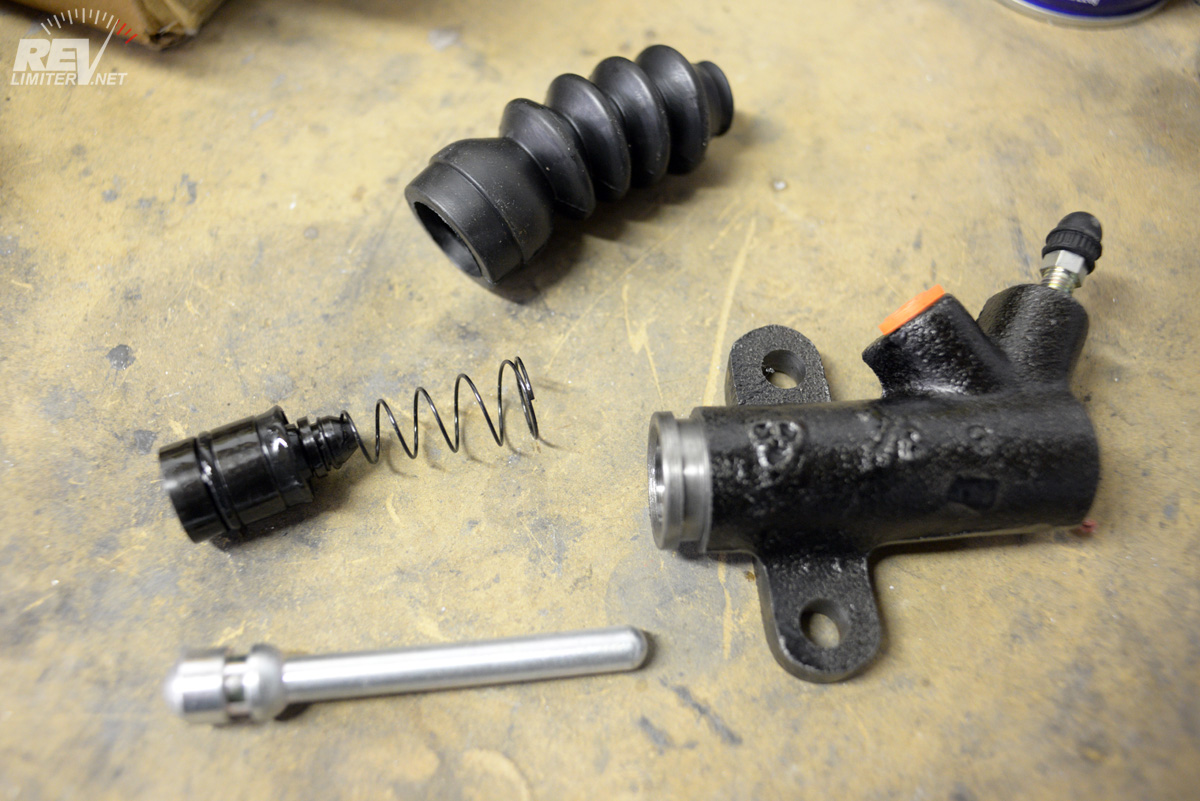
A fine new clutch slave, ready to get to work.
When you buy a clutch slave, you sometimes get them in pieces like this. And sometimes you’re lucky enough to find a rebuild kit instead of a whole replacement kit. A rebuild kit will come with everything except the big metal body.
If you live in a fairly rust-free environment, always try to get a rebuild kit. If you live in the rustbelt, you’re better off with a replacement kit. The reason is, the clutch slave body will rust internally. It’s hard to scrub off the rust and maintain roundness inside the cylinder. Chances of it leaking again are pretty high. But if your old cylinder has no rust, you can just clean things up and throw new parts at it for about 20% the price of a whole new slave cylinder.

Bench bleed the slave cyl.
Step 2: Bench bleed your new slave cylinder. While you don’t really have to do this, it’s very easy. And it makes the bleeding process much quicker once you have everything bolted together again. That, to me, is worth it.
There is nothing to this. It’s more gravity bleeding than bench bleeding. You just pour fluid in the top of the cylinder bore and then let it drip out the two holes in the other end. Pop off the cap (if your kit included one) and let fluid flow out the inlet hole. Then, once you’re happy, plug that hole up and unscrew the bleeder valve to let some fluid drip out of it. Then tighten it up and pour the excess fluid out of the cylinder. SIMPLE!
Just like above, the goal of bench bleeding is just to get everything wet. This makes it much easier to get bubbles out when bleeding for real. Which you’ll be doing very soon.
Removing the old and busted.
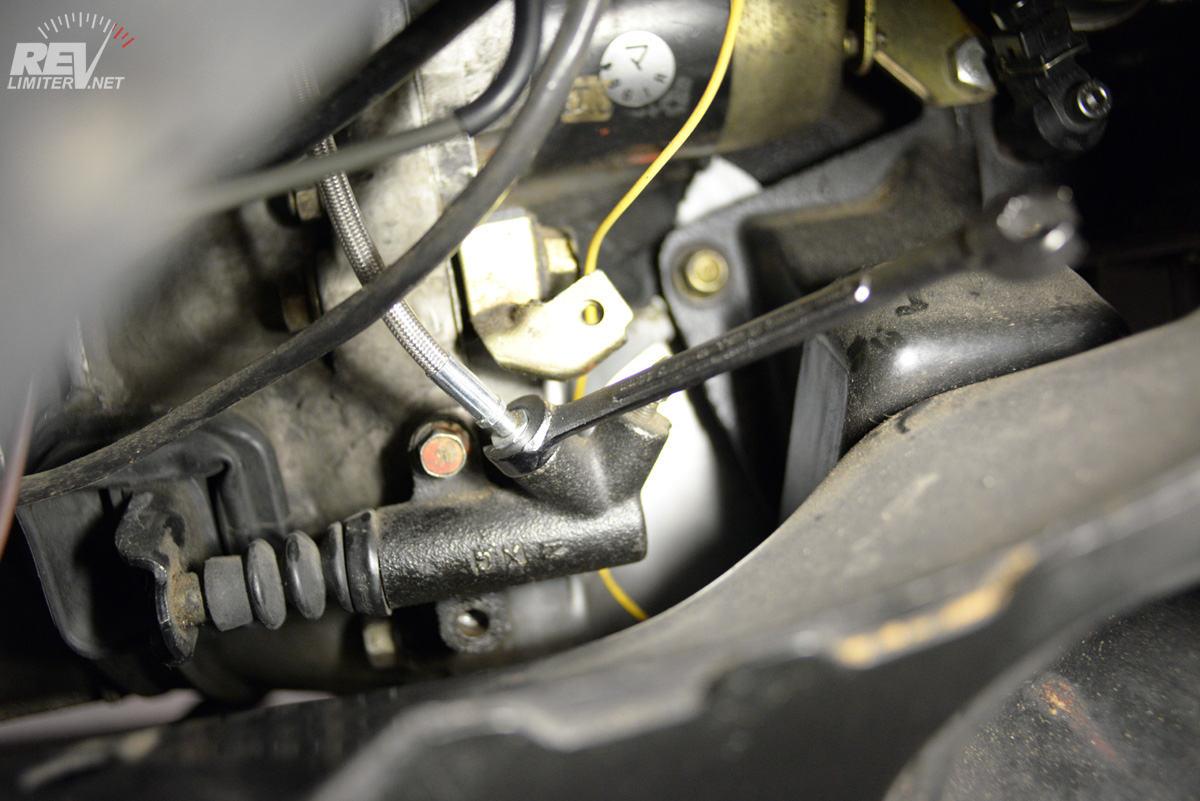
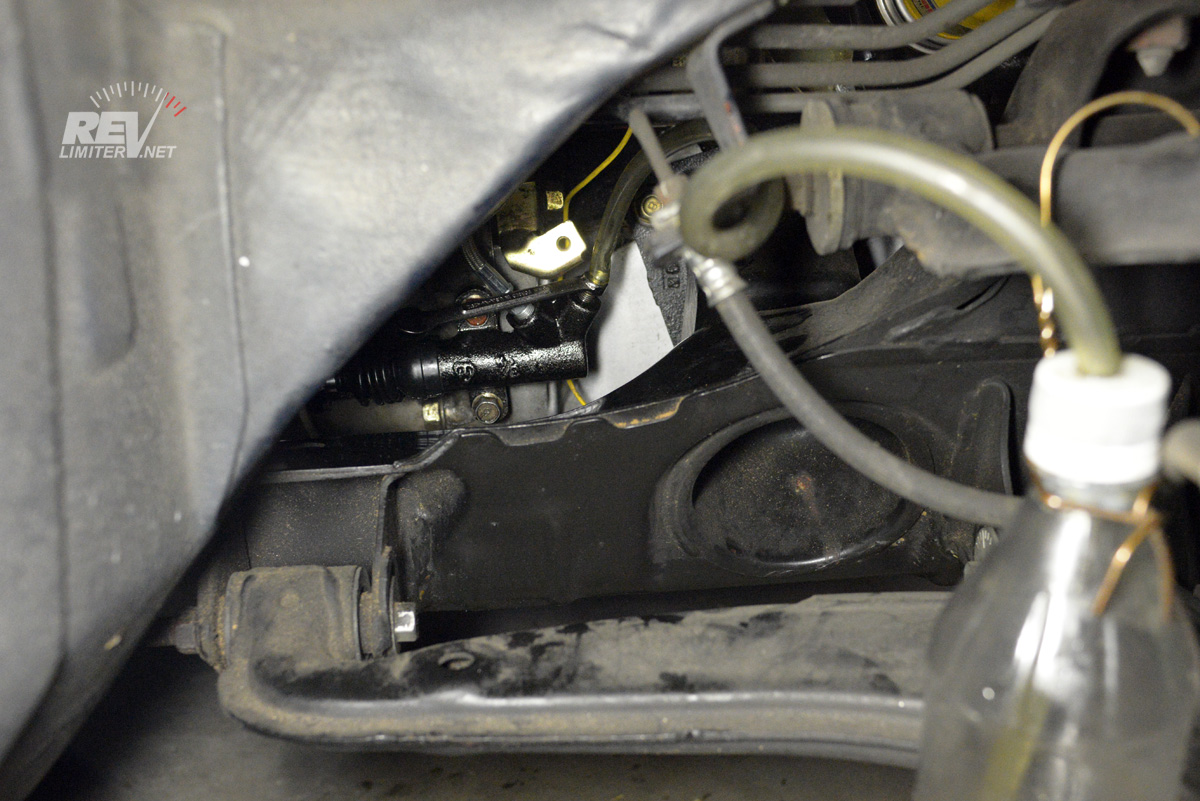
Step 3: Remove the old clutch slave. This is more difficult than the master cylinder, but not much. There are two bolts holding the slave to the side of the engine. There’s one hard line (most Miatas have a curly-q line that’s also attached to the engine) that will require a flare nut wrench. The stock line is 10mm. Sharka has the 949Racing stainless braided clutch line that eliminates the curly-q. This one takes an 11mm wrench.
Do yourself a favor and remove or at least loosen the hard line before you completely remove the slave cyl from the engine. You can see in the photo that I still have one bolt holding the thing on. I was about to remove it and then remembered to do the hydraulic line while still having something to hold things in place at the last minute.
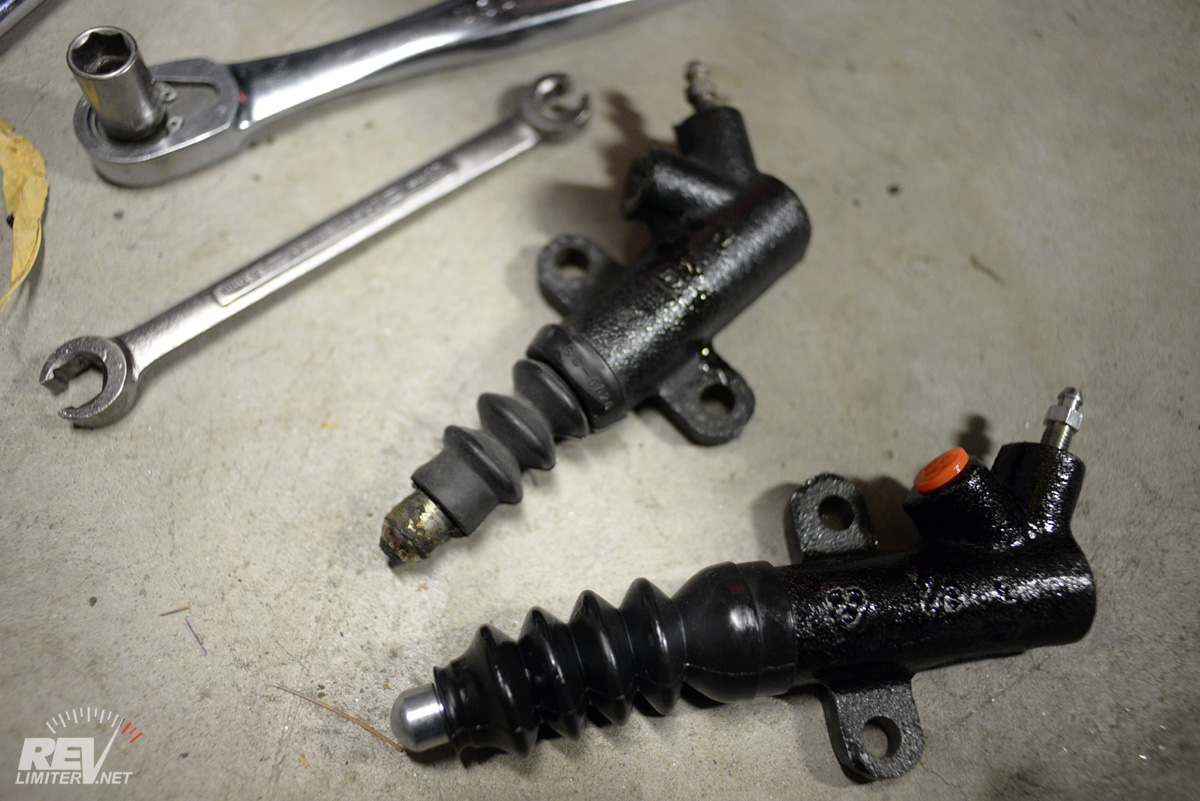
The one on the top is 18 years old.
Near as I can tell, these are Sharka’s original slave and master cylinders. The car was built in late 94. That puts them at just over 18 years of service. That’s pretty incredible in my humble opinion. I did 5 slave cylinders on Sharka-the-97 in 8 years. That is not so incredible. Or maybe it’s incredible for different reasons.
Step 4: Reinstall the slave cylinder. There’s really nothing to it. If you laid out your parts and tools, you didn’t even have to get up out of the wheel well to get the new slave cyl from being bled earlier.
Bleeding the Clutch
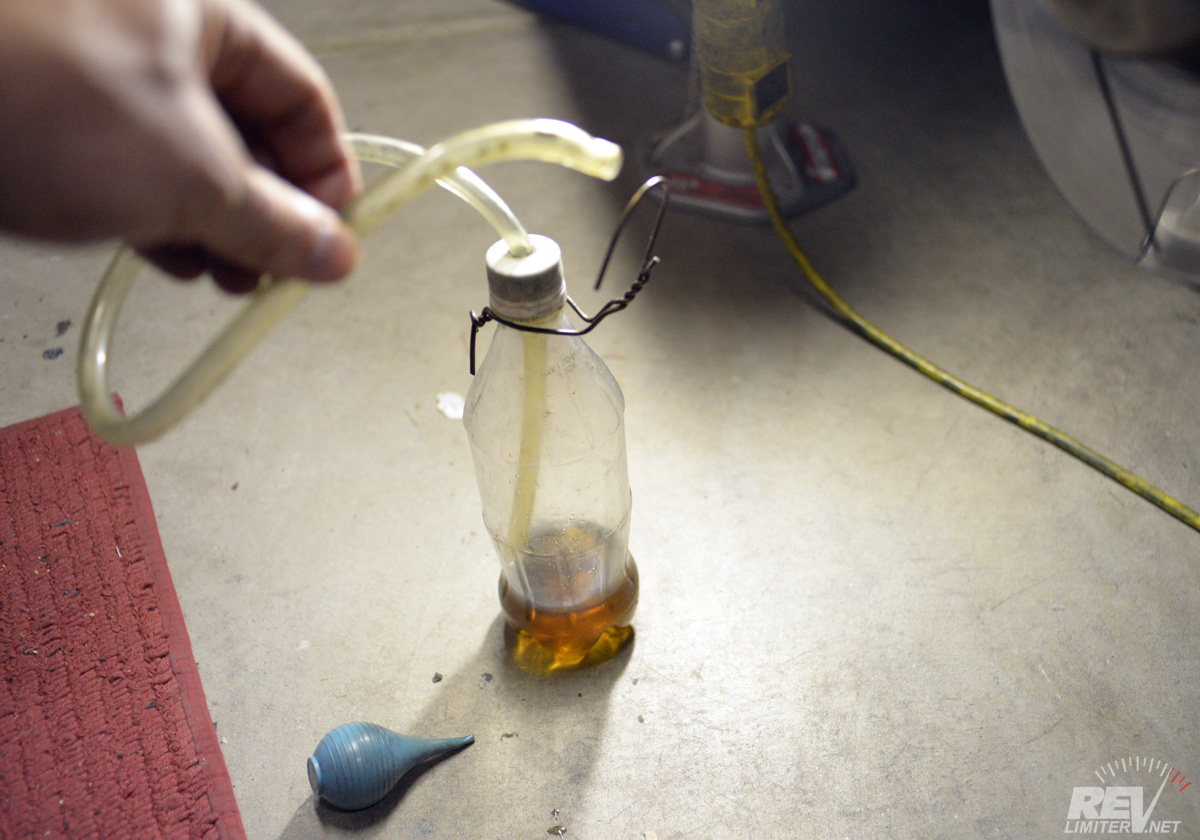
My high dollar brake and clutch bleeder.
Yes, really. What, did you expect something awesome? A crazy power bleeder system? Some kind of funky gravity bleed method? Those so-very-breakable Speedbleeder screws? Nope. I use THIS. It used to be a Diet Coke bottle. It’s been in my garage for about 15 years.
The only special component is the hose. You need one sized to fit over your bleeder screws. It also helps for said hose to be transparent so you can see bubbles coming out of the bleeder. That’s it. The rest of the parts can be found around your house. A bleeder bottle like this is well worth the 5 minutes it takes to make.
The tip of the syringe fits in the gap between the bottle and the hanger when not in use. And when not in use the whole thing just hangs from a shelf in the garage. I leave a little fluid in the bottom of the bottle.
Bleeding rig ready to go.
Open the valve, have your assistant press the clutch pedal. Then close the valve while their foot is down. Then let them lift. Then repeat. Keep in mind that the fluid reservoir is pretty small. It will need to be filled after a 8-10 presses.
Oops! Almost forgot to mention my assistant!
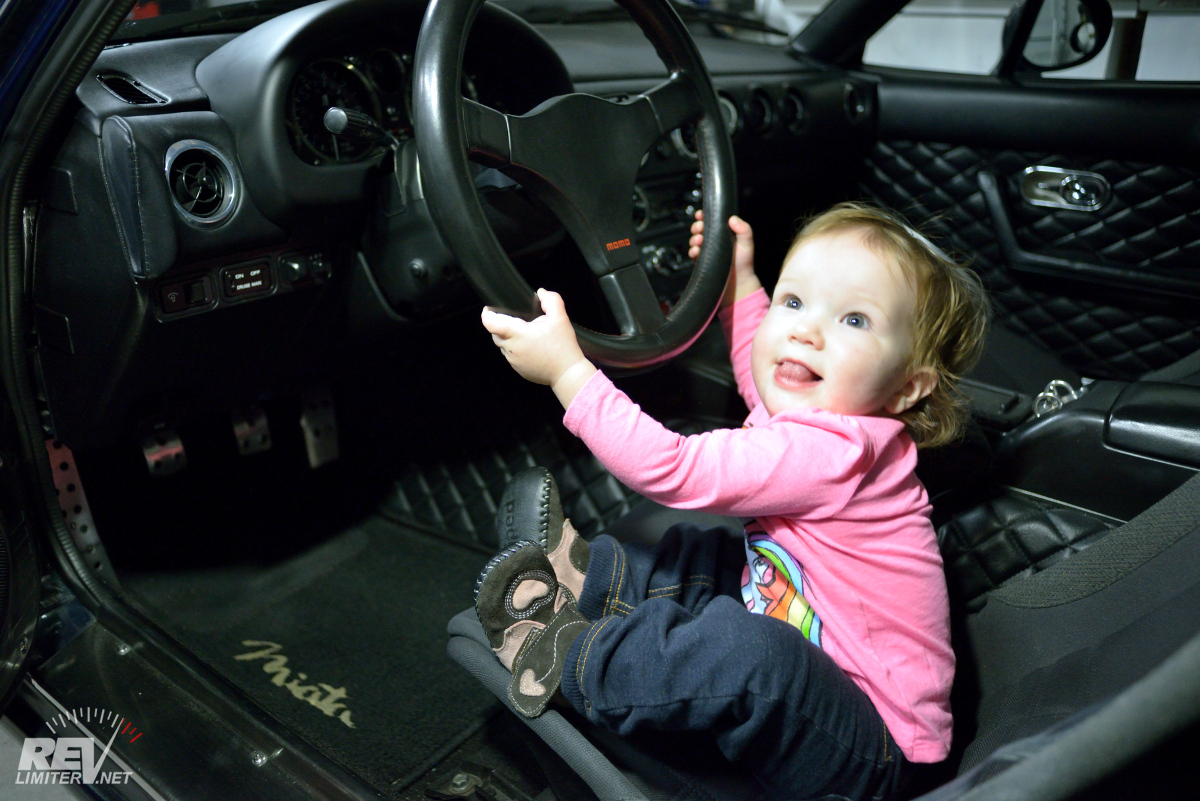
My assistant.
Just over a year old and already getting filthy in the garage with dad. She’s such an angel.
I hope this helps someone out! And if these NAPA parts last even half as long as the originals, I’ll be a happy guy.