
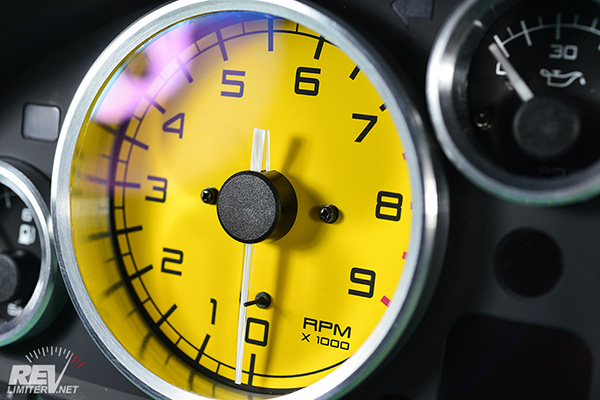
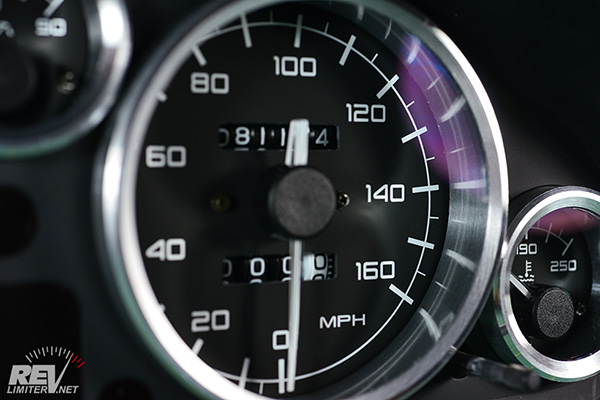
Garage5 Gauge Rings - installed
Your Shopping List
- A set of Garage5 gauge rings and lenses. You can buy them right here! Check out the revlimiter.net Store.
- A clean work area. There's no way to overstate the importance of this.
- Clear silicone. To glue the lenses and rings together. Also to install the rings in your cluster.
- Toothpicks and paper towels. To apply the silicone and to keep everything clean.
- Time. Clear silicone takes 24 hours to cure. Time should probably be higher on this list.
- 90% or higher Isopropyl Alcohol + nice microfiber towel. For cleaning the lenses after you're done.
- Large flat-blade screwdrivers. To remove the OEM plexi from the NA cluster.
- Gloves. Because it's always nice to have gloves.
Frequently Asked Questions
- I have an NB. Will this work?
Yes! There are gauge rings for both the NA and NB. - Can I buy these in anodized or powdercoated or painted?
Not from me. For custom colors contact Garage5. - Where can I get the parts in these pix???
I sell them here on this site! Check out the revlimiter.net Store.
Preliminary Work
Remove your gauge cluster. Check out the first part of the NA or NB gauge face install pages on this site. It's about 10 minutes of work to remove the cluster and transport it to your clean area.
Setup your clean area. Silicone gets everywhere. It's not a bug, but a feature. The more work you can do to contain the mess, the better off you'll be when you're elbow deep and trying to keep your lenses clean and pretty.
I suggest many paper towels pre-torn and at the ready. Some sheets of white paper as your work area will keep everything scratch-free and easy to see. Gather some extra toothpicks before you need them. Plan for a corner of your work area to have a little pool of silicone present and ready to go throughout the install.
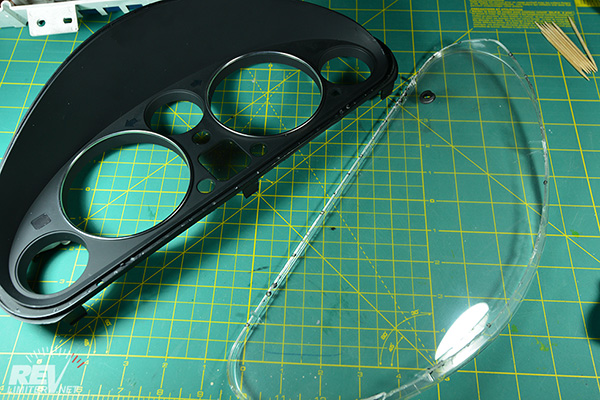
NA Plexi Removal
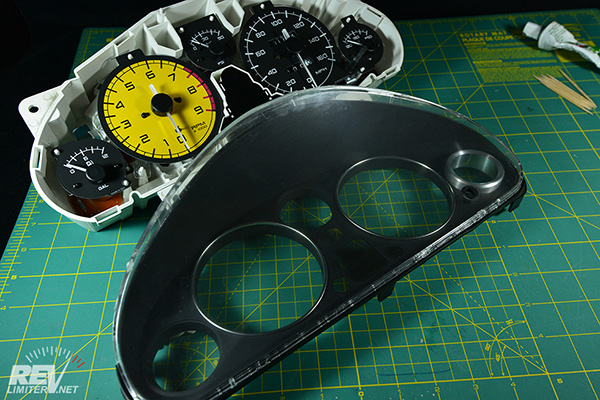
Remove the front cover from your gauges. I'll copy/paste from the NA Gauge Cluster Tutorial for the next step.
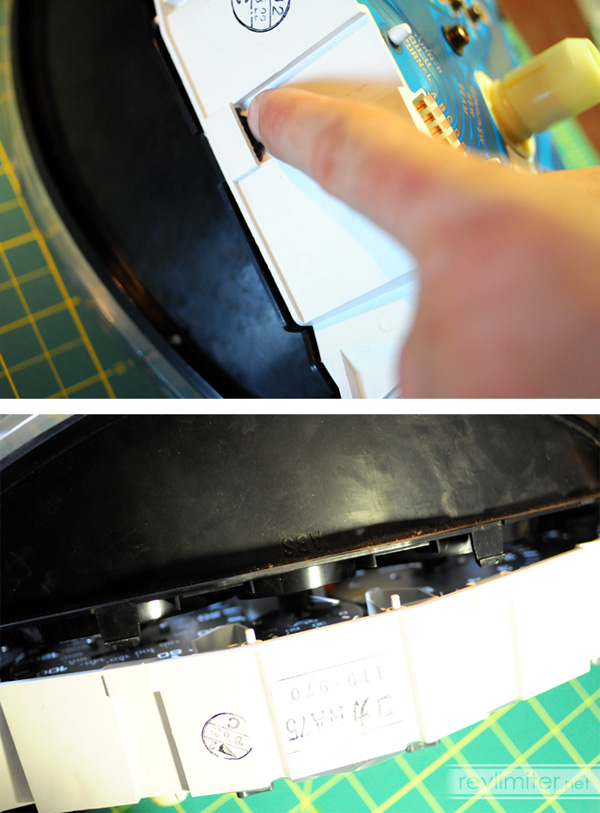
To get at the gauges, you'll need to separate the front cluster cover (the glass) from the rest of the gauges. It is secured by a bunch of little tabs that run around the outside. They are easily popped free with just your fingers. Press down on one tab with your right thumb (I like to start on a top corner) and wedge the cluster glass free with your left hand. It will open up very slightly. DO NOT FORCE IT. Then move to the tab next door and pop it free with your thumb while opening up the glass even more with your left hand. After two tabs are free, you're most of the way there. The rest of the tabs will open easily.
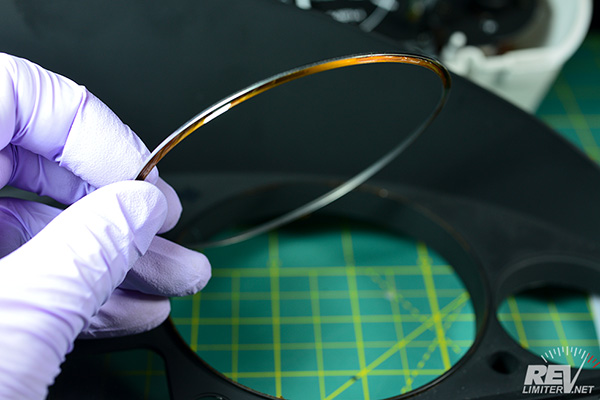
NB owners have it easy - the plexi on the NB clusters pops off. NA owners have to break the plexi free.
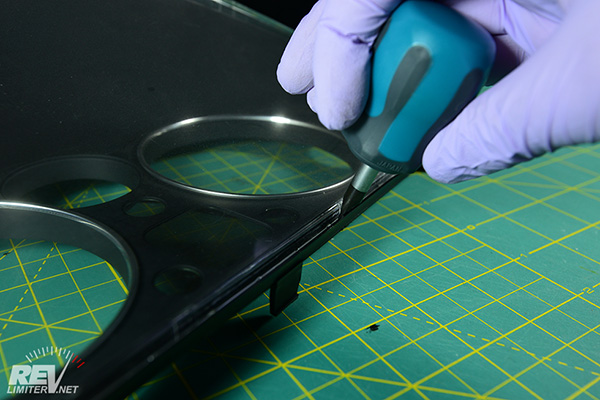
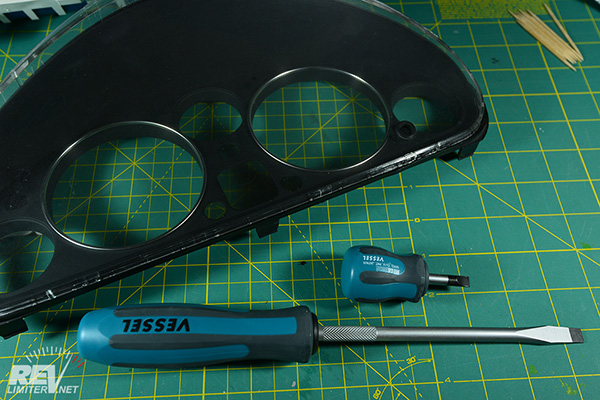
It's very easy to pop your front plexi off. Get a wide flat blade screwdriver and just start working around the outside of the cluster. You just want to break the glue free that holds the plexi onto the black plastic. Work slowly and don't get frustrated.
You don't need the cluster edge to be pretty since it's hidden by the gauge cowl cover. Don't worry if there's a bit of glue or clear plastic left around the edges of the black fascia.
Lens Gluing
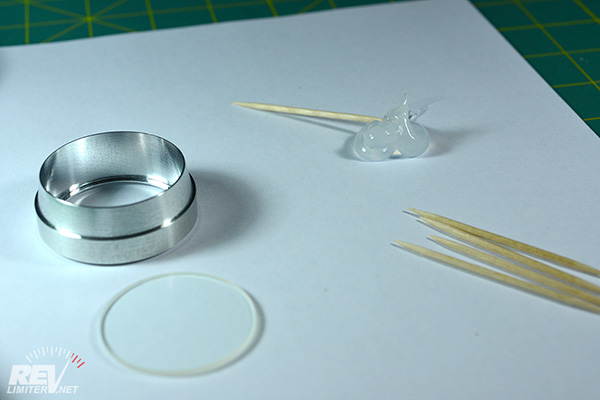
This is my work area. You don't need a lot of space for this, but it has to be clean space. A sheet of paper protects the glass and lenses from scratches. A little blob of silicone is ready to go at the top. I have extra toothpicks ready as well.
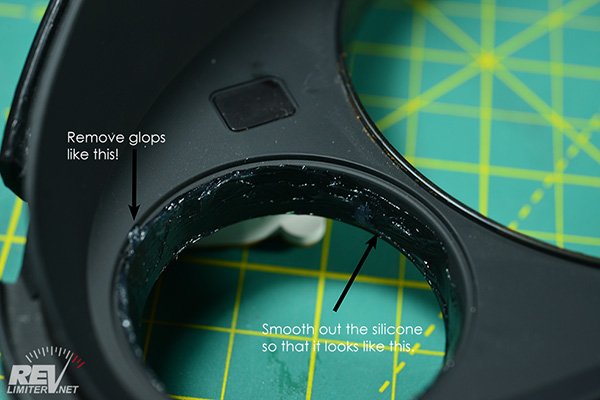
Keep in mind that the silicone will start to cure the moment that air hits it. It will get gloppy in about 15-30 minutes. When this happens, just wipe up the excess in your work area and put down a new blob. It's much easier to work with and smooth out fresh silicone that gloppy, partially cured stuff.
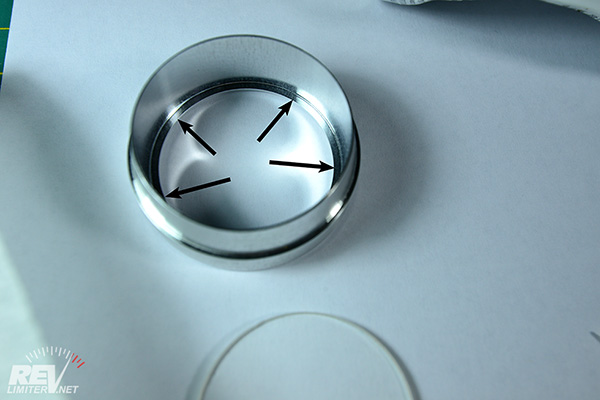
Silicone will be applied to the little lip on the inside edge of the trim rings. It should not get on the inner walls of the gauge rings or on the outer surface.
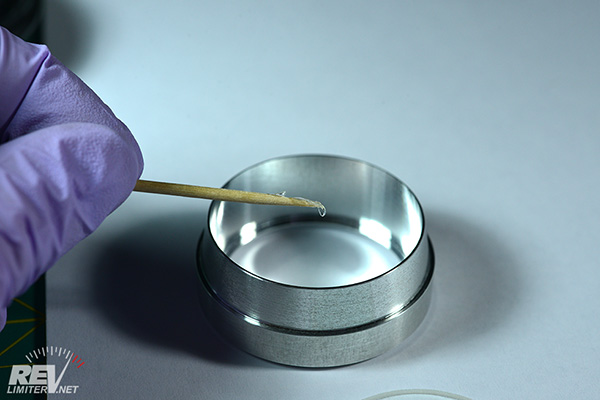
You can't apply too little at a time. Instead of big blobs, apply just small amounts of silicone smoothly around the inner lip.
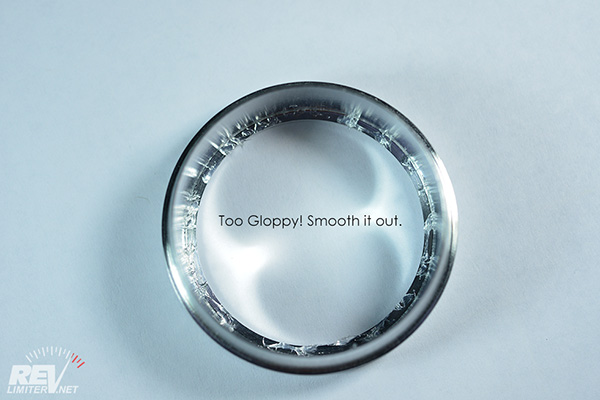
After applying the silicone, use your toothpick to smooth it out on this inner lip. Do not leave little blobs like you see in the photo above. A smooth film of silicone will secure the lens just fine and you won't have much if any problem with the silicone spreading out beyond the gauge ring lip.
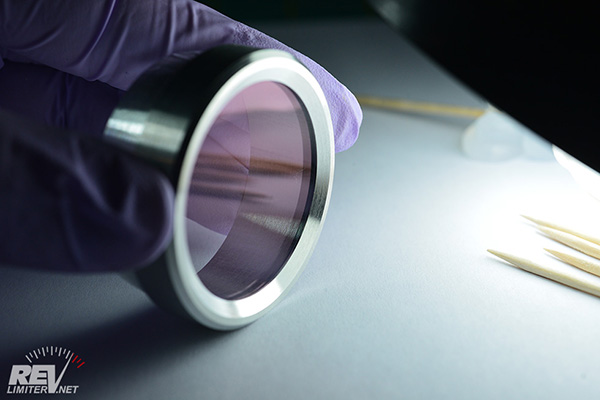
Once the lens is installed in one ring, move onto the next one. Do all five at once before messing with the cluster itself.
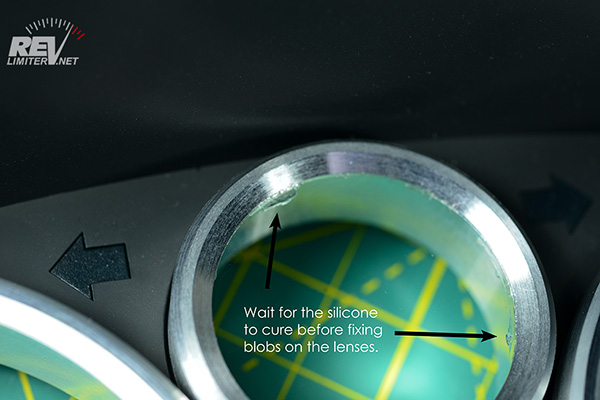
If you have visible blobs of silicone on the lens - do not try to wipe or clean them up. Wait 24 hours for the silicone to cure and then clean up the blobs. Your life will be much better if you do this.
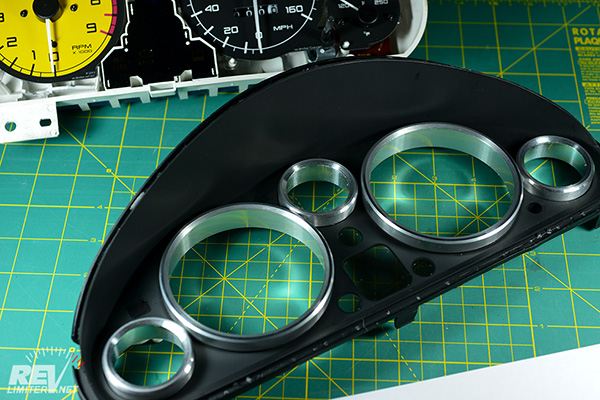
Ring Installation
Remove any trim rings your cluster might have. The stock NA and NB ones can just be pulled off by hand. The NB have little tabs holding them in place while the NA has glue.
Apply silicone around the inner edges of your gauge cover. You don't need much silicone. Apply a few large blobs and then carefully smooth it around the edge until you have a thin film. Carefully inspect each application after you're done and remove any blobs that might have not been smoothed out as well.
Do all 5 gauge openings at once. Install the rings after applying the silicone.
When installing the trim rings - do NOT press on the lenses from the front. This is because you just stuck them in place and they have no strength. Press the ring and lenses on by holding the outer edge of the ring. This might be obvious to you reading it, but I'm typing it because I screwed up this one myself. I popped a lens out and had to carefully re-install it.
Allow the silicone to cure for 24 hours.
A repeat from above, but it needs to be repeated. If you have visible blobs of silicone on the lens or the cluster, - do not try to wipe or clean them up. Wait 24 hours for the silicone to cure and then clean up the blobs. Silicone is very easy to clean once it's cured. It smears everywhere if you try to clean it before it is cured.
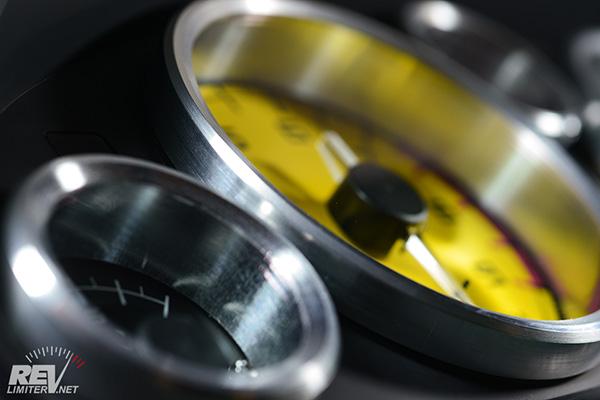
Cleaning the Lenses
Use rubbing alcohol (90% or higher isopropyl alcohol) and a soft microfiber towel to clean the lenses. A glass cleaner might remove the anti-reflective coating from the lenses, but rubbing alcohol is very safe. Get the lenses as clean and streak-free as possible. Flake off any visible silicone around the inner edges of the lenses and rings.
Cleaning might take you longer than the actual install. I spent about 45 minutes on this step for my own demo cluster. But it's worth the time it takes. Just remember to keep any cleaning fluids away from your gauges. The gauge faces (either stock or my own) do not like any form of moisture to come in contact with them.
Additional Images

Site Navigation
Latest Blog Posts
CarbonMiata Vent Window Install/Review
Posted on Mon, 30 Jan 2023 01:47:44 +0000
 After waiting 23 years, there's finally a pretty vent window kit on the market for the NA/NB Miata. Unfortunately, it doesn't actually work well.
Read more...
Period-Correct 90s Rear Speakers
Posted on Mon, 11 Oct 2021 02:12:26 +0000
 Sharka's rear package tray now holds more than just a rollbar. A set of 90s speakers is the next upgrade for the little blue and white boi.
Read more...
GV Tail Light Upgrade
Posted on Tue, 28 Sep 2021 02:05:06 +0000
 TLDR; LEDs are brighter, who knew?
Read more...
Mona Visits Joshua Tree
Posted on Sat, 26 Jun 2021 03:21:12 +0000
 Mona checks out the curious multi-armed residents of Joshua Tree National Park
Read more...
KINOD 15
Posted on Sun, 20 Jun 2021 22:49:33 +0000
 Mona and I made the pilgrimage to SoCal for the 15th Anniversary KINOD Event.
Read more...

Products sold on this site are for Off-road and Competition use only. This website intended solely to provide general guidance on matters of interest for the personal use of the Reader of this Page, who accepts full responsibility for its use. All products as well as information provided "as is," with no guarantee of completeness, accuracy, or timeliness, and without warranty of any kind, express or implied, including, but not limited to, the warranties of performance, merchantability, and fitness for a particular purpose.