- Removed: 11/2005 -
The Coldside now lives with Dan at
Run-Down.com
The "stock" idler pulley setup on the Coldside has always been a weak link. One bolt holding it all on, no good way to tension, and the fact that if/when you lose that one bolt, you lose your whole pulley setup... there was room for improvement. Thanks to Edward Smith and "Hamez" of the BRP Forum, I was able to put together something a little more sophisticated.
Lexan prototype of the new idler system.
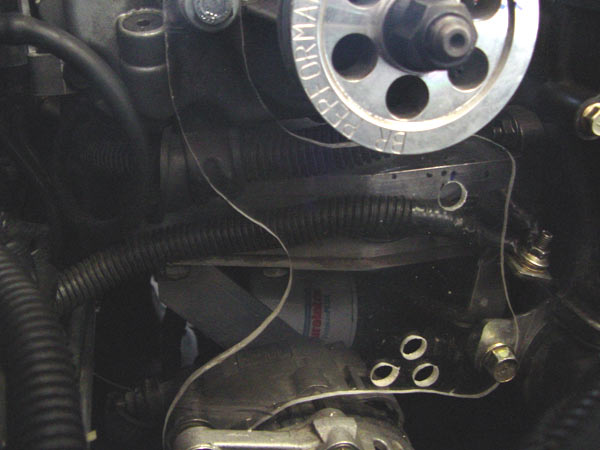
This photo doesn't quite show the three points of attachment defining the plane of the new pulley plate. Instead
of using the alternator adjustment bolt, now the alt. is positioned as far down in the range of travel as possible.
The water pump bolt on the right provides strenght to the system. And on top, the bolt through the front of the blower
defines the plane.
Another view of the lexan prototype.
The clear lexan allowed me to figure out exactly where I needed to drill each hole. For example, the top pulley hole
(empty in this shot) was dangerously close to my fuel line. This is a bad angle, but I was able to put that
hole right between the fuel line and the alternator ground wire.
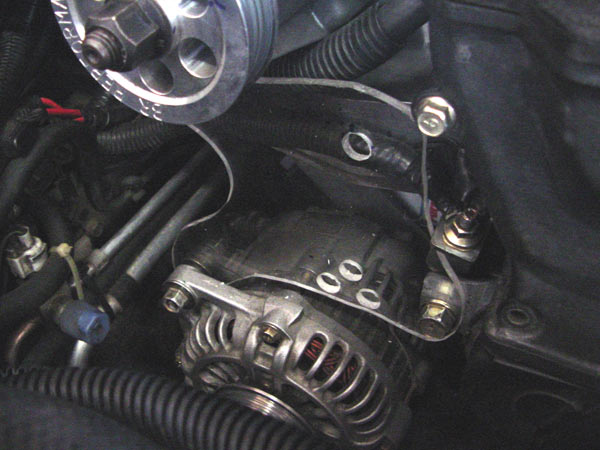
Water pump bolt and the alternator ground.
One thing about this new pulley system I wanted to maintain was usability. The old system was anything
but usable. I wanted quick belt changes, lots of belt wrap, and no problems adjusting tension.
I didn't want any stock parts to become hidden out of reach, thus, you see the alternator ground in its
final position in this pic. It just needed to be bent a little to the right.
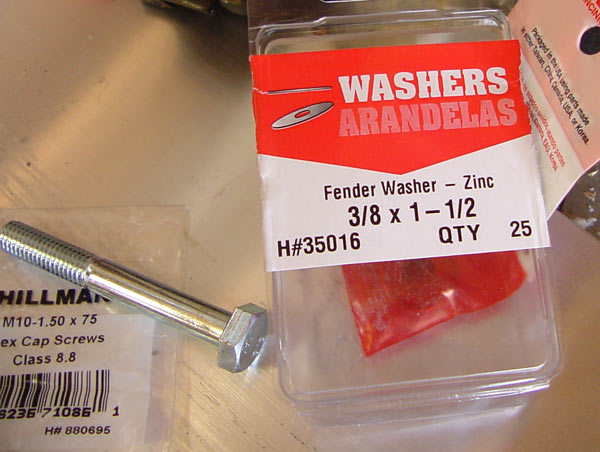
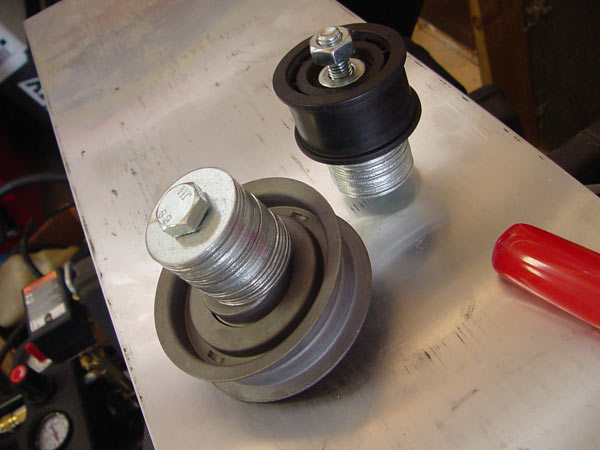
Parts needed to make your own revised pulley system.
Parts needed:
- At least 8"x12" of .25" thick aluminum for the plate
- At least two M10-150x75mm bolts (one for the idler, one for the tensioner)
- At least one pack of 3/8" fender washers (25-30 of them total)
- One idler (use a spare JRSC nylon one) and a VW timing belt tensioner
- Nyloc bolts for the pulleys
- Some method of cutting the aluminum. A jigsaw with a metal cutting blade and some cutting wax works well.
- A new belt. I used a Gates K080635.
The tensioner and the idler.
That's one JRSC nylon pulley in the back, and one VW timing belt tensioner. It tensions around a cam bolt with a little
tool (the red handle to the right). This is an unfortunate picture in that you can't see the offset of the hole in the
VW pulley. These both needed to be offset from the idler plate by a decent distance, and as you can see, I used only
the most hightech spacers available. As for the VW tensioner, it's supposedly for an early 90s VW Golf 1.8. I found
a listing at autohausaz.com for several pulleys and just ordered the one I thought looked closest. It was part
number 026-109-243e.
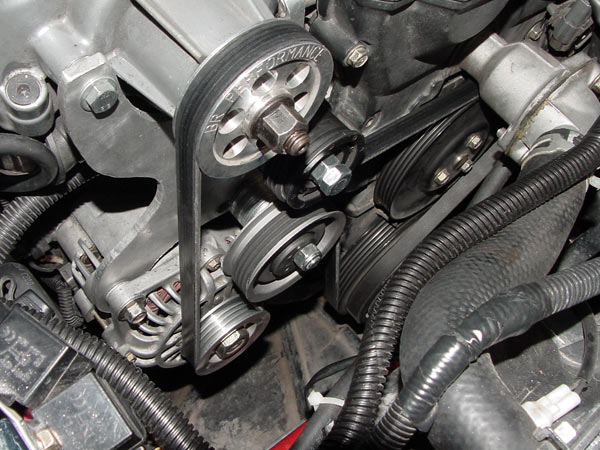
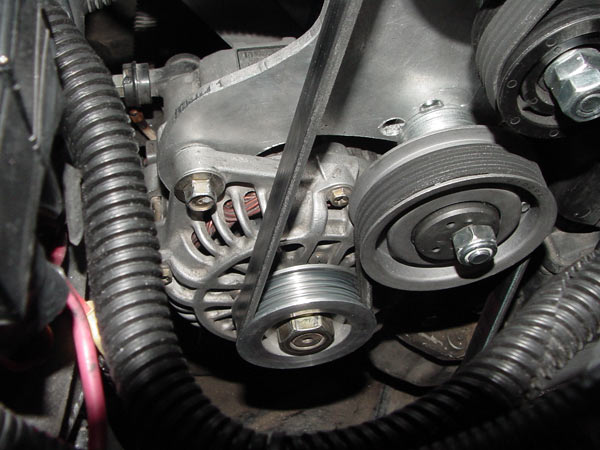
The completed idler system installed.
Anyone familiar with the Coldside idler system should be immediately impressed. This new system gives you more
than 180* of belt wrap on both the blower and the alternator. No more belt squeal, no more crazy 135+ lbs of belt
tension, and most importantly, no more threat of losing the whole pulley system if one bolt breaks.
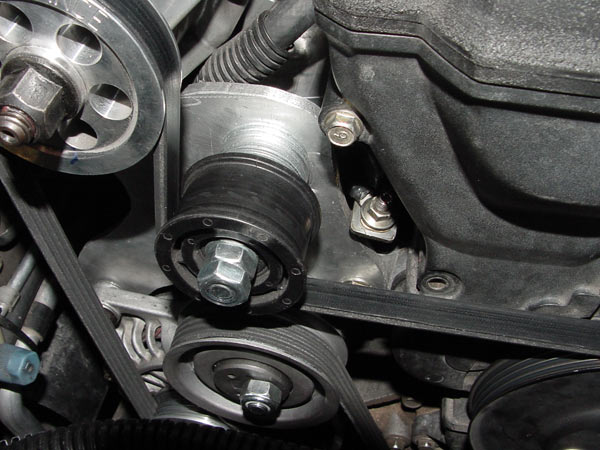
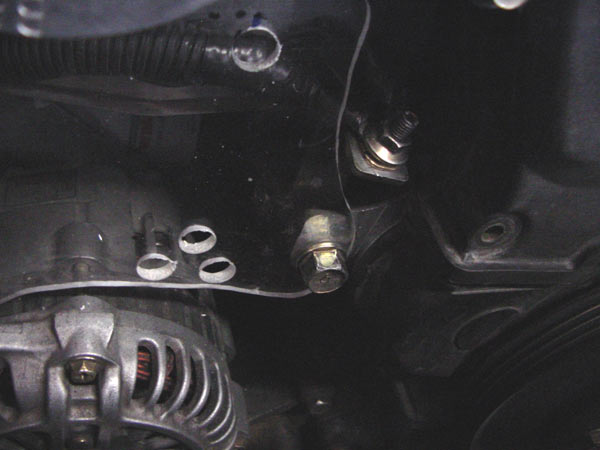
The idler (top) and the tensioner (bottom) installed.
At the bottom, you can see the offset of the VW cam pulley pretty nicely. It's tensioned through the holes
on the left. On the top pulley, you can see the stack of washers behind it, giving it a little offset to keep
the belt lined up perfectly.
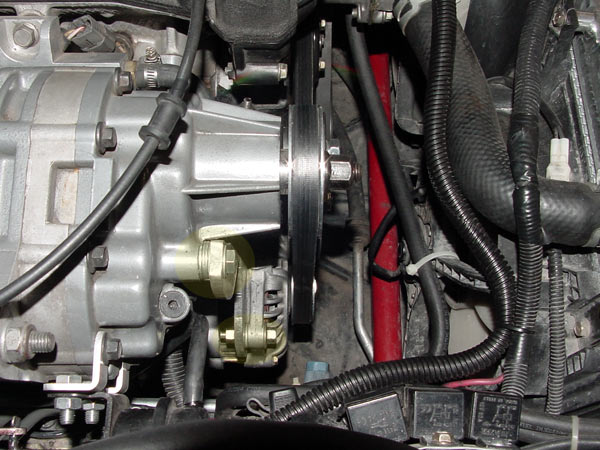
Notice the straight belt path.
This shot shows the belt lined up perfectly. I also highlighted (very lightly) two points of attachment. On the
bottom is the hole that used to have the alternator tensioner bolt. It now just has a single bolt that holds it in
place on the new bracket. On the top, you see the bolt going through the blower. This bolt is not for strength, it
only defines the plane. Notice how it's spaced out with washers behind the bracket.
Belt wrap on the alternator.
Lack of alternator belt wrap was a weak point of the original pulley system. I dare the alternator
to find a way to slip now! That is a lot of belt wrap.
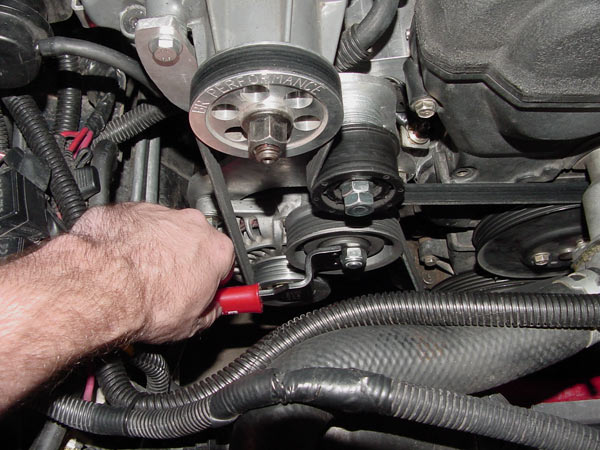
Finally, this is how we tension.
That's it. One special tool twists one pulley. No fiddling with pinch bolts or tweaking alternator brackets.
One special tool, and one bolt to tighten (the one going through that VW pulley). Simple. Easy. Uncomplicated. Just
like the Coldside.
Site Navigation
Latest Blog Posts
25 Years
Posted on Mon, 14 Jul 2025 02:09:39 +0000
 A few photos to commemorate owning Sharka for 25 years. They're worth a peek.
Read more...
Where’s all the blog posts?!?!
Posted on Fri, 27 Jun 2025 19:59:51 +0000
 Why are you seeing 2013 blog posts in the "new posts" list? It's been a hard month for the revlimiter site.
Read more...
Mabel
Posted on Sat, 29 Jun 2024 03:42:43 +0000
 Who’s the dog that keeps showing up on the revlimiter Instagram? It’s Mabel, my ACD/Pomeranian service dog.
Read more...
CarbonMiata Vent Window Install/Review
Posted on Sun, 29 Jan 2023 14:57:01 +0000
 After waiting 23 years, there’s finally a pretty vent window kit on the market for the NA/NB Miata. Unfortunately, it doesn’t actually work well.
Read more...
NA Miata Ignition Switch Replacement / Refurbish
Posted on Fri, 12 Mar 2021 19:25:57 +0000
 Is your NA Miata not starting anymore? A bad ignition switch may be the problem.
Read more...