

Beatrush Radiator Cooling Panel for 90-97 Miatas
That’s the Beatrush Radiator Cooling Panel. I’ve wanted one for a while, but have never gotten around to buying it. So, my darling wife got me one for my birthday. WOO! I’m a lucky guy.
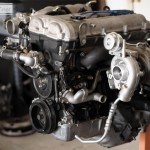
The idea behind this panel is simple. Replace flimsy plastic with rigid metal. More air flows through the radiator than up and around it. Now, there are a lot of panels like this on the market, but none that seem quite as well made as the Beatrush one. It has bends in it to follow the various curves of the Miata bodywork and an excellent angled bit on the back side (not really pictured, but that bend is what’s holding the panel up from the ground) to seal nicely against the top edge of the radiator. It’s a beautiful piece.
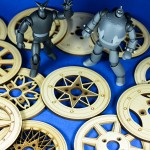
And I have a small robot buddy to help me install it. Say hello to Gurren.

Gurren points out the Beatrush brand etching.

Nice fasteners, eh?
I could install this by myself….. but what fun is that? Much more fun to have a small robot do 90% of the work for me while I take pix.

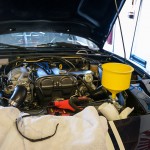
Step 1: Remove the plastic panel if equipped.
Some early Miatas did not even come with the extremely flimsy plastic panel from the factory. This thing isn’t the best but it’s better than nothing. And there are 4 plastic screws holding it in place along the front edge.
Yes. I’m really doing a whole blog post about this.

Have your assistant remove the 4 plastic screws.

Then remove the two bolts on the outside corners.
You’ll notice that it’s ME assisting Gurren with this install. I had to stop and laugh at myself after I took this shot. But seriously, I’m glad I was there to help the little guy. I don’t think he could have concentrated long enough to get it all done on his own.

Step 2: Install the panel and fasten it down.
And that’s it. Very simple. The hardest part of this whole job is getting the Beatrush panel over the hood latch. They give you just enough space.
The hardware is metric. 4mm hex head, if I recall correctly. Not that it matters, since I just had Gurren tighten it robot-fist-tight.

Panel installed...

... panel STICKERED!
This is very nearly the best part about any metal radiator panel. Stickers! I’ve been saving up stickers for months to install on something like this. Hell, that spiffy TEIN plate (it’s chromed plastic) has been in a drawer for about 5 years since putting the TEIN Basics on my wife’s car.

Yes, I am a 6 year old girl. I love my sticker panel.
This panel is a thing of beauty. Just what I wanted. A million thanks to my darling wife for this awesome birthday present. Now to search for more stickers!
And finally….

TEAM GURREN! Number One!!!
“Go beyond the impossible and kick reason to the curb! That’s how Team Gurren rolls!!!” – Kamina, Tengen Toppa Gurren Lagann


Hello,
Been following your blog and I’m very impressed with the quality of it. Keep up the good work!
Regards,
Ruben
Thanks! I’ll keep the little robot pix coming.