
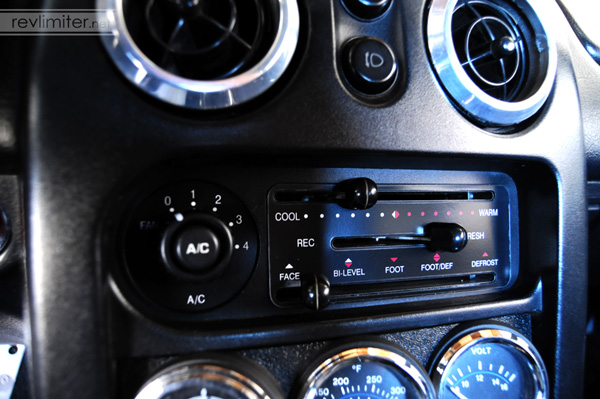
revlimiter.net HVAC Panel - installed!
Your Shopping List
- A Heater/Vent/AC slider control insert - There are lots of places to find these. The ones shown here come from the revlimiter.net Store. Really, this procedure works for any HVAC insert, even if you're just replacing a yellowed stock one with a new one.
- Clear double-sided tape - Not foam tape. Something very thin. I like Scotch Scrapbooking Tape.
- A hair drier - To reactivate the adhesive on the stock HVAC plate.
- A soft, microfiber towel - To wipe fingerprints and dust off.
- Tools to remove your center console - It can be done with just a Phillips screwdriver, but a pair of pliers and a piece of strong cord or wire helps too.
Frequently Asked Questions
- So... I can touch the surface, right? These aren't as delicate as the gauges?
That is correct. The HVAC panel has a special semi-gloss coating to resist dirt, fingerprints, and chemicals. At least the stock ones and the ones sold on my store do. I can't speak for other manufacturers. - Any tricks to the install?
The one big trick is figuring out how to remove the little sliders. The first time I took apart one of these panels (without any instructions) I pryed on them for a good 5 minutes before discovering the little screws on the bottom sides of those sliders. Aside from that, it's a very straightforward process. - Where can I get the HVAC panel in these pix???
I sell them here on this site! Check out the revlimiter.net Store.
HVAC Removal
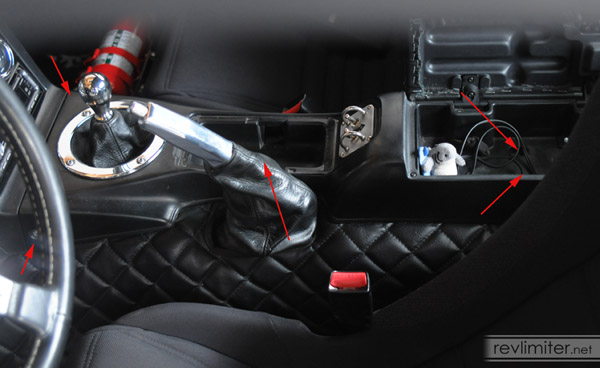
To remove the center bezel (the "tombstone" as many Miata guys call it), you have to first remove the center console with the armrest. It is held in by 5 screws. The little red arrows point to their locations.
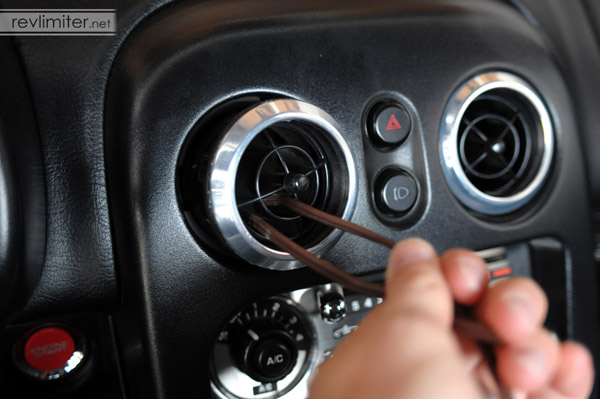
1 tombstone screw hides behind each of the eyeball vents. So... you get to remove the eyeball vents. If this is your first time doing it, I feel for you. It's not easy the first time.
There are many ways to do this. You can poke a screwdriver in, angle it up, and pry straight back. That sometimes pulls out an eyeball vent. You can thread a heavy piece of cord in, as you see in the photo above. This is my favorite way. Or you can slide a very thin piece of plasic in between the tombstone and the eyeball. The two plastic clips that hold each eyeball vent in place are at 3 and 9 o'clock.
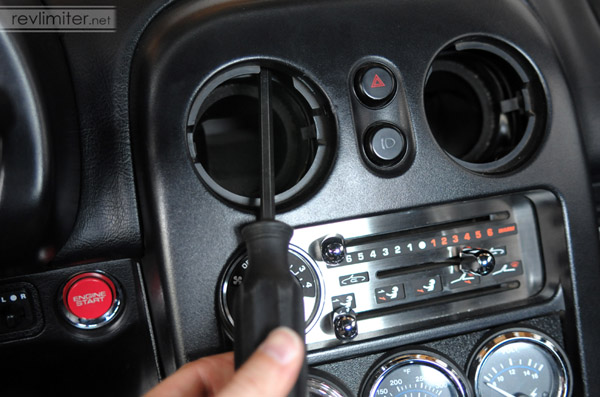
The tombstone is held in by 3 screws. Two of them are at the top, as seen here. Be VERY careful not to drop these into the black abyss of the ventilation system below. You don't want an endless rattle.
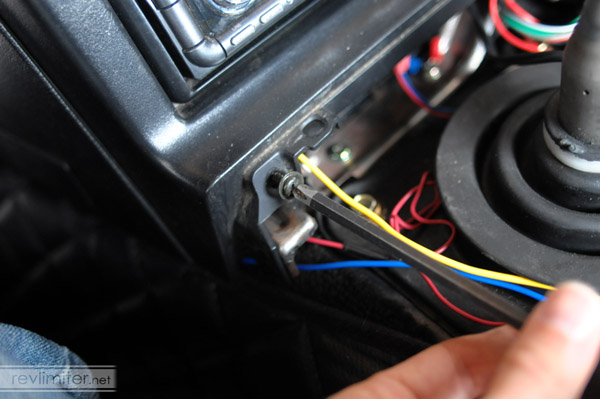
The final screw holding the tombstone in place lives down at the base.
You'll also need to remove your radio. I've not photographed this step at all since there are so many different radios around.
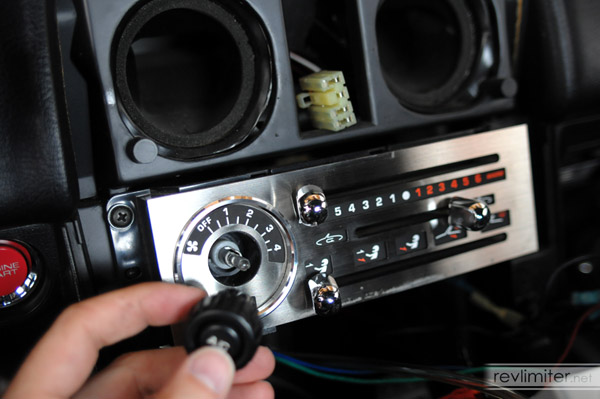
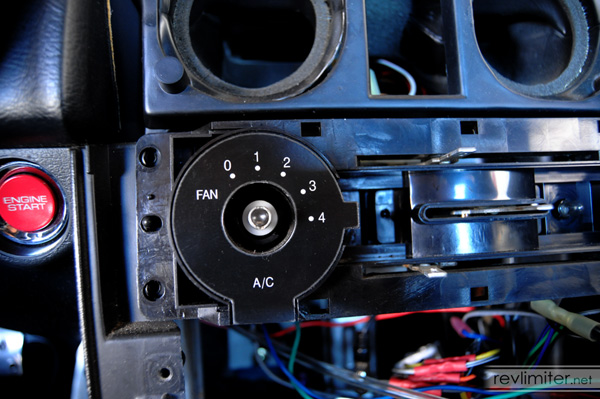
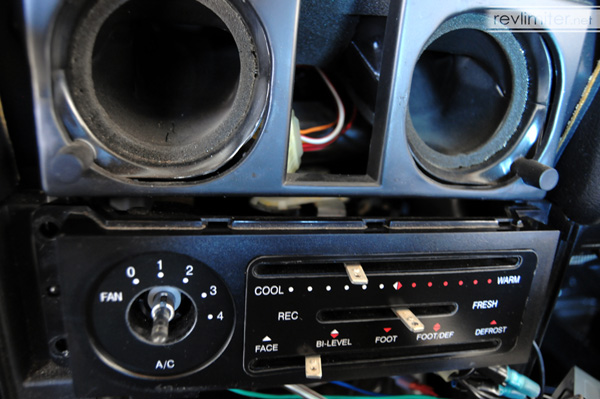
The fan knob pulls off by hand. No screws hold it in place. Just yank it out.
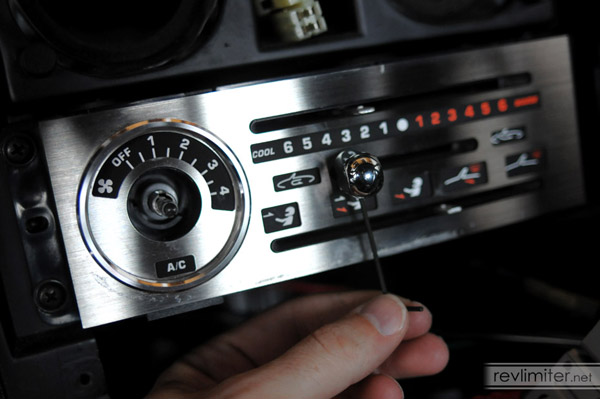
I mentioned this in the FAQ above. This is the one tricky step - removing these little slider buttons. They screw in from below with very tiny screws. The stock black ones use tiny Phillips screws that require a small jeweler's screwdriver to remove. I've got IL Motorsport chrome ones on Sharka. They use a 1.5mm hex key.
Things started to get hard to photograph, so I relocated up to my office for better lighting. I also switched to a stock HVAC control.
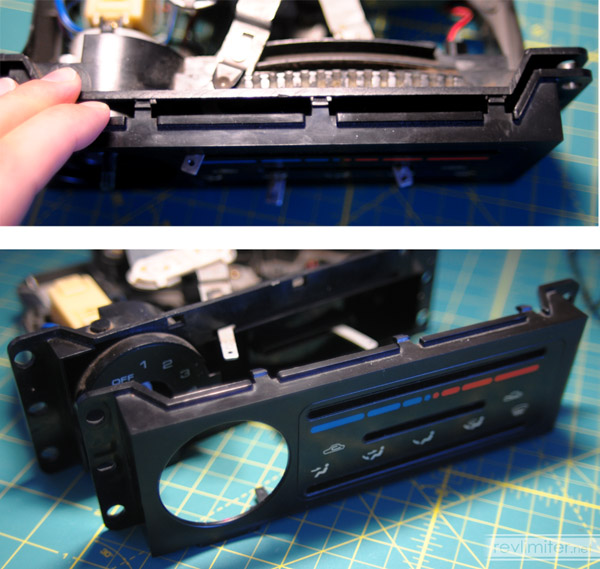
Notice the screw holes at the corners of this plate? These screws will have to be removed before you can get this face plate off. Then, there are 3 little clips on top and below. Be very careful with them. They can be very brittle after so many years. NA Miatas are not exactly new cars, after all.
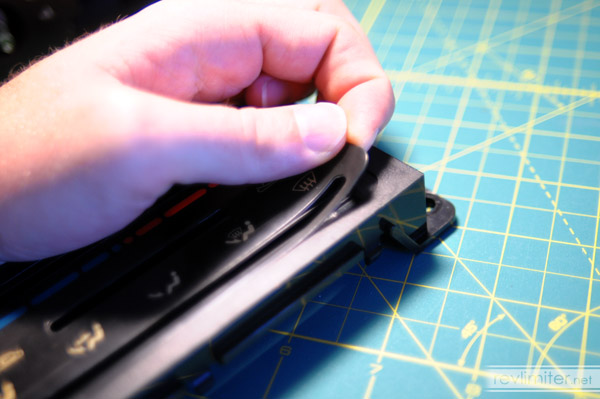
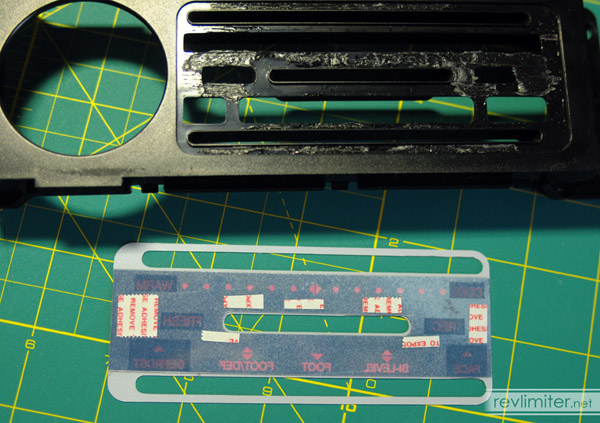
After you get that face plate off, the last step remaining is to remove the stock slider panel. It is just held on by a weak glue. You can pry it off with a thumb nail and then start peeling. If you're careful and your panel isn't too sun-soaked, you can get it off without it cracking into a thousand pieces. If you live in the desert like me, you'll probably not be so lucky. The one pictured above broke many times during the removal process.
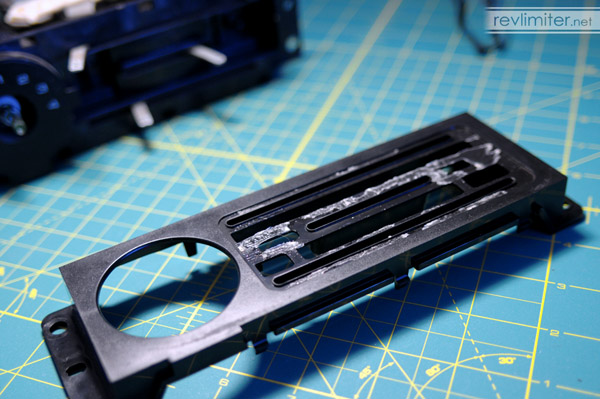
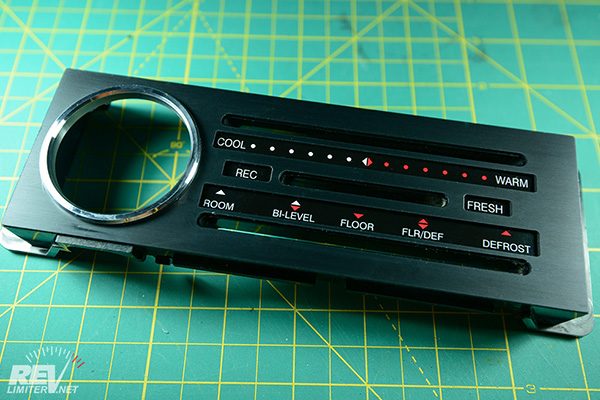
This is how you want the face plate to look before you begin applying the new slider panel to it. Leave the glue in place. It will help hold on the new artwork.

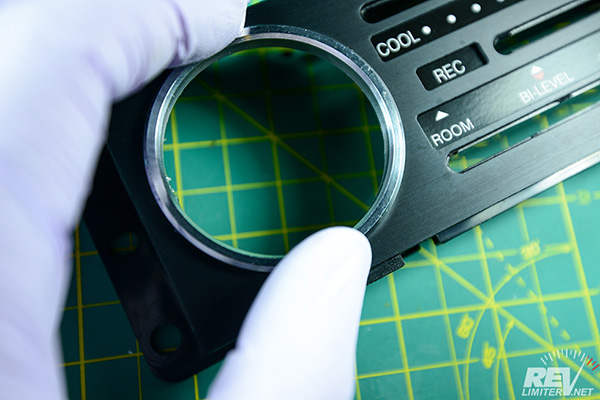
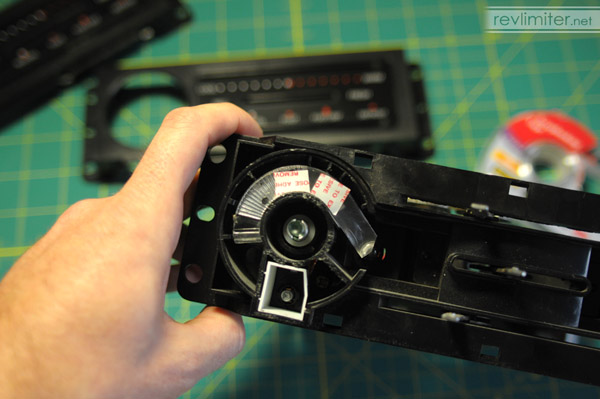
The little fan panel is much easier to remove than the slider one. Make note of the small glass insert left behind. You'll be modifying it in a moment.
HVAC Face Installation
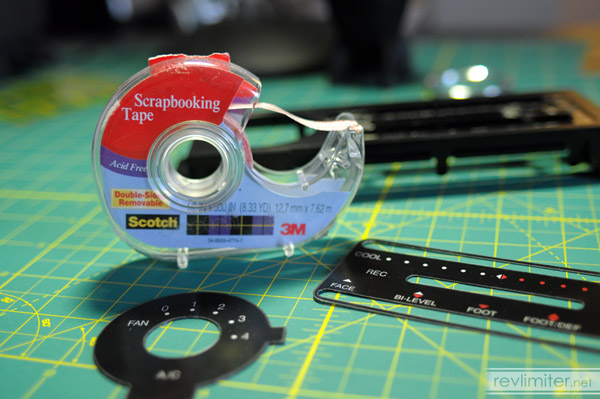
You'll need a little double sided tape to supplement the glue left over from the stock slider control. You want something thin, like this Scotch tape. Don't use a foam tape, as it will be too thick.
Having a little bit of adhesive on this fan glass really helps hold the new fan insert in place. I just stuck a couple pieces on the top edge.
Take a good look at your stock face plate. Notice any areas that are lacking in glue? These would be good ones to apply tape to. You can either stick it on the face plate itself or on the back of your new slider panel. Either will work fine.
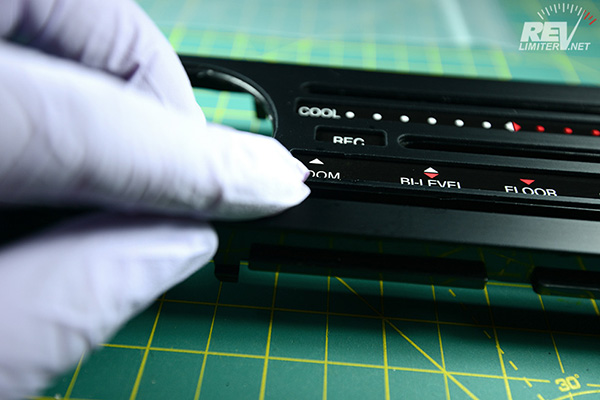
Stick the new slider panel on. You might want to do a couple test fits to make sure things line up right and light shines through all of the little indicators.
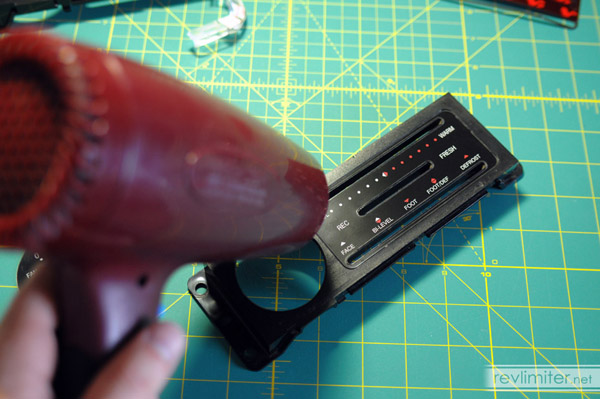
A hair drier really helps stick the slider panel down. It reactivates the glue. It smooths out any creases that may have developed in the slider panel. It just makes life a whole lot easier. Just realize that it will be very difficult to remove the slider panel again after applying heat.
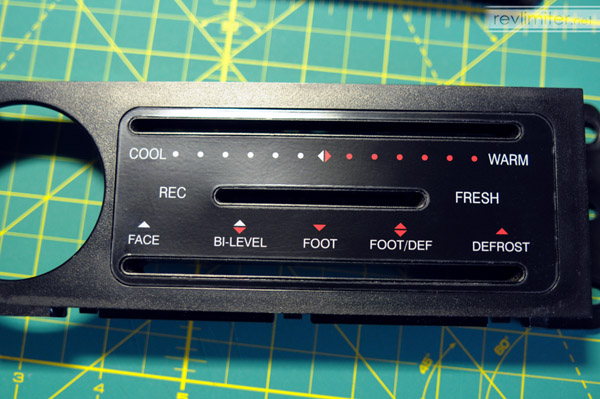
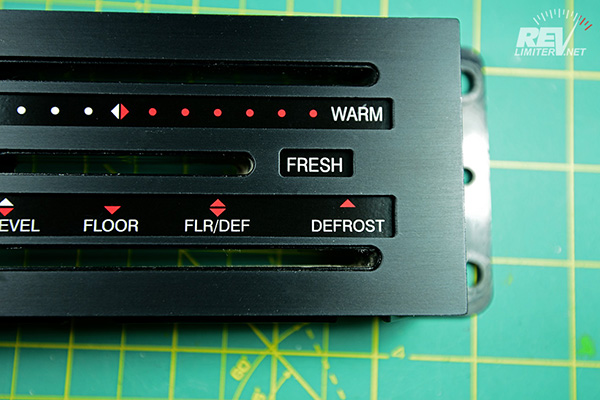
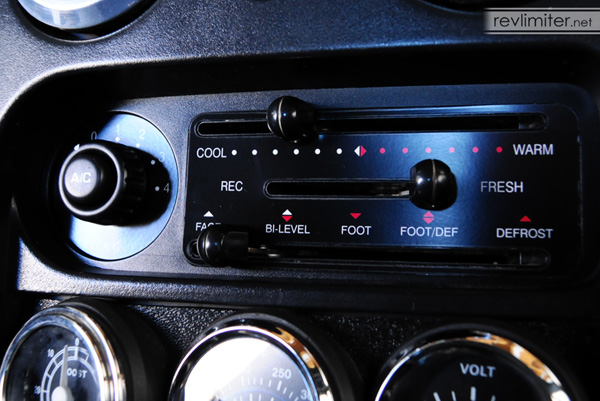
Perfect! Stuck on like stock. And no creases.
Retro HVAC Plate Installation
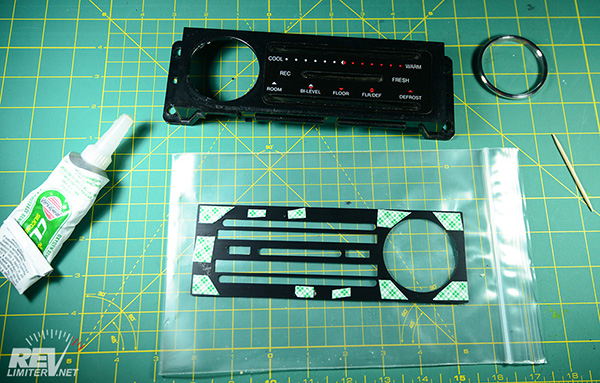
Lay your HVAC Plate on the bag it was packed in. This will help prevent scratches. Also, get your clear silicone ready and something to apply it with. Toothpicks are perfect for this. You should also put on your included gloves. That way you won't have to clean a ton of finger prints off your metal plate.
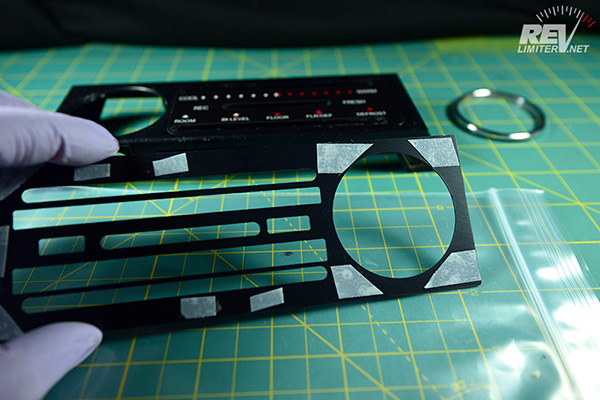
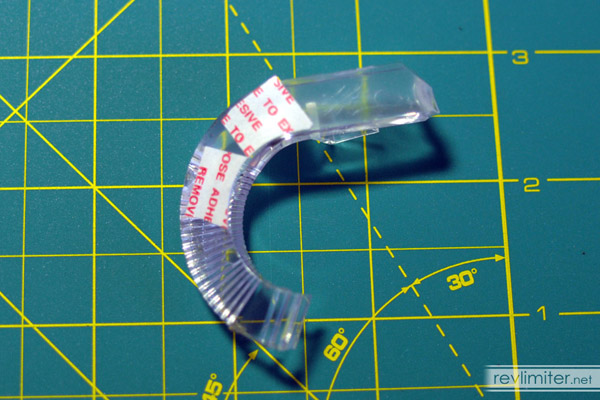
Remove the backing tape. I find a sharp object like an X-acto knife is perfect to get the edge started.
Place the metal plate on top of your HVAC face. Align the edges of the slider openings with the edges of the metal plate.
Activate the tape by pressing down firmly everywhere the tape is installed.
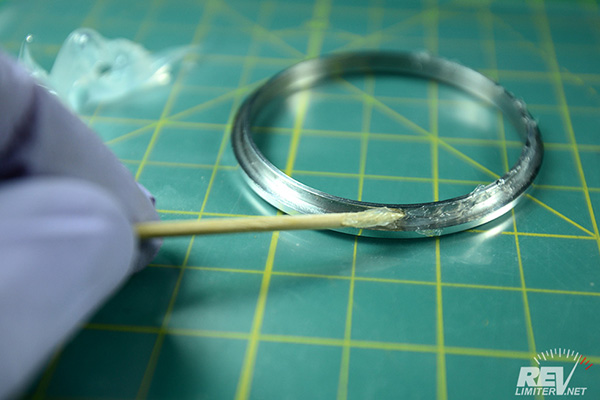
Squeeze out a bit of silicone onto a paper towel (I used the plastic bag) and carefully apply it to the edge of your trim ring. You don't need very much to hold it in place if you apply it all the way around the ring. The nice thing about clear silicone is how it behaves when dry. If you get a bit on the panel, you can just let it dry and then pick it off after installation. It also has great holding power, but no permanent bond.
Install the ring. Be careful to place it flat on the surface of the metal plate so as to not get silicone everywhere.
Done! Now you can take the completed panel out to your car for final fitting.
Final Fitting in the Car
Pop the little glass insert back in the HVAC control. Also remove the backing from the tape.
... and place the fan panel very carefully onto the HVAC control. A little care in getting it perfectly centered goes a long way in making the whole thing look as stock-like as possible.
Lastly, re-install the front plate. Remember that those little plastic prongs are really delicate. It would suck to break a couple when you're so near the end.

Then just button everything back up and you're done!
Additional Images
After all that work, I had to celebrate with some finished photos.

Sharka's center tombstone. Years of work to get to this point.
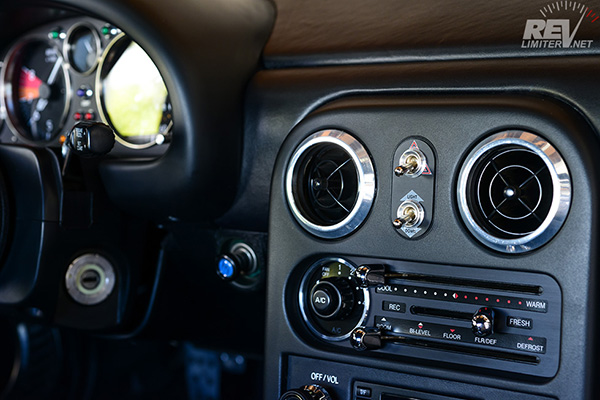
Classy.
Site Navigation
Latest Blog Posts
CarbonMiata Vent Window Install/Review
Posted on Mon, 30 Jan 2023 01:47:44 +0000
 After waiting 23 years, there's finally a pretty vent window kit on the market for the NA/NB Miata. Unfortunately, it doesn't actually work well.
Read more...
Period-Correct 90s Rear Speakers
Posted on Mon, 11 Oct 2021 02:12:26 +0000
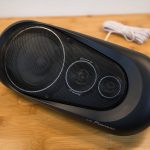 Sharka's rear package tray now holds more than just a rollbar. A set of 90s speakers is the next upgrade for the little blue and white boi.
Read more...
GV Tail Light Upgrade
Posted on Tue, 28 Sep 2021 02:05:06 +0000
 TLDR; LEDs are brighter, who knew?
Read more...
Mona Visits Joshua Tree
Posted on Sat, 26 Jun 2021 03:21:12 +0000
 Mona checks out the curious multi-armed residents of Joshua Tree National Park
Read more...
KINOD 15
Posted on Sun, 20 Jun 2021 22:49:33 +0000
 Mona and I made the pilgrimage to SoCal for the 15th Anniversary KINOD Event.
Read more...

Products sold on this site are for Off-road and Competition use only. This website intended solely to provide general guidance on matters of interest for the personal use of the Reader of this Page, who accepts full responsibility for its use. All products as well as information provided "as is," with no guarantee of completeness, accuracy, or timeliness, and without warranty of any kind, express or implied, including, but not limited to, the warranties of performance, merchantability, and fitness for a particular purpose.